How to Combine OCR with Redaction in Java

The release of the PSPDFKit Java Library version 1.3 saw the introduction of our exciting new OCR feature. If you don’t know what OCR is, check out the Introduction to OCR post for more information on the powerful utilities it provides.
In this blog post, we’ll show an example of removing sensitive information from an image by combining OCR with our PSPDFKit Java Library Redaction feature. We’ll guide you through the step-by-step process of achieving this easily with our Java API so you can see how redaction and OCR work hand-in-hand to provide powerful document and image editing tools.
ℹ️ Note: If you want to try this example as you read along, you’ll need to set up your Java project to use our latest OCR release. To do this, head over to our guide on integrating the new OCR package dependencies into your existing Java project.
Use Case
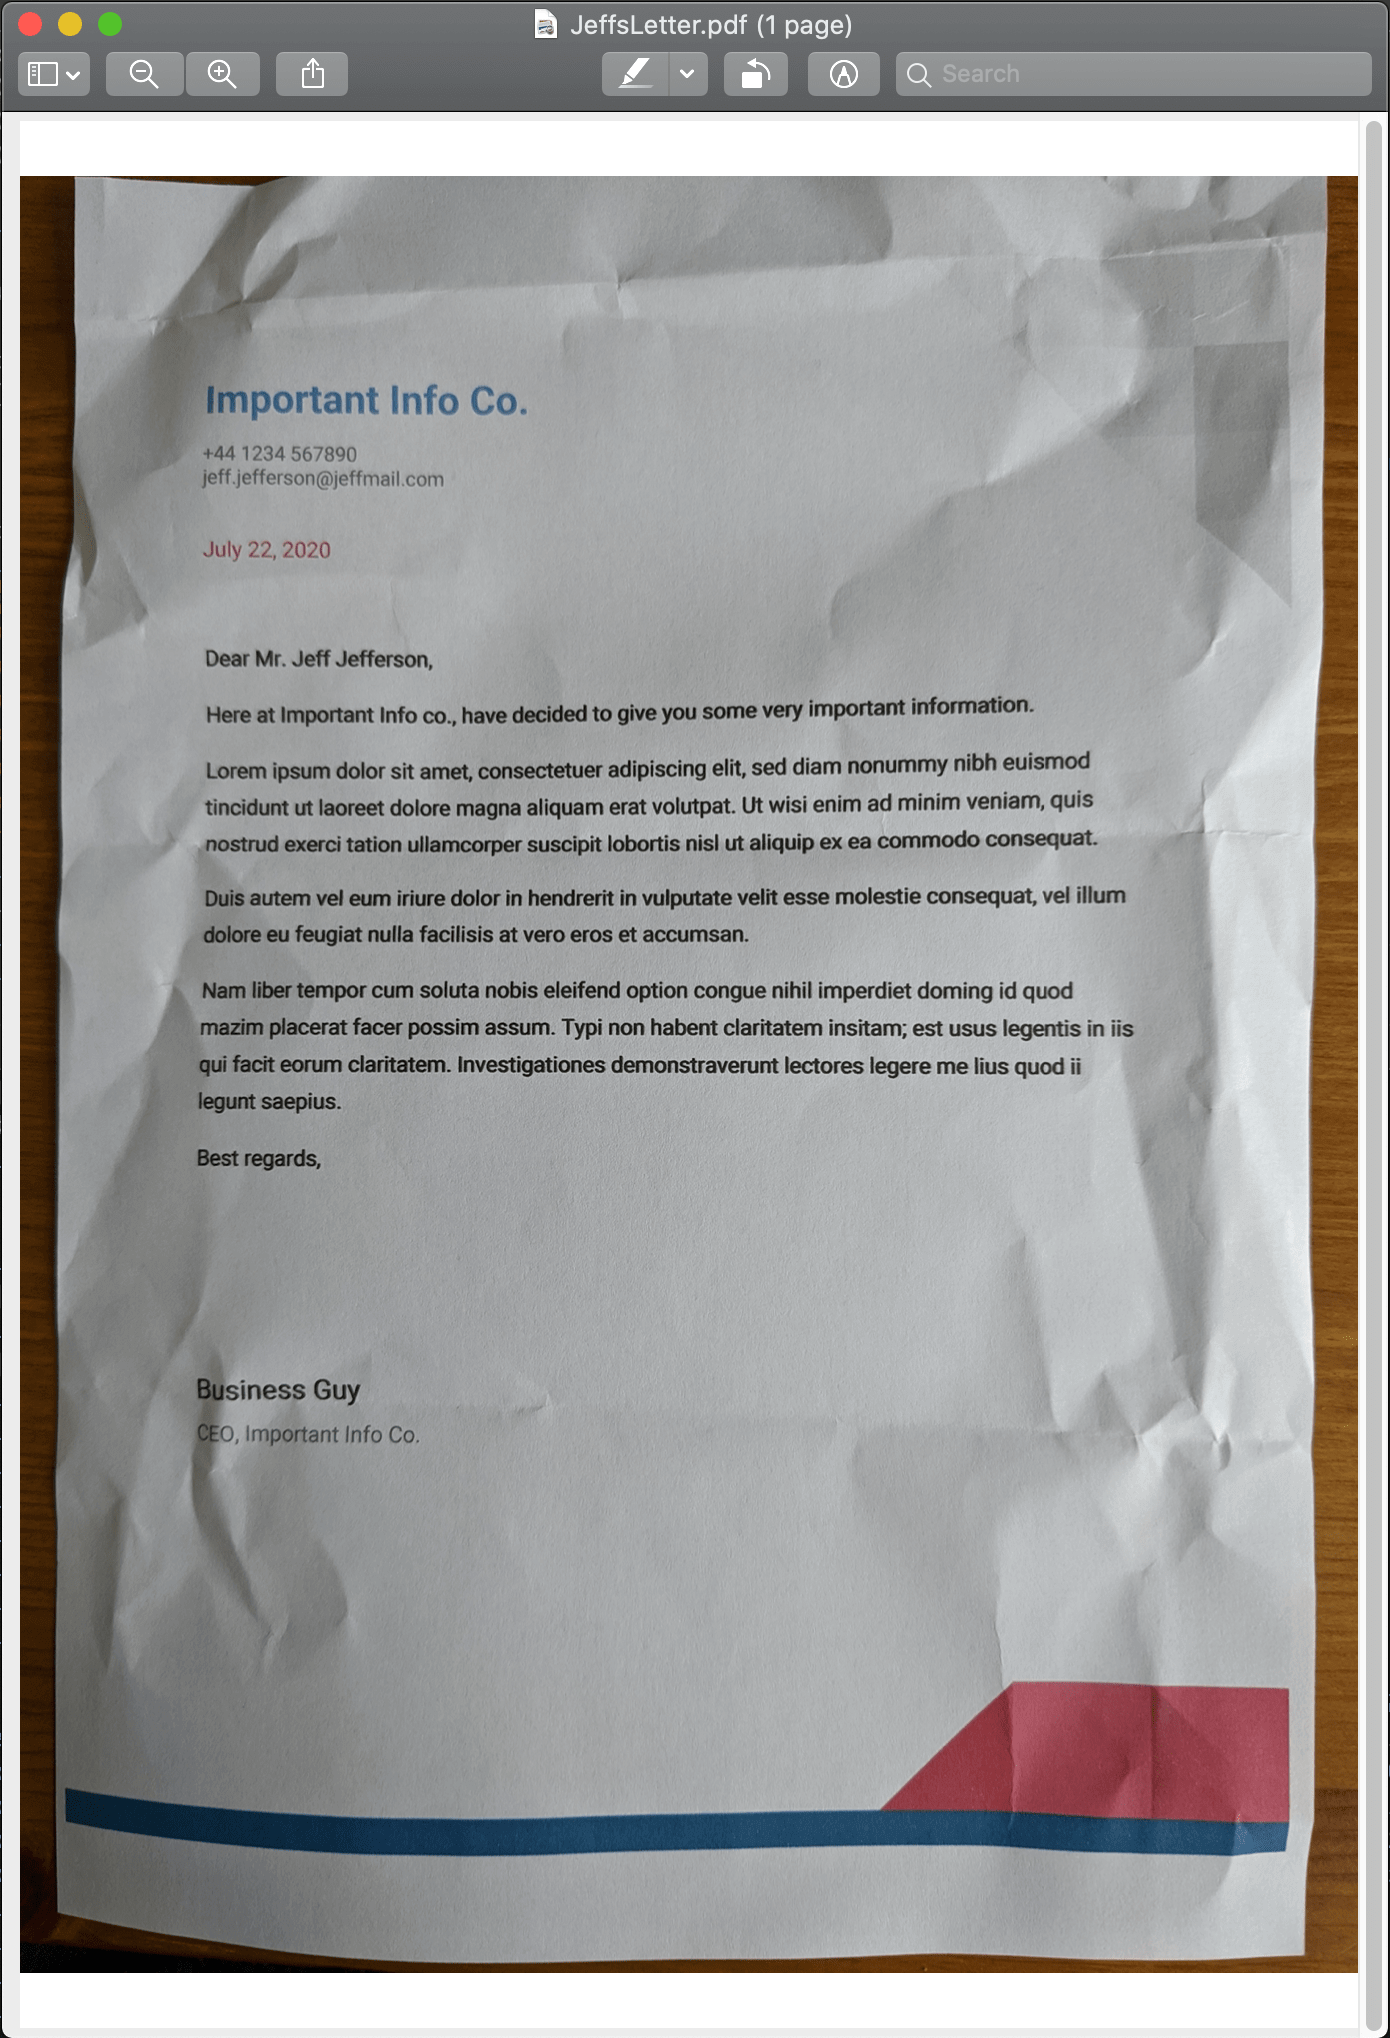
For this example, we’ll use an image document that was created from a photo of a letter sent to my imaginary friend, Jeff. This letter contains some important information he wants to share, but it also includes an email address and phone number, which he doesn’t want to share.
Jeff can use OCR to expose previously inaccessible text in the letter image, and then he can use our redaction presets search API to redact the sensitive information. We have a range of regex presets available in our API, and they can be used to help find common patterns in the text such as email addresses, dates, and URLs. For this example, we’ll use the EMAIL_ADDRESS and INTERNATIONAL_PHONE_NUMBER Java presets. For information on all the available presets, check out our preset API reference.
Jeff has already gone through the trouble of scanning his letter and saving it as a PDF called JeffsLetter.pdf.

Performing OCR
To perform the actions mentioned above, first we need to load Jeff’s image into the application. We create a PdfDocument object with the original document, and we prepare an output source into which we write the file that’s been processed with OCR:
PdfDocument document = PdfDocument.open(new FileDataProvider(new File("/path/to/JeffsLetter.pdf")));
FileDataProvider ocrProcessedFile = new FileDataProvider(new File("/tmp/JeffsLetterWithOCR.pdf"));
Because JeffsLetter.pdf is only one page in length and the text is in English, building our OCR processor is simple:
OcrProcessor ocrProcessor = new OcrProcessor.Builder(document).build();
ocrProcessor.performOcr(ocrProcessedFile);
For a larger, more complicated document, we can specify the pages we want to process and the language data we want to use (if the document is longer than a page and/or written in another one of our supported languages). Check out our Java OCR API guide for more information.
We can print out the path to the processed image using the File class. After opening it in your favorite PDF viewer, you’ll see it’s now possible to highlight text and create annotations.
Taking this one step further, we can use the Redaction feature to remove sensitive information from the letter.
Redaction
Now we can take the processed document and use the following code to take out any email addresses and phone numbers present in the letter:
// We can reuse the `document` object we created from the previous section to reload the OCR processed document.
document = PdfDocument.open(ocrProcessedFile);
// And then we redact any email addresses or international phone numbers found in the letter.
RedactionProcessor.create()
    .addRedactionTemplates(new RedactionPreset.Builder(RedactionPreset.Type.EMAIL_ADDRESS).build())
    .addRedactionTemplates(new RedactionPreset.Builder(RedactionPreset.Type.INTERNATIONAL_PHONE_NUMBER).build())
    .redact(document);
We did it! But now let’s see how to combine OCR and redaction in one simple step.
Putting It All Together
Combining what we did previously, we can create two functions to perform the OCR and redaction processes:
/**
 * A function that takes an input and output file path along with OCR language,
 * performs OCR on the input document, outputs it to `outputFile` path, and returns a
 * processed document for further use.
 */
@Nullable
public PdfDocument performOcrAndReturnProcessedDocument(@NotNull final String inputFile,
                                                        @NotNull final String outputFile,
                                                        @NotNull final OcrLanguage language) {
    try {
        PdfDocument document = PdfDocument.open(new FileDataProvider(new File(inputFile)));
        FileDataProvider ocrProcessedFile = new FileDataProvider(new File(outputFile));

        OcrProcessor ocrProcessor = new OcrProcessor.Builder(document)
                .setLanguage(language)
                .build();

        ocrProcessor.performOcr(ocrProcessedFile);

        // Log where our output file goes so we can easily find it.
        System.out.println("OCR processed file outputted to " + ocrProcessedFile.getFile().getAbsolutePath());

        // Reopen the processed file so we have access to the OCR metadata.
        return PdfDocument.open(ocrProcessedFile);
    } catch (IOException | PSPDFKitInitializeException e) {
        e.printStackTrace();
    }
    return null;
}


// Our main function combines the two functions above to perform OCR and redact the text from the image.
public void main() {
    final PdfDocument document = performOcrAndOpenProcessedDocument(
        "/path/to/JeffsLetter.pdf",
        "/tmp/JeffsLetterProcessed.pdf",
        OcrLanguage.English);

    // If the OCR was successful, we'll have a valid `document` to redact.
    if (document != null) {
        try {
            RedactionProcessor.create()
                .addRedactionTemplates(new RedactionPreset.Builder(RedactionPreset.Type.EMAIL_ADDRESS).build())
                .addRedactionTemplates(new RedactionPreset.Builder(RedactionPreset.Type.INTERNATIONAL_PHONE_NUMBER).build())
                .redact(document);
        } catch (IOException e) {
            e.printStackTrace();
        }
    }
}
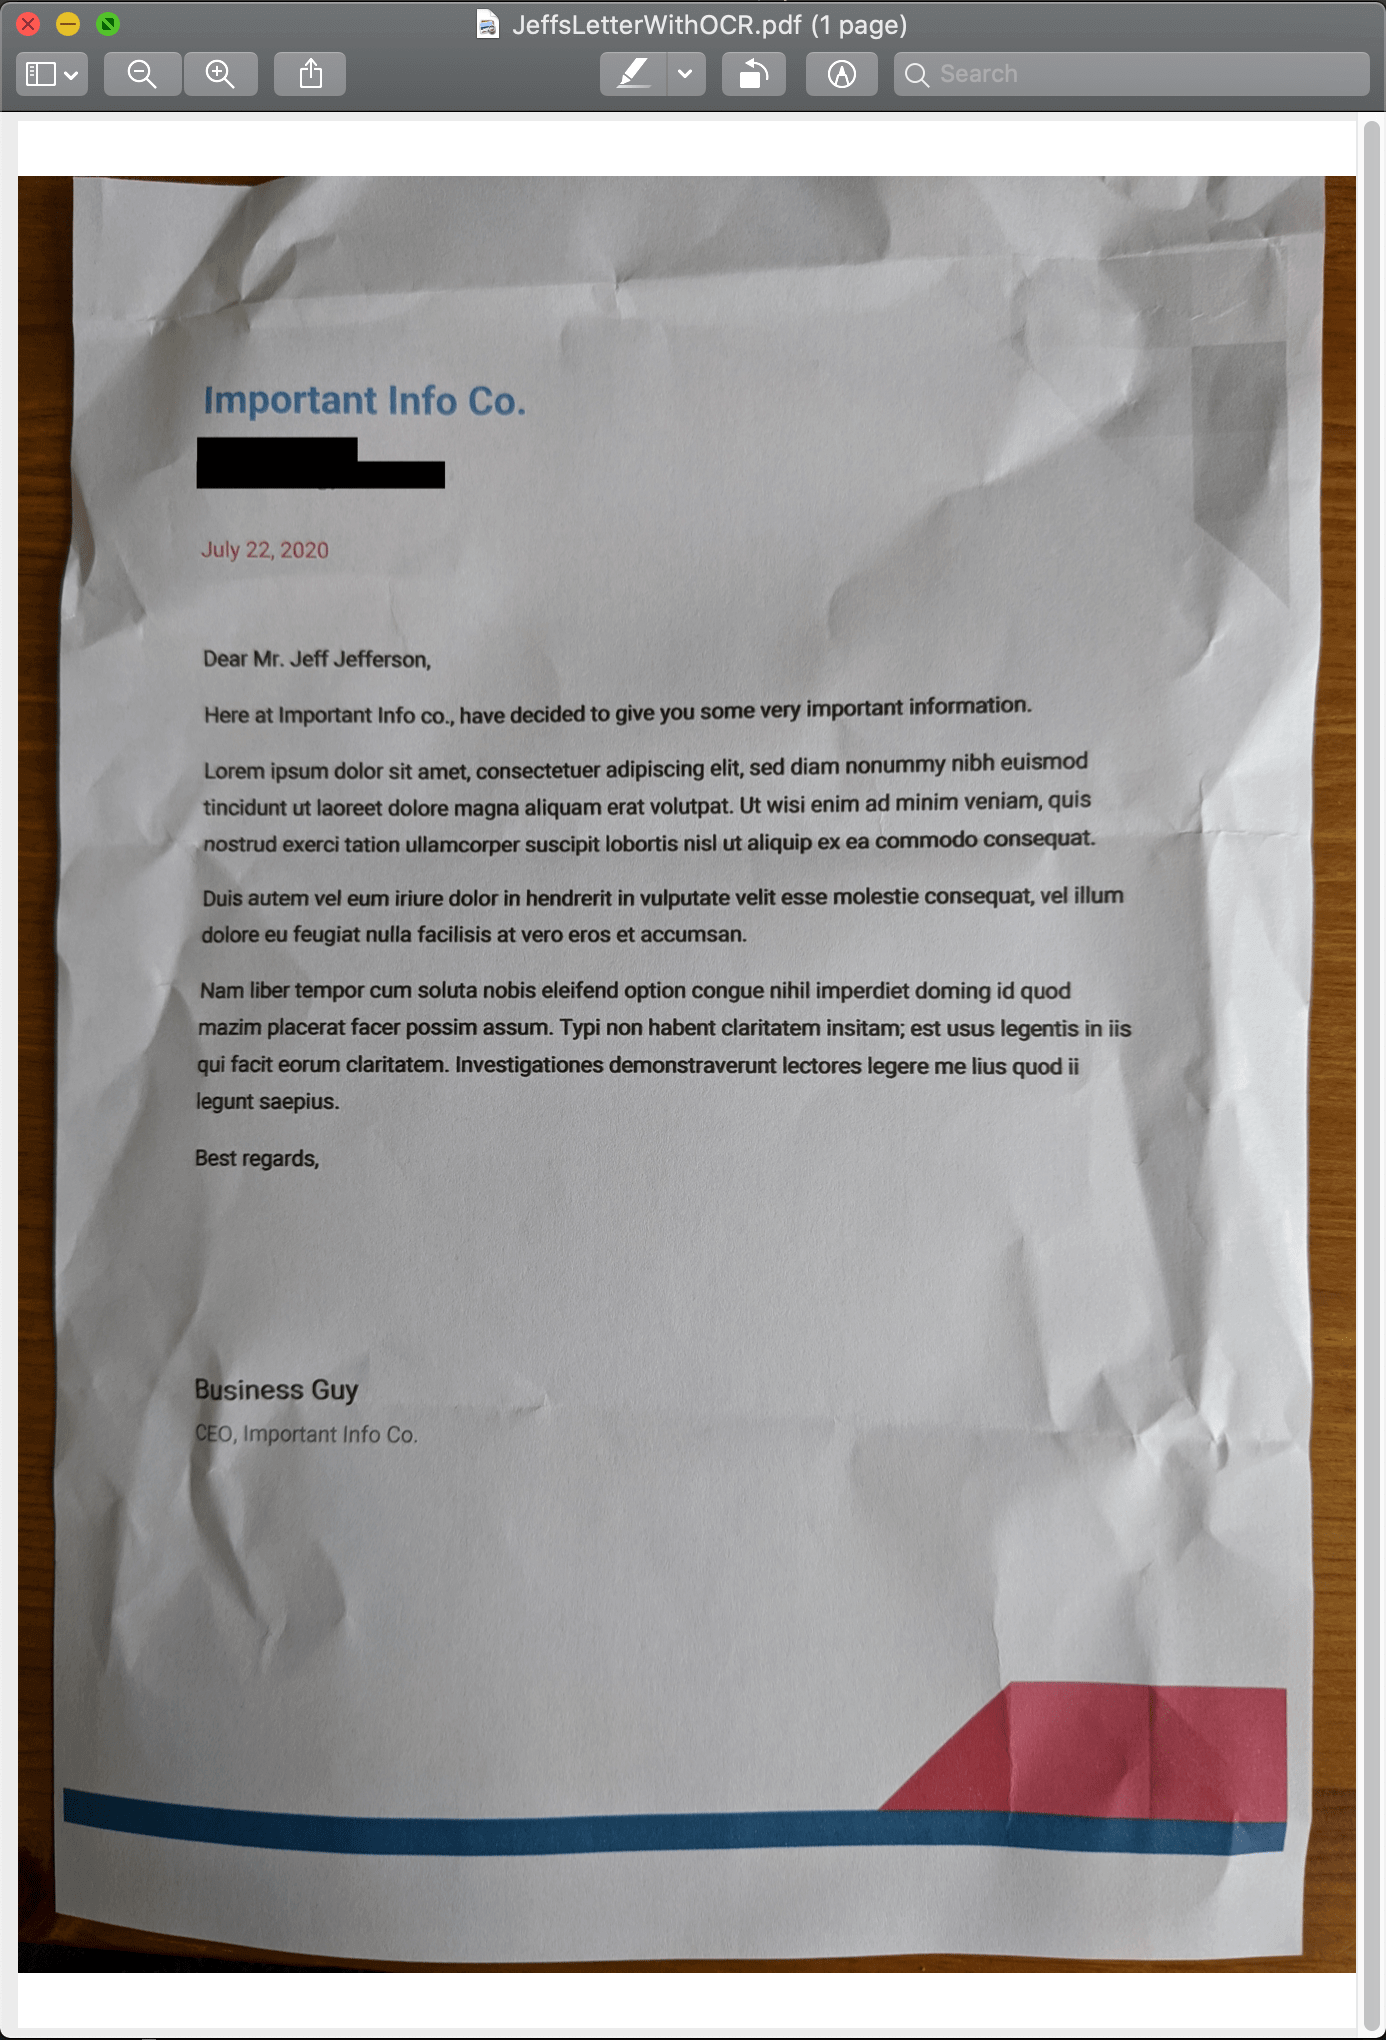
Now we can see the personal details in the image have been removed.

It’s as simple as that!
Conclusion
In this example, we scratched the surface of how we can combine two of our PDF processing features to create a powerful tool. Our use case — programmatically removing personal details from a scanned image of a letter — was simple, but it demonstrated what can be achieved with our image processing and PDF redaction tools. To see what else can be done with our Java library, head over to our other guides and read the API documentation.
To give these features a go and see for yourself how easy the PSPDFKit Java Library is to use, check out our free trial and download our library today.


