Getting Started on iOS

This guide will take you through the steps necessary to integrate PSPDFKit into a newly created iOS application. By the end, you’ll be able to present a PDF document in the default PSPDFKit UI.

Requirements

Creating a New Xcode Project

  1. Open Xcode and select New Project in the File > New > Project… menu to create a new project for your application:
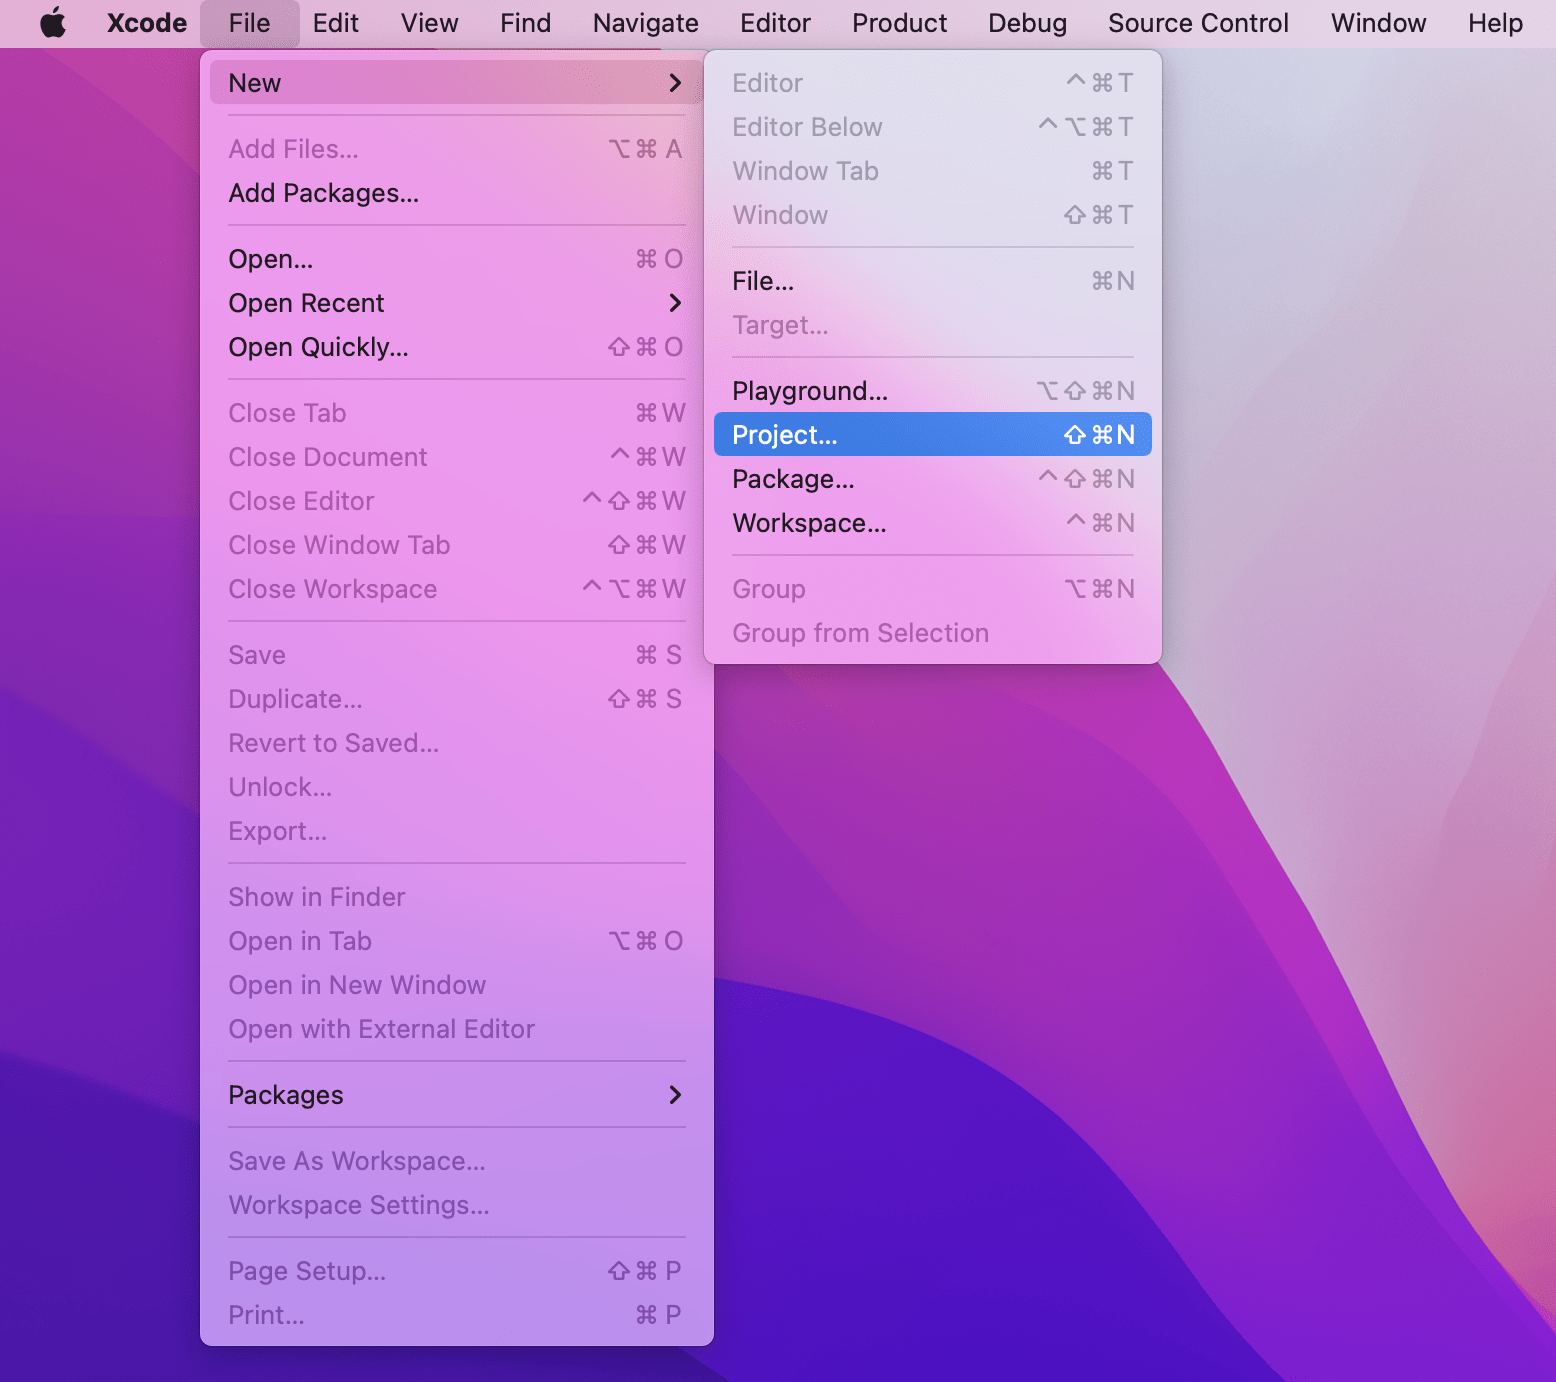
create-new-project

  1. Choose the App template for your project:
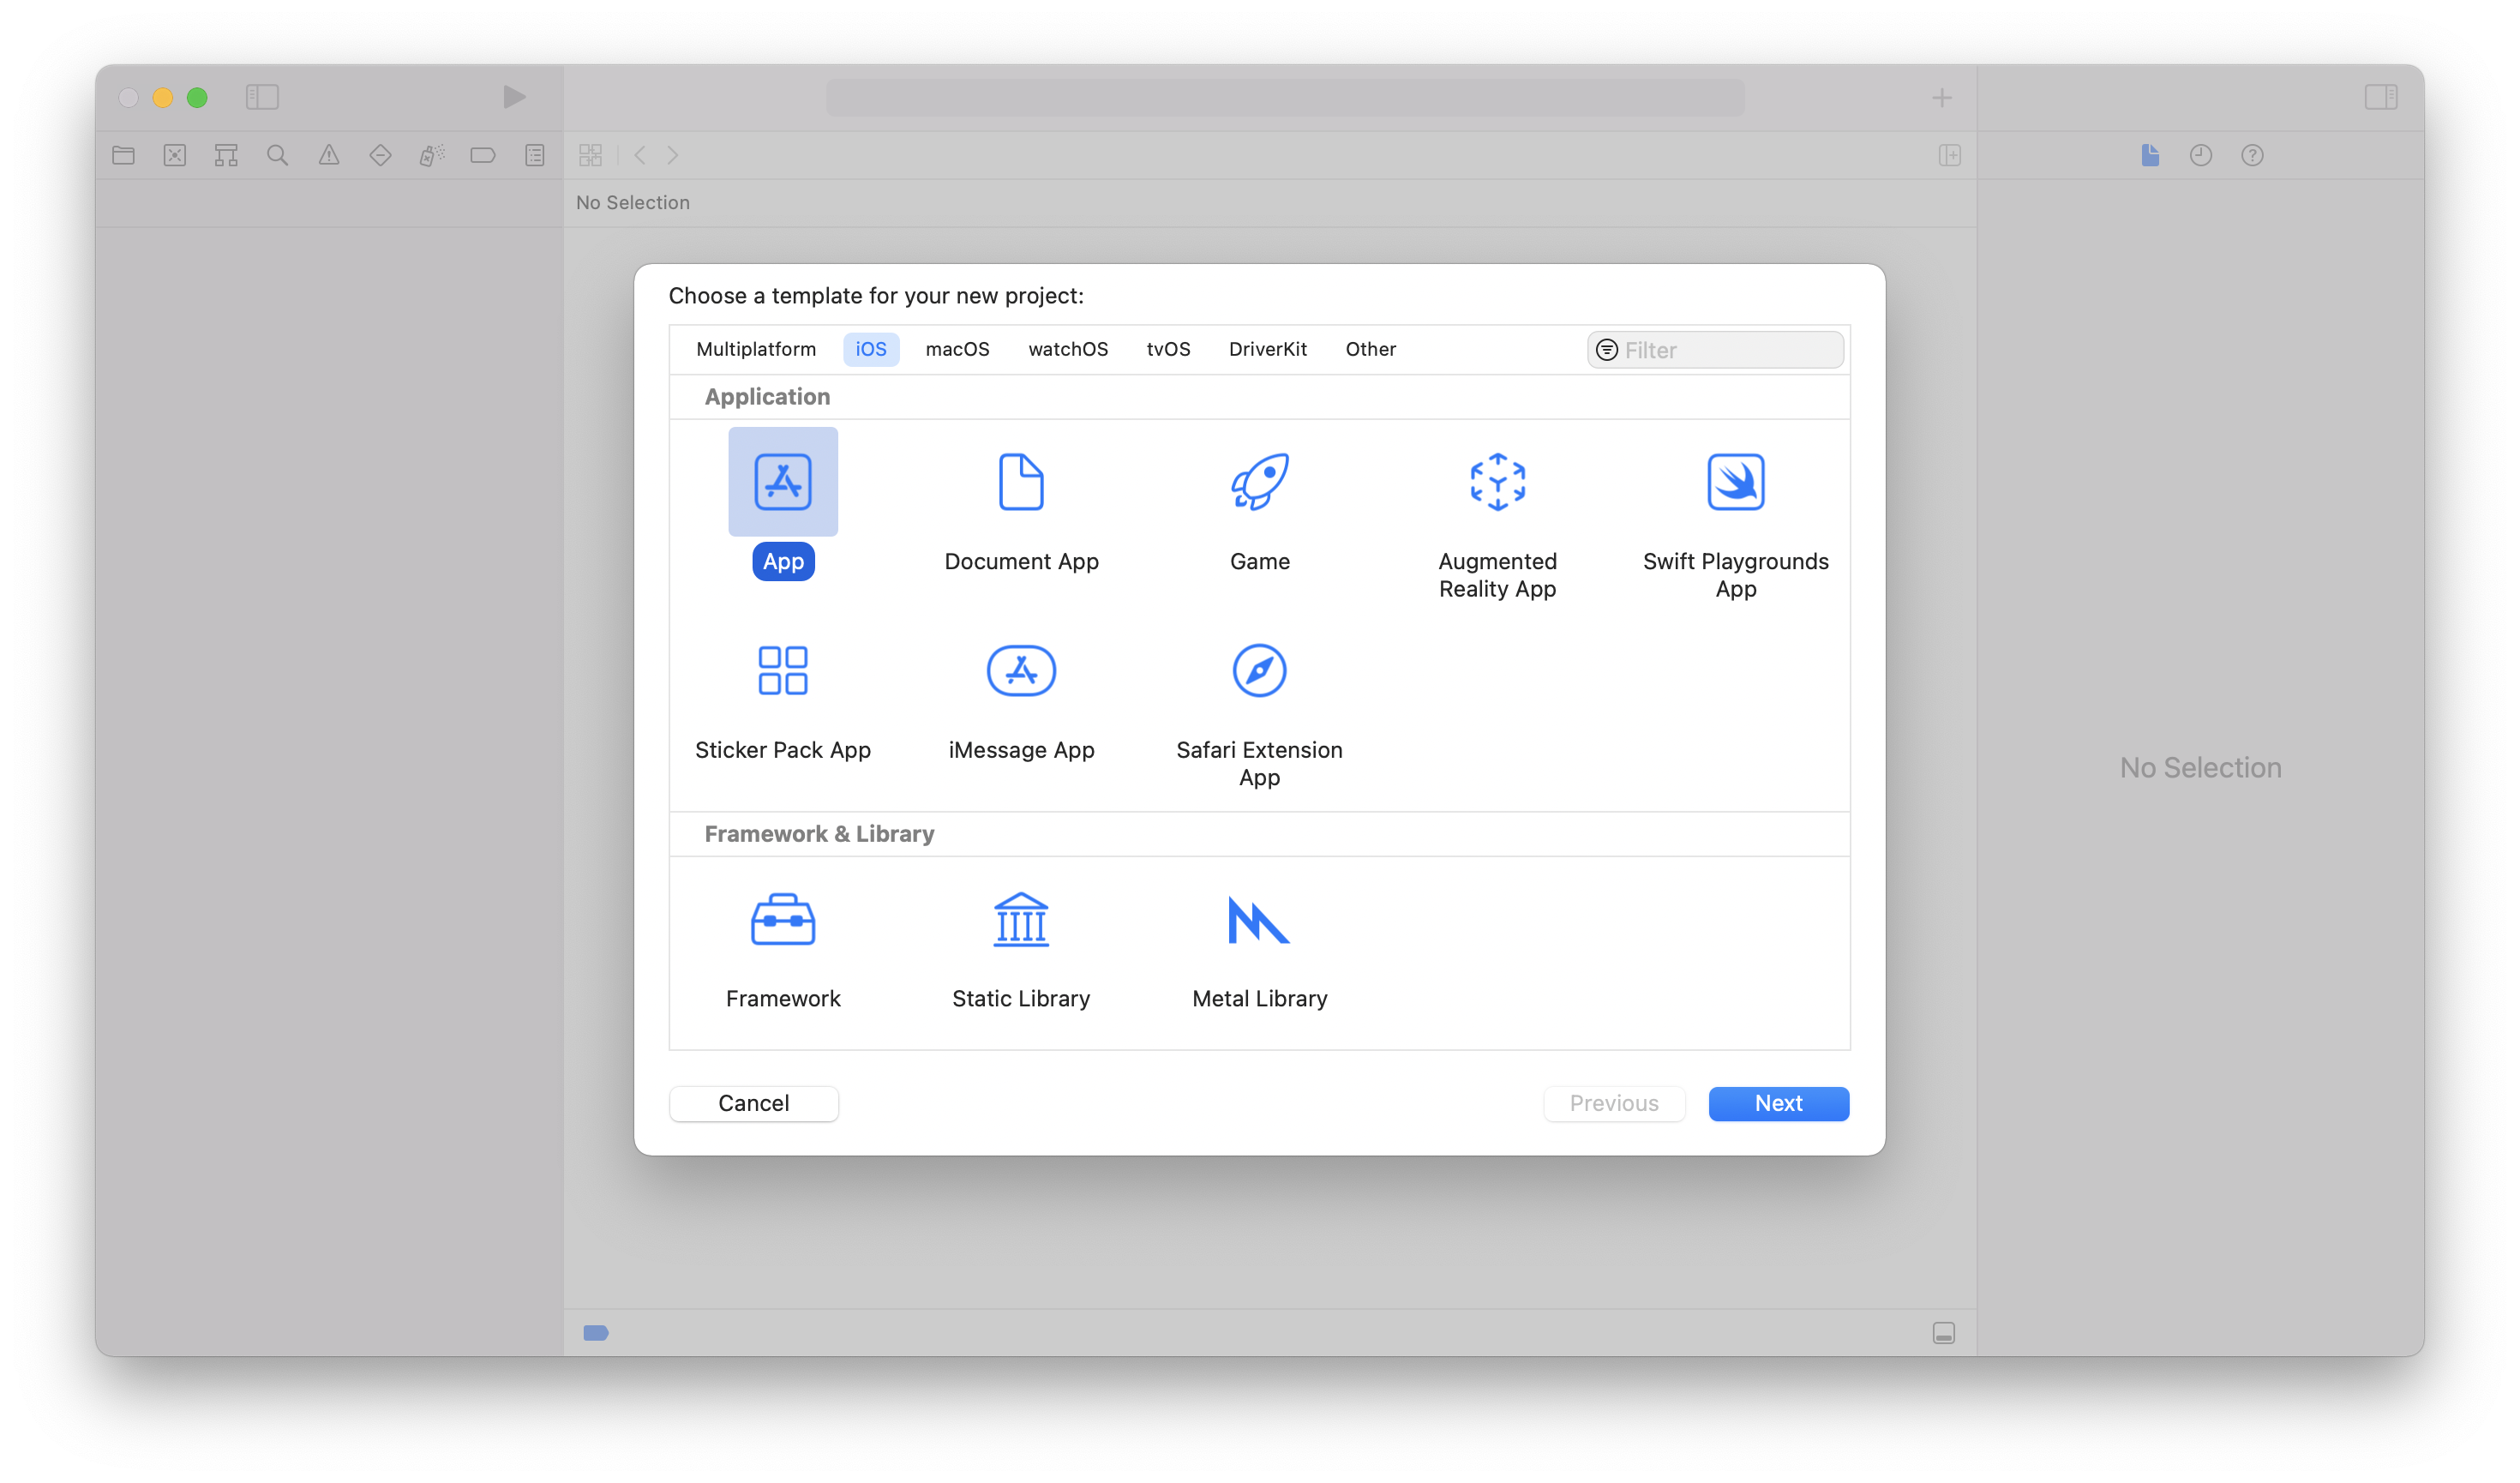
app-template

  1. When prompted, enter your app name (PSPDFKit-Demo) and your organization identifier (com.example) and choose Storyboard for the interface:
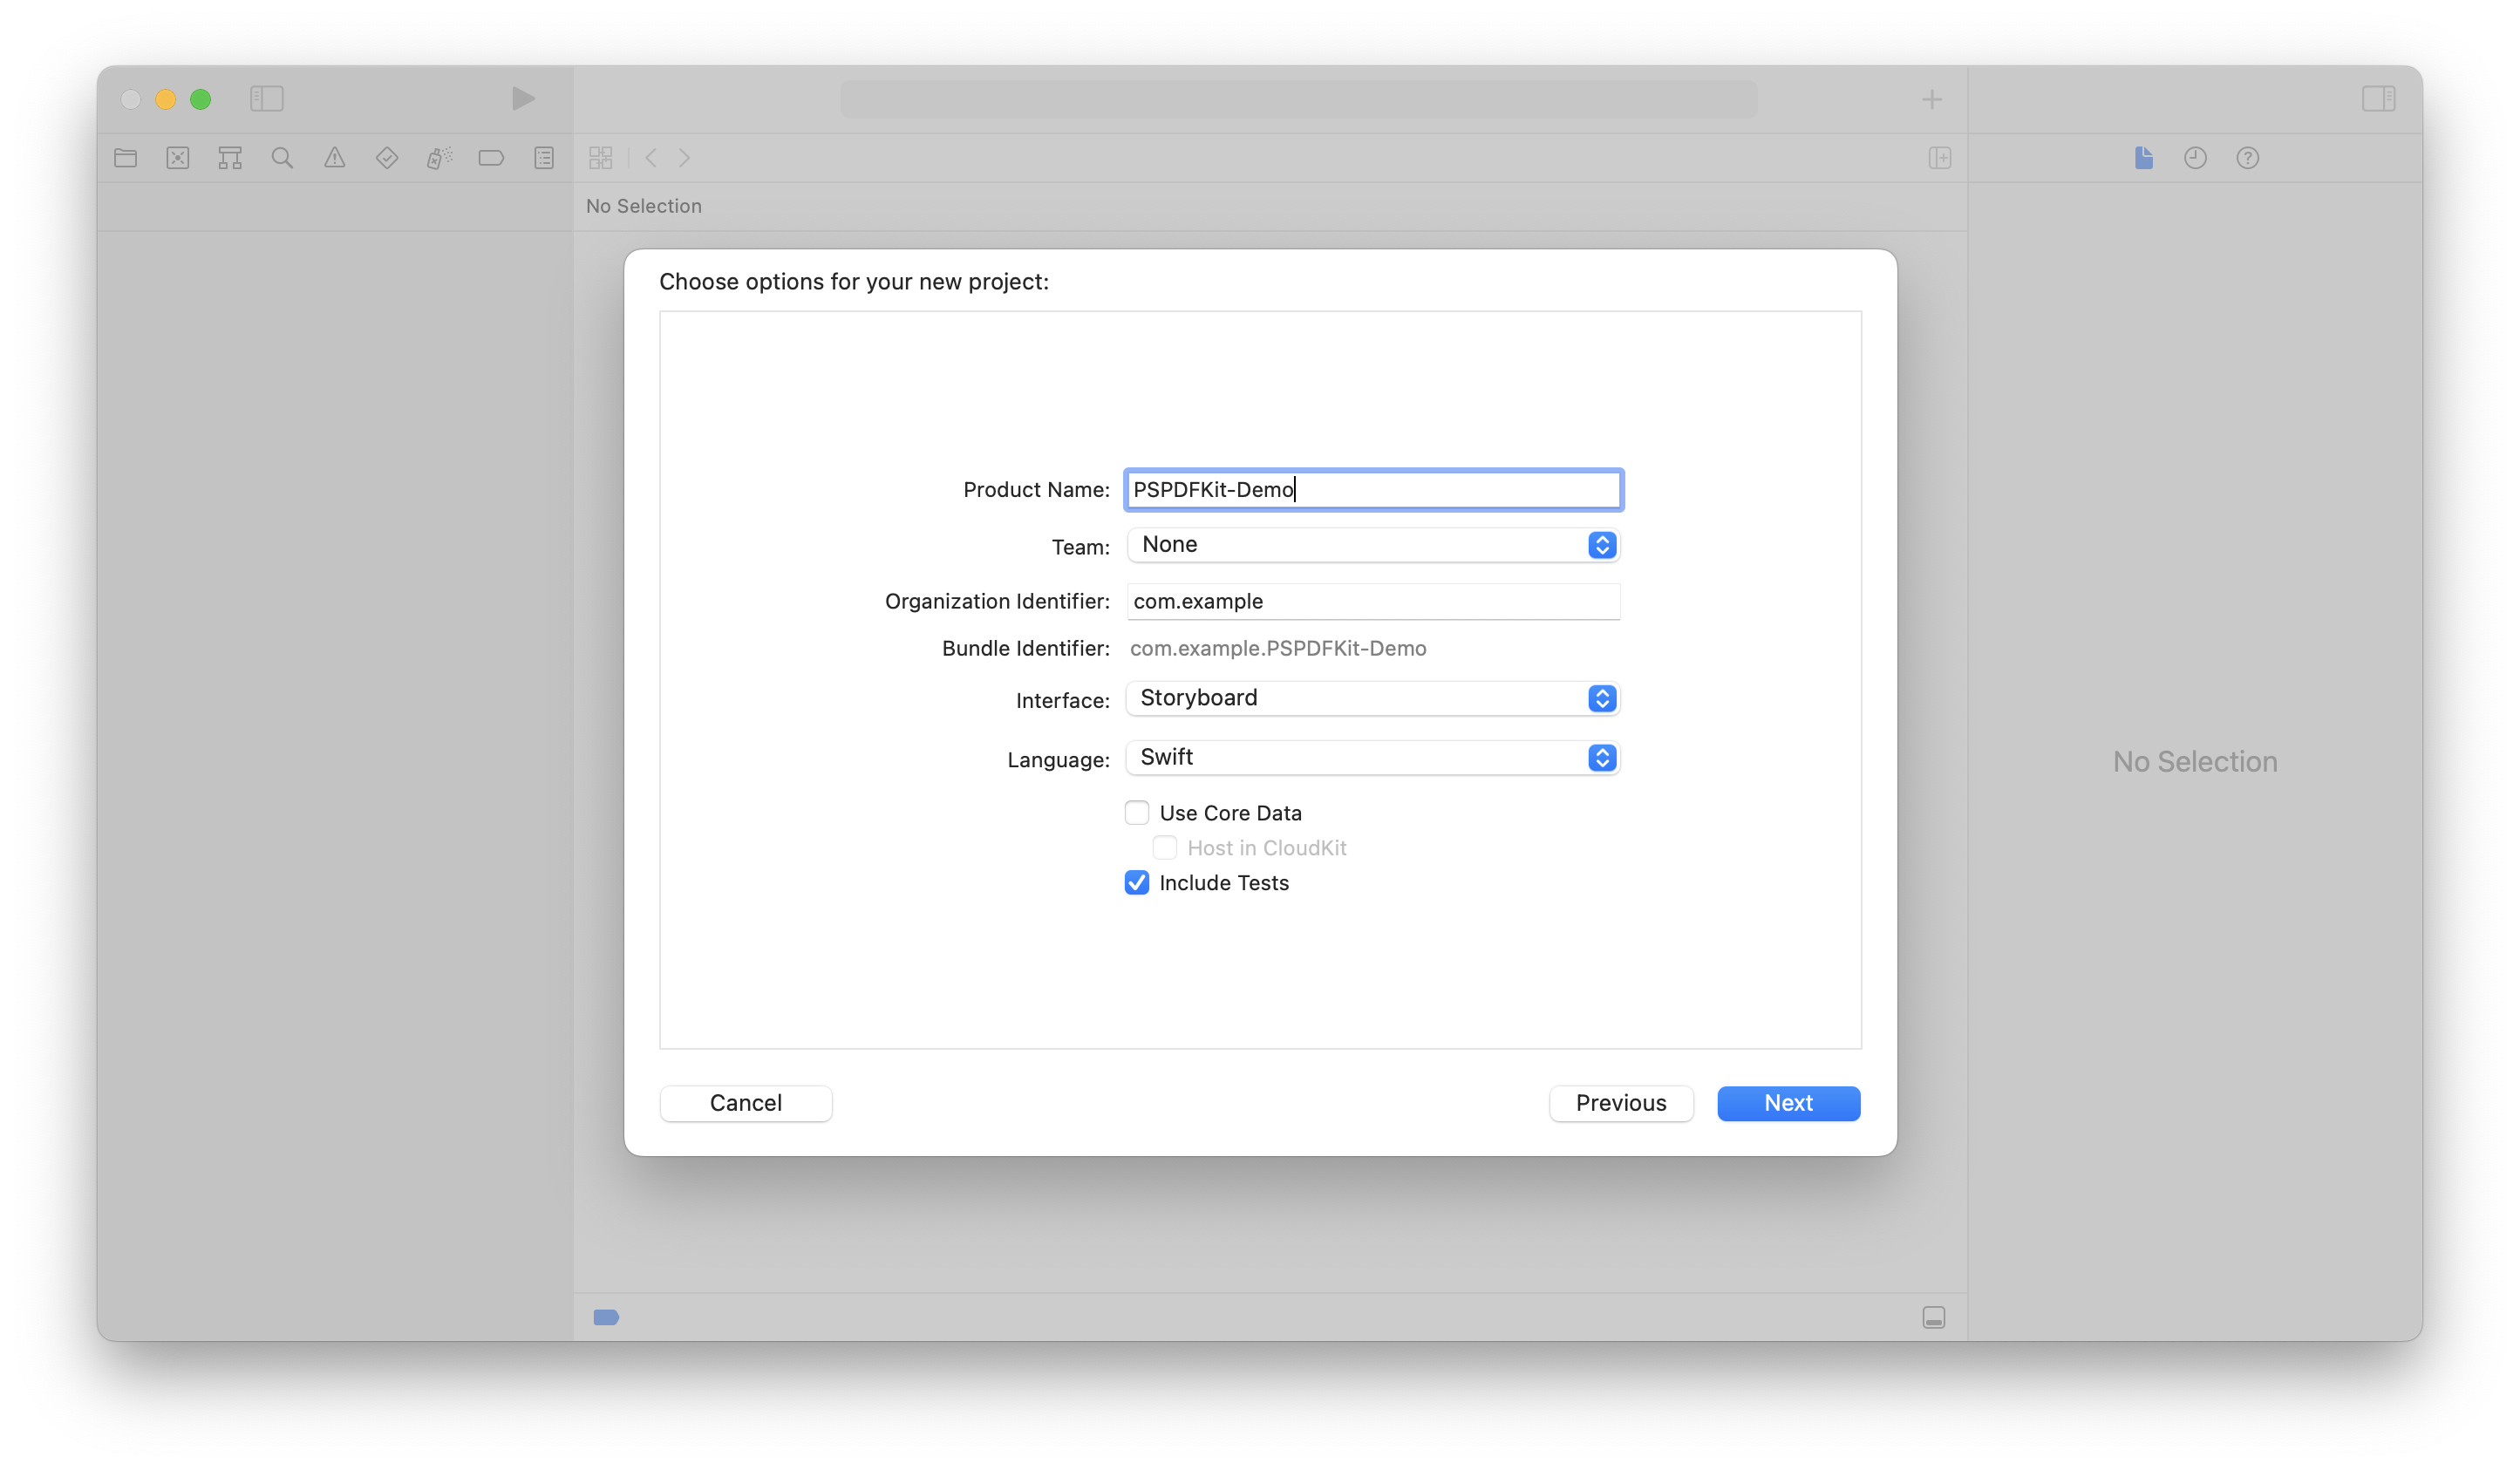
app-options

  1. Click the Next button and select the location to save the project.

  2. Click the Create button to finish.

Adding the PSPDFKit Swift Package

  1. Open your application in Xcode and select your project’s Package Dependencies tab.
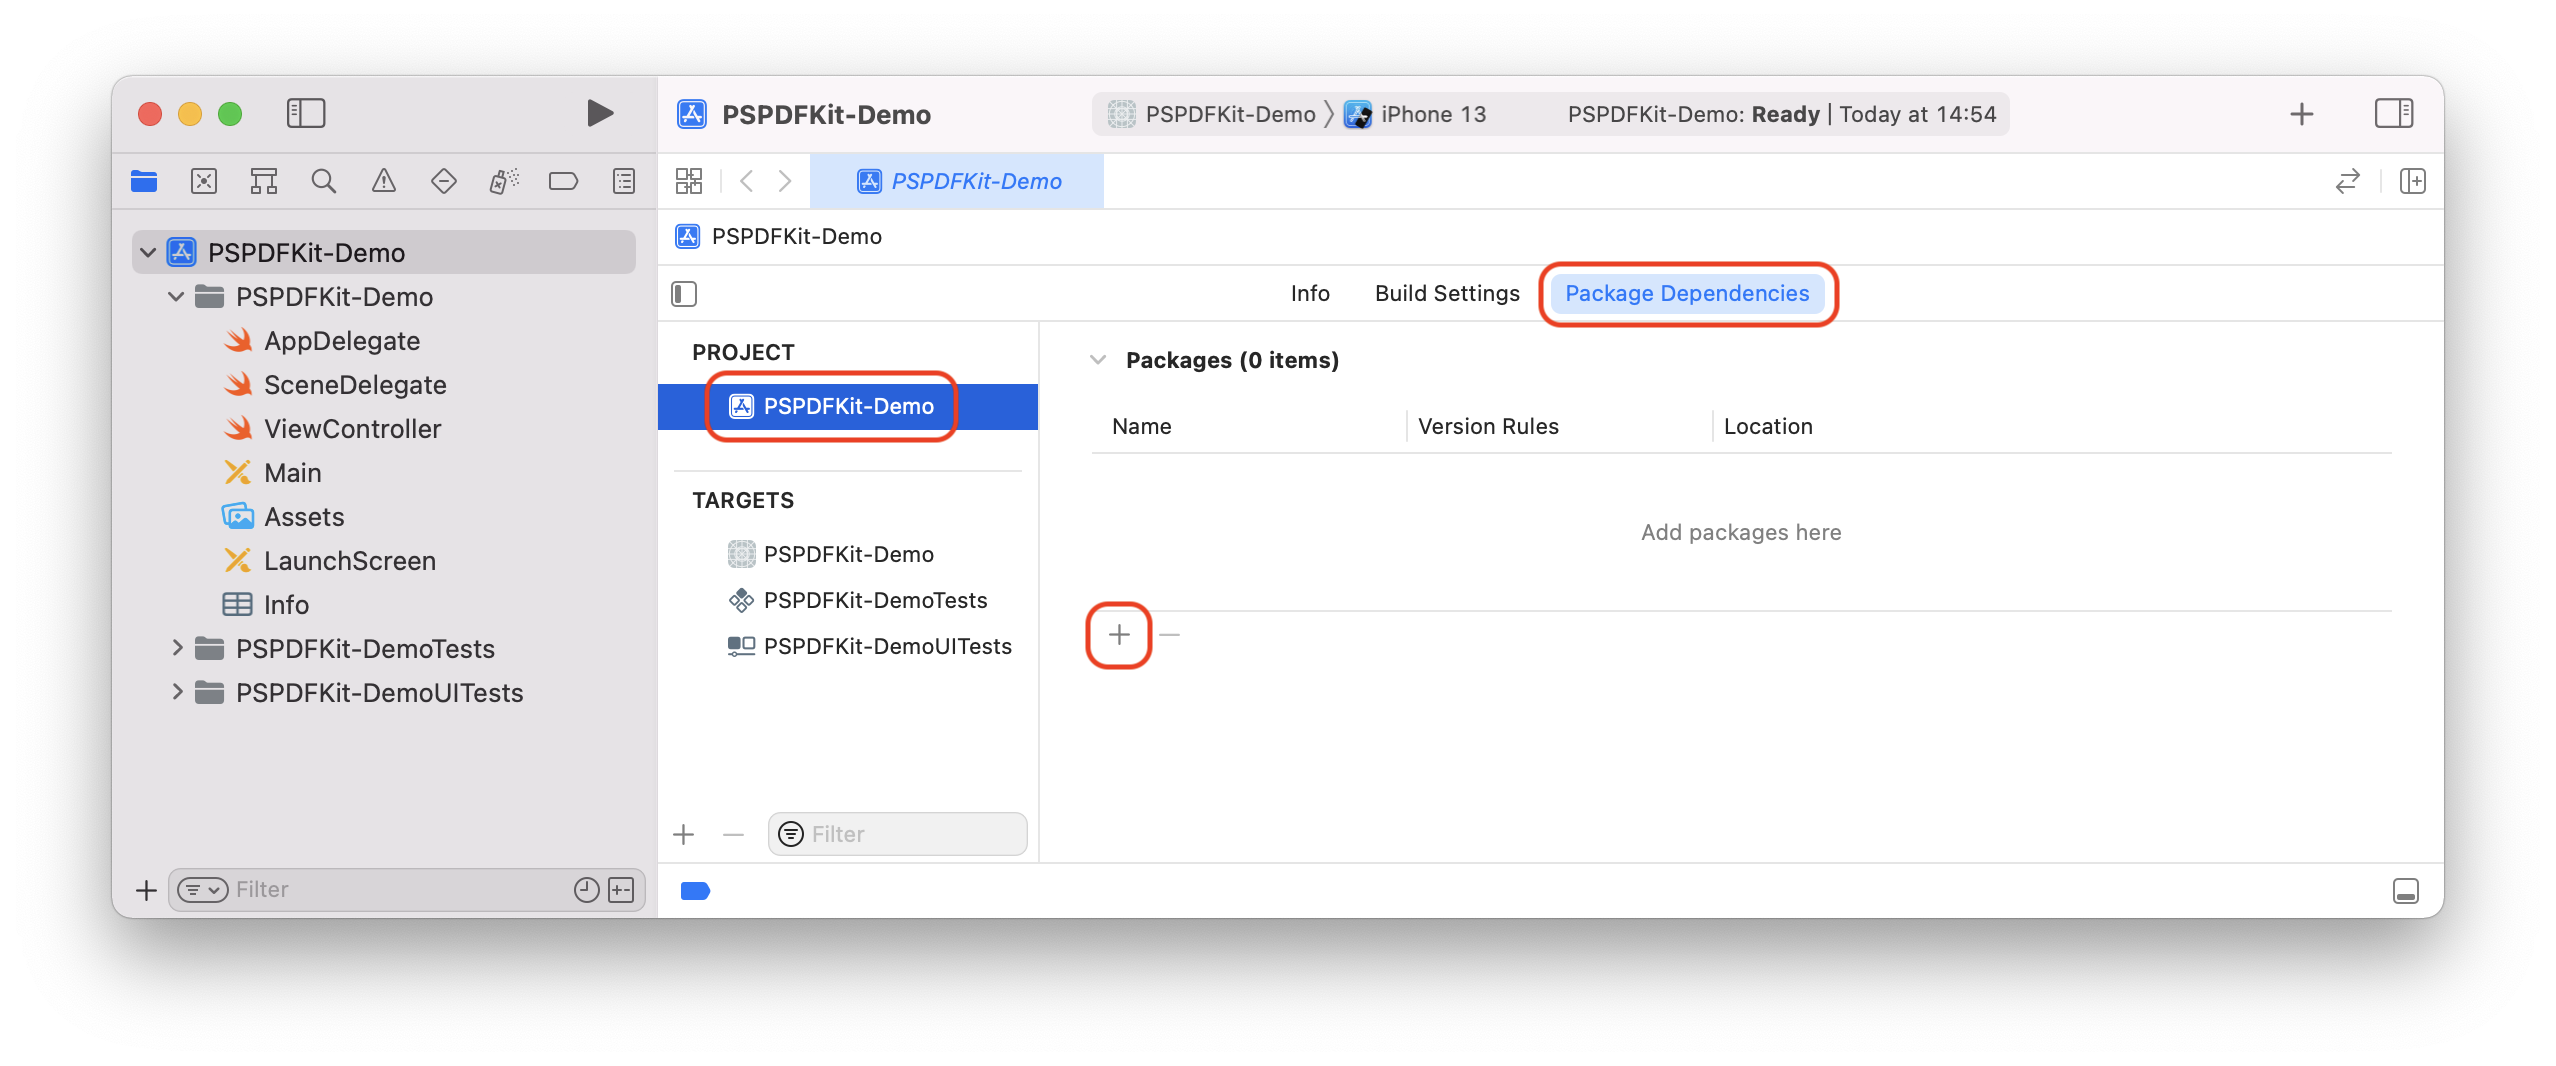
Selecting the Xcode project Package Dependencies

  1. Copy the PSPDFKit Swift package repository URL into the search field:

https://github.com/PSPDFKit/PSPDFKit-SP
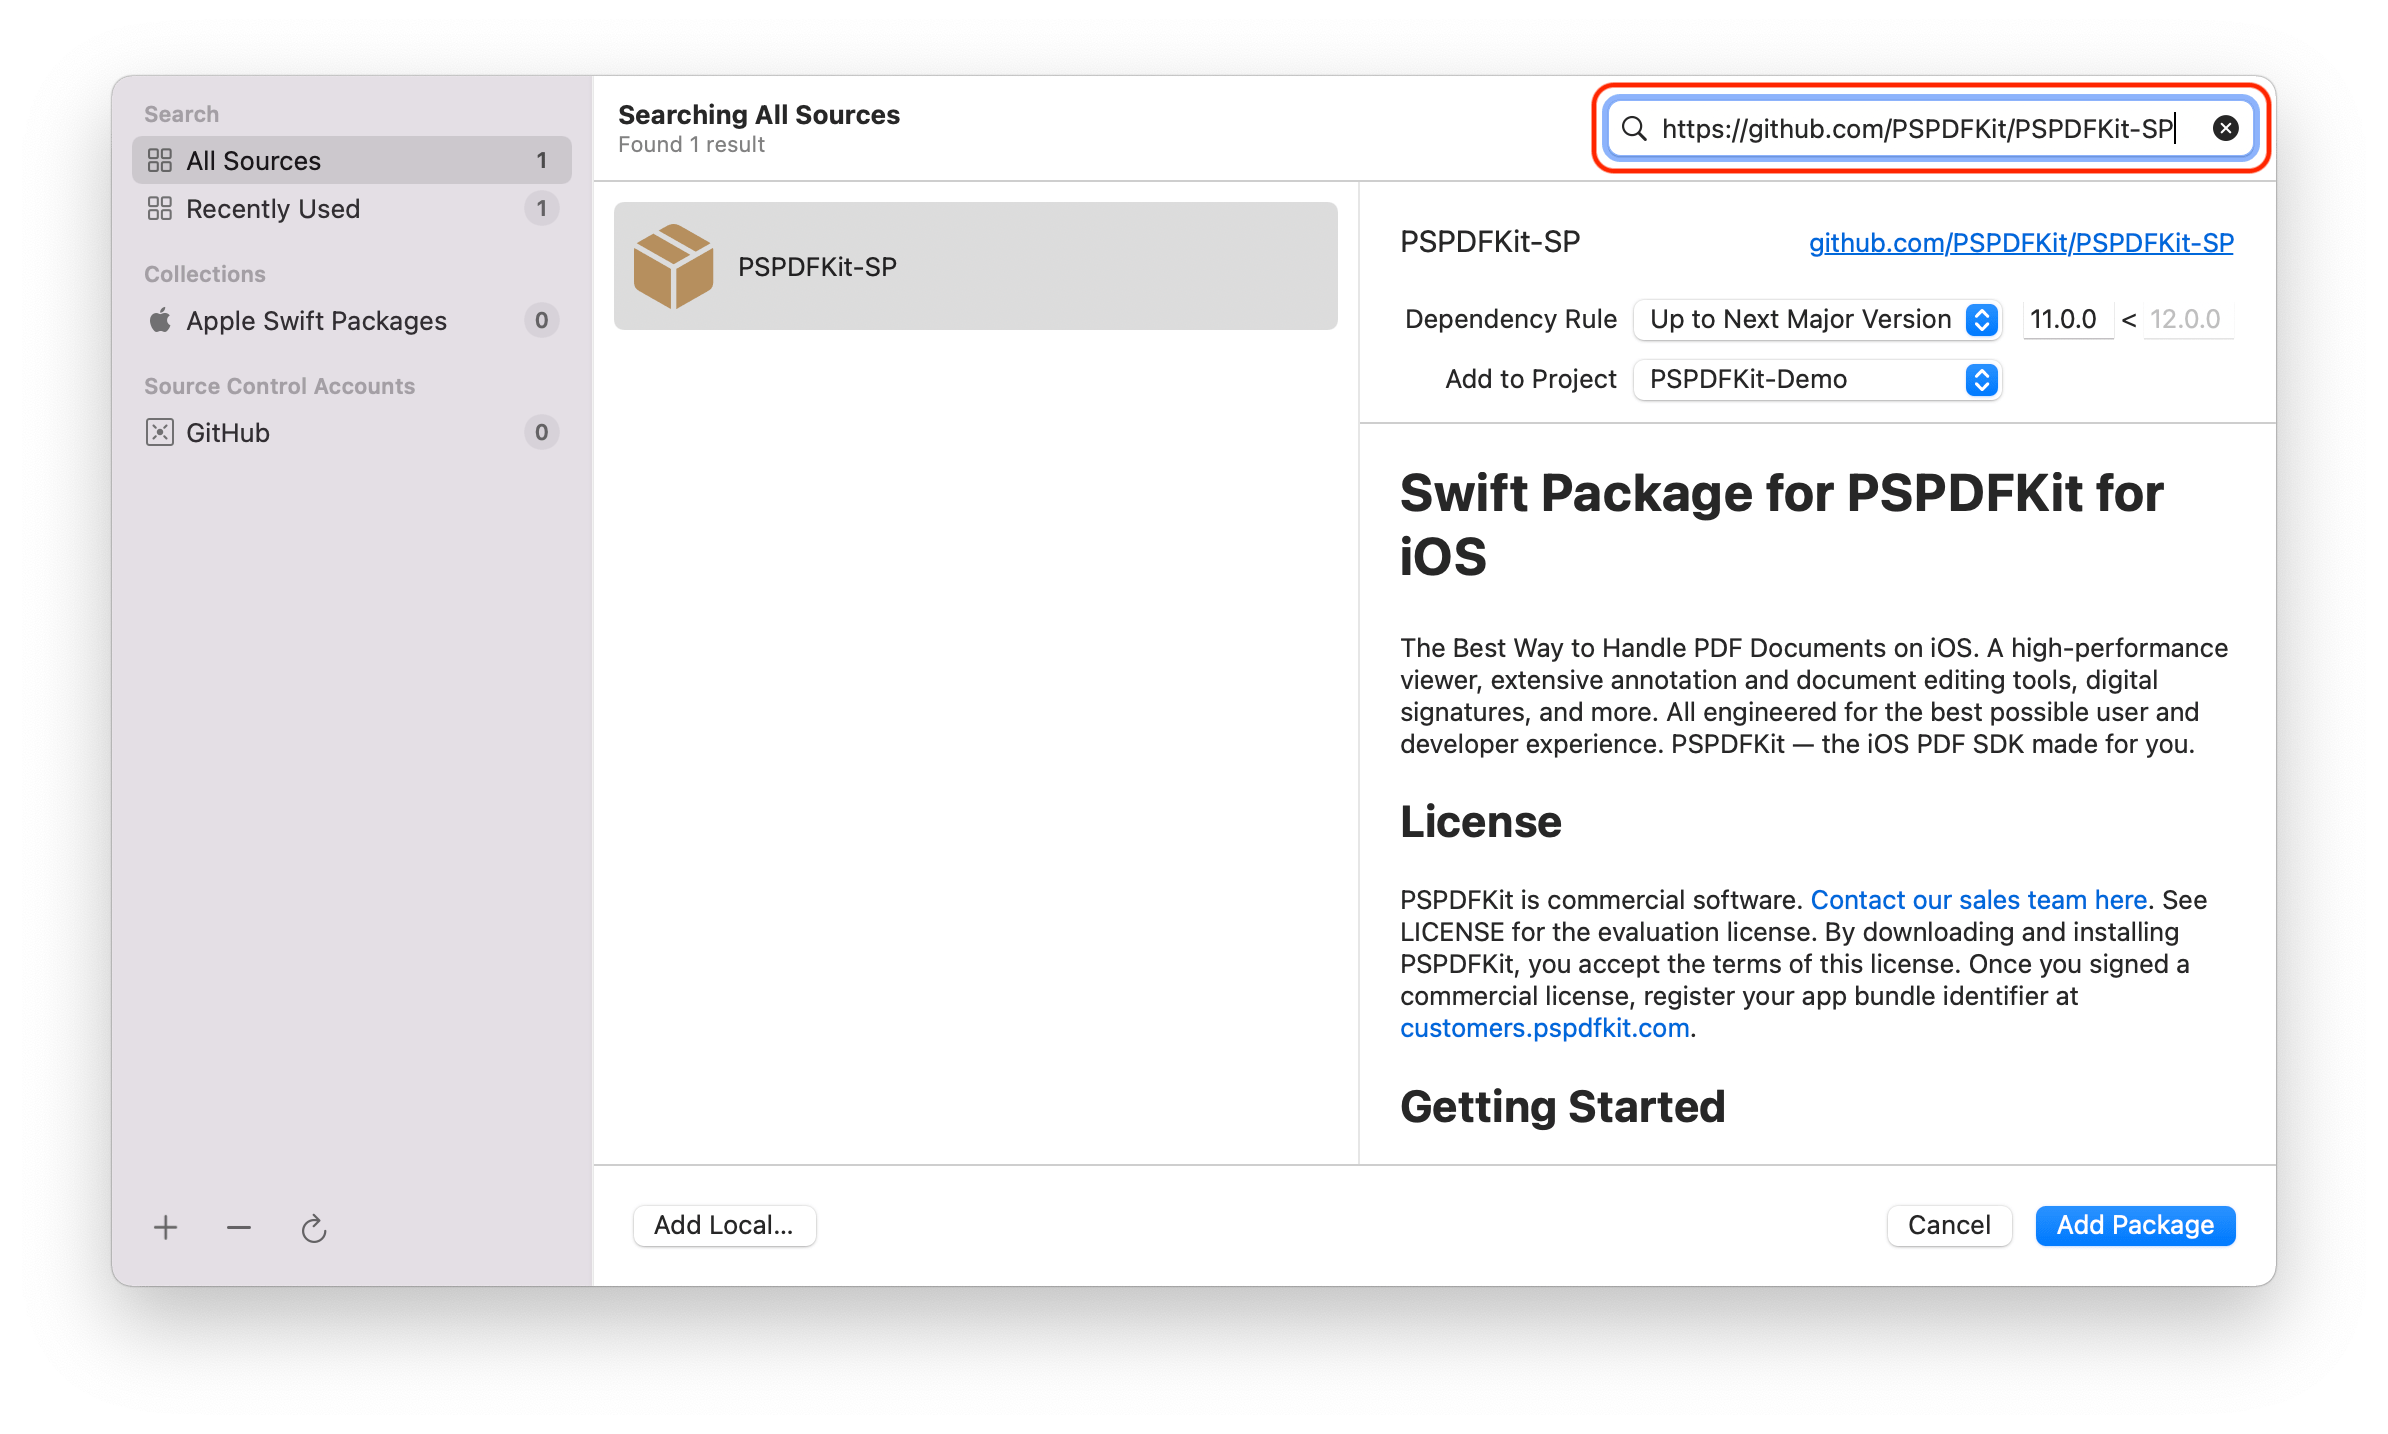
Adding the package URL

  1. In the Dependency Rule fields, select Branch > master, and then click Add Package.
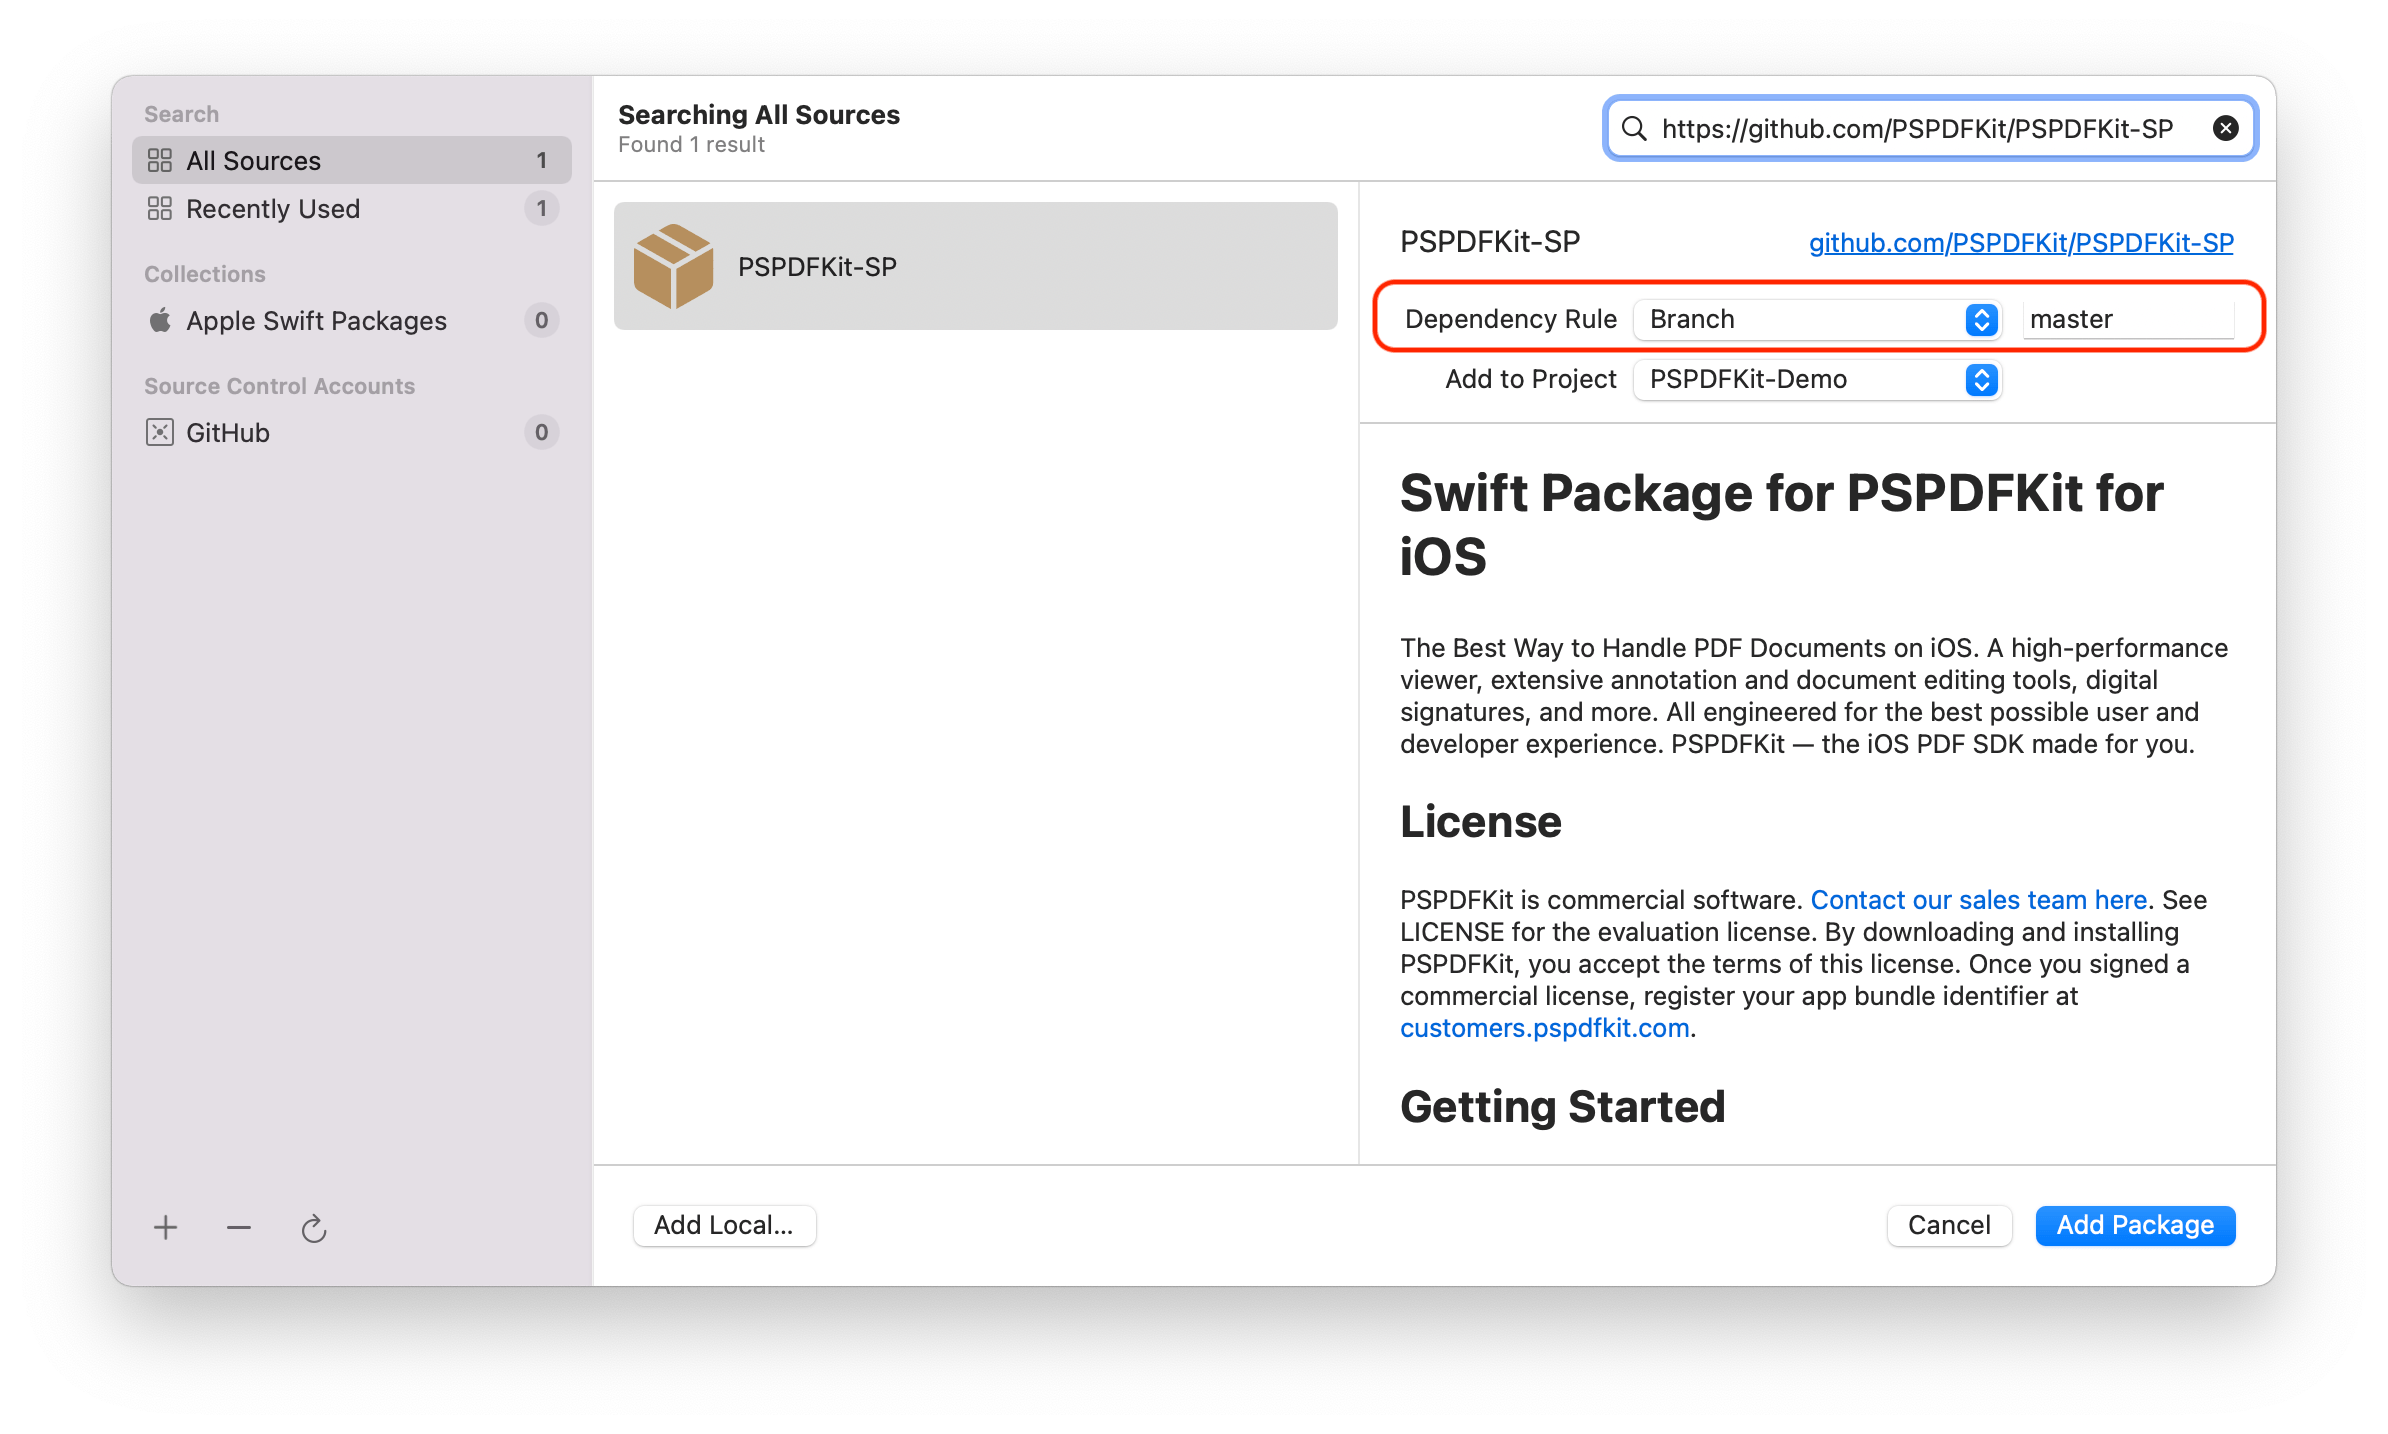
Choosing Branch: master

Information

Using Branch > master will ensure you always use the latest available version of PSPDFKit. Alternatively, you can select Version > Up to Next Minor to update at your own pace.

After the package download completes, select Add Package.

Adding the package

PSPDFKit should now be listed under Swift Package Dependencies in the Xcode Project navigator.

Displaying a PDF

  1. Add the PDF document you want to display to your application by dragging it into your project. On the dialog that’s displayed, select Finish to accept the default integration options. You can use this Quickstart Guide PDF as an example.

drag-and-drop-document

  1. Import PSPDFKit and PSPDFKitUI at the top of your UIViewController subclass implementation:

import PSPDFKit
import PSPDFKitUI
@import PSPDFKit;
@import PSPDFKitUI;
  1. Load your PDF document and display the view controller by implementing viewDidAppear(_:) in the ViewController.swift file like so:

override func viewDidAppear(_ animated: Bool) {
	super.viewDidAppear(animated)

	// Update to use your document name.
	let fileURL = Bundle.main.url(forResource: "Document", withExtension: "pdf")!
	let document = Document(url: fileURL)

	// The configuration closure is optional and allows additional customization.
	let pdfController = PDFViewController(document: document) {
			$0.isPageLabelEnabled = false
	}

	// Present the PDF view controller within a `UINavigationController` to show built-in toolbar buttons.
	present(UINavigationController(rootViewController: pdfController), animated: true)
}
- (void)viewDidAppear:(BOOL)animated {
	[super viewDidAppear:animated];

	// Update to use your document name.
	NSURL *documentURL = [NSBundle.mainBundle URLForResource:@"Document" withExtension:@"pdf"];
	PSPDFDocument *document = [[PSPDFDocument alloc] initWithURL:documentURL];

	// The configuration object is optional and allows additional customization.
	PSPDFViewController *pdfController = [[PSPDFViewController alloc] initWithDocument:document configuration:[PSPDFConfiguration configurationWithBuilder:^(PSPDFConfigurationBuilder *builder) {
			builder.pageLabelEnabled = NO;
	}]];

	// Present the PDF view controller within a `UINavigationController` to show built-in toolbar buttons.
	UINavigationController *navController = [[UINavigationController alloc] initWithRootViewController:pdfController];
	[self presentViewController:navController animated:YES completion:NULL];
}

Next Steps

This guide will take you through the steps necessary to integrate PSPDFKit into a newly created iOS application. By the end, you’ll be able to present a PDF document in the default PSPDFKit UI.

Requirements

Creating a New Xcode Project

  1. Open Xcode and select New Project in the File > New > Project… menu to create a new project for your application:

create-new-project

  1. Choose the App template for your project:

app-template

  1. When prompted, enter your app name (PSPDFKit-Demo) and your organization identifier (com.example) and choose Storyboard for the interface:

app-options

  1. Click the Next button and select the location to save the project.

  2. Click the Create button to finish.

  3. Close the Xcode project for now.

Adding the PSPDFKit CocoaPods Dependency

  1. Open the terminal and go to the directory containing your Xcode project: cd path/to/PSPDFKit-Demo.

  2. Run pod init. This will create a new Podfile next to your .xcodeproj file:

podfile-created

  1. Open the newly created Podfile in a text editor and add the PSPDFKit pod URL:

pod 'PSPDFKit', podspec: 'https://my.pspdfkit.com/pspdfkit-ios/latest.podspec'

Your Podfile should look like this:

target 'PSPDFKit-Demo' do
  use_frameworks!
  pod 'PSPDFKit', podspec: 'https://my.pspdfkit.com/pspdfkit-ios/latest.podspec'
end
  1. Run pod install and wait for CocoaPods to download PSPDFKit.

  2. Open your application’s newly created workspace (PSPDFKit-Demo.xcworkspace) in Xcode.

Displaying a PDF

  1. Add the PDF document you want to display to your application by dragging it into your project. On the dialog that’s displayed, select Finish to accept the default integration options. You can use this Quickstart Guide PDF as an example.

drag-and-drop-document

  1. Import PSPDFKit and PSPDFKitUI at the top of your UIViewController subclass implementation:

import PSPDFKit
import PSPDFKitUI
@import PSPDFKit;
@import PSPDFKitUI;
  1. Load your PDF document and display the view controller by implementing viewDidAppear(_:) in the ViewController.swift file like so:

override func viewDidAppear(_ animated: Bool) {
	super.viewDidAppear(animated)

	// Update to use your document name.
	let fileURL = Bundle.main.url(forResource: "Document", withExtension: "pdf")!
	let document = Document(url: fileURL)

	// The configuration closure is optional and allows additional customization.
	let pdfController = PDFViewController(document: document) {
			$0.isPageLabelEnabled = false
	}

	// Present the PDF view controller within a `UINavigationController` to show built-in toolbar buttons.
	present(UINavigationController(rootViewController: pdfController), animated: true)
}
- (void)viewDidAppear:(BOOL)animated {
	[super viewDidAppear:animated];

	// Update to use your document name.
	NSURL *documentURL = [NSBundle.mainBundle URLForResource:@"Document" withExtension:@"pdf"];
	PSPDFDocument *document = [[PSPDFDocument alloc] initWithURL:documentURL];

	// The configuration object is optional and allows additional customization.
	PSPDFViewController *pdfController = [[PSPDFViewController alloc] initWithDocument:document configuration:[PSPDFConfiguration configurationWithBuilder:^(PSPDFConfigurationBuilder *builder) {
			builder.pageLabelEnabled = NO;
	}]];

	// Present the PDF view controller within a `UINavigationController` to show built-in toolbar buttons.
	UINavigationController *navController = [[UINavigationController alloc] initWithRootViewController:pdfController];
	[self presentViewController:navController animated:YES completion:NULL];
}

Next Steps

This guide will take you through the steps necessary to integrate PSPDFKit into a newly created iOS application. By the end, you’ll be able to present a PDF document in the default PSPDFKit UI.

Requirements

Creating a New Xcode Project

  1. Open Xcode and select New Project in the File > New > Project… menu to create a new project for your application:

create-new-project

  1. Choose the App template for your project:

app-template

  1. When prompted, enter your app name (PSPDFKit-Demo) and your organization identifier (com.example) and choose Storyboard for the interface:

app-options

  1. Click the Next button and select the location to save the project.

  2. Click the Create button to finish.

Adding the PSPDFKit XCFrameworks Manually

  1. Download the latest DMG and mount it on your Mac.

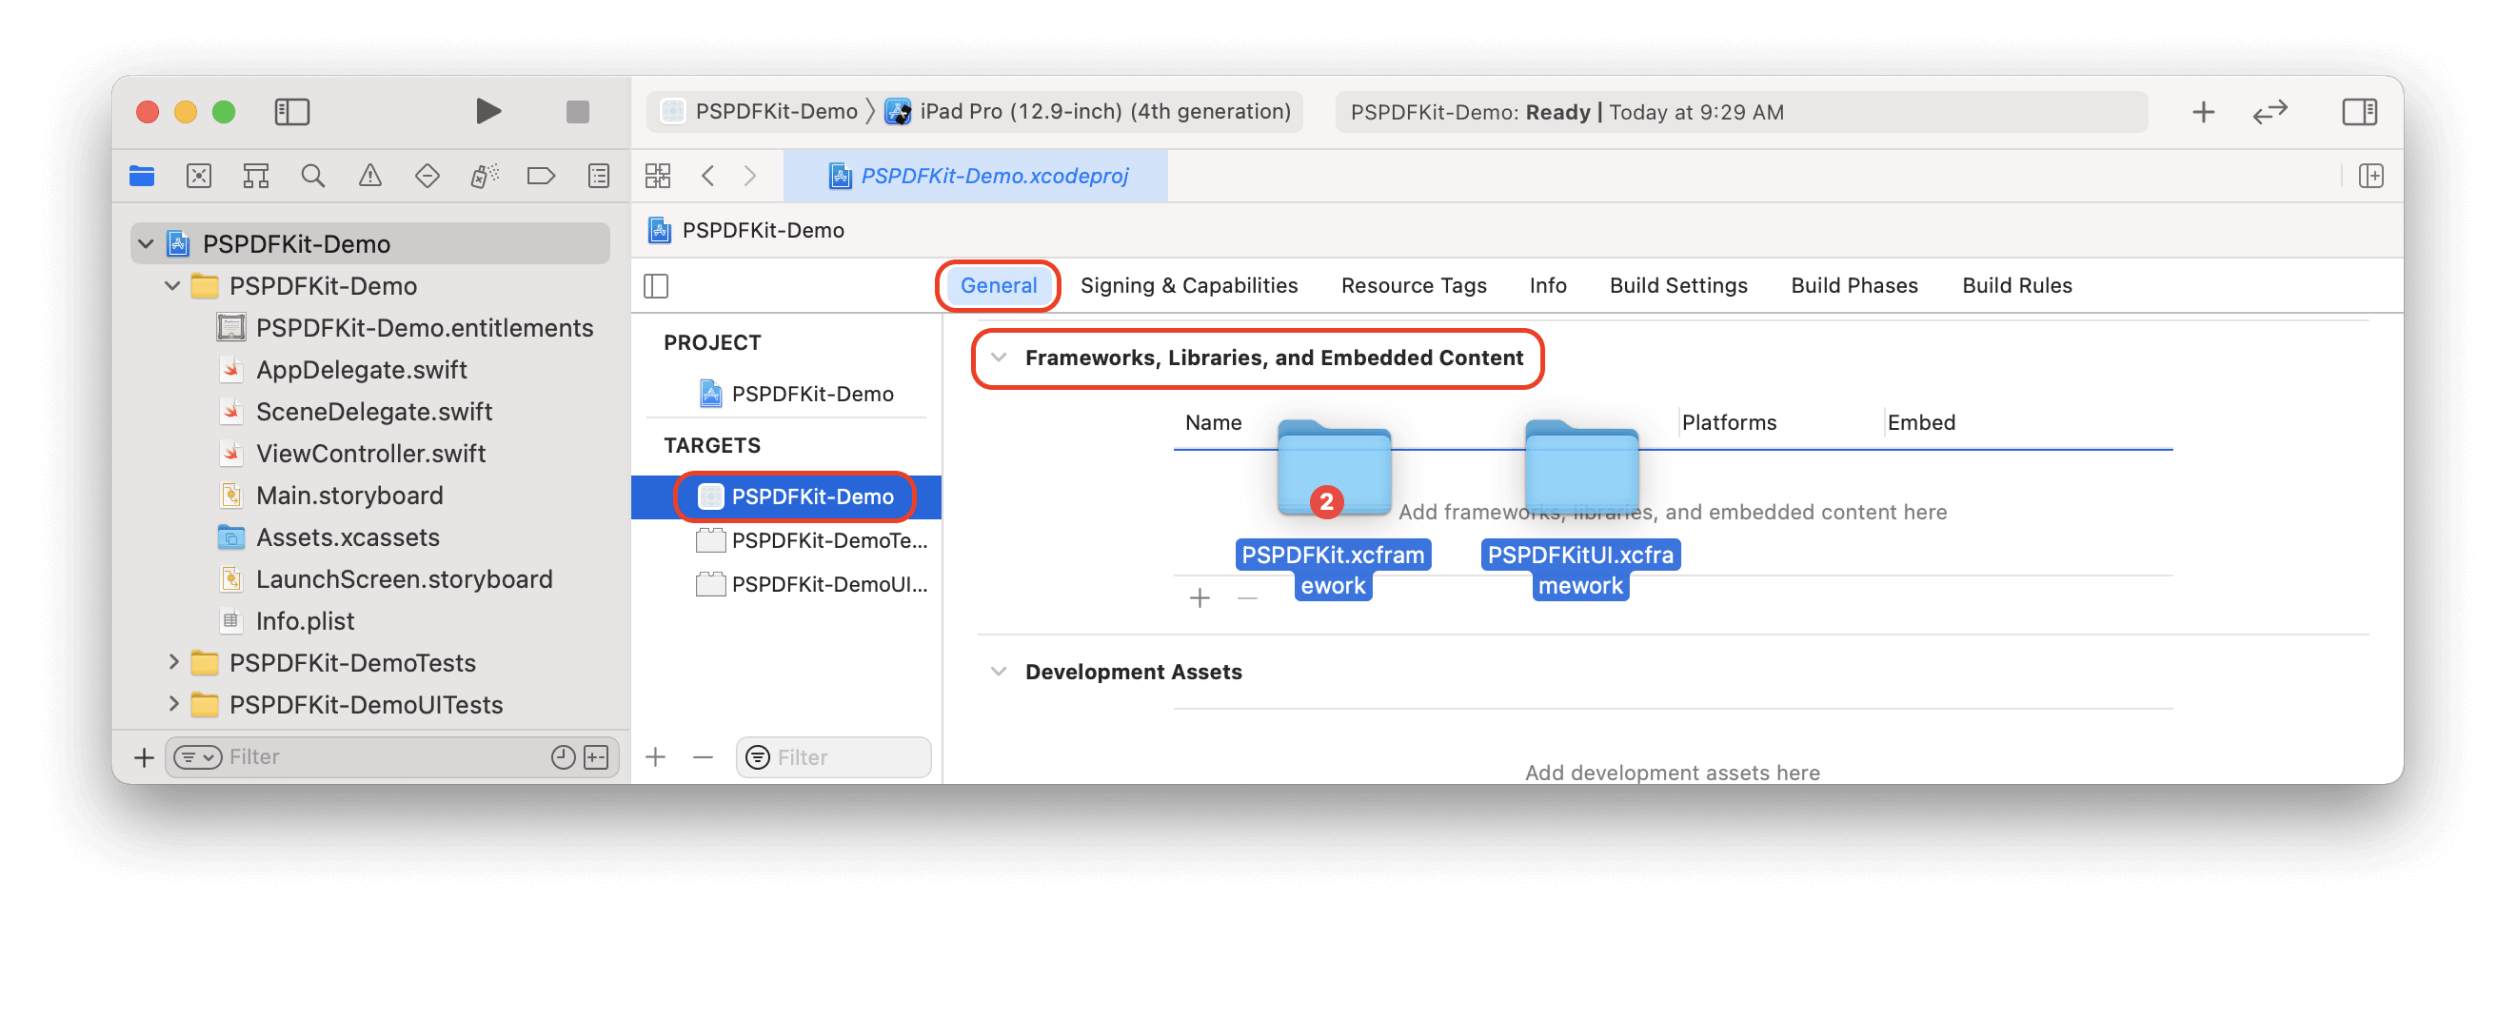
  2. Find PSPDFKit.xcframework and PSPDFKitUI.xcframework in the mounted DMG and copy them to your project directory next to the PSPDFKit-Demo.xcodeproj file.

  3. Drag the newly copied PSPDFKit.xcframework and PSPDFKitUI.xcframework files into the Frameworks, Libraries, and Embedded Content section of your target.

manual-embedded-binaries

Displaying a PDF

  1. Add the PDF document you want to display to your application by dragging it into your project. On the dialog that’s displayed, select Finish to accept the default integration options. You can use this Quickstart Guide PDF as an example.

drag-and-drop-document

  1. Import PSPDFKit and PSPDFKitUI at the top of your UIViewController subclass implementation:

import PSPDFKit
import PSPDFKitUI
@import PSPDFKit;
@import PSPDFKitUI;
  1. Load your PDF document and display the view controller by implementing viewDidAppear(_:) in the ViewController.swift file like so:

override func viewDidAppear(_ animated: Bool) {
	super.viewDidAppear(animated)

	// Update to use your document name.
	let fileURL = Bundle.main.url(forResource: "Document", withExtension: "pdf")!
	let document = Document(url: fileURL)

	// The configuration closure is optional and allows additional customization.
	let pdfController = PDFViewController(document: document) {
			$0.isPageLabelEnabled = false
	}

	// Present the PDF view controller within a `UINavigationController` to show built-in toolbar buttons.
	present(UINavigationController(rootViewController: pdfController), animated: true)
}
- (void)viewDidAppear:(BOOL)animated {
	[super viewDidAppear:animated];

	// Update to use your document name.
	NSURL *documentURL = [NSBundle.mainBundle URLForResource:@"Document" withExtension:@"pdf"];
	PSPDFDocument *document = [[PSPDFDocument alloc] initWithURL:documentURL];

	// The configuration object is optional and allows additional customization.
	PSPDFViewController *pdfController = [[PSPDFViewController alloc] initWithDocument:document configuration:[PSPDFConfiguration configurationWithBuilder:^(PSPDFConfigurationBuilder *builder) {
			builder.pageLabelEnabled = NO;
	}]];

	// Present the PDF view controller within a `UINavigationController` to show built-in toolbar buttons.
	UINavigationController *navController = [[UINavigationController alloc] initWithRootViewController:pdfController];
	[self presentViewController:navController animated:YES completion:NULL];
}

Next Steps

This guide will take you through the steps necessary to integrate PSPDFKit into your iOS application. By the end, you’ll be able to present a PDF document in the default PSPDFKit UI.

Requirements

Adding the PSPDFKit Swift Package

  1. Open your application in Xcode and select your project’s Package Dependencies tab.

Selecting the Xcode project Package Dependencies

  1. Copy the PSPDFKit Swift package repository URL into the search field:

https://github.com/PSPDFKit/PSPDFKit-SP

Adding the package URL

  1. In the Dependency Rule fields, select Branch > master, and then click Add Package.

Choosing Branch: master

Information

Using Branch > master will ensure you always use the latest available version of PSPDFKit. Alternatively, you can select Version > Up to Next Minor to update at your own pace.

After the package download completes, select Add Package.
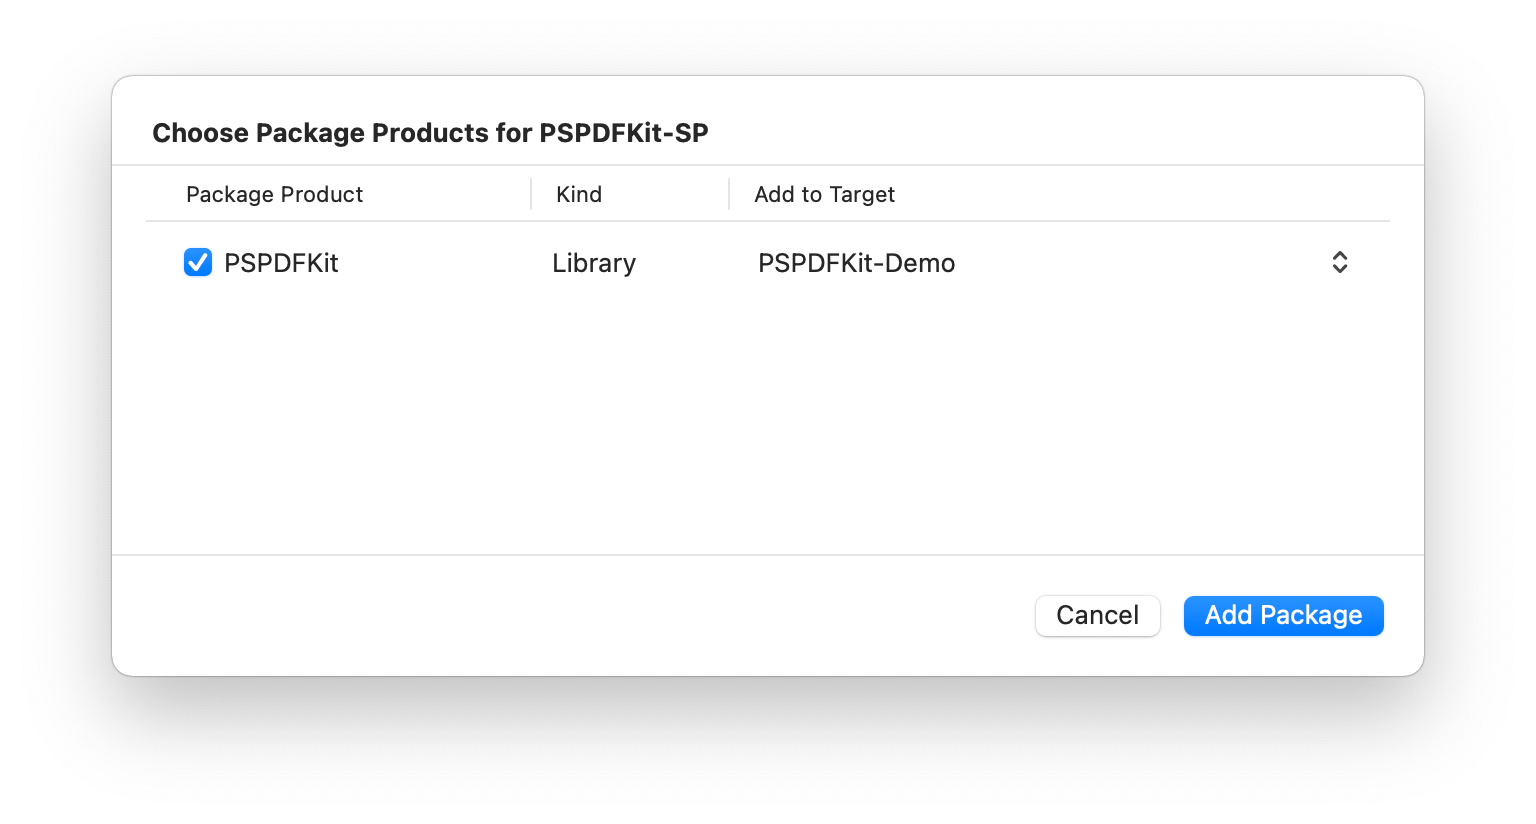
Adding the package

PSPDFKit should now be listed under Swift Package Dependencies in the Xcode Project navigator.

Displaying a PDF

  1. Add the PDF document you want to display to your application by dragging it into your project. On the dialog that’s displayed, select Finish to accept the default integration options. You can use this Quickstart Guide PDF as an example.

drag-and-drop-document

  1. Import PSPDFKit and PSPDFKitUI at the top of your UIViewController subclass implementation:

import PSPDFKit
import PSPDFKitUI
@import PSPDFKit;
@import PSPDFKitUI;
  1. Load your PDF document and display the view controller. This can be done in a button action handler, table view cell selection delegate, or similar:

// Update to use your document name.
let fileURL = Bundle.main.url(forResource: "Document", withExtension: "pdf")!
let document = Document(url: fileURL)

// The configuration closure is optional and allows additional customization.
let pdfController = PDFViewController(document: document) {
	$0.isPageLabelEnabled = false
}

// Present the PDF view controller within a `UINavigationController` to show built-in toolbar buttons.
present(UINavigationController(rootViewController: pdfController), animated: true)
// Update to use your document name.
NSURL *documentURL = [NSBundle.mainBundle URLForResource:@"Document" withExtension:@"pdf"];
PSPDFDocument *document = [[PSPDFDocument alloc] initWithURL:documentURL];

// The configuration object is optional and allows additional customization.
PSPDFViewController *pdfController = [[PSPDFViewController alloc] initWithDocument:document configuration:[PSPDFConfiguration configurationWithBuilder:^(PSPDFConfigurationBuilder *builder) {
	builder.pageLabelEnabled = NO;
}]];

// Present the PDF view controller within a `UINavigationController` to show built-in toolbar buttons.
UINavigationController *navController = [[UINavigationController alloc] initWithRootViewController:pdfController];
[self presentViewController:navController animated:YES completion:NULL];
  1. Build and run your application.

Next Steps

This guide will take you through the steps necessary to integrate PSPDFKit into your iOS application. By the end, you’ll be able to present a PDF document in the default PSPDFKit UI.

Requirements

Adding the PSPDFKit CocoaPods Dependency

  1. Open your project’s Podfile and add the PSPDFKit pod URL:

pod 'PSPDFKit', podspec: 'https://my.pspdfkit.com/pspdfkit-ios/latest.podspec'

Your Podfile should look like this:

target 'YourTargetName' do
  use_frameworks!
  pod 'PSPDFKit', podspec: 'https://my.pspdfkit.com/pspdfkit-ios/latest.podspec'
end

💡 Tip: latest.podspec will ensure you always use the latest available version of PSPDFKit. Alternatively, you can select a specific version by replacing latest.podspec with a version number podspec (e.g. 10.2.0.podspec) to update at your own pace. Take a look at our Advanced CocoaPods Integration guide for more details.

  1. In the terminal, go to the directory containing your Podfile: cd path/to/Your-Project.

  2. Run pod install and wait for CocoaPods to download PSPDFKit.

  3. Open your application’s workspace in Xcode.

Displaying a PDF

  1. Add the PDF document you want to display to your application by dragging it into your project. On the dialog that’s displayed, select Finish to accept the default integration options. You can use this Quickstart Guide PDF as an example.

drag-and-drop-document

  1. Import PSPDFKit and PSPDFKitUI at the top of your UIViewController subclass implementation:

import PSPDFKit
import PSPDFKitUI
@import PSPDFKit;
@import PSPDFKitUI;
  1. Load your PDF document and display the view controller. This can be done in a button action handler, table view cell selection delegate, or similar:

// Update to use your document name.
let fileURL = Bundle.main.url(forResource: "Document", withExtension: "pdf")!
let document = Document(url: fileURL)

// The configuration closure is optional and allows additional customization.
let pdfController = PDFViewController(document: document) {
	$0.isPageLabelEnabled = false
}

// Present the PDF view controller within a `UINavigationController` to show built-in toolbar buttons.
present(UINavigationController(rootViewController: pdfController), animated: true)
// Update to use your document name.
NSURL *documentURL = [NSBundle.mainBundle URLForResource:@"Document" withExtension:@"pdf"];
PSPDFDocument *document = [[PSPDFDocument alloc] initWithURL:documentURL];

// The configuration object is optional and allows additional customization.
PSPDFViewController *pdfController = [[PSPDFViewController alloc] initWithDocument:document configuration:[PSPDFConfiguration configurationWithBuilder:^(PSPDFConfigurationBuilder *builder) {
	builder.pageLabelEnabled = NO;
}]];

// Present the PDF view controller within a `UINavigationController` to show built-in toolbar buttons.
UINavigationController *navController = [[UINavigationController alloc] initWithRootViewController:pdfController];
[self presentViewController:navController animated:YES completion:NULL];
  1. Build and run your application.

Next Steps

This guide will take you through the steps necessary to integrate PSPDFKit into your iOS application. By the end, you’ll be able to present a PDF document in the default PSPDFKit UI.

Requirements

Adding the PSPDFKit XCFrameworks Manually

  1. Download the latest DMG and mount it on your Mac.

  2. Find PSPDFKit.xcframework and PSPDFKitUI.xcframework in the mounted DMG and copy them to your project directory next to your .xcodeproj file.

  3. Drag the newly copied PSPDFKit.xcframework and PSPDFKitUI.xcframework files into the Frameworks, Libraries, and Embedded Content section of your target.

manual-embedded-binaries

Displaying a PDF

  1. Add the PDF document you want to display to your application by dragging it into your project. On the dialog that’s displayed, select Finish to accept the default integration options. You can use this Quickstart Guide PDF as an example.

drag-and-drop-document

  1. Import PSPDFKit and PSPDFKitUI at the top of your UIViewController subclass implementation:

import PSPDFKit
import PSPDFKitUI
@import PSPDFKit;
@import PSPDFKitUI;
  1. Load your PDF document and display the view controller. This can be done in a button action handler, table view cell selection delegate, or similar:

// Update to use your document name.
let fileURL = Bundle.main.url(forResource: "Document", withExtension: "pdf")!
let document = Document(url: fileURL)

// The configuration closure is optional and allows additional customization.
let pdfController = PDFViewController(document: document) {
	$0.isPageLabelEnabled = false
}

// Present the PDF view controller within a `UINavigationController` to show built-in toolbar buttons.
present(UINavigationController(rootViewController: pdfController), animated: true)
// Update to use your document name.
NSURL *documentURL = [NSBundle.mainBundle URLForResource:@"Document" withExtension:@"pdf"];
PSPDFDocument *document = [[PSPDFDocument alloc] initWithURL:documentURL];

// The configuration object is optional and allows additional customization.
PSPDFViewController *pdfController = [[PSPDFViewController alloc] initWithDocument:document configuration:[PSPDFConfiguration configurationWithBuilder:^(PSPDFConfigurationBuilder *builder) {
	builder.pageLabelEnabled = NO;
}]];

// Present the PDF view controller within a `UINavigationController` to show built-in toolbar buttons.
UINavigationController *navController = [[UINavigationController alloc] initWithRootViewController:pdfController];
[self presentViewController:navController animated:YES completion:NULL];
  1. Build and run your application.

Next Steps

This guide will take you through the steps necessary to clone the PSPDFKit Catalog app and run it on your Mac.

Requirements

Cloning PSPDFKit Catalog

  1. Open the terminal and change the current working directory. In this case, we’ll use the ~/Downloads directory:

cd ~/Downloads
  1. Clone the PSPDFKit Catalog repository:

git clone https://github.com/PSPDFKit/pspdfkit-ios-catalog.git
  1. Open the Catalog Xcode project (Catalog.xcodeproj):

open pspdfkit-ios-catalog/Catalog.xcodeproj/
  1. Wait a few moments for the PSPDFKit Swift packages to download.

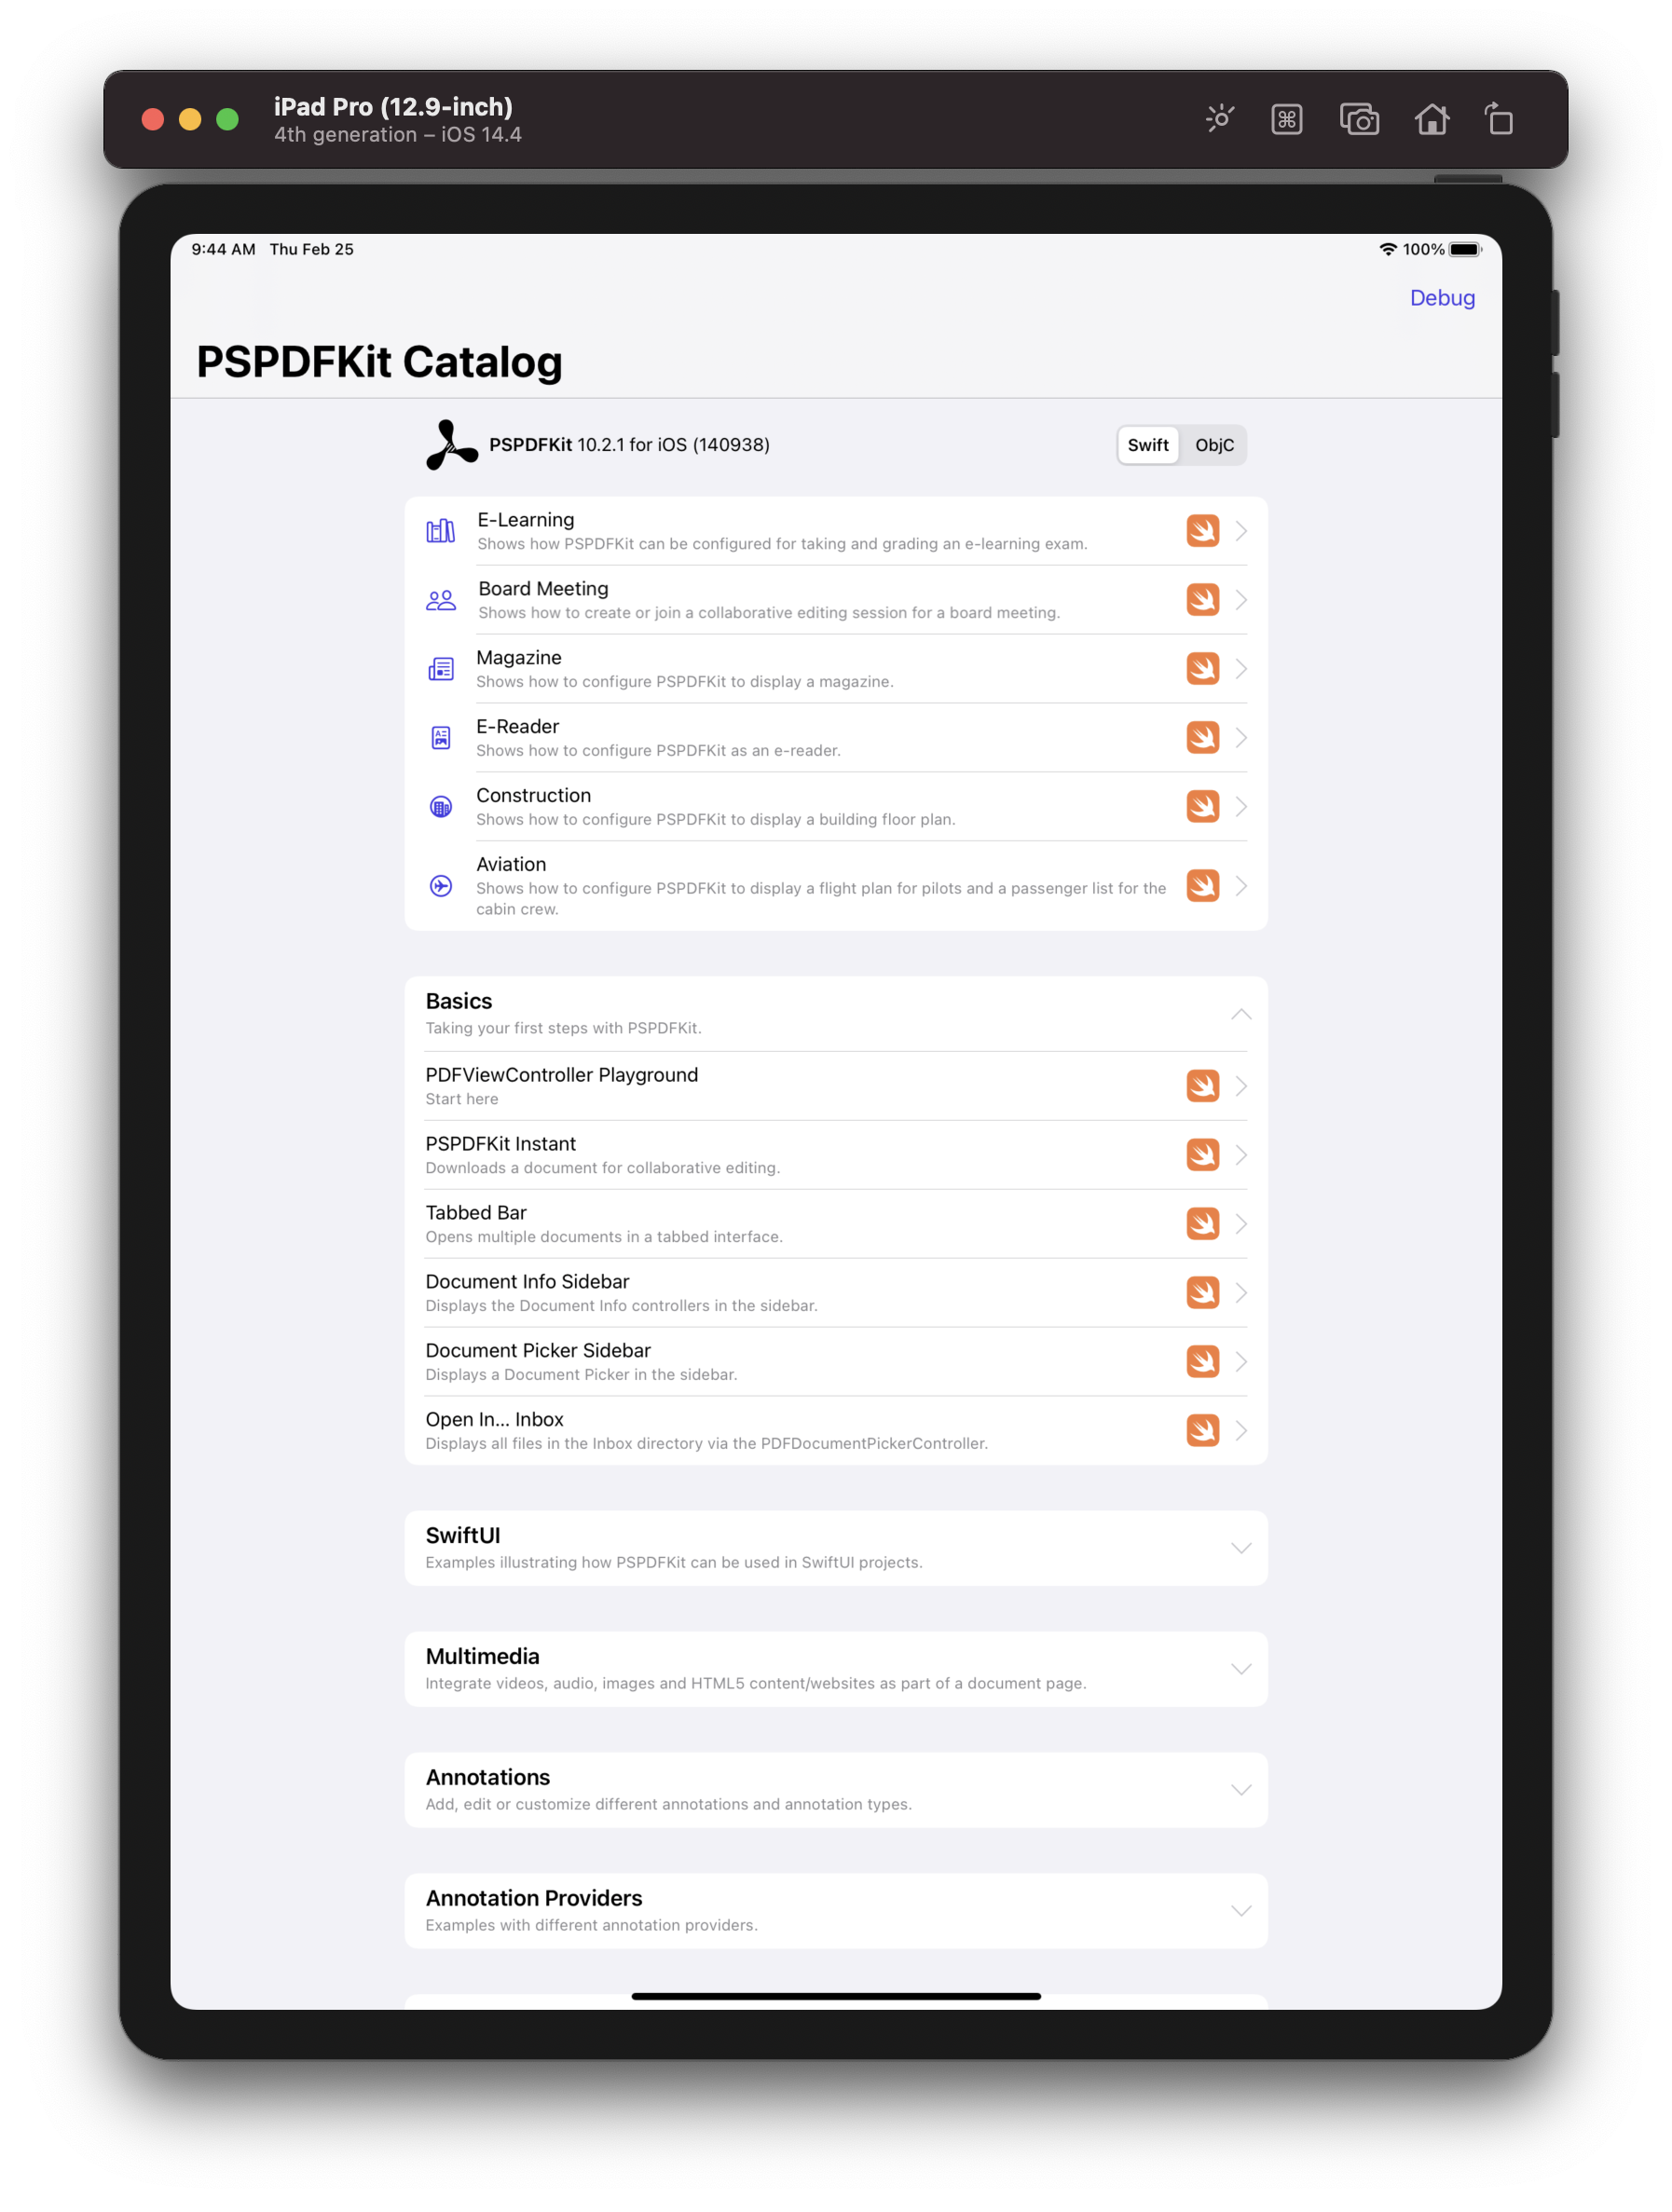
  2. Build and run the Catalog on an iOS simulator.

Information

If you see any errors related to Swift Packages, use the File > Packages > Reset Package Caches menu option in Xcode.

catalog-simulator

Next Steps