Vue.js PDF Editor: How to Edit PDFs Using Vue.js

In this article, you’ll learn how to edit and manipulate PDF files using PSPDFKit’s Vue.js PDF library. You’ll create an end-to-end project using Vue.js and the PSPDFKit SDK that will merge, rotate, remove, and add pages in PDF files.
Use Cases for Editing PDFs in Vue.js
There are a few reasons you might need a JavaScript-based PDF editing library. For one, you can use it to allow your users to view and edit PDFs straight in the browser or your app. This ensures they don’t need to have a PDF editor installed locally and provides a consistent PDF editing user interface (UI) for all users.
Additionally, you might want to integrate certain PDF editing and automation features into your web application that simply aren’t available in desktop software. For instance, you can provide your users with a single button that merges two PDFs and crops or rotates the final output.
Vue.js PDF Editor — Build or Buy
Once you decide you’d like to integrate a JavaScript-based PDF editor into your application, you’ll need to look at the available options. Currently, there isn’t a full-featured Vue.js open source solution available. One option is to create a custom JavaScript-based PDF editor from scratch, but that will likely take a considerable amount of time and effort. If you need a quick solution, you can leverage an existing SDK such as PSPDFKit. We offer a full-featured editor with superb support and wide industry adoption. It supports React, Vue.js, and a whole host of additional platforms and frameworks.
Setting Up Vue.js and PSPDFKit
Our documentation outlines how to set up Vue.js and PSPDFKit. This post will walk through the process, but it’s worth checking out the documentation on your own to see for yourself what else is possible with PSPDFKit.
Make sure you have the latest version of Node.js installed. You can download and install Node.js via the official website if you don’t have it.
You’ll also need access to either Yarn or npm. This post uses Yarn, but you can use npm instead if you prefer.
The first step is to install Vue.js:
yarn global add @vue/cli
Next, create a new project using Vue.js:
vue create pspdfkit-vue-demo
Make sure you run the vue create command in the folder where you want your project to be. Pick Vue 3 as your preset, and select Yarn as the package manager:
Vue CLI v5.0.8
? Please pick a preset: Default ([Vue 3] babel, eslint)
? Pick the package manager to use when installing dependencies: Yarn
Now, go to the new project directory and add PSPDFKit as a dependency:
cd pspdfkit-vue-demo
yarn add pspdfkit
Copy the PSPDFKit for Web library assets from ./node_modules/pspdfkit/dist/pspdfkit-lib to the public/js directory:
mkdir -p public/js
cp -R ./node_modules/pspdfkit/dist/pspdfkit-lib public/js/pspdfkit-lib
Finally, do a dry run to ensure your default Vue.js application is working fine. To fire up the development server, run this command:
yarn serve
If you open the URL that shows up in the terminal, you’ll see the default Vue.js, as shown below.

So far, so good!
Now, copy a default PDF file to the public folder. Download this demo PDF file and move it to the public folder. Then you’ll be ready to start writing some PSPDFKit-specific code and open the demo PDF in the PSPDFKit viewer.
At this point, your directory structure will look something like this:
├── README.md
├── babel.config.js
├── jsconfig.json
├── package.json
├── public
│   ├── favicon.ico
│   ├── index.html
│   ├── js
│   │   └── pspdfkit-lib
│   │       ├── Caveat-Bold.woff
│   │       ├── ...
│   │       ├── pspdfkit-eb1f893073cadb44.wasm
│   │       └── windows-ba2e2d3f7c5061a9.css
│   └── pspdfkit-web-demo.pdf
├── node_modules
│   └── ...
├── src
│   ├── App.vue
│   ├── assets
│   │   └── logo.png
│   ├── components
│   │   └── HelloWorld.vue
│   └── main.js
├── vue.config.js
└── yarn.lock
Opening the Demo PDF Using PSPDFKit
Create a new PSPDFKitContainer.vue file in the src/components directory and add the following code to it:
<template>
	<div class="pdf-container"></div>
</template>

<script>
	import PSPDFKit from 'pspdfkit';

	/**
	 * PSPDFKit for Web example component.
	 */
	export default {
		name: 'PSPDFKit',
		/**
		 * The component receives `pdfFile` as a prop, which is of type `String` and is required.
		 */
		props: {
			pdfFile: {
				type: String,
				required: true,
			},
		},
		/**
		 * We wait until the template has been rendered to load the document into the library.
		 */
		mounted() {
			this.loadPSPDFKit().then((instance) => {
				this.$emit('loaded', instance);
			});
		},
		/**
		 * We watch for `pdfFile` prop changes and trigger unloading and loading when there's a new document to load.
		 */
		watch: {
			pdfFile(val) {
				if (val) {
					this.loadPSPDFKit();
				}
			},
		},
		/**
		 * Our component has the `loadPSPDFKit` method. This unloads and cleans up the component and triggers document loading.
		 */
		methods: {
			async loadPSPDFKit() {
				PSPDFKit.unload('.pdf-container');
				return PSPDFKit.load({
					// Access the `pdfFile` from props.
					document: this.pdfFile,
					container: '.pdf-container',
				});
			},
		},

		/**
		 * Clean up when the component is unmounted so it's ready to load another document (not needed in this example).
		 */
		beforeUnmount() {
			PSPDFKit.unload('.pdf-container');
		},
	};
</script>

<style scoped>
	.pdf-container {
		height: 100vh;
	}
</style>
This file is taken from the Vue.js getting started guide. It defines a new template that contains a div with the pdf-container class. The PSPDFKit UI and the PDF will be loaded inside this div. The component also expects a pdfFile prop that will contain the path to the PDF file PSPDFKit is supposed to open.
The component defines a loadPSPDFKit method. It unloads a PSPDFKit instance if already loaded, and then reloads it inside the .pdf-container div with the pdfFile prop value.
The component also defines the mounted and beforeUnmount lifecycle hooks. The mounted hook runs the loadPSPDFKit method and emits the loaded event upon successful return. The beforeUnmount hook makes sure the PSPDFKit instance is safely unloaded before the component is unmounted. You’ll handle the loaded event later on.
The component also contains a watcher that reloads PSPDFKit whenever the pdfFile prop value changes. This is important to ensure a prop value change triggers a reinitialization of PSPDFKit.
There’s also a scoped style defined inside the component. The style sets the height of the .pdf-container to 100vh. This is required so that PSPDFKit knows how much space it’s allowed to take. By default, the container has no height, and if the height isn’t set, PSPDFKit will fail to load and will throw this error:
Uncaught (in promise) PSPDFKitError: The mounting container has no height.
Now, with the custom PSPDFKit component defined, you need to reference this component inside your App.vue file and load it. To do that, replace everything in the App.vue file with this:
<template>
	<div id="app">
		<label for="file-upload" class="custom-file-upload">
			Open PDF
		</label>
		<input
			id="file-upload"
			type="file"
			@change="openDocument"
			class="btn"
		/>
		<PSPDFKitContainer :pdfFile="pdfFile" @loaded="handleLoaded" />
	</div>
</template>

<script>
import PSPDFKitContainer from '@/components/PSPDFKitContainer';

export default {
	data() {
		return {
			pdfFile: this.pdfFile || '/pspdfkit-web-demo.pdf',
		};
	},
	/**
	 * Render the `PSPDFKitContainer` component.
	 */
	components: {
		PSPDFKitContainer,
	},
	/**
	 * Our component has two methods — one to check when the document is loaded, and the other to open the document.
	 */
	methods: {
		handleLoaded(instance) {
			console.log('PSPDFKit has loaded: ', instance);
			// Do something.
		},

		openDocument(event) {
			// To access the Vue.js instance data properties, use `this` keyword.
			if (this.pdfFile && this.pdfFile.startsWith('blob:')) {
				window.URL.revokeObjectURL(this.pdfFile);
			}
			this.pdfFile = window.URL.createObjectURL(
				event.target.files[0],
			);
		},
	},
};
</script>

<style>
#app {
	font-family: Avenir, Helvetica, Arial, sans-serif;
	text-align: center;
	color: #2c3e50;
}

body {
	margin: 0;
}

input[type='file'] {
	display: none;
}

.custom-file-upload {
	border: 1px solid #ccc;
	border-radius: 4px;
	display: inline-block;
	padding: 6px 12px;
	cursor: pointer;
	background: #4a8fed;
	padding: 10px;
	color: #fff;
	font: inherit;
	font-size: 16px;
	font-weight: bold;
}
</style>
In the code above, there’s a simple template containing three elements inside the #app div: a label, an input, and the PSPDFKitContainer component. The label and input will help you open a local PDF file, and PSPDFKitContainer will assist you in displaying it on the screen.
The input calls the openDocument method as its onChange event handler. This method updates the pdfFile property that triggers a reload of PSPDFKit inside the PSPDFKitContainer as it references this property as the input for the pdfFile prop. You also define a handler for the loaded event emitted by PSPDFKitContainer, but this handler doesn’t do anything right now; you’ll add more logic to it in a little bit.
Using the style tag, you’ll hide the input tag and style the label. This just makes it more visually appealing. You can skip the styles if you want, as they don’t add any functional logic to the application. The image below shows what the label will look like after styling.

In the script tag, import the PSPDFKitContainer component and register it with your app via the components option. Then, define the default value of pdfFile via the data function, and define the handleLoaded and openDocument methods.
Now, if you go back to the browser, you’ll see the demo document loading successfully.
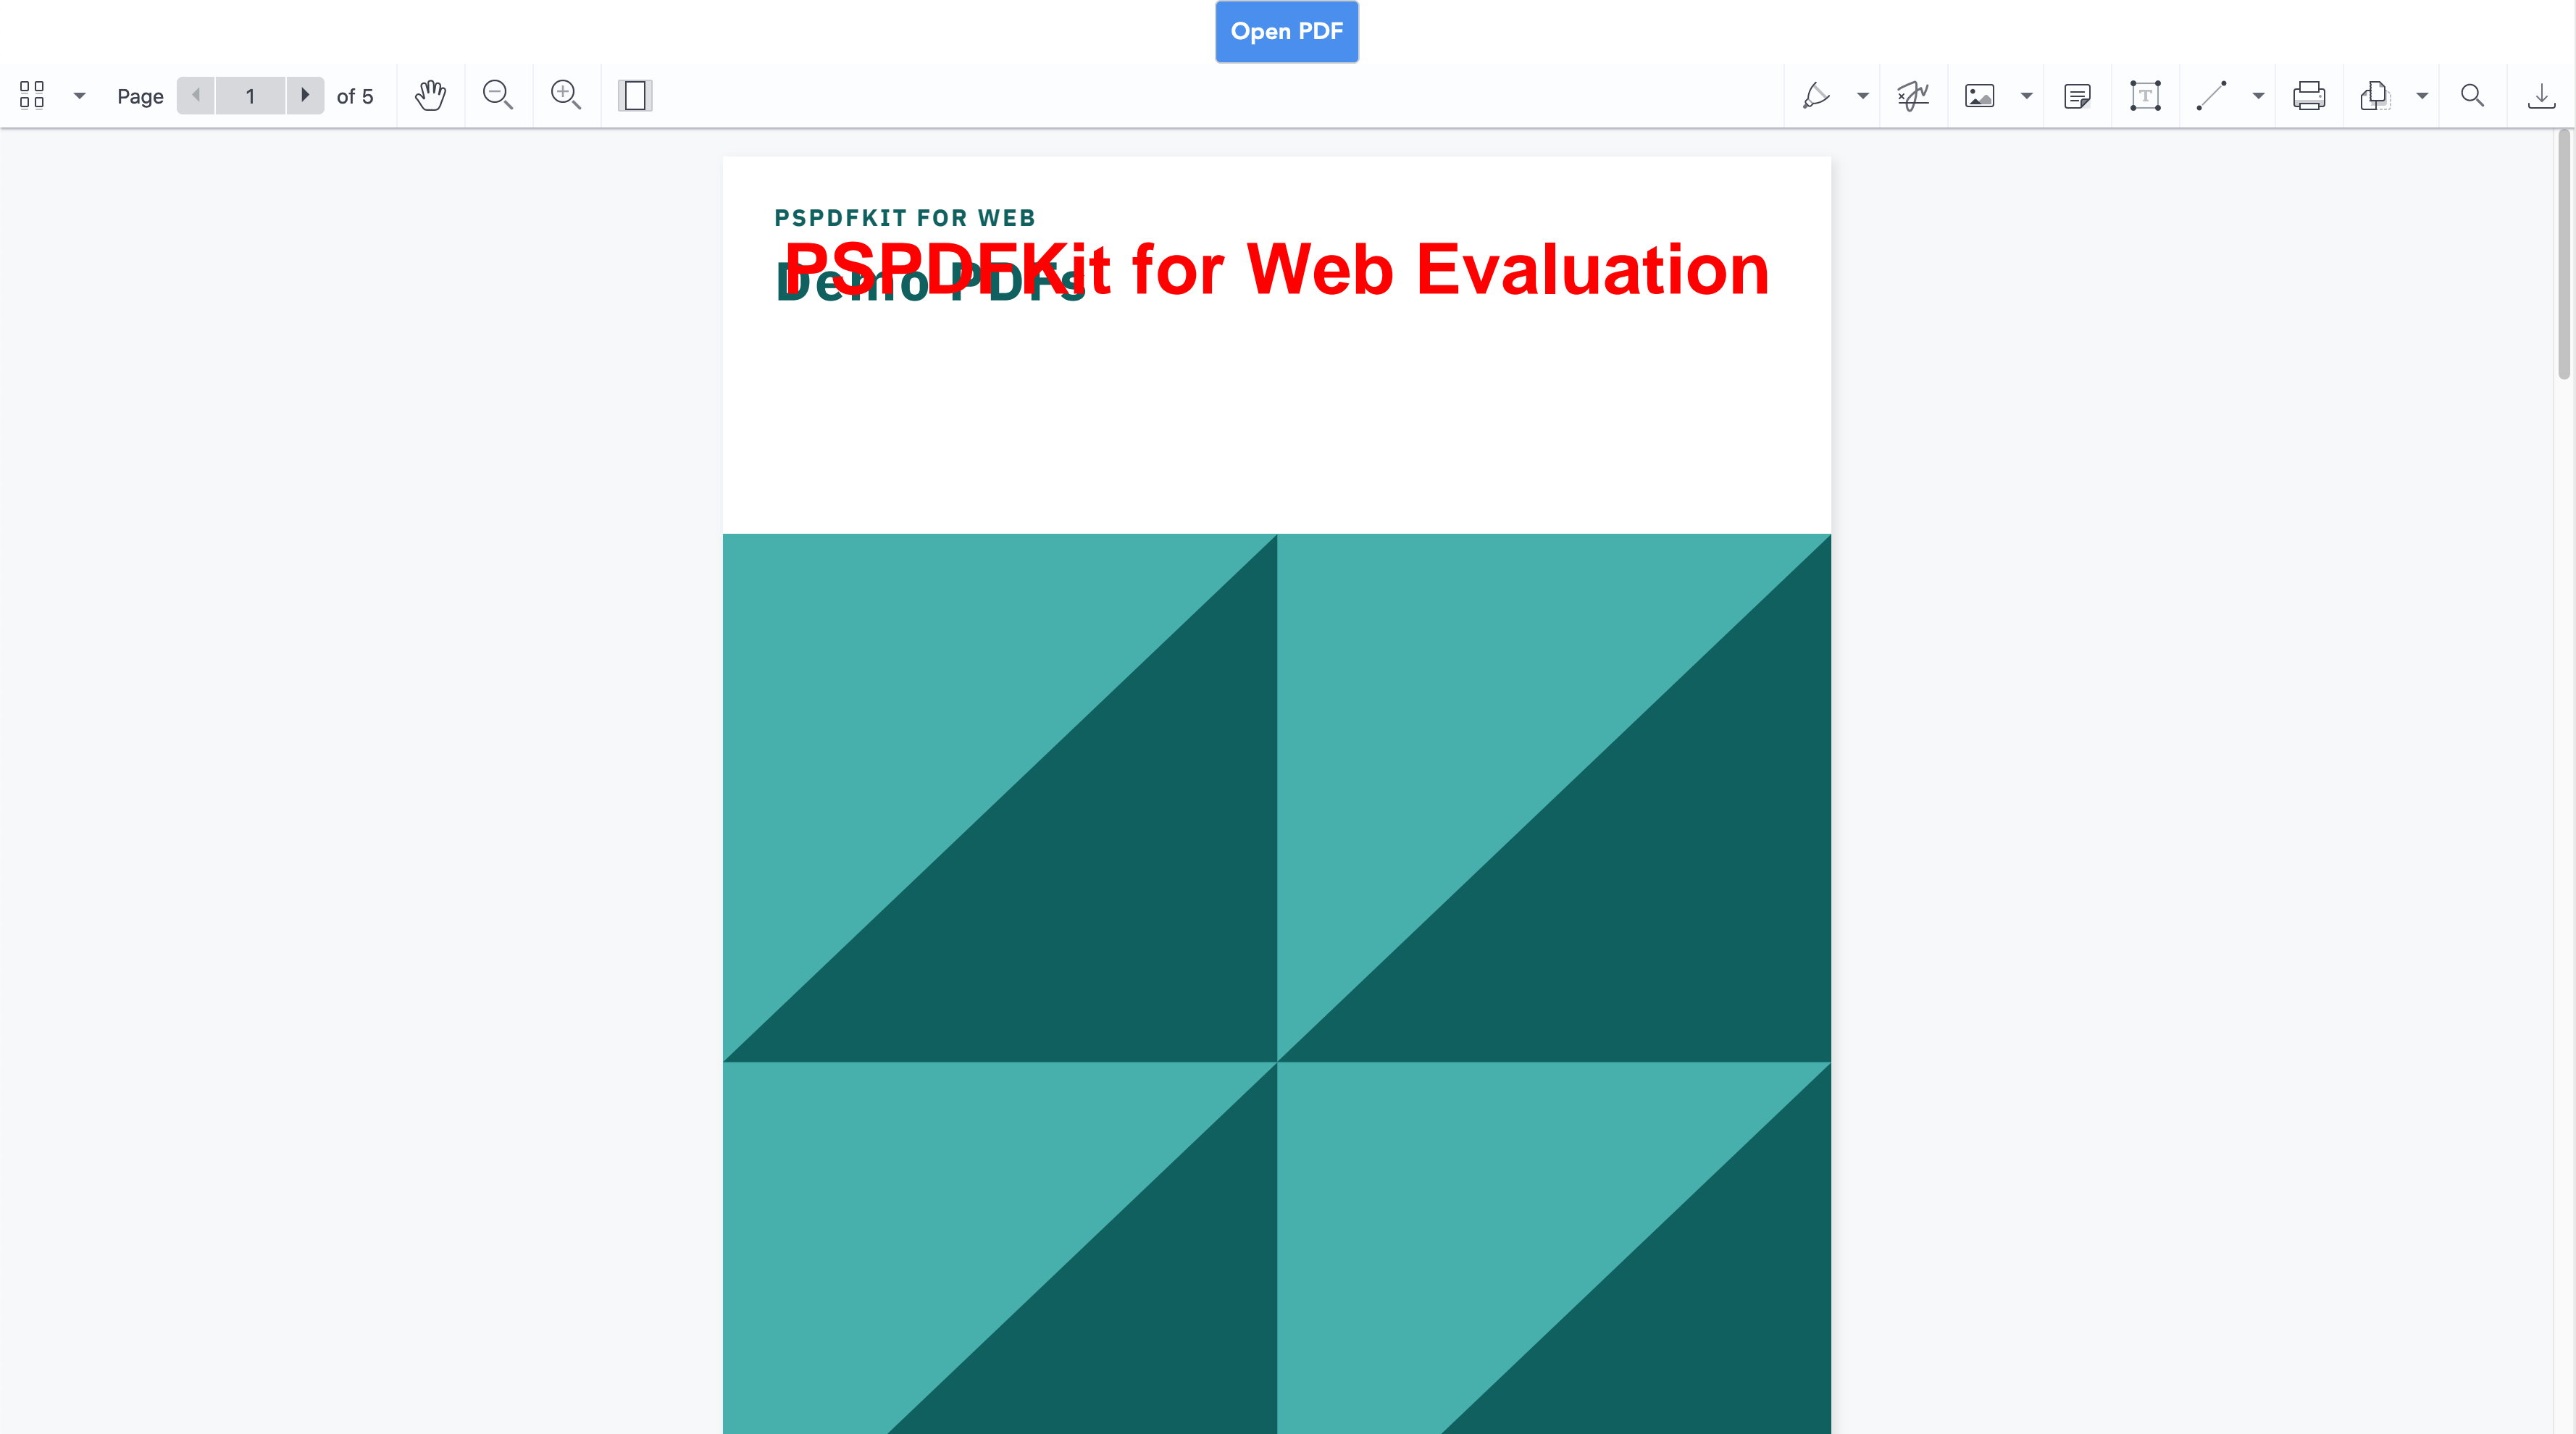
Try loading a different document via the Open PDF button. It’ll open immediately.
Editing PDF Files Using Vue.js and PSPDFKit
Now that you’ve learned how to open PDFs, this next section will cover some simple editing workflows.
Merging PDFs
PSPDFKit makes it easy to merge two PDF files using the importDocument operation. Go to the App.vue file and add a new data property named mergeFile. This will reference the second PDF that you’ll be merging with the first one. Your data function will look something like this:
data() {
    return {
        pdfFile: this.pdfFile || "/pspdfkit-web-demo.pdf",
        mergeFile: this.mergeFile || "/pspdfkit-web-demo.pdf",
    };
},
You’re using the same demo PDF as the default value for this property, but you can use a different one if you want.
Now, create a mergePDFs method that will do the heavy lifting:
mergePDFs(instance){
    fetch(this.mergeFile)
        .then((res) => {
            if (!res.ok) {
                throw res;
            }
            return res;
        })
        .then((res) => res.blob())
        .then((blob) => {
            instance.applyOperations([
                {
                    type: "importDocument",
                    beforePageIndex: 0,
                    document: blob,
                }
            ]);
        });
}
Next, update the handleLoaded method to resemble this:
handleLoaded(instance) {
    console.log("PSPDFKit has loaded: ", instance);
    this.mergePDFs(instance);
}
When you refresh the page, both PDF files should be merged. The original page count was 5, and the new page count is 10.

There are multiple options you can tweak while merging the PDFs. Two important ones are importedPageIndexes and beforePageIndex. They allow you to control where the second PDF should be inserted and which pages of the second PDF should be merged with the first one. You can see the available options in the official documentation.
Rotating a Page
PSPDFKit allows you to rotate pages using the rotatePages operation. Create a new rotatePages method and call it from the handleLoaded method:
handleLoaded(instance) {
    console.log("PSPDFKit has loaded: ", instance);
    this.rotatePDF(instance, [0])
}

//...

rotatePages(instance, pageIndexes) {
    instance.applyOperations([
        {
            type: "rotatePages", // Tell PSPDFKit to rotate the page.
            pageIndexes, // Page number(s) to select and rotate.
            rotateBy: 180, // Rotate by 180 degrees. This will flip the page.
        },
    ]);
}
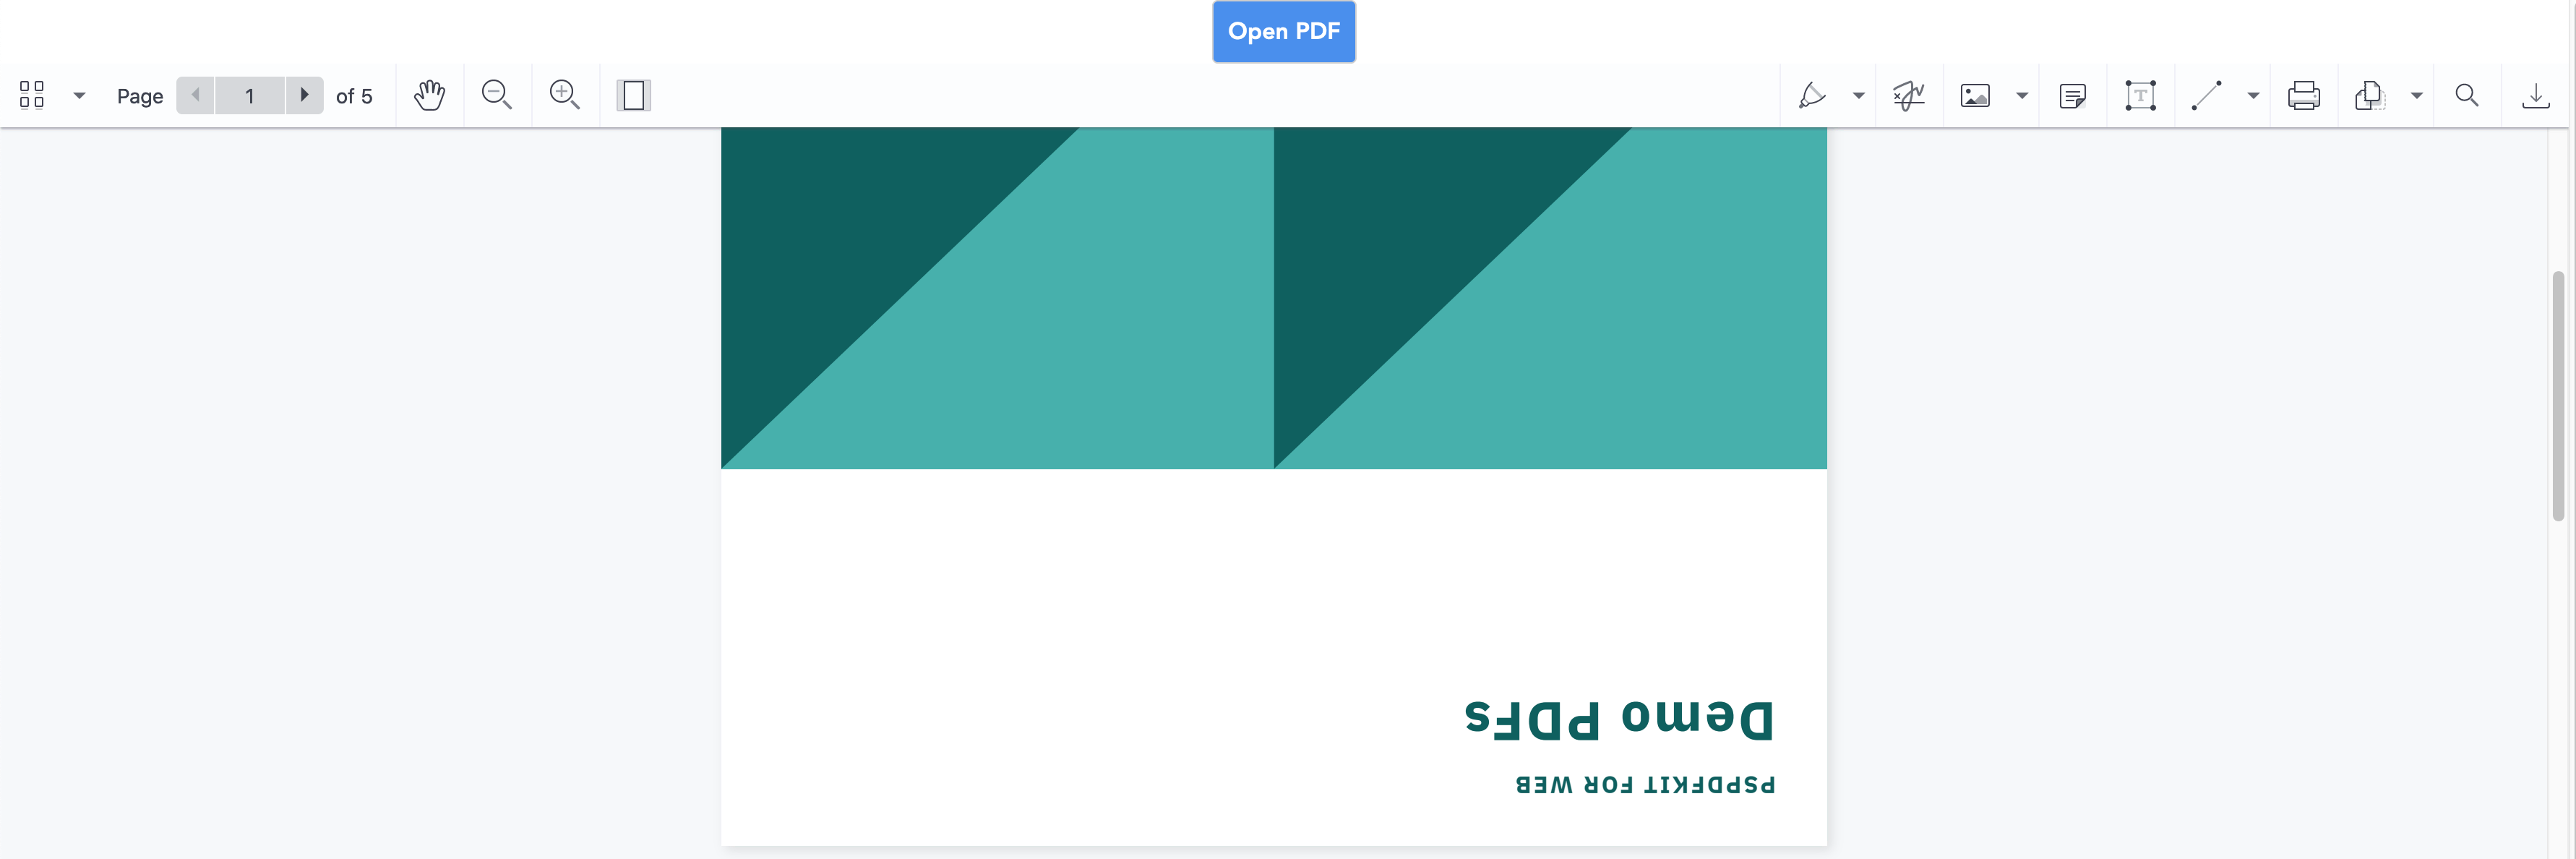
Refresh the browser and the first page of the PDF will now be rotated 180 degrees.
Removing Pages
PSPDFKit provides a removePages operation to remove pages from a PDF. Create a new removePages method and call it from the handleLoaded method:
handleLoaded(instance) {
    console.log("PSPDFKit has loaded: ", instance);
    this.removePages(instance, [0])
}

//...

removePages(instance, pageIndexes) {
    instance.applyOperations([
        {
            type: "removePages", // Tell PSPDFKit to remove the page.
            pageIndexes, // Page number(s) to select and remove.
        },
    ]);
},
Refreshing the browser will display the same PDF but with the first page removed.

Adding Pages
PSPDFKit enables adding new pages to a document via the addPage operation. Create an addPage method and call it from the handleLoaded method:
import PSPDFKit from "pspdfkit";

//...

handleLoaded(instance) {
    console.log("PSPDFKit has loaded: ", instance);
    this.addPage(instance)
}

//...

addPage(instance) {
    instance.applyOperations([
        {
            type: "addPage", // Add a page to the document.
            afterPageIndex: instance.totalPageCount - 1, // Append the page at the end.
            backgroundColor: new PSPDFKit.Color({ r: 100, g: 200, b: 255 }), // Set the new page background color.
            pageWidth: 750, // Dimensions of the page:
            pageHeight: 1000,
        },
    ]);
},
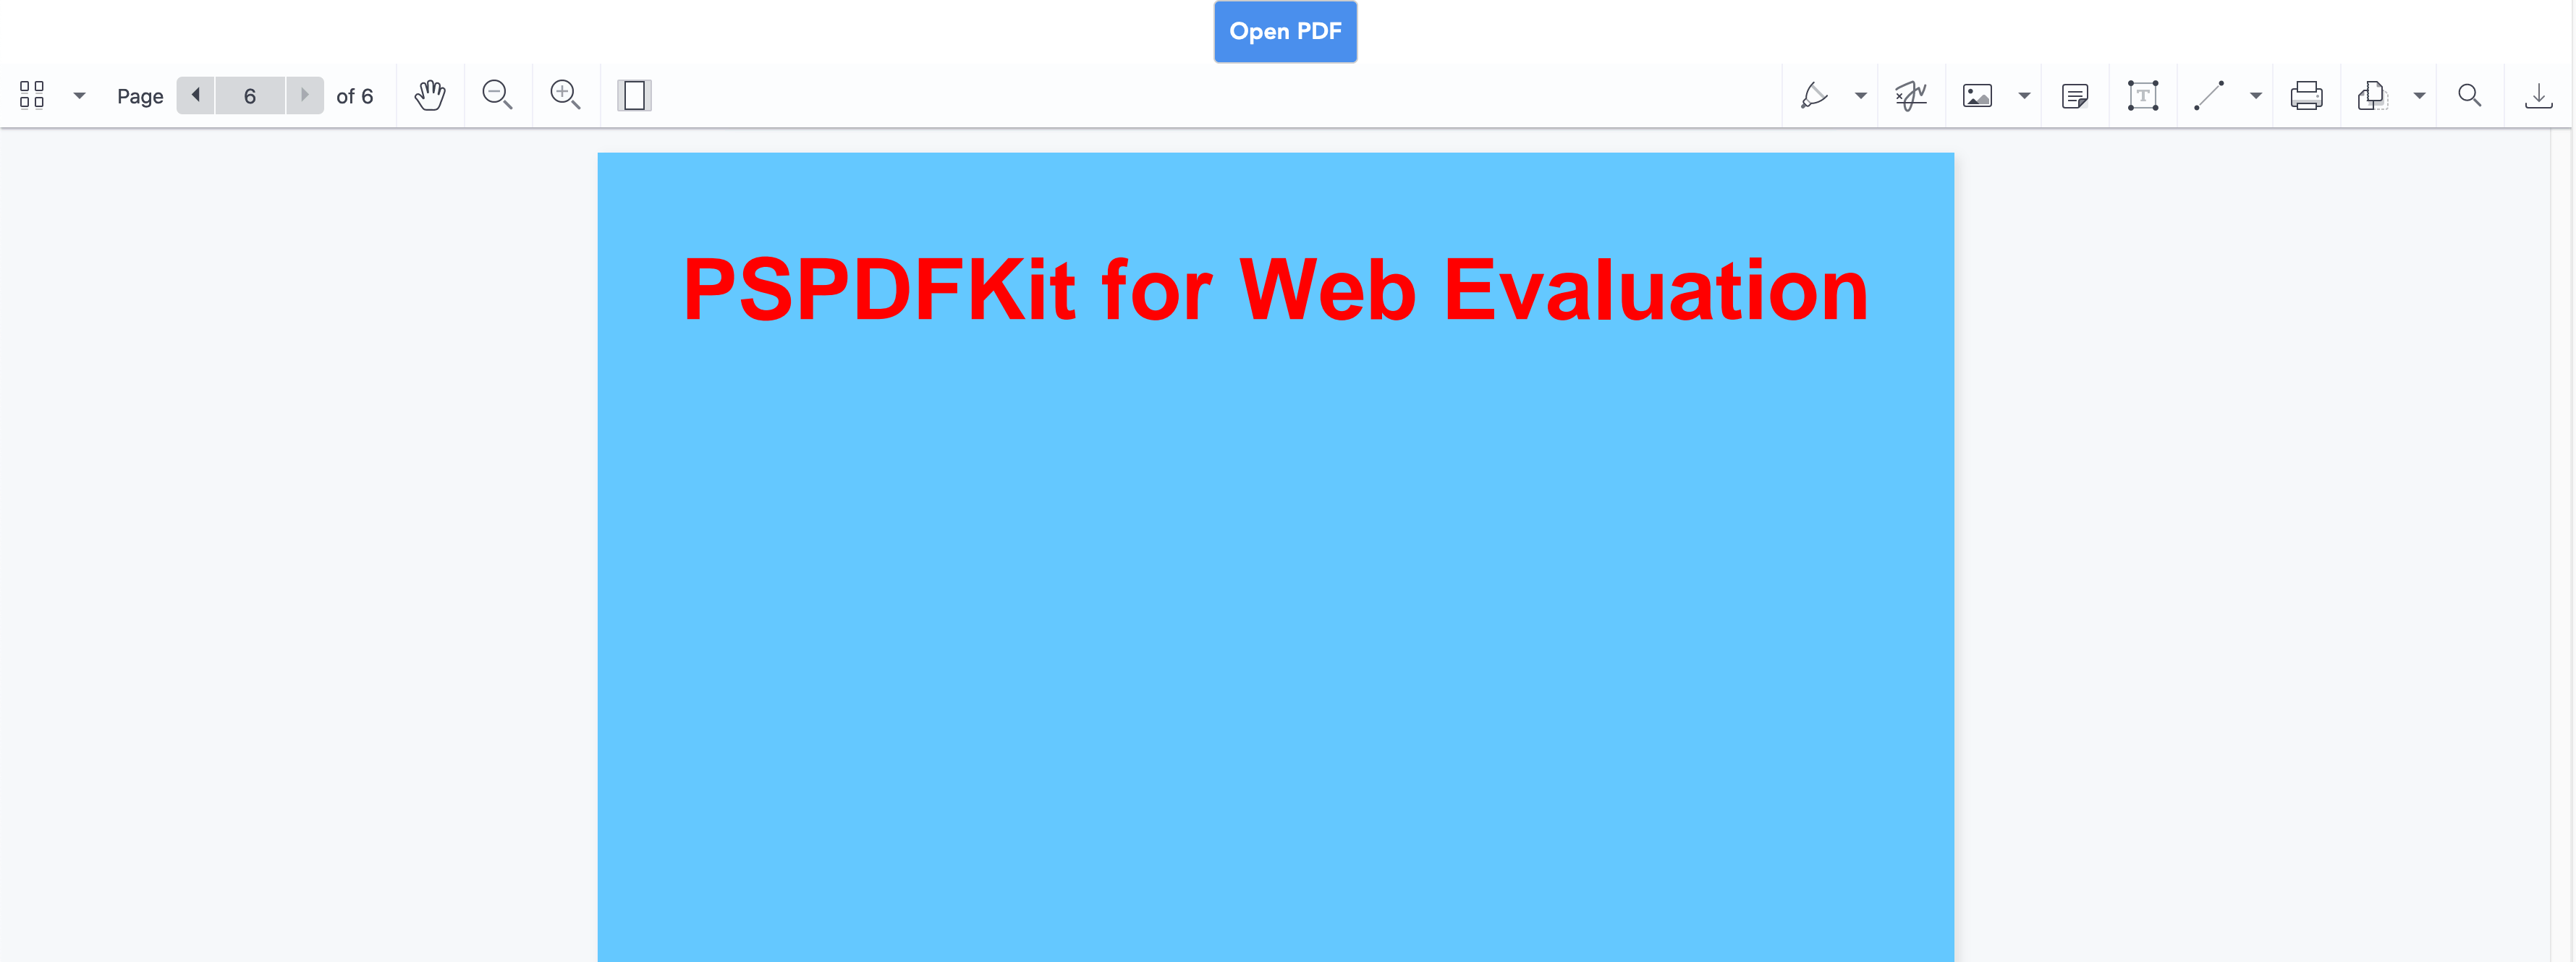
You imported PSPDFKit in App.vue because you need to call the Color constructor from the PSPDFKit library. Everything else is similar to what was shown in the other sections. You can modify the color of the new page by tweaking the RGB values passed in to the PSPDFKit.Color method.
If you refresh the browser, you’ll see a brand-new page appended at the end of the PDF file.
Complete App.vue Code
The complete code for App.vue is included below for reference:
<template>
	<div id="app">
		<label for="file-upload" class="custom-file-upload">
			Open PDF
		</label>
		<input
			id="file-upload"
			type="file"
			@change="openDocument"
			class="btn"
		/>

		<PSPDFKitContainer :pdfFile="pdfFile" @loaded="handleLoaded" />
	</div>
</template>

<script>
import PSPDFKitContainer from '@/components/PSPDFKitContainer';
import PSPDFKit from 'pspdfkit';

export default {
	data() {
		return {
			pdfFile: this.pdfFile || '/pspdfkit-web-demo.pdf',
			mergeFile: this.mergeFile || '/pspdfkit-web-demo.pdf',
		};
	},

	components: {
		PSPDFKitContainer,
	},

	methods: {
		handleLoaded(instance) {
			console.log('PSPDFKit has loaded: ', instance);
			// `this.mergePDFs(instance);`
			// `this.rotatePages(instance, [0]);`
			// `this.removePages(instance, [0]);`
			this.addPage(instance);
		},

		mergePDFs(instance) {
			fetch(this.mergeFile)
				.then((res) => {
					if (!res.ok) {
						throw res;
					}
					return res;
				})
				.then((res) => res.blob())
				.then((blob) => {
					instance.applyOperations([
						{
							type: 'importDocument',
							beforePageIndex: 0,
							document: blob,
						},
					]);
				});
		},

		rotatePages(instance, pageIndexes) {
			instance.applyOperations([
				{
					type: 'rotatePages', // Tell PSPDFKit to rotate the page.
					pageIndexes, // Page number(s) to select and rotate.
					rotateBy: 180, // Rotate by 180 degrees. This will flip the page.
				},
			]);
		},

		removePages(instance, pageIndexes) {
			instance.applyOperations([
				{
					type: 'removePages', // Tell PSPDFKit to remove the page.
					pageIndexes, // Page number(s) to select and remove.
				},
			]);
		},

		addPage(instance) {
			instance.applyOperations([
				{
					type: 'addPage', // Add a page to the document.
					afterPageIndex: instance.totalPageCount - 1, // Append the page at the end.
					backgroundColor: new PSPDFKit.Color({
						r: 100,
						g: 200,
						b: 255,
					}), // Set the new page background color.
					pageWidth: 750, // Dimensions of the page:
					pageHeight: 1000,
				},
			]);
		},

		openDocument(event) {
			if (this.pdfFile && this.pdfFile.startsWith('blob:')) {
				window.URL.revokeObjectURL(this.pdfFile);
			}
			this.pdfFile = window.URL.createObjectURL(
				event.target.files[0],
			);
		},
	},
};
</script>

<style>
#app {
	font-family: Avenir, Helvetica, Arial, sans-serif;
	text-align: center;
	color: #2c3e50;
}

body {
	margin: 0;
}

input[type='file'] {
	display: none;
}

.custom-file-upload {
	border: 1px solid #ccc;
	border-radius: 4px;
	display: inline-block;
	padding: 6px 12px;
	cursor: pointer;
	background: #4a8fed;
	padding: 10px;
	color: #fff;
	font: inherit;
	font-size: 16px;
	font-weight: bold;
}
</style>
Conclusion
This article gives you a glimpse of what’s possible with PSPDFKit’s Vue.js PDF library. It makes it much easier to integrate and work with PDF files in your application. To see a full list of SDK features, you can visit our Vue.js documentation and guides.
If you’d like to test the PSPDFKit for Web SDK, you can request a free trial. Alternatively, you can browse our demo page to see what our API is capable of.
If you encountered any errors while following this tutorial, please refer to our troubleshooting guide. It lists the most common problems and their solutions. Additionally, if you hit any snags, don’t hesitate to reach out to our Support team for help.
We also maintain a GitHub repository with a working Vue.js example project. Please refer to it if you have any issues.


