How to Build a Vue.js Word (DOC and DOCX) Viewer Using PSPDFKit
In this blog post, you’ll learn how to build a Vue.js Word viewer using the PSPDFKit for Web SDK. You’ll open and view DOC or DOCX files directly in your web browser using client-side processing (no server required).
The image below shows what you’ll be building.
You can check out the demo to see it in action.
Opening and Rendering Office Documents in the Browser
PSPDFKit for Web brings support for Word, Excel, and PowerPoint formats to your application, without you or your users needing any MS Office software, MS Office licenses, or third-party open source software. The technology works by converting an Office document to PDF directly in the browser, and the document is then rendered in our JavaScript viewer.
Unlocking More Capabilities with Office-to-PDF Conversion
By converting an Office document to PDF using client-side JavaScript, you have the option to support a rich array of additional Office document functionality, such as:
-
Text editing — Edit text directly in the displayed Office document.
-
Page manipulation — Organize documents by adding, removing, or rearranging pages.
-
Annotations — Boost collaboration by adding text highlights, comments, or stamps.
-
Adding signatures — Draw, type, or upload a signature directly to a Word document.
Requirements to Get Started
To get started, you’ll need:
- Git
- Node.js (this article uses version 16.13.0)
- A package manager for installing the Vue command-line interface (CLI) and importing packages — you can use npm or Yarn
Installing the Vue CLI
To work with Vue.js, you need to install the Vue CLI, which is standard tooling for Vue.js. It helps you create, build, and run Vue.js applications.
You can install the CLI using npm, which comes with Node.js, or yarn:
npm install -g @vue/cli
yarn global add @vue/cli
You can check the version of Vue by running the following:
vue --version
This blog post uses Vue CLI version 5.0.8.
Creating the Project
Now, it’s time to integrate PSPDFKit into your Vue.js project.
-
Vue CLI provides an easy way of creating projects using the following command:
vue create pspdfkit-vue-project
Here, you’re using the create option with the name of the project you want to create (pspdfkit-vue-project).
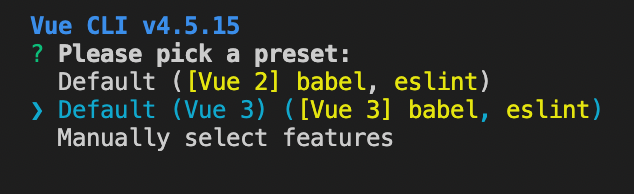
It’ll then ask some configuration questions.
-
Select Default (Vue 3) ([Vue 3] babel, eslint) from the list.
-
Now, change the directory to
pspdfkit-vue-project:
cd pspdfkit-vue-project
Adding PSPDFKit
-
Install
pspdfkitas a dependency withnpmoryarn:
npm install pspdfkit
yarn add pspdfkit
-
Now you can start building your Vue.js project. First, create a
jsdirectory under thepublicdirectory. Go to your terminal and run the following:
mkdir -p public/js
-
Copy the PSPDFKit for Web library assets to the
public/jsdirectory:
cp -R ./node_modules/pspdfkit/dist/pspdfkit-lib public/js/pspdfkit-lib
This will copy the pspdfkit-lib directory from within node_modules/ into the public/js/ directory to make it available to the SDK at runtime.
Displaying a Word Document
-
Add a Word (DOC, DOCX) document you want to display to the
publicdirectory. You can use our demo document as an example. -
Add a component wrapper for the PSPDFKit library and save it as
src/components/PSPDFKitContainer.vue:
<template>
	<div class="doc-container"></div>
</template>

<script>
import PSPDFKit from 'pspdfkit';

export default {
	name: 'PSPDFKit',
	/**
	 * The component receives the `pdfFile` prop, which is of type `String` and is required.
	 */
	props: {
		wordFile: {
			type: String,
			required: true,
		},
	},
	/**
	 * We wait until the template has been rendered to load the document into the library.
	 */
	mounted() {
		this.loadPSPDFKit().then((instance) => {
			this.$emit('loaded', instance);
		});
	},
	/**
	 * We watch for `wordFile` prop changes and trigger unloading and loading when there's a new document to load.
	 */
	watch: {
		wordFile(val) {
			if (val) {
				this.loadPSPDFKit();
			}
		},
	},
	/**
	 * Our component has the `loadPSPDFKit` method. This unloads and cleans up the component and triggers document loading.
	 */
	methods: {
		async loadPSPDFKit() {
			PSPDFKit.unload('.doc-container');
			return PSPDFKit.load({
				// To access the `pdfFile` from props, use `this` keyword.
				document: this.wordFile,
				container: '.doc-container',
			});
		},
	},

	/**
	 * Clean up when the component is unmounted so it's ready to load another document (not needed in this example).
	 */
	beforeUnmount() {
		PSPDFKit.unload('.doc-container');
	},
};
</script>

<style scoped>
.doc-container {
	height: 100vh;
}
</style>
Here’s what’s happening in the component:
-
The
templatesection is rendering adivwith thedoc-containerclass. This will help you declaratively bind the rendered DOM to the underlying component instance’s data. -
The
scriptsection is defining a Vue.js instance namedPSPDFKitand creating methods for mounting, loading, and unloading PDF files into thedoc-container. -
The
stylesection is defining the height of the container.
-
Now, replace the contents of
src/App.vuewith the following:
<template>
	<div id="app">
		<label for="file-upload" class="custom-file-upload">
			Open Word
		</label>
		<input
			id="file-upload"
			type="file"
			@change="openDocument"
			class="btn"
		/>
		<PSPDFKitContainer :wordFile="wordFile" @loaded="handleLoaded" />
	</div>
</template>

<script>
import PSPDFKitContainer from '@/components/PSPDFKitContainer';

export default {
	data() {
		return {
			wordFile: this.wordFile || '/document.docx',
		};
	},
	/**
	 * Render the `PSPDFKitContainer` component.
	 */
	components: {
		PSPDFKitContainer,
	},
	/**
	 * Our component has two methods — one to check when the document is loaded, and the other to open the document.
	 */
	methods: {
		handleLoaded(instance) {
			console.log('PSPDFKit has loaded: ', instance);
			// Do something.
		},

		openDocument() {
			// To access the Vue instance data properties, use `this` keyword.
			if (this.wordFile) {
				window.URL.revokeObjectURL(this.wordFile);
			}
			this.wordFile = window.URL.createObjectURL(
				event.target.files[0],
			);
		},
	},
};
</script>

<style>
#app {
	text-align: center;
	color: #2c3e50;
}

body {
	margin: 0;
}

input[type='file'] {
	display: none;
}

.custom-file-upload {
	border: 1px solid #ccc;
	border-radius: 4px;
	display: inline-block;
	padding: 6px 12px;
	cursor: pointer;
	background: #4a8fed;
	padding: 10px;
	color: #fff;
	font: inherit;
	font-size: 16px;
	font-weight: bold;
}
</style>
-
In the
templatesection, you have a file upload input and thePSPDFKitContainercomponent.

Vue.js uses directives to handle some types of functionality. For the input field, you’re using the 'v-on' directive to attach an event listener to the element. In this case, it’s the 'change' event. There’s a shortcut to 'v-on' that removes the keyword and uses an '@' symbol instead.
v-on:change="openDocument"
v-on:loaded="handleLoaded"
// Or
@change="openDocument"
@loaded="handleLoaded"
Similar to the input field, for the PSPDFKitContainer component, you’re using the v-bind directive to bind the wordFile property to the wordFile property of the component and attaching an event listener for the loaded event:
<PSPDFKitContainer :wordFile="wordFile" @loaded="handleLoaded" />
-
In the
scriptsection, you can see the implementation of thehandleLoadedandopenDocumentmethods. There’s also a data function that returns thewordFileproperty.
The data keeps track of reactive state within the current component. It’s always a function and returns an object. The object’s top-level properties are exposed via the component instance.
-
In the
stylesection, there are styles for custom file input, and there are some general styles for theapp.
-
Start the app:
npm run serve
yarn serve
You can see the application running on localhost:8080.
If you can’t see your Word file rendered in the browser, make sure you actually uploaded a DOC or DOCX file inside the public directory.
In the demo application, you can open different Word files by clicking the Open Word button. You can add signatures, annotations, stamps, and more.
A Note about Fonts
In client-side web applications for Microsoft Office-to-PDF conversion, PSPDFKit addresses font licensing constraints through font substitutions, typically replacing unavailable fonts with their equivalents — like Arial with Noto. For precise font matching, you can provide your own fonts, embed them into source files, or designate paths to your .ttf fonts for custom solutions.
Adding Even More Capabilities
Once you’ve deployed your viewer, you can start customizing it to meet your specific requirements or easily add more capabilities. To help you get started, here are some of our most popular Vue.js guides:
- Instant synchronization
- Document assembly
- Page manipulation
- Editor
- Forms
- Signatures
- Redaction
- Document security
Conclusion
In this blog post, you learned how to build a Word viewer using Vue.js with the PSPDFKit SDK. It also discussed the benefits of using PSPDFKit for Web Standalone to render Office documents in the browser. If you hit any snags, don’t hesitate to reach out to our Support team for help.
You can also integrate our JavaScript Word viewer using web frameworks like Angular and React.js. To see a list of all web frameworks, start your free trial. Or, launch our demo to see our viewer in action.

Hulya is a frontend web developer and technical writer at PSPDFKit who enjoys creating responsive, scalable, and maintainable web experiences. She’s passionate about open source, web accessibility, cybersecurity privacy, and blockchain.


