Level Up Your Trackpad Support Using UIInteraction
Apple’s Magic Keyboard for iPad features a built-in trackpad, and on iOS 13.4, it’s also possible to use almost any Bluetooth or USB mouse or trackpad with an iPad. In this post, we’ll look at three interactions: scrolling, activating secondary actions and dragging. For each of these, we’ll explore how to adapt the interaction from working well with finger touches to working well with a pointing device.
When I say interaction, I really mean it: We’re going to implement our own objects conforming to UIKit’s UIInteraction protocol, and you’ll see what a flexible and convenient API it is. One common theme is that if you’re following UIKit best practices, your app will work wonderfully with a trackpad or mouse by default.
You can read more about trackpad and mouse support in our post on supporting hover effects using UIPointerInteraction.
Scrolling
Scrolling on iOS devices feels effortless. You put your finger on the screen, and as your finger moves, the scrolling content tracks it. This would directly map to clicking on a trackpad or mouse and then dragging to scroll, which would be a far more involved action compared to finger scrolling. But there are better ways to scroll. Trackpads support two-finger tracking, Apple’s Magic Mouse scrolls by moving a single finger on its top surface and other mice have scroll wheels. These interactions feel easy again.
UIScrollView is Best for Scroll-Like Interactions (Surprise!)
Something that was immediately noticeable when updating my iPad to iOS 13.4 was that, in most apps, scrolling worked effortlessly, as expected. However, in a few apps, it was necessary to click and drag. In some places, it was even impossible to scroll because text selection would steal the click-and-drag input from the trackpad. You might see this broken scrolling where you would expect to swipe to go back in a custom master-detail navigation UI, or to dismiss a fullscreen image that flies off with a physics-based spinning motion.
The apps in the happy first group use a UIScrollView for scroll-like interactions. You can drive any sliding panel UI with a scroll view. It will feel great because you get the standard scrolling deceleration and rubber band bouncing curves for free, and it will automatically work perfectly with trackpad scrolling.
Avoiding Click and Drag with UIPanGestureRecognizer
If the user needs to click and drag for a scroll-like interaction, it’s likely you’re driving this with a UIPanGestureRecognizer. Fortunately, updating your recogniser to work with trackpad and mouse scrolling is a straightforward task. UIPanGestureRecognizer has a property, allowedScrollTypesMask, which defaults to not allowing any scrolling events to trigger panning. If your pan recogniser is moving sliding panels that lock into place, set the property like this:
panRecognizer.allowedScrollTypesMask = .continuous
Here’s our ‘half modal’ annotation inspector, which uses a UIPanGestureRecognizer on the navigation bar, and which can now be dismissed easily by scrolling.
If your pan recogniser allows free movement, then you can also allow scrolling from discrete sources that move in fixed steps, like scroll wheels:
panRecognizer.allowedScrollTypesMask = .all
This should only take a minute and will make your app much more usable with a trackpad or mouse. A key point is that although we’re using a single gesture recogniser, that gesture recogniser is internally handling two kinds of inputs: touch events and scroll events.
Secondary Actions
A long press with a finger is the standard way to activate an alternative action like showing a contextual menu. One thing I’ve unfortunately been doing a lot since iOS 13.4 came out is long clicking. This feels slow and unfamiliar. With a trackpad or mouse, there is a faster and more conventional way to trigger such actions: the right click.
For the rest of this post, I’m going to use the more correct term secondary click instead of right click. The user can set which side of the mouse triggers the alternative action, and on trackpads, the input is a click with two fingers.
Make sure a long click does the same as a long press, since secondary clicking might not be possible. For example, secondary clicking is disabled by default on the Apple Magic Mouse; the user must enable this in Settings.
Contextual Menus with Backwards Compatibility
I recommend auditing your use of UILongPressGestureRecognizer. If you’re using a long press to show an action sheet or other menu-like UI, you should almost certainly make this available with a secondary click. The preferred option is to use the system contextual menus. While the design of these menus leaves a few things to be desired, platform consistency is a huge benefit, especially when making a Mac Catalyst app. The system contextual menus can be trigged by long press, secondary click or 3D Touch and work well with drag and drop.
But UIContextMenuInteraction is only available on iOS 13 — what about older iOS versions? We can nicely compartmentalise backwards compatibility using one of my favourite bits of API in UIKit: UIInteraction.
I assume you’re familiar with gesture recognisers. They handle touch input and can be added to views. The UIInteraction protocol is a generalisation of the idea of a ‘thing’ that can be added to a view. You can add as many interactions to a UIView as you like, and the view will take care of keeping those interaction objects alive. UIInteraction is very barebones, and this simplicity is what’s so brilliant about this API: You can put whatever functionality you like in an interaction and create lots of small classes with specific responsibilities.
A common use case for a UIInteraction is to compose gesture recognisers and other interactions to form higher-level functionality.
Let’s make a ContextualMenuInteraction. It’s going to show a system contextual menu on iOS 13 or later, and on older versions, it will fall back to showing an action sheet in response to a long press. The view providing the actions doesn’t need to worry about the iOS version, as this information will be the same across versions.
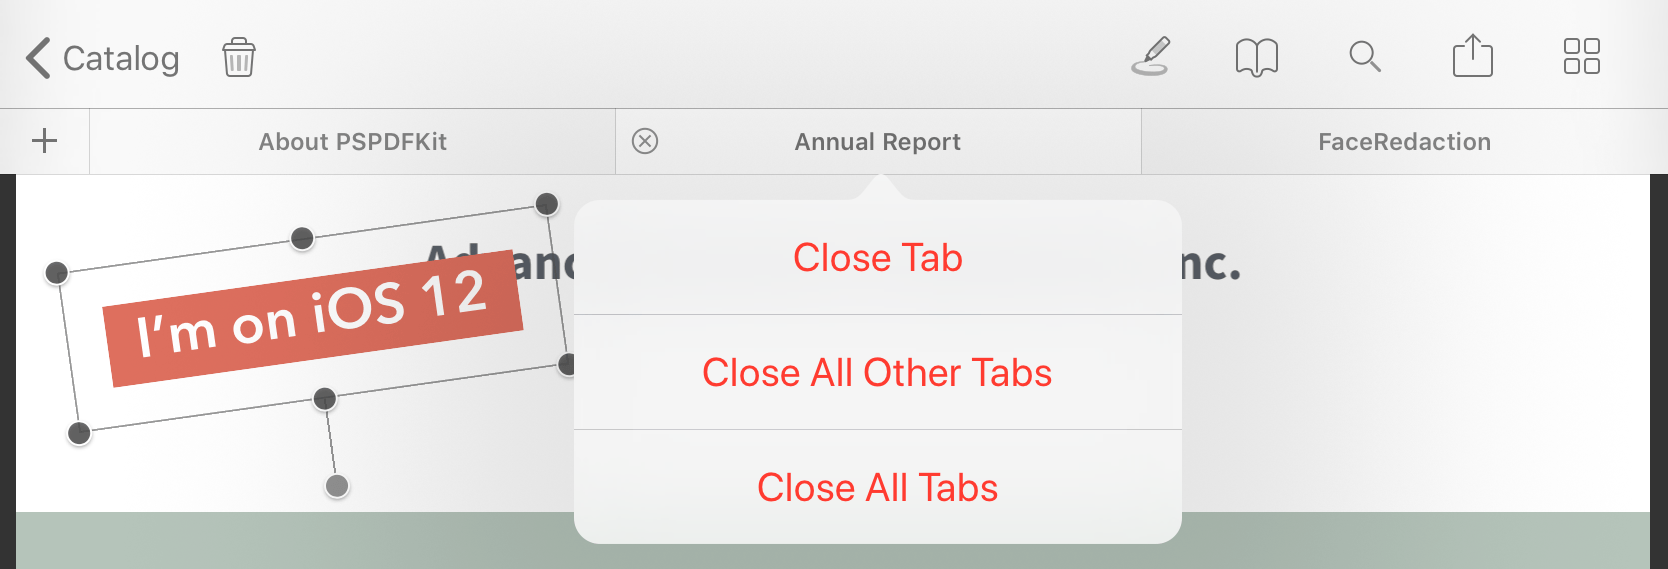
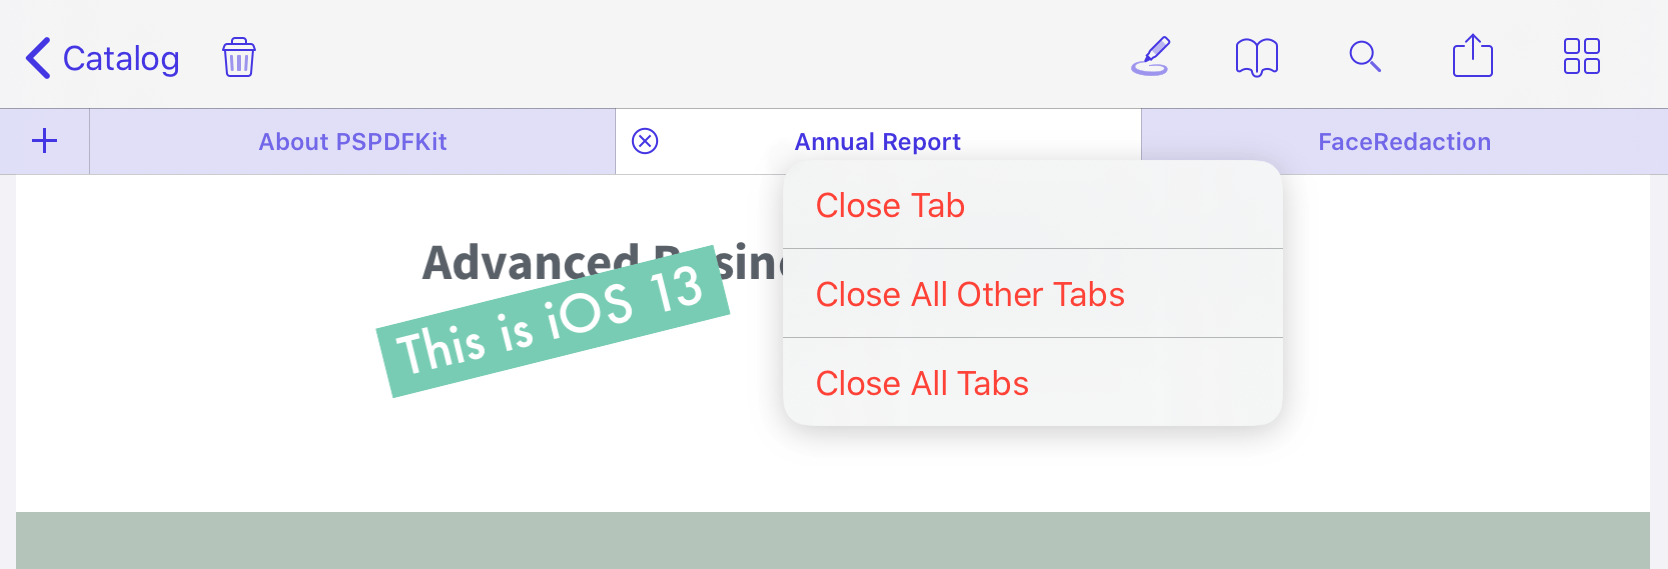
In PSPDFKit, our document tabs and back and forward navigation buttons previously showed an action sheet on long press. We swapped that out for a contextual menu interaction so that it works the same as before on iOS 12 and uses the new menus on iOS 13.
Here’s the API of ContextualMenuInteraction:
class ContextualMenuInteraction: NSObject, UIInteraction {
    struct Action {
        let title: String
        let handler: (Action) -> Void
    }

    weak var delegate: ContextualMenuInteractionDelegate?
}

protocol ContextualMenuInteractionDelegate : NSObjectProtocol {
    func actionsForContextualMenu(_ contextualMenuInteraction:
        ContextualMenuInteraction) -> [ContextualMenuInteraction.Action]
}
That’s it. The interaction can be added to a view and needs a delegate that will provide the menu actions to show.
Our interaction works by adding either a UIContextMenuInteraction or a UILongPressGestureRecognizer to the view, depending on the iOS version, so we need properties for those:
@available(iOS 13.0, *)
private lazy var systemContextMenuInteraction
    = UIContextMenuInteraction(delegate: self)

private lazy var fallbackLongPressGestureRecognizer
    = UILongPressGestureRecognizer(target: self, action: #selector(showActionSheet))
We can implement conformance to the UIInteraction protocol by adding and removing the child interaction or gesture recogniser:
/// Storage for the view property from `UIInteraction`.
private(set) weak var view: UIView?

func willMove(to newView: UIView?) {
    guard let oldView = self.view else {
        return;
    }

    if #available(iOS 13.0, *) {
        oldView.removeInteraction(self.systemContextMenuInteraction)
    } else {
        oldView.removeGestureRecognizer(self.fallbackLongPressGestureRecognizer)
    }
}

func didMove(to newView: UIView?) {
    self.view = newView

    guard let newView = newView else {
        return
    }

    if #available(iOS 13.0, *) {
        newView.addInteraction(self.systemContextMenuInteraction)
    } else {
        newView.addGestureRecognizer(self.fallbackLongPressGestureRecognizer)
    }
All that’s left to implement this interaction is to handle UIContextMenuInteractionDelegate and the long-press action method. The specific menu items to show come from the interaction’s own delegate, so on iOS 13, the interaction needs to map that information to a UIContextMenuConfiguration:
@available(iOS 13.0, *)
func contextMenuInteraction(_ interaction: UIContextMenuInteraction, configurationForMenuAtLocation location: CGPoint) -> UIContextMenuConfiguration? {
    guard let delegate = delegate else {
        return nil
    }

    return UIContextMenuConfiguration(identifier: nil, previewProvider: nil) { _ -> UIMenu? in
        let actions = delegate.actionsForContextualMenu(self).map { action in
            UIAction(title: action.title) { menuAction in
                action.handler(action)
            }
        }
        return UIMenu(title: "", children: actions)
    }
}
On iOS 12 or earlier, we set up an action sheet by mapping actions from the delegate to UIAlertActions in a UIAlertController. For a different style, we could just as easily set up UIMenuItems to show with UIMenuController (an edit menu):
@objc private func showActionSheet(_ sender: UILongPressGestureRecognizer) {
    guard sender.state == .began, let view = view, let delegate = delegate else {
        return
    }

    let alertController = UIAlertController(title: nil, message: nil, preferredStyle: .actionSheet)

    for action in delegate.actionsForContextualMenu(self) {
        alertController.addAction(UIAlertAction(title: action.title, style: .default) { alertAction in
            action.handler(action)
        })
    }

    alertController.addAction(UIAlertAction(title: "Cancel", style: .cancel, handler: nil))

    let popoverPresentation = alertController.popoverPresentationController!
    popoverPresentation.sourceView = view
    popoverPresentation.sourceRect = view.bounds

    // Find a view controller to present the alert controller.
    // Omitted to focus on `UIInteraction`.
}
Showing a Custom UI on a Long Press or Secondary Click
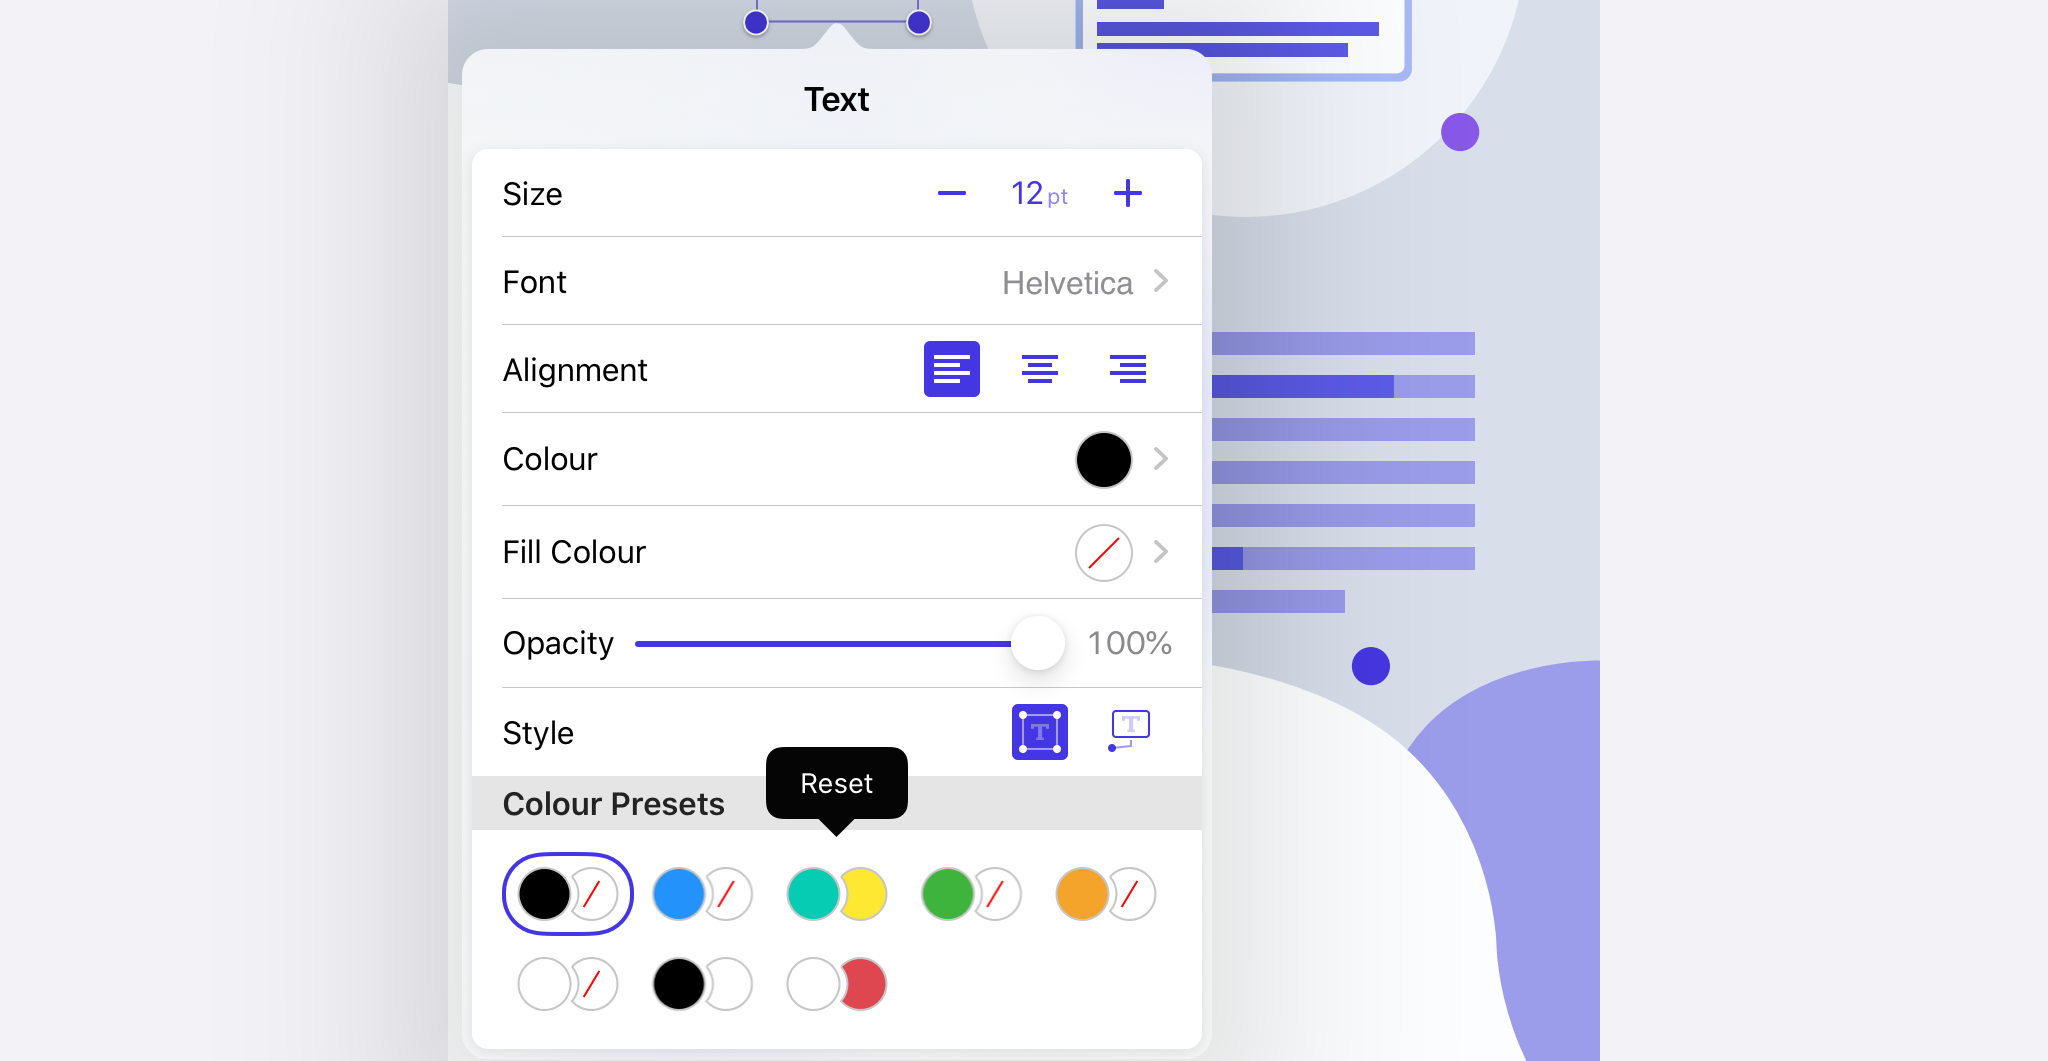
What if you want to show something other than a system contextual menu in response to a long press or secondary click? For example, we felt a system contextual menu would be too heavy for resetting colour presets in our annotation inspector, so instead we use an edit menu:
We can implement a SecondaryActionInteraction. This new interaction will combine two gesture recognisers. Instead of using a delegate, the new one will use the target/action pattern. Let’s only support a single target to keep the example short. Here is the API of our new class:
class SecondaryActionInteraction : NSObject, UIInteraction {
    weak var target: AnyObject?
    var action: Selector

    init(target: AnyObject, action: Selector)
}
We want two gesture recogniser properties. The long-press recogniser is straightforward. Listening for a secondary click is as simple as setting two properties on a UITapGestureRecognizer. Note that in order to receive touch events with the touch type indirectPointer, your app must set UIApplicationSupportsIndirectInputEvents to YES in its Info.plist file. Otherwise, clicks from a trackpad or mouse will be delivered with the touch type direct for compatibility.
First, a quick aside to make the API of allowedTouchTypes more native in Swift:
extension UIGestureRecognizer {
    var allowedTouchTypes_: [UITouch.TouchType] {
        get {
            allowedTouchTypes.map { nsNumber -> UITouch.TouchType in
                UITouch.TouchType(rawValue: nsNumber.intValue)!
            }
        }
        set {
            allowedTouchTypes = newValue.map { type -> NSNumber in
                NSNumber(value: type.rawValue)
            }
        }
    }
}
Back to SecondaryActionInteraction:
private lazy var longPressGestureRecognizer = UILongPressGestureRecognizer(
    target: self,
    action: #selector(handleLongPress)
)

@available(iOS 13.4, *)
private lazy var secondaryClickRecognizer: UITapGestureRecognizer = {
    let recognizer = UITapGestureRecognizer(
        target: self,
        action: #selector(handleSecondaryClick)
    )
    recognizer.allowedTouchTypes_ = [.indirectPointer]
    recognizer.buttonMaskRequired = .secondary
    return recognizer
}()
The implementation of UIInteraction’s protocol requirement is similar to that of ContextMenuInteraction:
private var gestureRecognizers: [UIGestureRecognizer] {
    var recognizers: [UIGestureRecognizer] = [longPressGestureRecognizer]
    if #available(iOS 13.4, *) {
        recognizers.append(secondaryClickRecognizer)
    }
    return recognizers
}

private(set) weak var view: UIView?

func willMove(to newView: UIView?) {
    guard let oldView = self.view else {
        return;
    }

    for recognizer in gestureRecognizers {
        oldView.removeGestureRecognizer(recognizer)
    }
}

func didMove(to newView: UIView?) {
    self.view = newView

    guard let newView = newView else {
        return
    }

    for recognizer in gestureRecognizers {
        newView.addGestureRecognizer(recognizer)
    }
}
When either gesture recogniser fires, we forward that to the interaction’s target:
@objc private func handleLongPress(_ sender: UILongPressGestureRecognizer) {
    if sender.state == .began {
        sendActions()
    }
}

@objc private func handleSecondaryClick(_ sender: UITapGestureRecognizer) {
    sendActions()
}

private func sendActions() {
    UIApplication.shared.sendAction(action, to: target, from: self, for: nil)
}
It’s so cool that this is a near drop-in replacement for UILongPressGestureRecognizer. It works better with trackpads and mice without increasing the complexity of our views or view controllers.
Dragging
Apple’s senior vice president of Software Engineering, Craig Federighi, described another benefit of trackpads on episode 162 of the AppStories podcast:
In the trackpad experience, [we’re] able to make drag and drop even more immediate, because when you click and drag on something, there’s no ambiguity as to whether you were scrolling, because we know if you were scrolling you’d be using two fingers on the trackpad.
Unlike with touch, when using a trackpad or mouse, drag and drop can start with no initial delay. You can really feel the interaction is snappier.
System Dragging
In most cases, iOS apps should implement dragging using the system drag functionality provided by UIDragInteraction. The key benefit of the system functionality is that it allows dragging and dropping content between apps, or even attaching an NSUserActivity to a drag so it can be dropped to create a new window. Of course, we support this when dragging tabs in PDF Viewer, and apps using PSPDFKit can easily get the same multiple window functionality. We also use system dragging in our powerful Document Editor.
UIDragInteraction provides zero-delay dragging with trackpads with no extra work. It was a smart move by the UIKit team to provide instances of UIInteraction instead of gesture recognisers. UIKit can add additional gesture recognisers without needing us to make integration changes in our apps to support new features like trackpads.
Custom Dragging with a Self-Contained UIInteraction
If, for some reason, you set up dragging within your app using a UILongPressGestureRecognizer, you should make trackpad and mouse dragging immediate. To illustrate this, let’s implement one more interaction. This time, to demonstrate the power of UIInteraction, I’ll show how we can use this API to add fully self-contained functionality to any view. And I really mean any view, even if it’s a terrible idea.
Our interaction’s API is nothing beyond conformance to UIInteraction:
class DragInteraction : NSObject, UIInteraction { }
The interaction will add two long-press gesture recognisers to its view: one for finger touches, and one for trackpads, mice and Apple Pencil. This input exclusivity can be set up using the allowedTouchTypes property. The second recogniser will have its minimumPressDuration set to zero:
private lazy var delayedDragRecognizer: UILongPressGestureRecognizer = {
    let recognizer = UILongPressGestureRecognizer(
        target: self,
        action: #selector(handleLongPressUpdate)
    )
    recognizer.allowedTouchTypes_ = [.direct]
    return recognizer
}()

private lazy var immediateDragRecognizer: UILongPressGestureRecognizer = {
    let recognizer = UILongPressGestureRecognizer(
        target: self,
        action: #selector(handleLongPressUpdate)
    )
    recognizer.minimumPressDuration = 0
    var types: [UITouch.TouchType] = [.pencil]
    if #available(iOS 13.4, *) {
        types.append(.indirectPointer)
    }
    recognizer.allowedTouchTypes_ = types
    return recognizer
}()

private var recognizers: [UIGestureRecognizer] {
    [delayedDragRecognizer, immediateDragRecognizer]
}
Conformance to UIInteraction is exactly the same as SecondaryActionInteraction above, except this class is using different gesture recognisers.
All that’s left is to implement dragging the view around when the long-press gesture recognisers update. I’ve included a working example of this below, but the details aren’t too important for the point of this post, so feel free to skip down to the summary if you like:
private var locationsAtStartOfDrag: (viewCenter: CGPoint, touchLocation: CGPoint)?

@objc private func handleLongPressUpdate(_ sender: UILongPressGestureRecognizer) {
    let scaleFactor: CGFloat = 1.1
    let opacityFactor: CGFloat = 0.8
    let view = self.view!
    let superview = view.superview!

    func animate(_ animations: @escaping () -> Void) {
        UIView.animate(withDuration: 0.3, delay: 0, options: .allowUserInteraction, animations: {
            animations()
        }, completion: nil)
    }

    func animateLift() {
        animate {
            view.transform = view.transform.scaledBy(x: scaleFactor, y: scaleFactor)
            view.alpha *= opacityFactor
        }
    }

    func animateDrop(withAdditionalAnimations additionalAnimations: @escaping () -> Void = {}) {
        animate {
            view.transform = view.transform.scaledBy(x: 1 / scaleFactor, y: 1 / scaleFactor)
            view.alpha /= opacityFactor
            additionalAnimations()
        }
    }

    switch sender.state {
    case .began:
        // Lift the object.
        locationsAtStartOfDrag = (viewCenter: view.center, touchLocation: sender.location(in: superview))
        animateLift()
    case .changed:
        // Move the object.
        view.center = locationsAtStartOfDrag!.viewCenter + sender.location(in: superview) - locationsAtStartOfDrag!.touchLocation
    case .ended:
        // Drop the object.
        animateDrop()
        locationsAtStartOfDrag = nil
    case .cancelled:
        // Move the object back to the start.
        let resetPoint = locationsAtStartOfDrag!.viewCenter
        animateDrop(withAdditionalAnimations: {
            view.center = resetPoint
        })
        locationsAtStartOfDrag = nil
    default:
        break
    }
}
In practice, you’d probably want a callback mechanism to actually do something with the view after it’s been dragged to a new location, but I think this example demonstrates just how versatile UIInteraction can be.
Summary
-
For scroll-like interactions,
UIScrollViewwill generally require less code and feel better than using aUIPanGestureRecognizer. -
If you decide a pan recogniser is needed, set
allowedScrollTypesMaskto support trackpad scrolling. -
Using
UIContextMenuInteractionis generally the best way to show a list of actions on long press, secondary click or 3D Touch. Implement a customUIInteractionto add compatibility with iOS 12 and earlier. -
If the system contextual menu isn’t suitable, implement a
UIInteractionto package up gesture recognisers so that either a long press or a secondary click can be used. -
Using
UIDragInteractionis the best way to support drag and drop, since it lets users drag items between apps. -
If the system drag isn’t suitable, you can use
UIInteractionto package up two long-press recognisers, where one has zero delay for pointing devices. -
UIInteractiongives us excellent trackpad and mouse support without increasing the complexity of our views and view controllers.
By the way, everything discussed in this post is also great for making a Mac Catalyst app feel more native.

Douglas makes the most of our fully remote setup by frequently traveling around Europe by train. He’s a proponent of iPad as a productivity platform and is obsessive about the details of great user experiences. He’s also an organizer of the NSLondon meetup.