Creating Invoices with PSPDFKit Server - Part 2


This is the second of a two-part series where we create and generate invoices using PSPDFKit Server’s HTTP API. In the previous part, we went through the process of creating a template for our invoices. In this post, we’ll look into generating actual invoices from dynamic data.
ℹ️ Note: You can find the entire code for the project on GitHub.
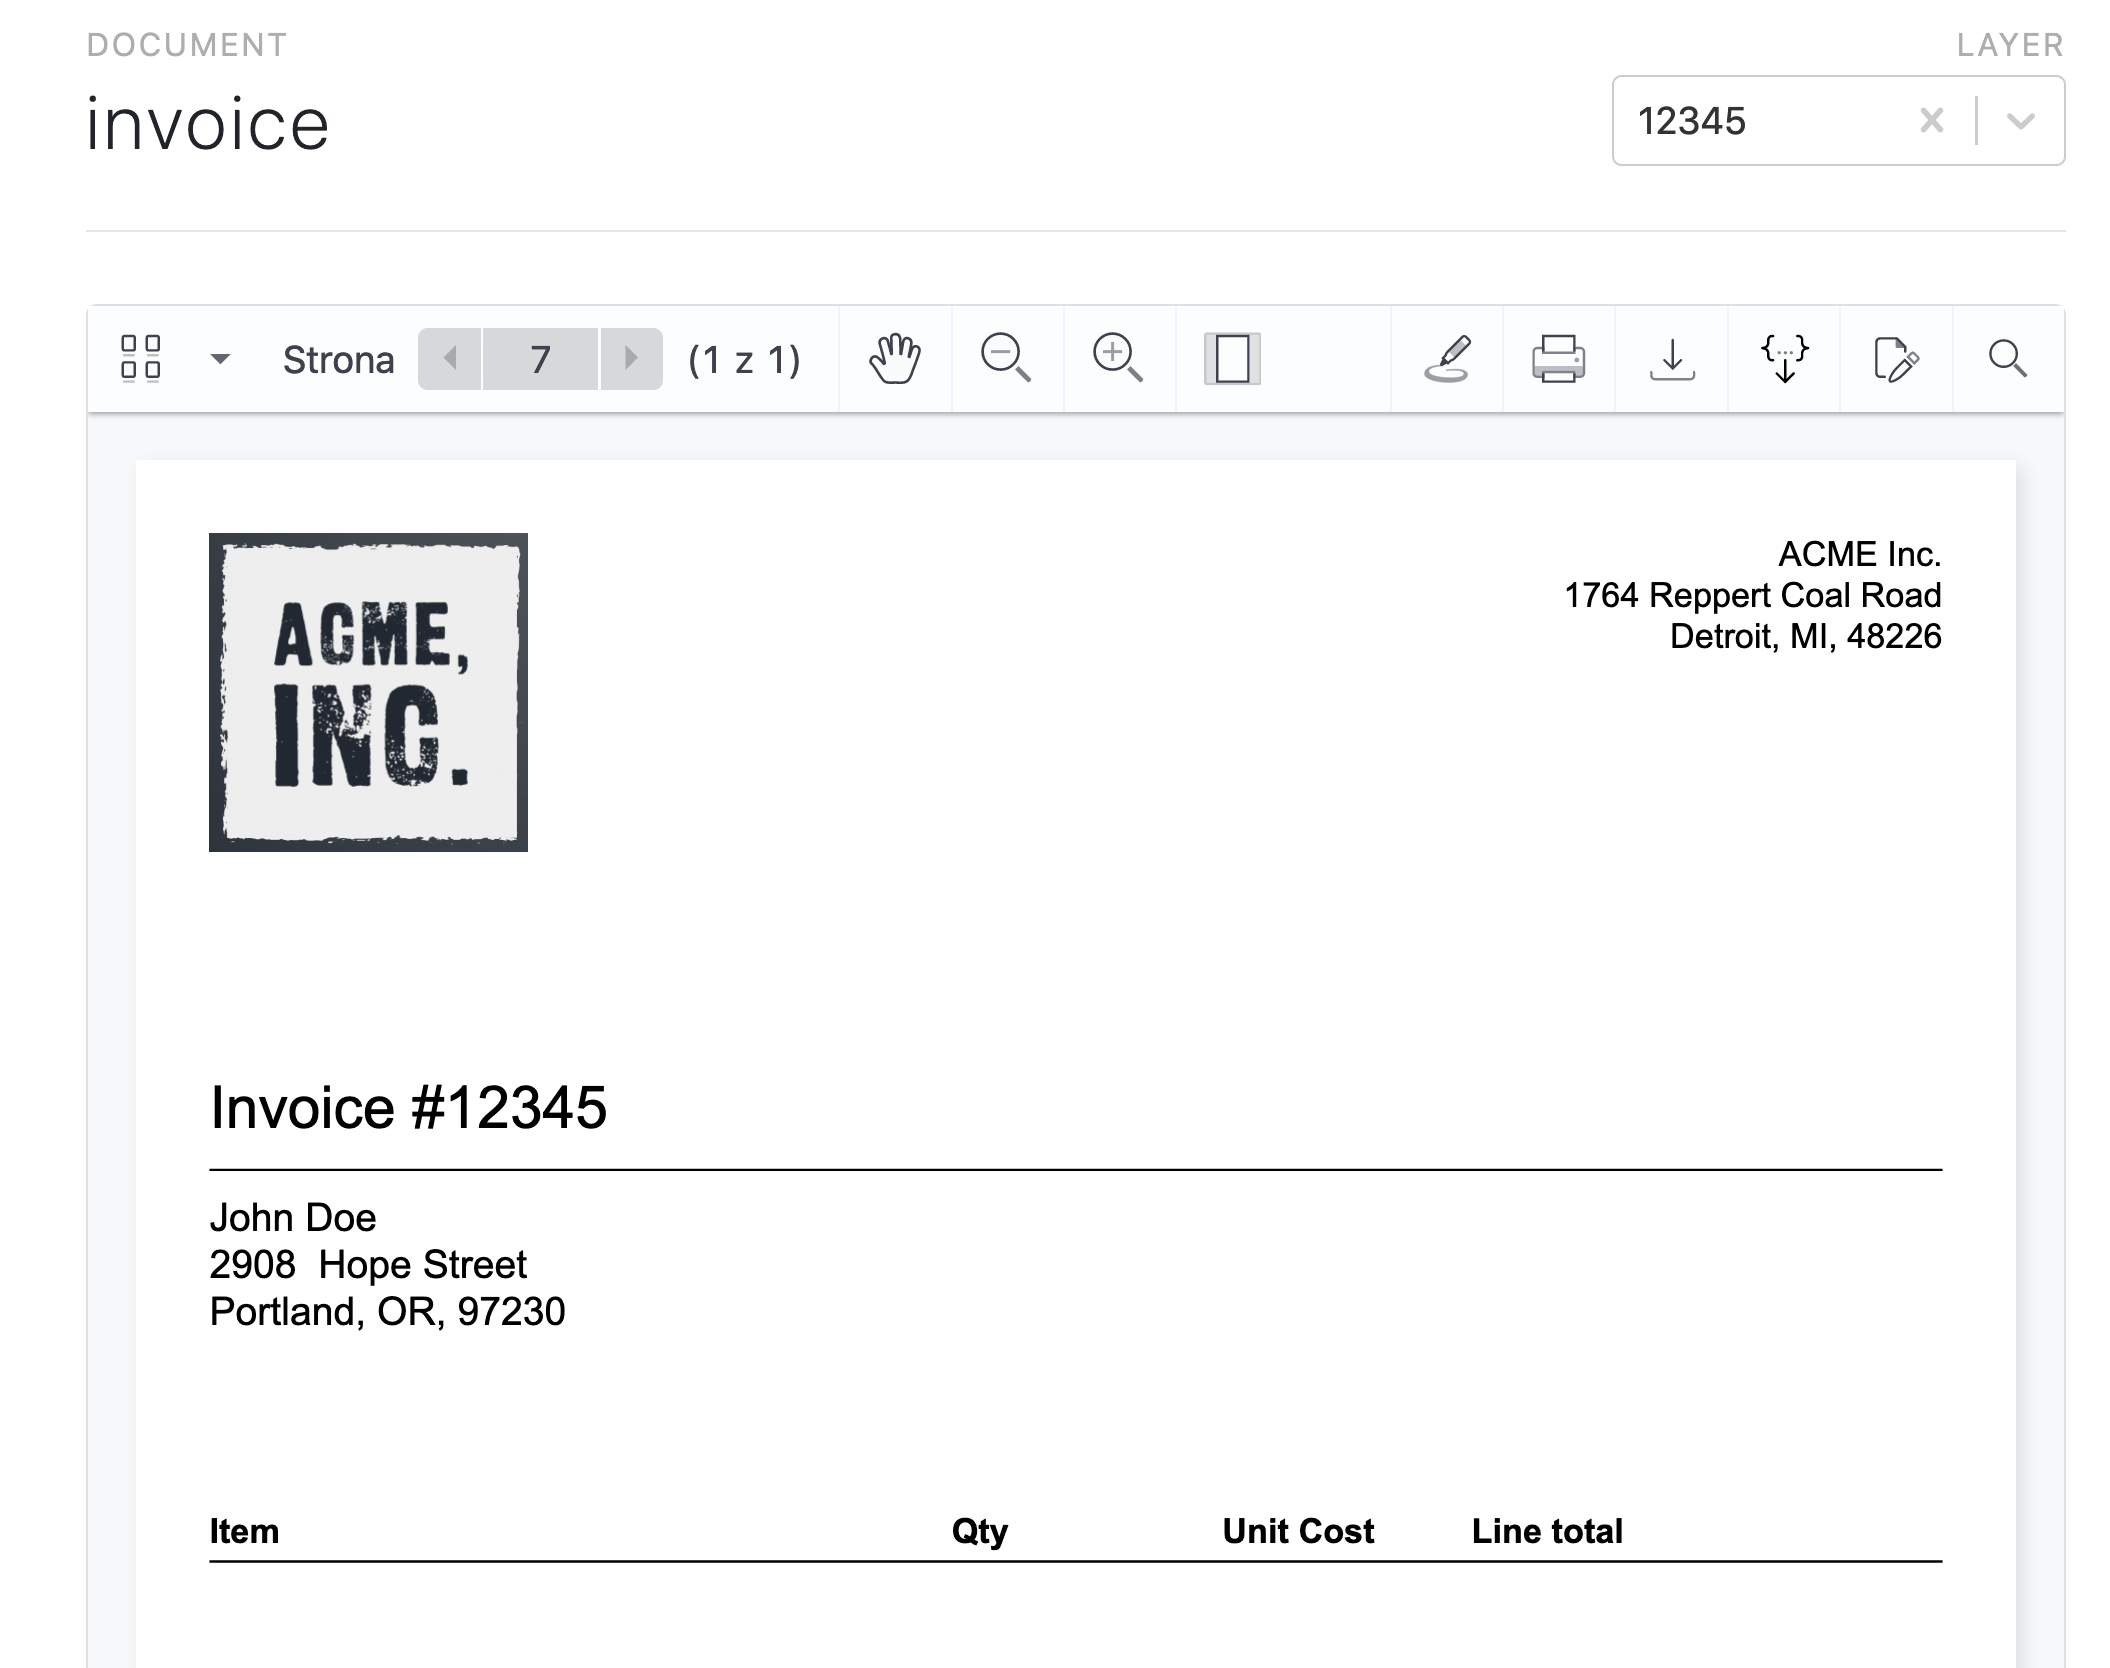
As a reminder, let’s look at the invoice template mockup.

Last time, we built all the black elements of the invoice and prepared placeholders for the blue elements. Today, we’re going to fill in the placeholders and build the table with invoice items.
Data Model
Looking at the mockup, we can see we need to have three pieces of information to generate an invoice:
-
An invoice number.
-
The customer name and address.
-
Invoice items (name, quantity, and cost per unit).
Let’s add this information to the invoice.json file at the root of the project:
{
  "number": "12345",
  "customer": "John Doe\n2908  Hope Street\nPortland, OR, 97230",
  "items": [
    {
      "name": "Cartridge",
      "unitCost": 15.5,
      "quantity": 2
    },
    {
      "name": "USB/USB-C Adapter",
      "unitCost": 2.3,
      "quantity": 1
    },
    {
      "name": "Ethernet RJ45 Cable 10m",
      "unitCost": 10,
      "quantity": 3
    }
  ]
}
When generating the invoice, we’ll consult that file and use the data in it to fill in the blanks.
Generating the Invoice
In the first part, we discussed leveraging document layers. We created one layer for the invoice template, and each invoice we generate will have its own dedicated layer as well. The first step, then, is to make a copy of our template layer so that we can add data specific to the invoice to it.
Create a file called createInvoice.js at the root of the project and add the following code:
const { documentId, http } = require("./common");

const createLayer = layerName => {
  const payload = {
    name: layerName,
    source_layer_name: templateLayerName
  };

  return http.post(`/documents/${documentId}/layers`, payload);
};
The createLayer function simply creates a new layer from the template layer, with a name provided as an argument.
Each layer in the document needs to have a unique name. Since invoice numbers are unique by nature, we’ll use them for simplicity’s sake. To obtain the number, we need to parse the file with the invoice data first:
const fs = require("fs");
...

const invoice = JSON.parse(fs.readFileSync("./invoice.json"));
const layerName = invoice.number;

createLayer(layerName)
  .catch((err) => console.log(err));
You can run the script by entering node createInvoice.js on the command line. But make sure you’ve run the createTemplate.js script from the previous part before! After running the script, if you go to the document in the Server dashboard, you’ll see there’s a new layer with the name we specified. This layer is (for now) an exact copy of the template layer.
As with the template layer in the last blog post, you’ll need to delete the invoice layer every time before you run the script again. You can do that by using the Server API (e.g. using cURL), or through Server API Explorer in the dashboard.
Updating the Placeholders
Last time, we prepared annotations serving as placeholders for the invoice number and customer details. We also saved their IDs in the common.js file so that we can reuse them now. What’s left is to simply update the text of these text annotations.
In order to do that, we can use the annotation update API. However, that API requires us to provide the whole body of the annotation, and not only the one property we want to change. We can imitate the behavior we need by:
-
Fetching the annotation.
-
Merging the property we want to update with the fetched annotation’s properties.
-
Updating the annotation.
With that plan in mind, we can get to the code.
In createInvoice.js add:
const fs = require("fs");
const {
  customerDetailsAnnotationId,
  documentId,
  http,
  invoiceNumberAnnotationId,
  templateLayerName
} = require("./common");

const updateAnnotation = (layerName, annotationId, updates) => {
  const path = `/documents/${documentId}/layers/${layerName}/annotations/${annotationId}`;
  return http.get(path).then(response => {
    const { content } = response.data;
    const updatedContent = { ...content, ...updates };

    return http.put(path, { id: annotationId, content: updatedContent });
  });
};

const setInvoiceNumber = (layerName, invoiceNumber) =>
  updateAnnotation(layerName, invoiceNumberAnnotationId, {
    text: `Invoice #${invoiceNumber}`
  });

const setCustomerDetails = (layerName, customerDetails) =>
  updateAnnotation(layerName, customerDetailsAnnotationId, {
    text: customerDetails
  });
The updateAnnotation function takes a layer name, an annotation ID, and properties of the annotation we want to update. As described above, it first fetches the annotation, then merges the updated properties with the received annotation body, and finally sends a PUT request to update the annotation. Below, setInvoiceNumber and setCustomerDetails use the updateAnnotation function to update the placeholder annotations with the desired data.
Now we just need to call these functions in the invoice-generation pipeline:
const invoice = JSON.parse(fs.readFileSync("./invoice.json"));
const layerName = invoice.number;

createLayer(layerName)
  .then(() => setInvoiceNumber(layerName, invoice.number))
  .then(() => setCustomerDetails(layerName, invoice.customer))
  .catch(err => console.log(err));
If you run the script now and open the dashboard, you should see that the invoice number and customer details look correct!
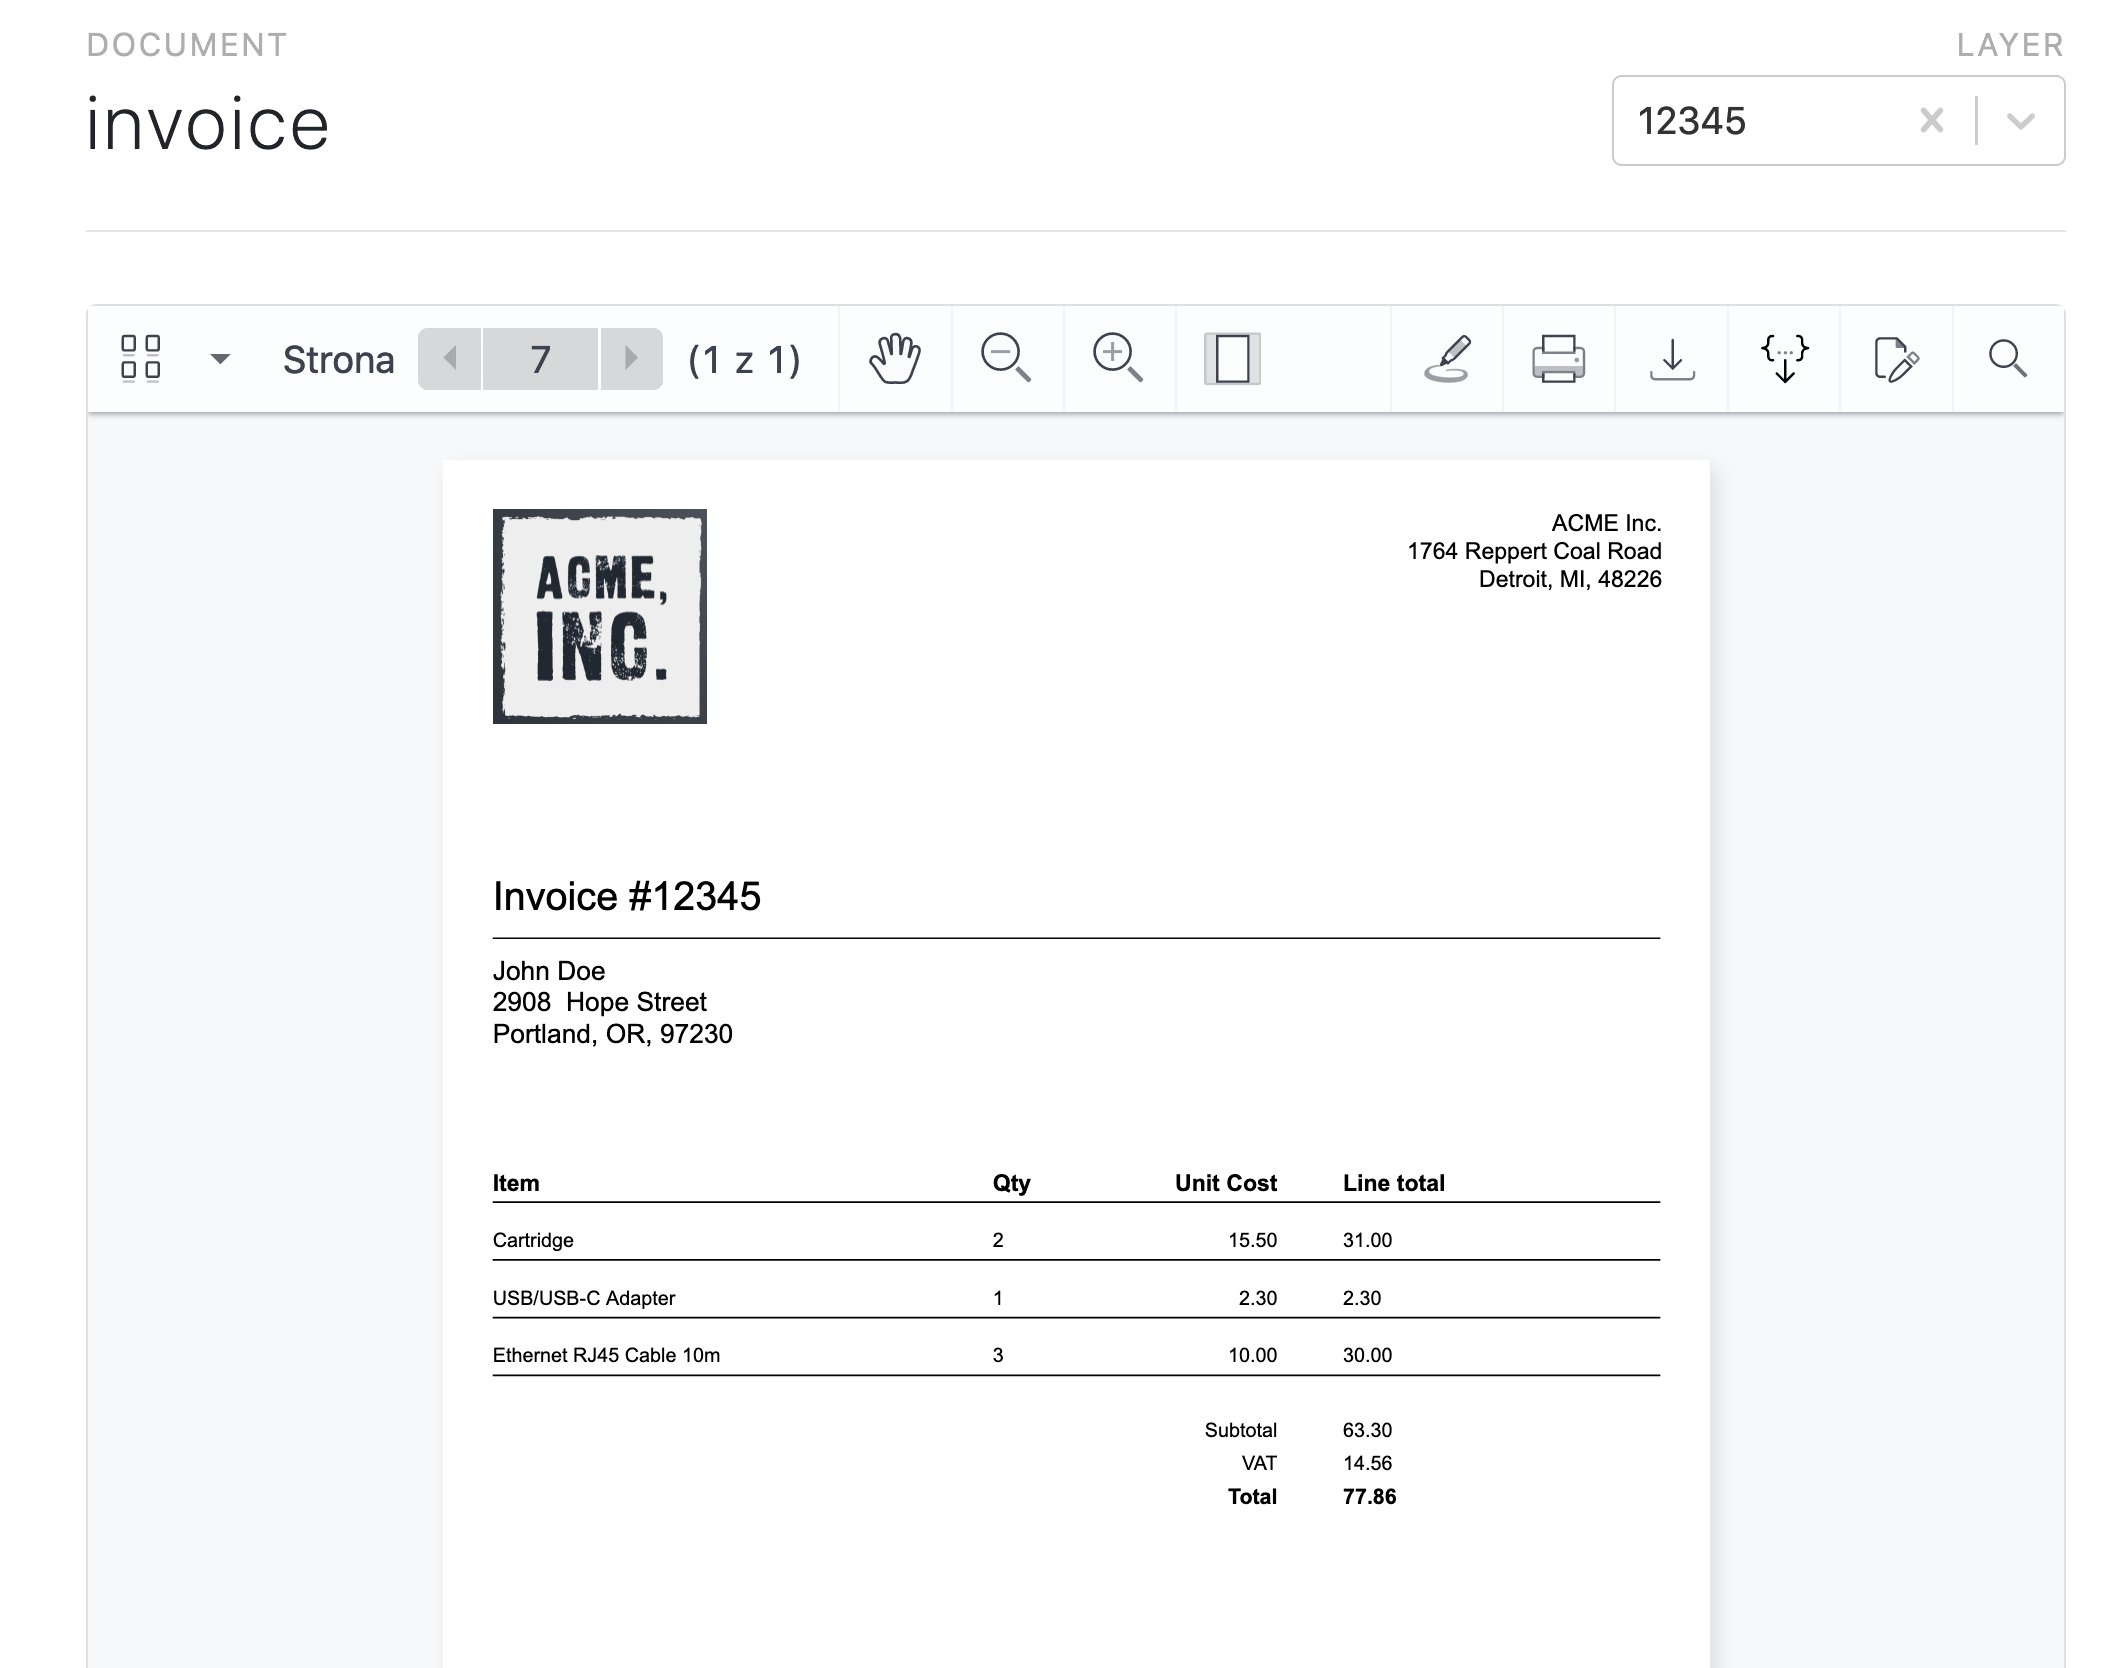
Adding the Invoice Items
In the previous part, we created the headers for the items table using the addRow function. We can reuse the exact same function now to add the items to the table:
const fs = require("fs");
const {
  addRow,
  customerDetailsAnnotationId,
  documentId,
  http,
  invoiceNumberAnnotationId,
  layout,
  templateLayerName,
} = require("./common");
...

const addItems = (layerName, items, start) => {
  const requests = items.map(({ name, unitCost, quantity }, index) => {
    const top = start + (layout.table.rowHeight * index);
    return addRow(
      layerName,
      [name, quantity, unitCost.toFixed(2), (unitCost * quantity).toFixed(2)],
      top
    );
  });

  return Promise.all(requests).then(
    new Promise((resolve) => {
      layout.endOfItemsTable = start + layout.table.rowHeight * items.length;
    })
  );
};
The addItems function takes a list of items and a top coordinate that indicates where the first row of items will start. Note that, in addition to the data we fetch from the file, we also calculate the line total of each item. We use the toFixed method on the numbers representing money so that they’re displayed with fixed precision.
Finally, after all the items are added to the table, we compute where the last item row ends so that we can place the table summary directly below.
You probably noticed we’re reusing the layout object from the previous part here. Since it’s a different script than the one that creates the template, we need to compute the dimensions of the table once again:
createLayer(layerName)
  .then(() => setInvoiceNumber(layerName, invoice.number))
  .then(() => setCustomerDetails(layerName, invoice.customer))
  .then(getPageDimensions)
  .then(calculateTableDimensions)
  .then(() => addItems(layerName, invoice.items, 455))
  .catch(err => console.log(err));
Adding the Table Summary
Finally, the last part of the invoice is the table for the summary of the items. We want to display a subtotal, the VAT amount, and the total cost. If you look at the mockup again, you’ll notice that elements of the summary are just more rows of the table, with the first two columns simply being empty!
const fs = require("fs");
const {
  addRow,
  customerDetailsAnnotationId,
  calculateTableDimensions,
  documentId,
  getPageDimensions,
  http,
  invoiceNumberAnnotationId,
  layout,
  templateLayerName,
} = require("./common");
...

const addSummary = (layerName, items) => {
  const subtotal = items.reduce(
    (acc, item) => acc + item.unitCost * item.quantity,
    0
  );
  const vat = subtotal * 0.23;
  const total = subtotal + vat;

  const start = layout.endOfItemsTable + 10;

  return Promise.all([
    addRow(layerName, ["", "", "Subtotal", subtotal.toFixed(2)], start, {
      ruler: false,
    }),
    addRow(layerName, ["", "", "VAT", vat.toFixed(2)], start + 20, {
      ruler: false,
    }),
    addRow(layerName, ["", "", "Total", total.toFixed(2)], start + 40, {
      ruler: false,
      style: { fontSize: 13, fontStyle: ["bold"] },
    }),
  ]);
};
The first half of addSummary calculates the values we want to display. The other half adds three new table rows, starting where the last row of items ended (with a small margin). We also add some extra style to the row with the total amount so that it stands out.
Now we just need to call this function in the pipeline at the bottom:
const invoice = JSON.parse(fs.readFileSync("./invoice.json"));
const layerName = invoice.number;

createLayer(layerName)
  .then(() => setInvoiceNumber(layerName, invoice.number))
  .then(() => setCustomerDetails(layerName, invoice.customer))
  .then(getPageDimensions)
  .then(calculateTableDimensions)
  .then(() => addItems(layerName, invoice.items, 455))
  .then(() => addSummary(layerName, invoice.items))
  .catch(err => console.log(err));
And that’s it!
If you open the invoice in the browser now, you’ll see all the data is there.
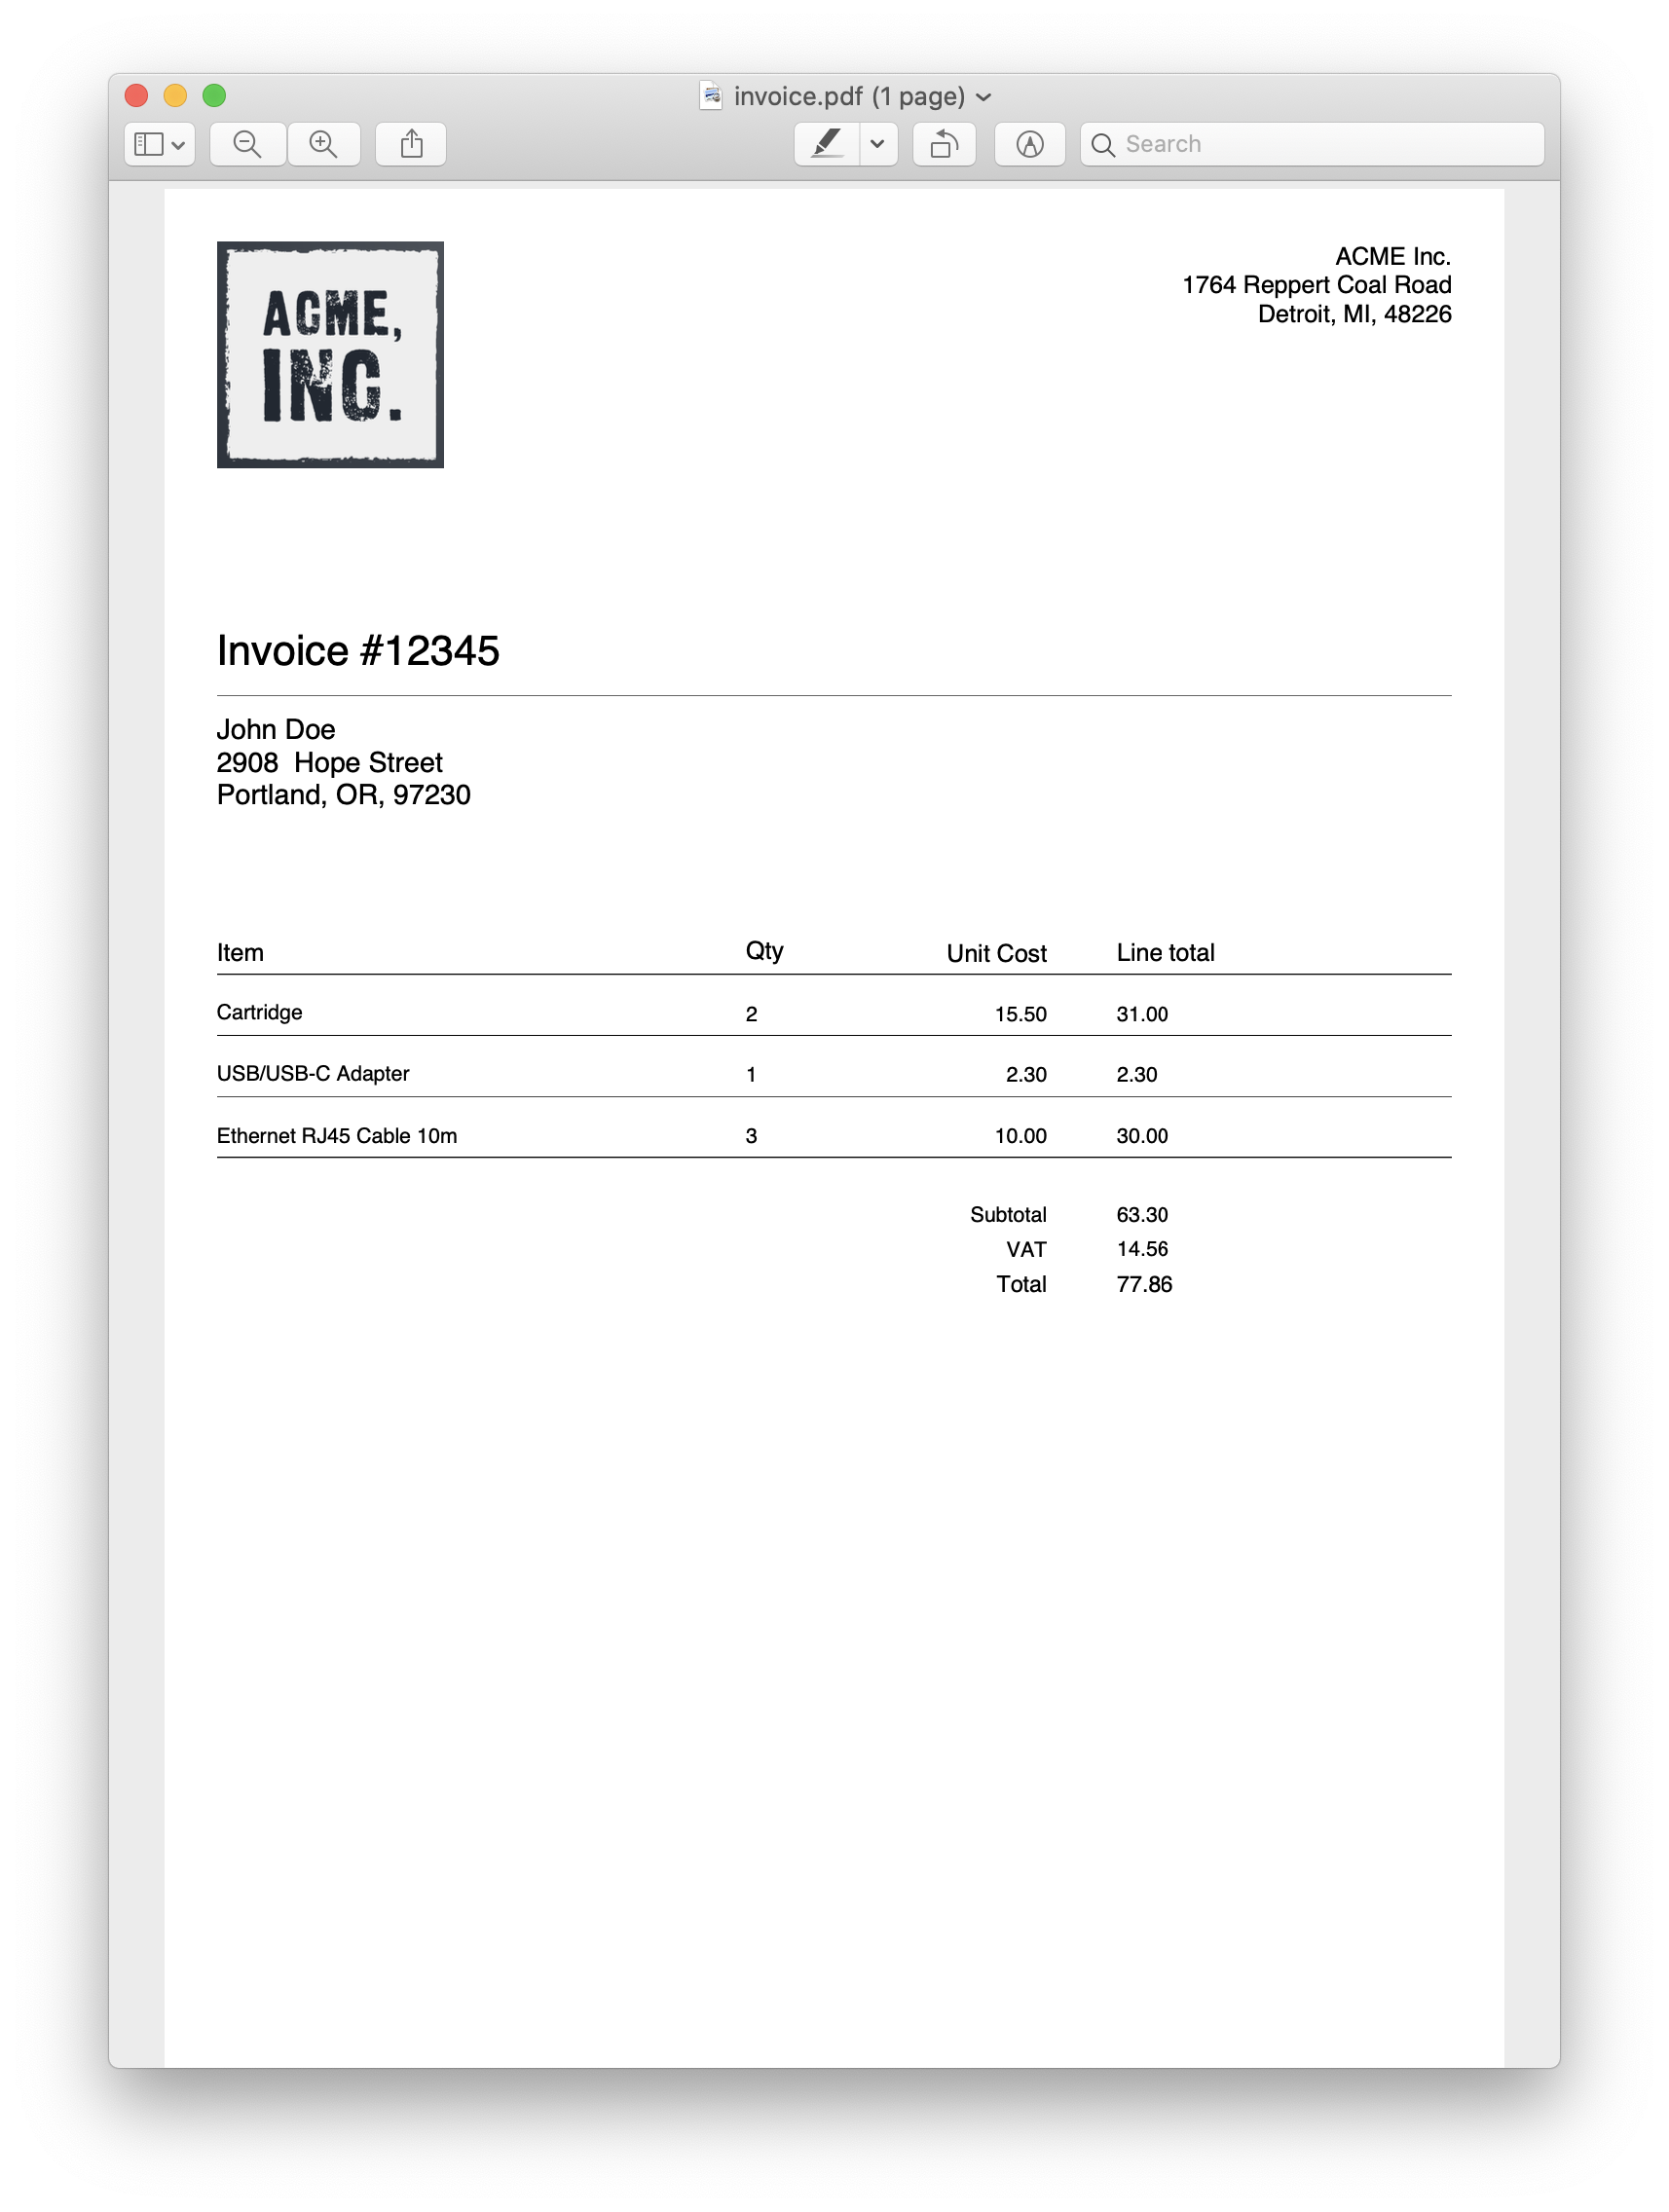
Downloading the Invoice
At the very beginning of the first blog post, we mentioned PDF is a ubiquitous format: Virtually anyone can open and view PDF files. However, our invoice is not a PDF just yet — all the data we added to the invoice is only stored on PSPDFKit Server. As a final piece, let’s download the PDF representation of the invoice:
const downloadInvoice = (layerName, filename) => {
  return http
    .get(`/documents/${documentId}/layers/${layerName}/pdf?flatten=true`, {
      responseType: "stream"
    })
    .then(response => response.data.pipe(fs.createWriteStream("invoice.pdf")));
};

const invoice = JSON.parse(fs.readFileSync("./invoice.json"));
const layerName = invoice.number;

createLayer(layerName)
  .then(() => setInvoiceNumber(layerName, invoice.number))
  .then(() => setCustomerDetails(layerName, invoice.customer))
  .then(getPageDimensions)
  .then(calculateTableDimensions)
  .then(() => addItems(layerName, invoice.items, 455))
  .then(() => addSummary(layerName, invoice.items))
  .then(() => downloadInvoice(layerName, "invoice.pdf"))
  .catch(err => console.log(err));
When downloading the invoice, we provide a flatten=true option so that the annotations we created are embedded in a PDF and can’t be modified.
When we run the script for the last time, we’ll find invoice.pdf at the root of the project.
Conclusion
In this part of the series, we generated an invoice based on the template we built the last time. We filled in the placeholder annotations and created rows of items and a table summary with the same helpers we used to create the template itself.
This small project is a showcase of what can be achieved using the PSPDFKit Server API. The concept of layers allows us to isolate the data for the same document, and the annotation API provides fine-grained control over annotations in the layer. While some tasks are perfectly fine done manually, PSPDFKit Server provides a broad set of tools for when batch processing and automation are necessary.