Change Android Themes Instantly Using the Circular Reveal Animation
 Simone Arpe

In its most recent update, the Telegram app for Android introduced an eye-catching animation that happens when users change the theme. Luckily for us, the source code is available on GitHub, so we can take a closer look at how the effect is achieved.
In this article, I’ll delve into the process of achieving this fancy transition, beginning with the concepts and ending with the actual implementation. Then I’ll try to apply it to PDF Viewer for Android.
The Telegram Animation
The introduction of this animation was warmly welcomed by the Android community. In fact, there are many subreddits on the topic asking for information about the technique used. The reason for all this interest is due to the complexity of the Android theme system.
The Concepts
The entire algorithm can be easily unraveled with the use of two key steps: taking a screenshot of the window, and using ViewAnimationUtils#createCircularReveal().
Once the transition starts, here is the logic:
-
Take a screenshot of the window.
-
Set the screenshot as an image bitmap in an
ImageViewthat covers the entire window. -
Make the
ImageViewvisible. -
Apply the circular reveal effect to the drawer layout container.
-
Change the theme.
-
Make the
ImageViewinvisible, setting its state asGONE.
ℹ️ Note: The moment when the theme changes (step number 4), the layout will have the ImageView on top, covering the new theme; the only change that can be visually perceived in this step will be that of the navigation bar, because it is positioned outside of the area covered by the ImageView.
Once you understand the key concepts, the code is rather simple.
Implementing the Feature in PDF Viewer
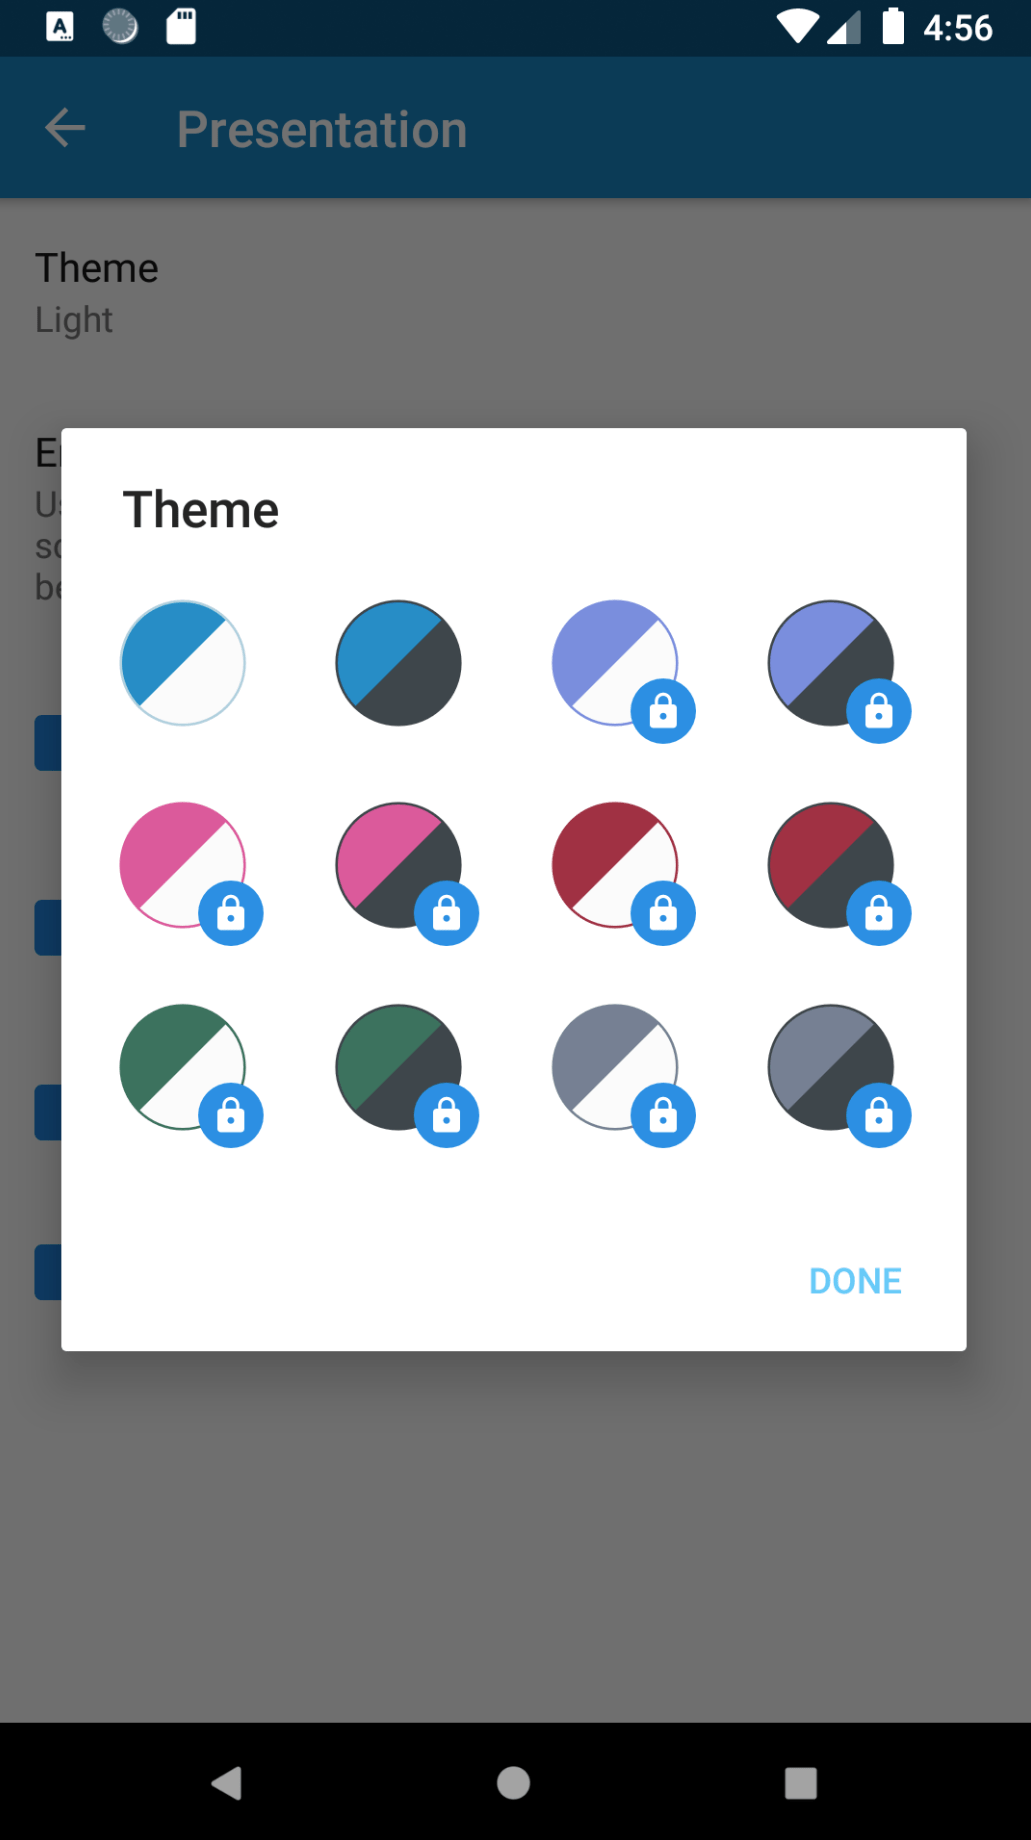
I began experimenting with implementing the feature in PDF Viewer for Android, and it became immediately clear that obtaining a screenshot by using a draw call on a canvas (i.e. drawerLayoutContainer.draw(canvas)) was not a viable option with our codebase. Given that our theme chooser UI was a DialogFragment, the outcome would have been a bitmap with a transparent background instead of a full screenshot of the window.
One approach for solving this problem was to take a screenshot of the entire activity. There are many libraries on GitHub that can do this, but I’d recommend taking a look at Falcon.
Using Falcon to take a screenshot requires only one line of code: val bitmap = Falcon.takeScreenshotBitmap(activity).
To show the screenshot on top of the other views, there are two options:
-
Add a new
ImageViewto the current layout that takes all the space matching its parent width and height. -
Start a new activity with a minimal layout composed of a single
ImageView.
Before going further, we should stop for a moment here and consider a few things. Starting a new activity just for showing an animation may sound like overkill for this particular case, however, adding an image view to the current layout might not produce the expected result.
In the specific case of PDF Viewer where there is a DialogFragment containing the theme chooser UI, the first option will not draw the screenshot bitmap on top of the dialog, but rather behind it. A workaround might be closing the dialog immediately after the theme has been selected and then drawing the image view immediately before starting the circular reveal transition.
Because this solution entails a radical modification of the current behavior of the app, I decided to discard it. I won’t go into more detail about the challenges I encountered while trying this, but below you can see an example of the outcome. Notice how clear the flickering is and how the content of the image view is slightly misaligned.
Due to the above, I decided to explore the second solution.
The next step is related to the configuration used in PDF Viewer for the system UI visibility, so there’s not a unique approach that fits every configuration.
In our settings activity, we are using the default SYSTEM_UI_FLAG_VISIBLE, which implies having a solid status bar.
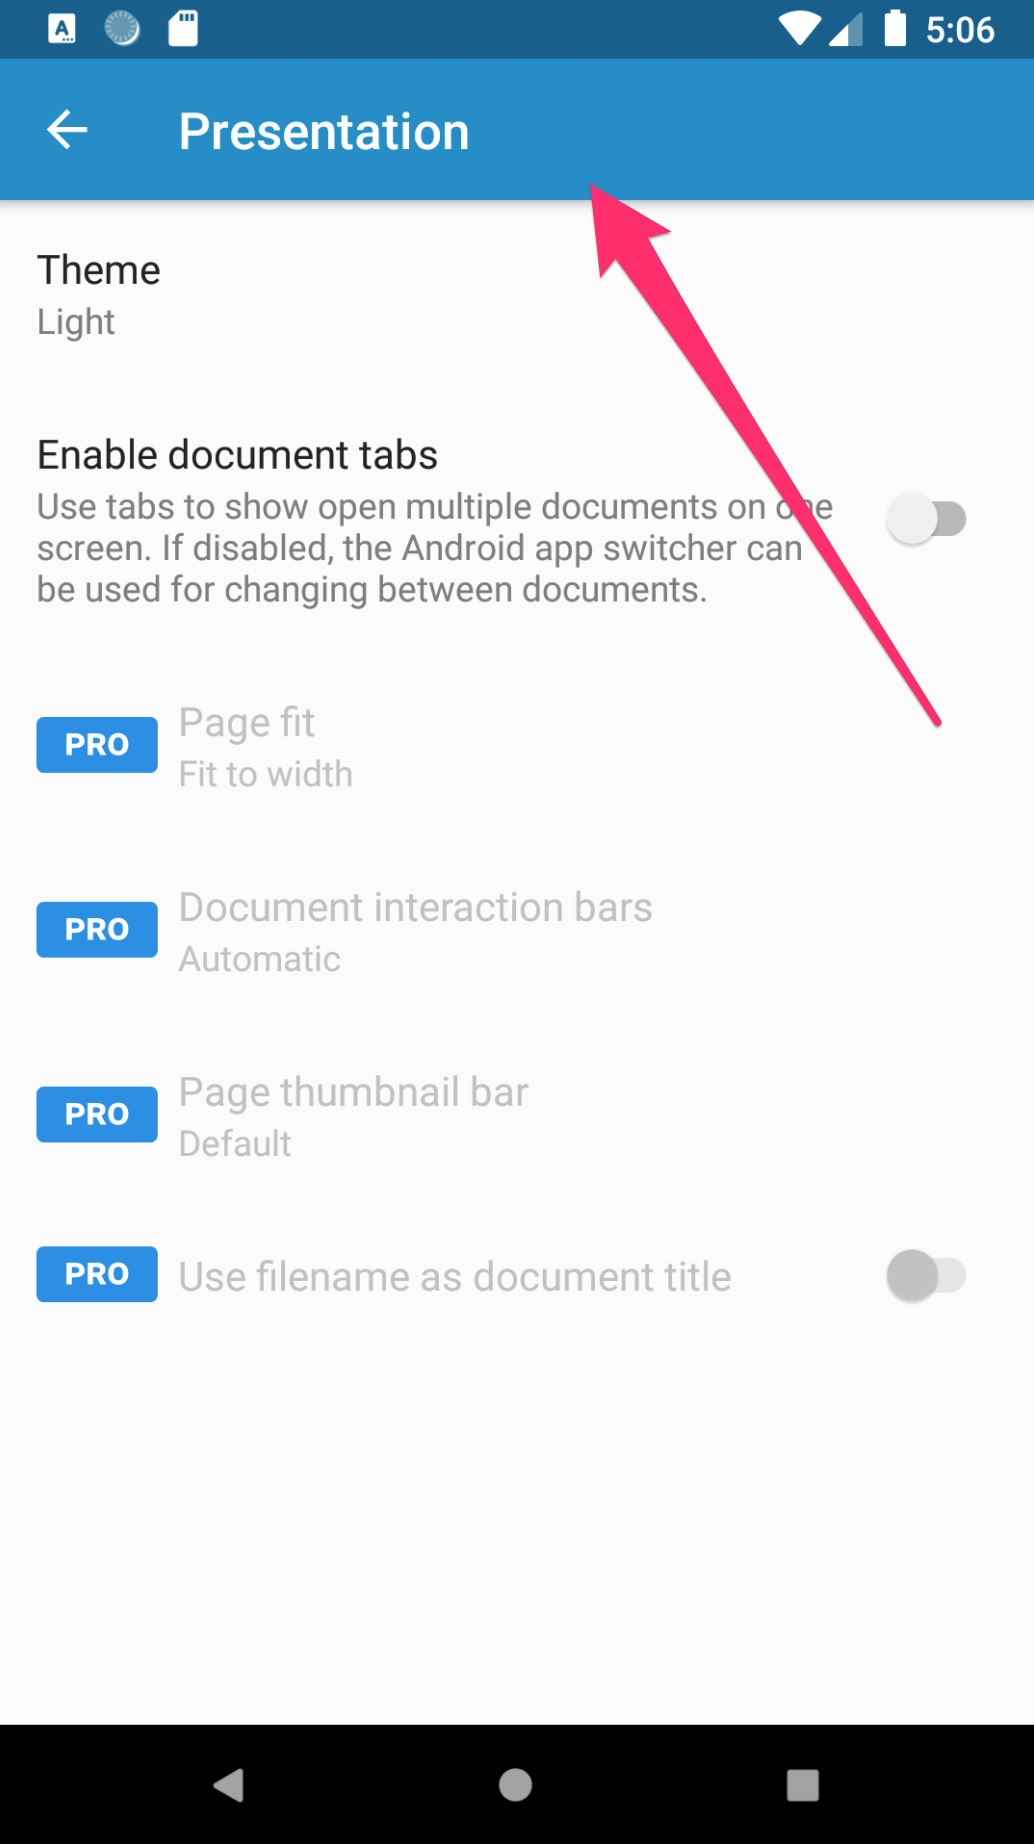
Because of the SYSTEM_UI_FLAG_VISIBLE flag, the screenshot needs to be taken without including the status bar. Falcon takes the screenshot of the whole window, status bar included. We can still rely on the Falcon implementation, but the portion including the status bar needs to be cut out from the bitmap.
A simple solution can be achieved in this way:
private fun getStatusBarHeight(): Int {
    var result = 0
    val resourceId = resources.getIdentifier("status_bar_height", "dimen", "android")
    if (resourceId > 0) {
        result = resources.getDimensionPixelSize(resourceId)
    }
    return result
}

fun newThemeSelected() {
    ...
    val windowBitmap = Falcon.takeScreenshotBitmap(activity)
    val statusBarHeight = getStatusBarHeight()
    val bitmap = Bitmap.createBitmap(windowBitmap, 0, statusBarHeight, partialBitmap.getWidth(), partialBitmap.getHeight() - statusBarHeight, null, true)
    ...
}
The screenshot activity needs a transparent theme to allow the settings activity underneath it to be seen. In the AndroidManifest.xml file, set android:theme="@style/AppTheme.Transparent" for the screenshot activity and use the following theme:
<style name="AppTheme.Transparent">
    <item name="android:windowIsTranslucent">true</item>
    <item name="android:windowBackground">@android:color/transparent</item>
    <item name="android:windowContentOverlay">@null</item>
    <item name="android:windowNoTitle">true</item>
    <item name="android:windowIsFloating">true</item>
    <item name="android:backgroundDimEnabled">false</item>
</style>
To make the transition from one activity to another quicker, it’s better to set the FLAG_ACTIVITY_NO_ANIMATION flag and override any pending transaction:
// From the calling activity.
val intent = Intent(this, Screenshot::class.java).apply {
    ...
    addFlags(Intent.FLAG_ACTIVITY_NO_ANIMATION)
}
startActivity(intent)
// 0 param means no animation.
overridePendingTransition(0, 0)
...
The ScreenshotActivity requires three parameters: the bitmap, and the x and y coordinates. Passing the coordinates can be easily achieved using the Intent:
val intent = Intent(this, ScreenshotActivity::class.java).apply {
    putExtra(SCREENSHOT_X, posX)
    putExtra(SCREENSHOT_Y, posY)
    addFlags(Intent.FLAG_ACTIVITY_NO_ANIMATION)
}
startActivity(intent)
overridePendingTransition(0, 0)
// We recreate the activity with the new theme selected.
recreate()
The bitmap cannot be passed using the Intent, as it can easily go over the byte limit imposed for the Parcelable objects and may produce the following Java binder error:
JavaBinder﹕ !!! FAILED BINDER TRANSACTION !!!
It’s a well-known problem, and there are several solutions to overcome it. For the sake of brevity in this blog post, I’ve used a static field to hold the reference of the bitmap, even though it’s not advisable.
When the screenshot activity starts, the bitmap must be shown immediately:
override fun onCreate(savedInstanceState: Bundle?) {
    super.onCreate(savedInstanceState)
    setContentView(R.layout.activity_screenshot)
    bitmap = Global.screenshot
    posX = intent.getIntExtra(SCREENSHOT_X, -1)
    posY = intent.getIntExtra(SCREENSHOT_Y, -1)

    screenshot = findViewById(R.id.sub_settings_screenshot)
    screenshot.setImageBitmap(bitmap)
    screenshot.scaleType = ImageView.ScaleType.MATRIX
    screenshot.visibility = VISIBLE

    // Start circular animation.
    ...
Circular Reveal Animation
The reveal animation is the final thing that needs to be applied to complete the theme switching. The image view containing the screenshot is visible at this point. We don’t have control over the content behind it, so to keep this experiment simple (and short), I’m going to apply createCircularReveal to the image view itself. I’ll keep the tweaking out of scope, but to better give the gist, we are going to call the startCircularAnimation method in onCreate:
private fun startCircularAnimation(bitmap: Bitmap, posX: Int, posY: Int) {
    val screenshot = findViewById<ImageView>(R.id.sub_settings_screenshot)
    screenshot.setImageBitmap(bitmap)
    screenshot.scaleType = ImageView.ScaleType.MATRIX
    screenshot.visibility = VISIBLE

    // Final radius is approximated here.
    val finalRadius = 1500f
    val anim = ViewAnimationUtils.createCircularReveal(screenshot, posX, posY, 0f, finalRadius)
    anim.duration = 400
    anim.interpolator = CubicBezierInterpolator.EASE_IN_OUT_QUAD
    val animationListener = object: Animator.AnimatorListener {
        override fun onAnimationEnd(animation: Animator?) {
            screenshot.setImageDrawable(null)
            screenshot.visibility = View.GONE
            finish()
        }

        override fun onAnimationCancel(animation: Animator?) {}
        override fun onAnimationRepeat(animation: Animator?) {}
        override fun onAnimationStart(animation: Animator?) {}
    }
    anim.addListener(animationListener)
    anim.start()
}
ℹ️ Note: CubicBezierInterpolator can be retrieved from the Telegram source code on GitHub.
If we had just started the circular reveal animation in onCreate, we would be greeted with an IllegalStateException with the message Cannot start this animator on a detached view!. We need to use an OnAttachStateChangeListener to make sure we are starting the animation on the attached view:
override fun onCreate(savedInstanceState: Bundle?) {
    super.onCreate(savedInstanceState)
    setContentView(R.layout.activity_screenshot)
    bitmap = Global.screenshot
    posX = intent.getIntExtra(SCREENSHOT_X, -1)
    posY = intent.getIntExtra(SCREENSHOT_Y, -1)

    screenshot = findViewById(R.id.sub_settings_screenshot)
    screenshot.setImageBitmap(bitmap)
    screenshot.scaleType = ImageView.ScaleType.MATRIX
    screenshot.visibility = VISIBLE

    val listener = object: View.OnAttachStateChangeListener {
        override fun onViewAttachedToWindow(v: View?) {
            startCircularAnimation(bitmap, posX, posY)
        }
        override fun onViewDetachedFromWindow(v: View?) {}
    }
    screenshot.addOnAttachStateChangeListener(listener)
}
...
And finally, the entire animation is complete!
The transition from one activity to another can still be seen, even with the FLAG_ACTIVITY_NO_ANIMATION flag. This is probably due to some timing issue and would require more experimentation to tweak the delay on the activity start and recreation.
Conclusion
Studying the circular reveal animation and how the developers at Telegram implemented it was an exciting journey. Applying it to your codebase the exact same way they did may not always be possible, but it was interesting experimenting with some alternative approaches and checking the final result.
Depending on your app’s architecture, it may not always be possible to achieve complicated animations. For our specific case, dealing with Dialogs and DialogFragments exponentially increased the complexity of the experiment. Most of the time, the strategy adopted by wise developers is to pinpoint a compromise between the time you have at your disposal and the complexity of the feature you want to achieve.
The folks working at Telegram have done a splendid job putting together a transition ahead of its time — one that brings something new to the tricky topic of switching themes. Telegram remains one of my favorite messaging apps for Android, and its UX is top-notch.