Saving the Activity State
 Reinhard Hafenscher
Part of writing a great Android app is making sure your activities handle the Android lifecycle correctly, and a big part of that is not losing any of your app’s state when it unexpectedly gets put into the background or the user rotates their device. In this blog post, we’ll take a look at the best practices for making sure your Activity is able to correctly save and restore its state.
Restoring the View State
The first thing we’ll look at is making sure that any input your users make into things like EditTexts is correctly saved. Luckily for us, Android makes this really simple for the default view classes provided. As long as you set an id on your View, it will automatically save and restore its view state. Keep in mind that the id needs to be unique inside the entire view hierarchy; otherwise, the state can’t be restored. Supporting this for your own custom views takes a bit of extra work, but nothing major. All you need to do is provide a custom implementation of BaseSavedState, like this:
private static class SavedState extends BaseSavedState {
    public static final Parcelable.Creator<SavedState> CREATOR = new Parcelable.Creator<SavedState>() {
        @Override
        public SavedState createFromParcel(Parcel in) {
            return new SavedState(in);
        }

        @Override
        public SavedState[] newArray(int size) {
            return new SavedState[size];
        }
    };

    boolean isChecked;

    SavedState(Parcelable superState) {
        super(superState);
    }

    private SavedState(Parcel in) {
        super(in);
        isChecked = in.readInt() == 1;
    }

    @Override
    public void writeToParcel(Parcel out, int flags) {
        super.writeToParcel(out, flags);
        out.writeInt(isChecked ? 1 : 0);
    }
}
What this does is tell the system how to serialize your view’s state into a Parcel. Then you need to add two more methods to the View subclass:
// Called by the system when your view needs to persist its state.
@Override
protected Parcelable onSaveInstanceState() {
    SavedState savedState = new SavedState(super.onSaveInstanceState());
    savedState.isChecked = this.isChecked;
    return savedState;
}

// Called by the system when the state of your view gets restored.
@Override
protected void onRestoreInstanceState(Parcelable state) {
    if (!(state instanceof SavedState)) {
        super.onRestoreInstanceState(state);
        return;
    }

    final SavedState savedState = (SavedState) state;
    super.onRestoreInstanceState(savedState.getSuperState());
    if (savedState.isChecked) {
        // Restore your view accordingly.
    }
}
These methods are called by the system to save and restore your view’s state. And with that, as long as your view has an id, its state will be restored as part of the activity’s state.
Restoring Other State
Now that we’ve taken care of making sure our views remember the way we left them, it’s time to take a look at saving the other state your activity might contain. Let’s imagine we have a simple app that shows a button along with a counter of how often this button is pressed:
public class ExampleActivity extends AppCompatActivity {

    private TextView counter;
    private int count = 0;

    @Override
    protected void onCreate(@Nullable Bundle savedInstanceState) {
        super.onCreate(savedInstanceState);
        setContentView(R.layout.activity_example);

        counter = findViewById(R.id.counter);
        updateCounter();

        final Button button = findViewById(R.id.button);

        button.setOnClickListener(new View.OnClickListener() {
            @Override
            public void onClick(View view) {
                count++;
                updateCounter();
            }
        });
    }

    private void updateCounter() {
        counter.setText("Count: " + count);
    }
}
As you can see in the above video, while our counter works, as soon as the device is rotated, the current count is lost. This is because Android recreates your Activity whenever you rotate the device or when it’s in the background and memory runs low. You may also have noticed that the onCreate method comes with a savedInstanceState parameter, and this is how we’re going to make sure our count is correctly stored.
The Solution
Enter onSaveInstanceState(), which is called by the system when it’s time for your Activity to persist its state. Let’s take a look at how that would look:
@Override
protected void onSaveInstanceState(@NonNull Bundle outState) {
    super.onSaveInstanceState(outState);
    outState.putInt(STATE_COUNT, count);
}
This method puts our count into the outState. This way, the next time onCreate is called on our activity, we can read the count back and continue where we left off. Now we just need to read it back in our onCreate method:
@Override
protected void onCreate(@Nullable Bundle savedInstanceState) {
    super.onCreate(savedInstanceState);
    setContentView(R.layout.activity_example);

    if (savedInstanceState != null) {
        count = savedInstanceState.getInt(STATE_COUNT);
    }
    ...
Now if there is a savedInstanceState, we’ll read the count back and we won’t have to start over. Keep in mind that you can’t put everything into a Bundle, and that it’s only designed to persist small amounts of data. So if, for example, your state contains data loaded from the network or large binary data-like images, you should persist it some other way. You could store it in a file or a database, and if you only need to make sure the state survives configuration changes, you can also override onRetainCustomNonConfigurationInstance.
onRetainCustomNonConfigurationInstance
onRetainCustomNonConfigurationInstance is a method you can override in your activity, and it allows you to persist one object across configuration changes. It’s only part of FragmentActivity, so keep that in mind. Let’s take a quick look at how this works:
@Override
public Object onRetainCustomNonConfigurationInstance() {
    return this.myEntireState;
}
In your activity, simply override onRetainCustomNonConfigurationInstance() to retain one object containing the state you want to save. Take care not to save any object holding a reference to Context, since that will cause a memory leak to occur. Finally, to get the data back, just call getLastCustomNonConfigurationInstance() in onCreate():
@Override
protected void onCreate(Bundle savedInstanceState) {
    super.onCreate(savedInstanceState);
    if (getLastCustomNonConfigurationInstance() != null) {
            this.myEntireState = (State) getLastCustomNonConfigurationInstance();
        } else {
            this.myEntireState = new State();
        }
    }
}
Now with data, you can make any object survive a configuration change. But there’s one more thing I want to talk about that was already touched on earlier.
Parcelable
The Parcelable interface can be implemented by objects so that you can put them into a Bundle — for example, to save your activity’s instance state or put them into an Intent. It should be mentioned that you can also put any Serializable class into a Bundle, but this is significantly less efficient. We used this earlier when saving the state of our custom view, but it deserves to be mentioned again since you can use it to make any of your model classes saveable. Let’s take a look at an example implementation:
class ExampleModel implements Parcelable {
    final int dataA;
    final int dataB;

    public ExampleModel(int dataA, int dataB) {
        this.dataA = dataA;
        this.dataB = dataB;
    }

    private ExampleModel(Parcel in) {
        dataA = in.readInt();
        dataB = in.readInt();
    }

    // This is called when it's time for your object to be serialized.
    @Override
    public void writeToParcel(Parcel dest, int flags) {
        dest.writeInt(dataA);
        dest.writeInt(dataB);
    }

    @Override
    public int describeContents() {
        return 0;
    }

    // This is necessary so the system can instantiate your class when loading it from a parcel.
    public static final Creator<ExampleModel> CREATOR = new Creator<ExampleModel>() {
        @Override
        public ExampleModel createFromParcel(Parcel in) {
            return new ExampleModel(in);
        }

        @Override
        public ExampleModel[] newArray(int size) {
            return new ExampleModel[size];
        }
    };
}
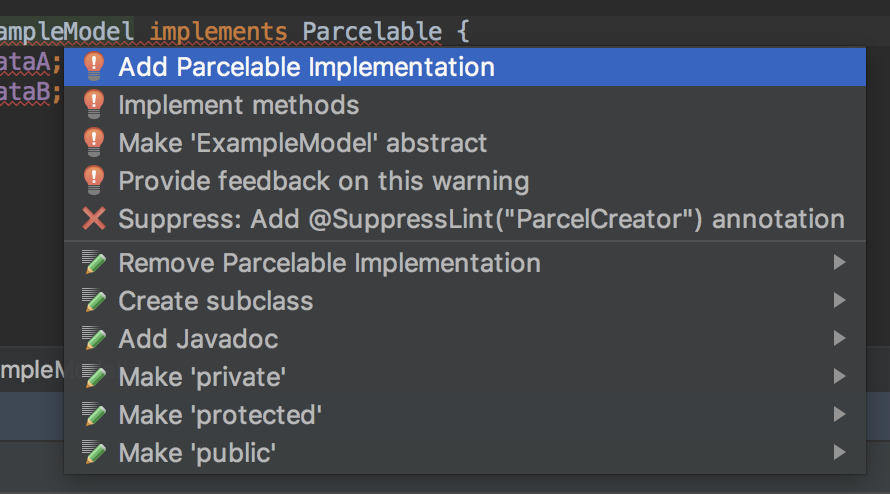
The implementation is actually pretty straightforward; the only special thing is the CREATOR, which is used by the system to obtain instances of your class. If you’re using any modern version of Android Studio, it can even automatically generate the implementation for you.
Using the new ExampleModel from the above code sample is also really simple:
@Override
protected void onSaveInstanceState(@NonNull Bundle outState) {
    super.onSaveInstanceState(outState);
    outState.putParcelable(STATE_EXAMPLE, new ExampleModel(12,34));
}


@Override
protected void onCreate(@Nullable Bundle savedInstanceState) {
    super.onCreate(savedInstanceState);
    if (savedInstanceState != null) {
        ExampleModel model = savedInstanceState.getParcelable(STATE_EXAMPLE);
        ...
Simply use the putParcelable and getParcelable methods.
Conclusion
In this blog post, we looked at making sure that our views remember what the user put into them, as well as ensuring that any derived state is correctly restored when an app is removed from memory or a user rotates their device. We looked at how the Parcelable interface can be used to allow any object to be put into an Bundle. We also discussed what information isn’t appropriate to be saved using onSaveInstanceState.