Creating a Web Component with PDF.js
 Jonathan D. Rhyne

PDF.js is a JavaScript library that can open and display PDF files in the browser. In a previous blog post, we looked at how it’s possible to use PDF.js to embed a PDF document on a webpage.
In this blog post, we’ll now see how we can use PDF.js from within a web component, which will make the process of actually using the library simpler.
Recap
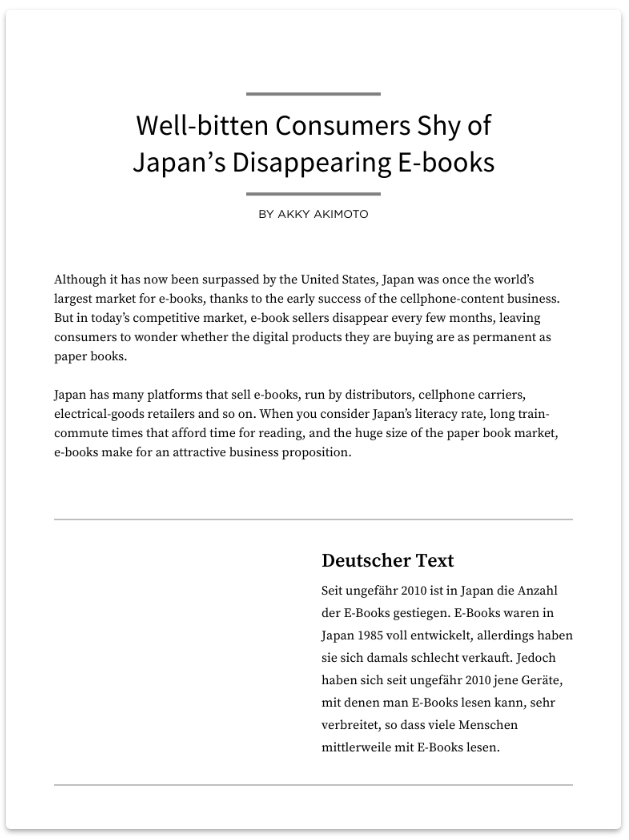
Let’s first revisit the (slightly altered) code from the aforementioned blog post (not using Web Components), which will display the first page of example.pdf:
import pdfjs from "pdfjs-dist";

async function loadPdf(path, element) {
  const pdf = await pdfjs.getDocument(path).promise;
  const page = await pdf.getPage(1);
  const viewport = page.getViewport(1);

  const canvas = document.querySelector(element);
  const ctx = canvas.getContext("2d");
  canvas.width = viewport.width;
  canvas.height = viewport.height;

  const renderCtx = {
    canvasContext: ctx,
    viewport: viewport
  };

  page.render(renderCtx);
}

loadPdf("/pdf/example.pdf", "#pdf-canvas");
After creating a bundle from the example above using a tool like webpack, we can include it in our page:
<canvas id="pdf-canvas"></canvas>
<script src="/js/my-bundle.js"></script>
We should get the following result:
This works well enough. However, the way our code is currently written, we’d need to both manually call loadPdf() for every PDF document we want to display and ensure that the selector matches a unique <canvas> element for the function to use.
It would be nice if we could encapsulate this functionality in a reusable component so that we don’t need to worry about these specifics.
Enter Web Components
Web Components is actually an umbrella term consisting of three independent specifications:
-
Custom elements provide a standardized way for you to create your own HTML elements with a unique name and behavior.
-
Shadow DOM allows you to insert an encapsulated DOM tree into an element. You can use this to write scoped scripts and style sheets that don’t have to worry about things like class name collisions.
-
HTML templates are a way to write markup that is not rendered but can be “stamped” into other locations, or even used as a placeholder element to reassign children passed to your custom elements.
We can use Web Components to create our own custom element that accepts a path to a PDF file and displays it, like so:
<x-pdf pdf="/path/to/pdf"></x-pdf>In order to shorten the example code, we won’t use HTML templates in this blog post — our example is simple enough that we can make do with JavaScript template literals. We will use custom elements and shadow DOM, though. For now, let’s get started writing our own component that can display a PDF!
ℹ️ Note: A complete example project using the code in this post can be found on GitHub.
First Steps
To start creating a custom element, all we need to do is write a class for it that defines its functionality and behavior. For example, we need to specify a way to tell our element where it can find a PDF to display.
Let’s begin with some boilerplate:
class MyPdfElement extends HTMLElement {
  static get observedAttributes() {
    // We need to return this so that we are notified whenever the `pdf`
    // attribute changes.
    return ["pdf"];
  }

  constructor() {
    super();
  }

  attributeChangedCallback(attr, oldVal, val) {
    console.log(
      `[MyPdfElement] Attribute '${attr}' changed from '${oldVal}' to '${val}'`
    );
  }
}

// Register our element so that we can use it in our HTML.
customElements.define("x-pdf", MyPdfElement);
Here in our example, we first need to define which attributes we care about in the static getter, observedAttributes.
Now, when we instantiate our element by writing <x-pdf pdf="/pdf/example.pdf"></x-pdf>, we should see the following in our console:
[MyPdfElement] Attribute `pdf` changed from `null` to `/pdf/example.pdf`.
It works! Now all we need to do is wire our original example up to our custom element using PDF.js.
One of the problems with our original implementation using PDF.js was that when we wanted to show a PDF, we needed to create a canvas element ourselves, and this element also needed to have a unique id. Shadow DOM can solve this problem nicely for us.
Setting Boundaries
With shadow DOM, we can have two elements with the same id. How? Well, if we put those two elements in two different shadow DOM trees, then each of those elements will not be visible to outside code unless it explicitly queries inside a tree.
What this means for us is that we can create a canvas inside our PDF element and not have to worry about collisions. In fact, we don’t even need to use an id, since we know that it is the only <canvas> in the shadow DOM tree!
So with that explained, let’s add the functionality we described:
import pdfjs from "pdfjs-dist";

class MyPdfElement extends HTMLElement {
  static get observedAttributes() {
    return ["pdf"];
  }

  constructor() {
    super();
    this.readyPromise = new Promise(resolve => {
      this.resolveReady = resolve;
    });
  }

  // Triggered when the element has been attached to the regular DOM. We
  // can do important work after this point.
  connectedCallback() {
    // We resolve this promise here so that code elsewhere knows when it
    // can operate on the DOM.
    this.resolveReady();

    // Create our shadow DOM tree. Setting `mode` to `'open'` allows us to
    // access the shadow DOM from `this.shadowRoot`.
    this.attachShadow({ mode: "open" });

    // Assign our HTML structure and scoped styles.
    this.shadowRoot.innerHTML = `
      <style>
        canvas {
          box-shadow: 0 3px 6px #0004;
          border-radius: 6px;
        }
      </style>

      <canvas></canvas>
    `;
  }

  attributeChangedCallback(attr, oldVal, val) {
    if (attr === "pdf" && val != null) {
      // Invoke PDF.js when we have been given a path. We ignore `null` for
      // when the attribute is removed.
      this.setPdf(val);
    }
  }

  async setPdf(path) {
    await this.readyPromise;

    const pdf = await pdfjs.getDocument(path).promise;
    const page = await pdf.getPage(1);
    const viewport = page.getViewport(1);

    // We can simply query for the single `<canvas>` in our shadow DOM!
    const canvas = this.shadowRoot.querySelector("canvas");

    const ctx = canvas.getContext("2d");
    canvas.width = viewport.width;
    canvas.height = viewport.height;
    const renderCtx = {
      canvasContext: ctx,
      viewport: viewport
    };

    page.render(renderCtx);
  }
}

customElements.define("x-pdf", MyPdfElement);
There are a few things in this code that we haven’t seen before. We introduced a new callback, connectedCallback, which is called when our custom element has been inserted into the DOM. We start by creating the shadow DOM and inserting HTML into it. As you may have noticed, we write our styles as an inline element so that they are contained within the shadow DOM.
Another change was the addition of the setPdf() function. With the exception of getting a reference to the <canvas> element from the shadow DOM, this code is mostly unchanged from our original example. However, it is now run every time the pdf attribute changes, allowing us to simply run the following to change the PDF:
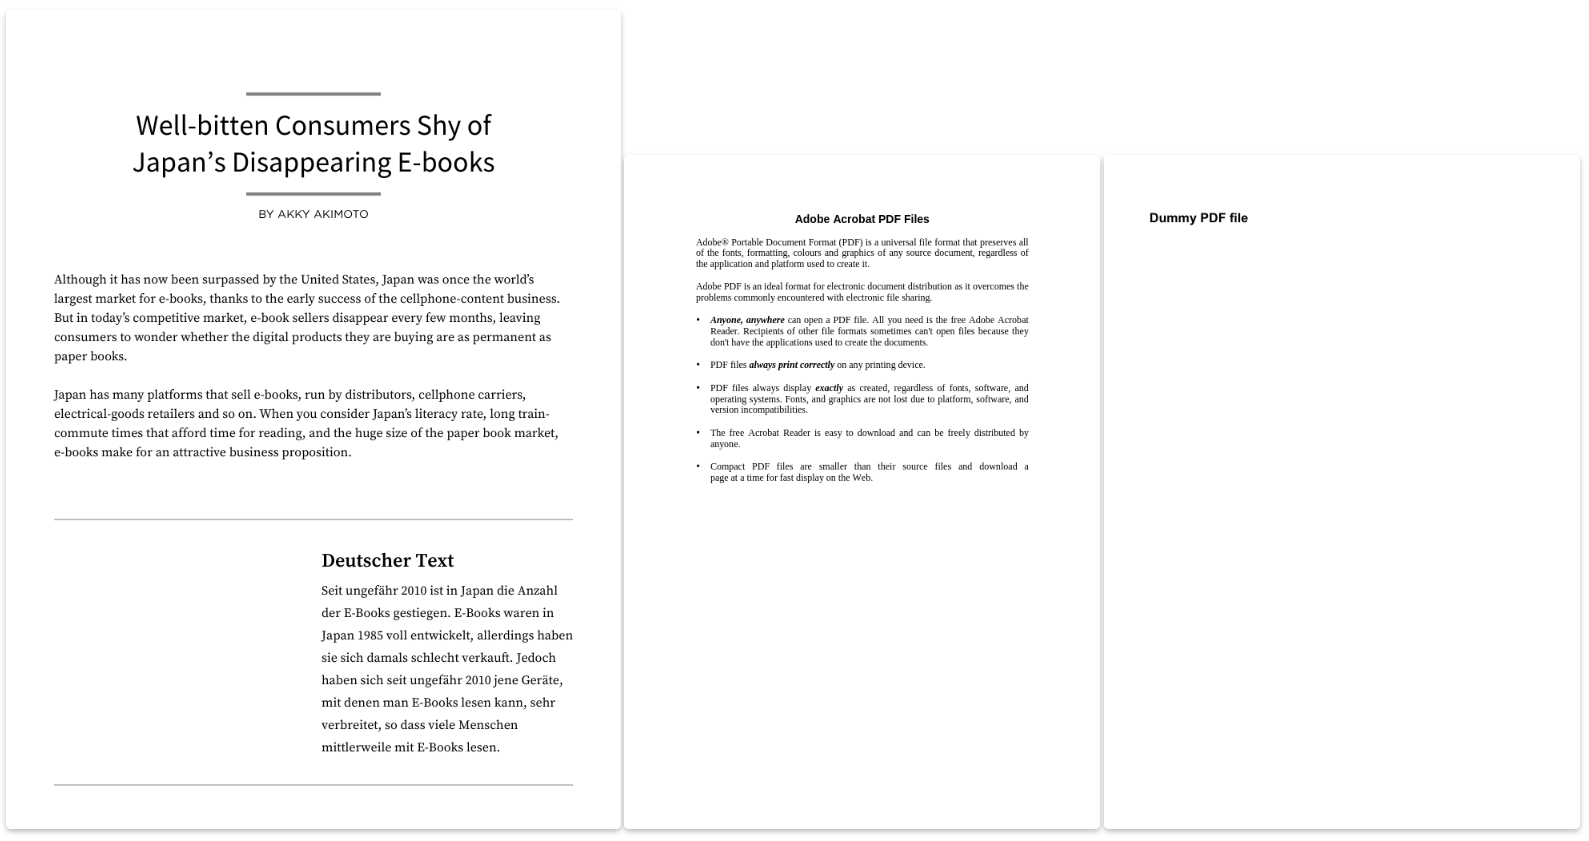
myPdfElement.setAttribute("pdf", "/pdf/other-document.pdf");With these changes, we can finally test our component. In the following example, I’ll invoke the custom element we just made with three different PDFs, all on the same page:
<x-pdf pdf="/pdf/example.pdf"></x-pdf>
<x-pdf pdf="/pdf/second.pdf"></pdf>
<x-pdf pdf="/pdf/third.pdf"></pdf>
And the result is what we expect — three PDFs rendered side by side! As consumers of this web component, we don’t have to worry about name collisions or even how to display the PDF. Let’s take a look!
Conclusion
In this blog post, we used Web Components to encapsulate the implementation details of displaying a PDF. Compared to alternative systems that allow defining components, our solution:
-
Uses real encapsulation via shadow DOM. No class name mangling required!
-
Does not require external dependencies, aside from PDF.js.
-
Is framework-agnostic. You can use the component in a React, Vue, or vanilla JS app.
Although PDF.js meets our needs for this example, it is somewhat lacking in documentation and support for advanced features such as adding and editing annotations. If you want a well-tested PDF SDK that supports those features and more, check out PSPDFKit for Web!

Jonathan joined PSPDFKit in 2014. As CEO, Jonathan defines the company’s vision and strategic goals, bolsters the team culture, and steers product direction. When he’s not working, he enjoys being a dad, photography, and soccer.


