How to Use Android App Bundles
 Anastasiia Zhuravleva
Today I would like to talk about Android App Bundles, what exactly they are, and how you can create your own.
What Is an App Bundle?
An Android App Bundle is a fairly recently introduced upload format for the Google Play Store that entirely replaces the old single APK format. It includes all of an app’s compiled code and resources, just like before, but it offloads the final APK generation and signing tasks to Google Play.
The Android App Bundle is used by the new application serving model, Dynamic Delivery. The main responsibility of Dynamic Delivery is to generate and serve APKs specifically tailored to each user’s device configuration. This involves “splitting” the application, and it results in the user only downloading the code and resources they need, which in turn means a smaller application download, with less space occupied on a device after installation.
Configurations Used By Dynamic Delivery
Dynamic Delivery configures the optimized split configuration based on a device’s ABI, localization, and screen density. Below I’ll go into more detail about each configuration criterion used for the split.
Application Binary Interface (ABI)
The ABI defines how an application’s machine code is supposed to interact with a system at runtime, and this all depends upon a device’s CPU and CPU instruction set (for example, arm64 or x86). In the case of Dynamic Delivery, once a device’s ABI is determined, it has no use for other ABI configurations and they can be removed from the final bundle.
Localization Resources
Localizing an application essentially means creating different string translations for each language the application should be in. When the application was shipped as a single APK using the old approach, it contained all localizations at once, even though there was hardly a need for that. App bundles optimize this process by delivering only the language resources that match the device’s system locales. However, if the user decides to change the system locale after the app is already installed, resources for missing languages will be automatically downloaded. For some applications, the localization case might go even further and include locale-specific videos or imagery. As a result, those applications will benefit even more from optimized bundle delivery.
Screen Density Resources
An Android application should be able to run on a variety of different screen sizes and pixel densities. Android usually performs basic scaling and resizing to adapt a UI to different screens, but to ensure a better UX, additional work must be done.
This usually includes the following:
-
UI layouts depending on the screen configuration — for example, layouts specifically designed for watch, phone, tablet, or TV.
-
Bitmaps to match each screen density.
-
Icon drawables for each screen density if they are too complex for a mipmap drawable.
Again, the older strategy with the single APK would’ve delivered all those resources at once, even though a device would not have had much use for most of them. But app bundles ensure that only those resources that correspond to a device’s screen size and density will be delivered.
How to Make an App Bundle
The easiest way to create an app bundle would be by using Android Studio version 3.2 or higher. Navigate to Build > Generate Signed Bundle / APK…, and the following UI will be presented.
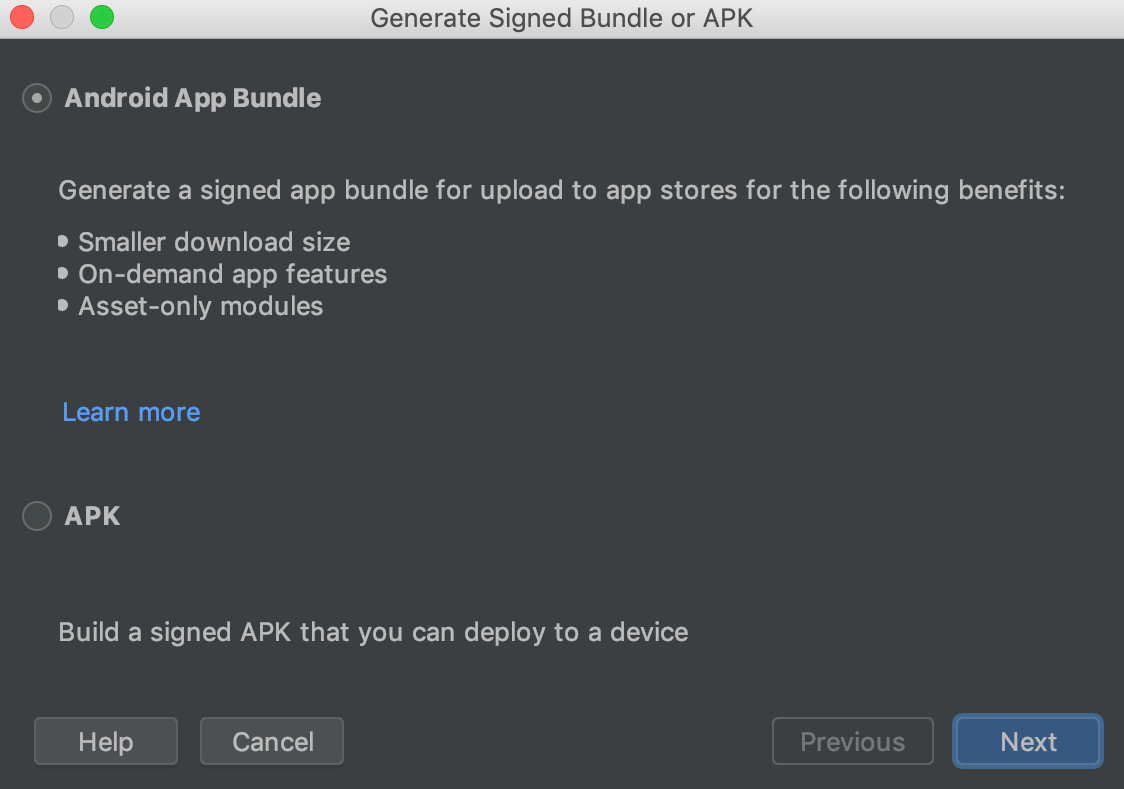
As you can see, the generation of an app bundle is a default option. Selecting Next will take you through the usual keystore selection dialog, which is no different than it was during the old APK signing process. After that, Android Studio will build the app bundle and present us with an .aab file that’s ready to be uploaded to Google Play.
How to Test the App Bundle
After you have your .aab file, you might want to test its behavior when deployed on a real device. There are two ways to perform this testing process:
-
Through the Google Play Store, by uploading an app bundle to one of the prerelease channels (internal, alpha, or beta) and getting it on the device from there.
-
Using the bundletool to deploy on the device through the command line.
The first way, through the Google Play Store, is pretty straightforward and offers basic testing to make sure the app bundle works. The second option offers more granular testing and a more detailed under-the-hood look. Let’s talk about it more.
When you selected Generate Signed Bundle / APK… as described in the previous section and then went through the steps of creating the app bundle, you were actually already using the bundletool. Android Studio has another tool located at Build > Build Bundle(s). This tool automatically creates the required APK split for the specified device and uploads it to the aforementioned device for testing. It is simply done by editing the desired run/debug configuration and setting the deploy option to APK from app bundle, as shown below.
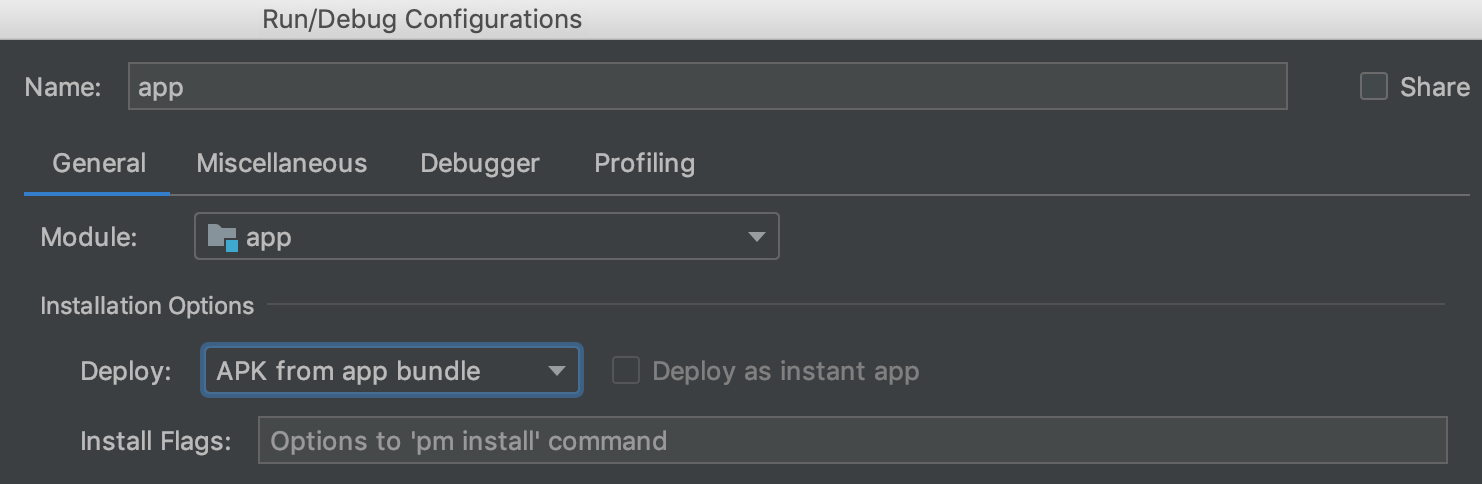
After doing this, you can run the configuration as usual and bundletool will perform all the required steps for you to be able to test your app bundle split. Just don’t forget to disable it by setting the deploy option back to Default APK after testing is done; otherwise, it will perform the app bundle’s build on each configuration run, which will add to the overall build time.
Apart from the built-in Android Studio bundletool access points, the bundletool also can be used directly from the command line. For example, here is how to create a set of unsigned APKs for all possible configurations supported by the current app bundle:
bundletool build-apks --bundle=/path/to/bundle/my_bundle.aab --output=/path/to/apks/my_apks.apks
And here is how to measure the estimated download sizes of APKs in an APK split:
bundletool get-size total --apks=/path/to/apks/my_apks.apks
This estimation can also be viewed in the Google Play Console after you upload your app bundle there. More on this in the next section.
Check out the bundletool official webpage for the list of supported features.
How to Upload to the Play Store
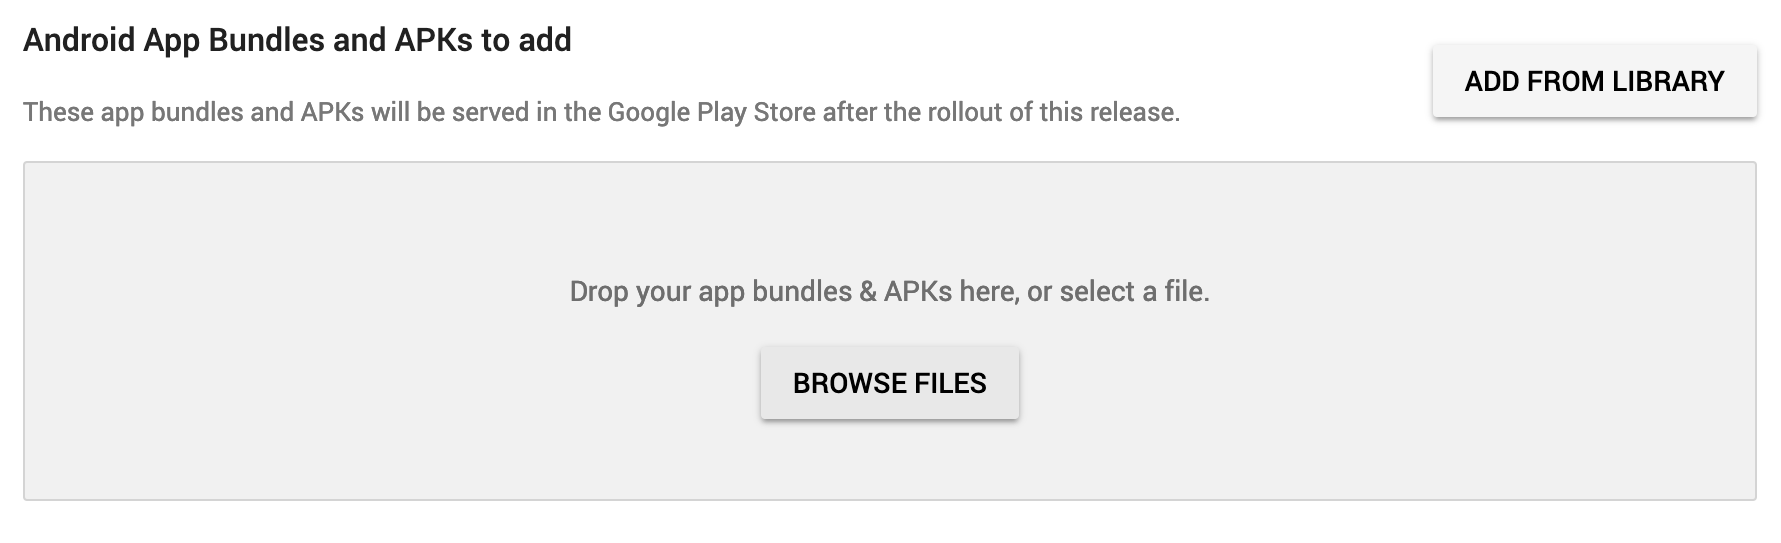
Now that you’ve got your .aab file made and tested, head over to the Google Play Console and navigate to the page where APKs are uploaded for distribution. Notice how it also mentions that it accepts app bundles.
After the upload of the app bundle is finished, an important message will be shown. It details the estimated percentage of how much using the app bundle format instead of a single APK saved in storage space and network traffic while downloading:

Beware that this result differs from application to application, but it almost always it shows a significant APK size reduction.
Google Play Console also allows you to view all possible device configurations. Click on Explore App Bundle and it will present a report similar to the one below.
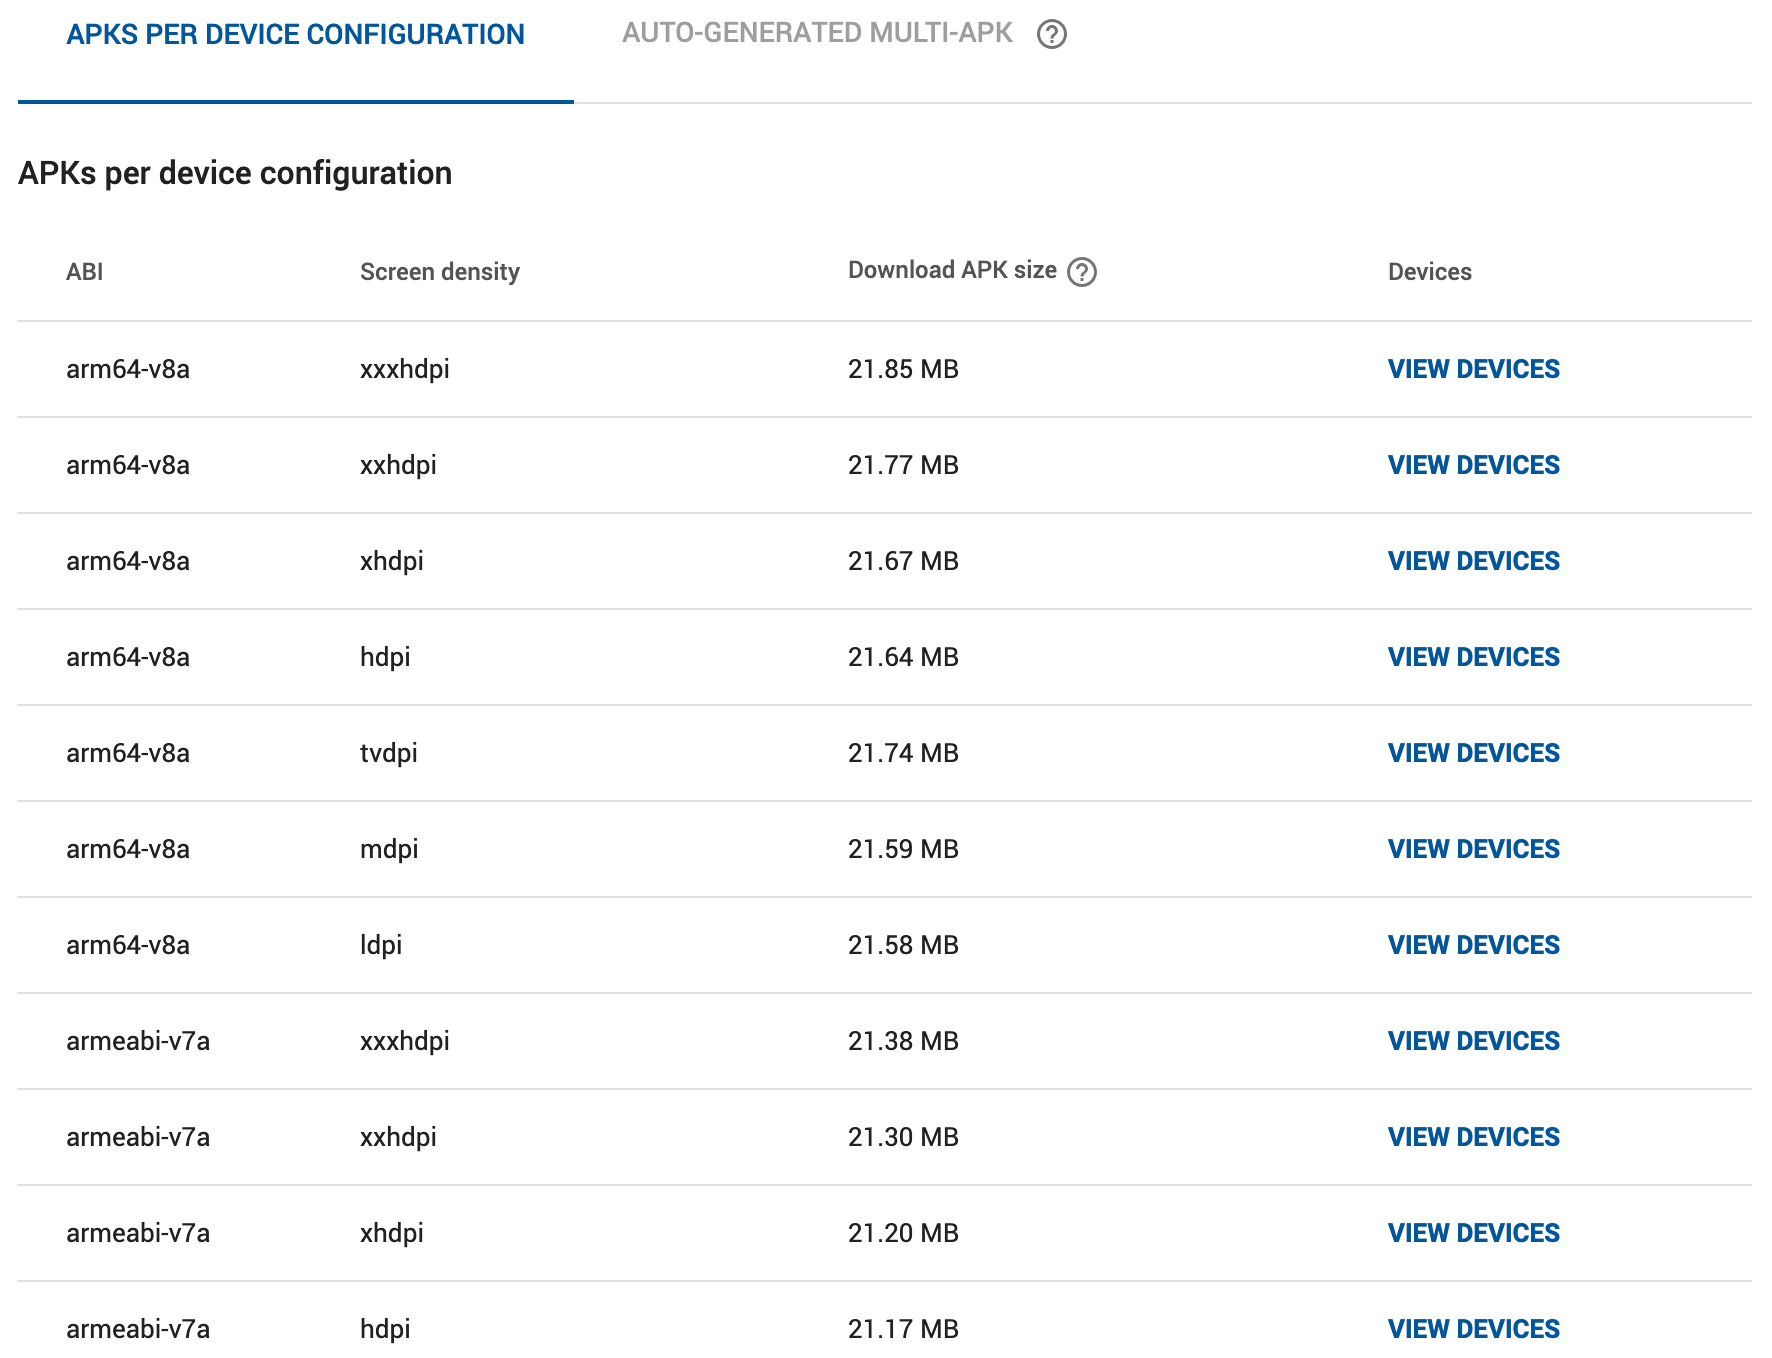
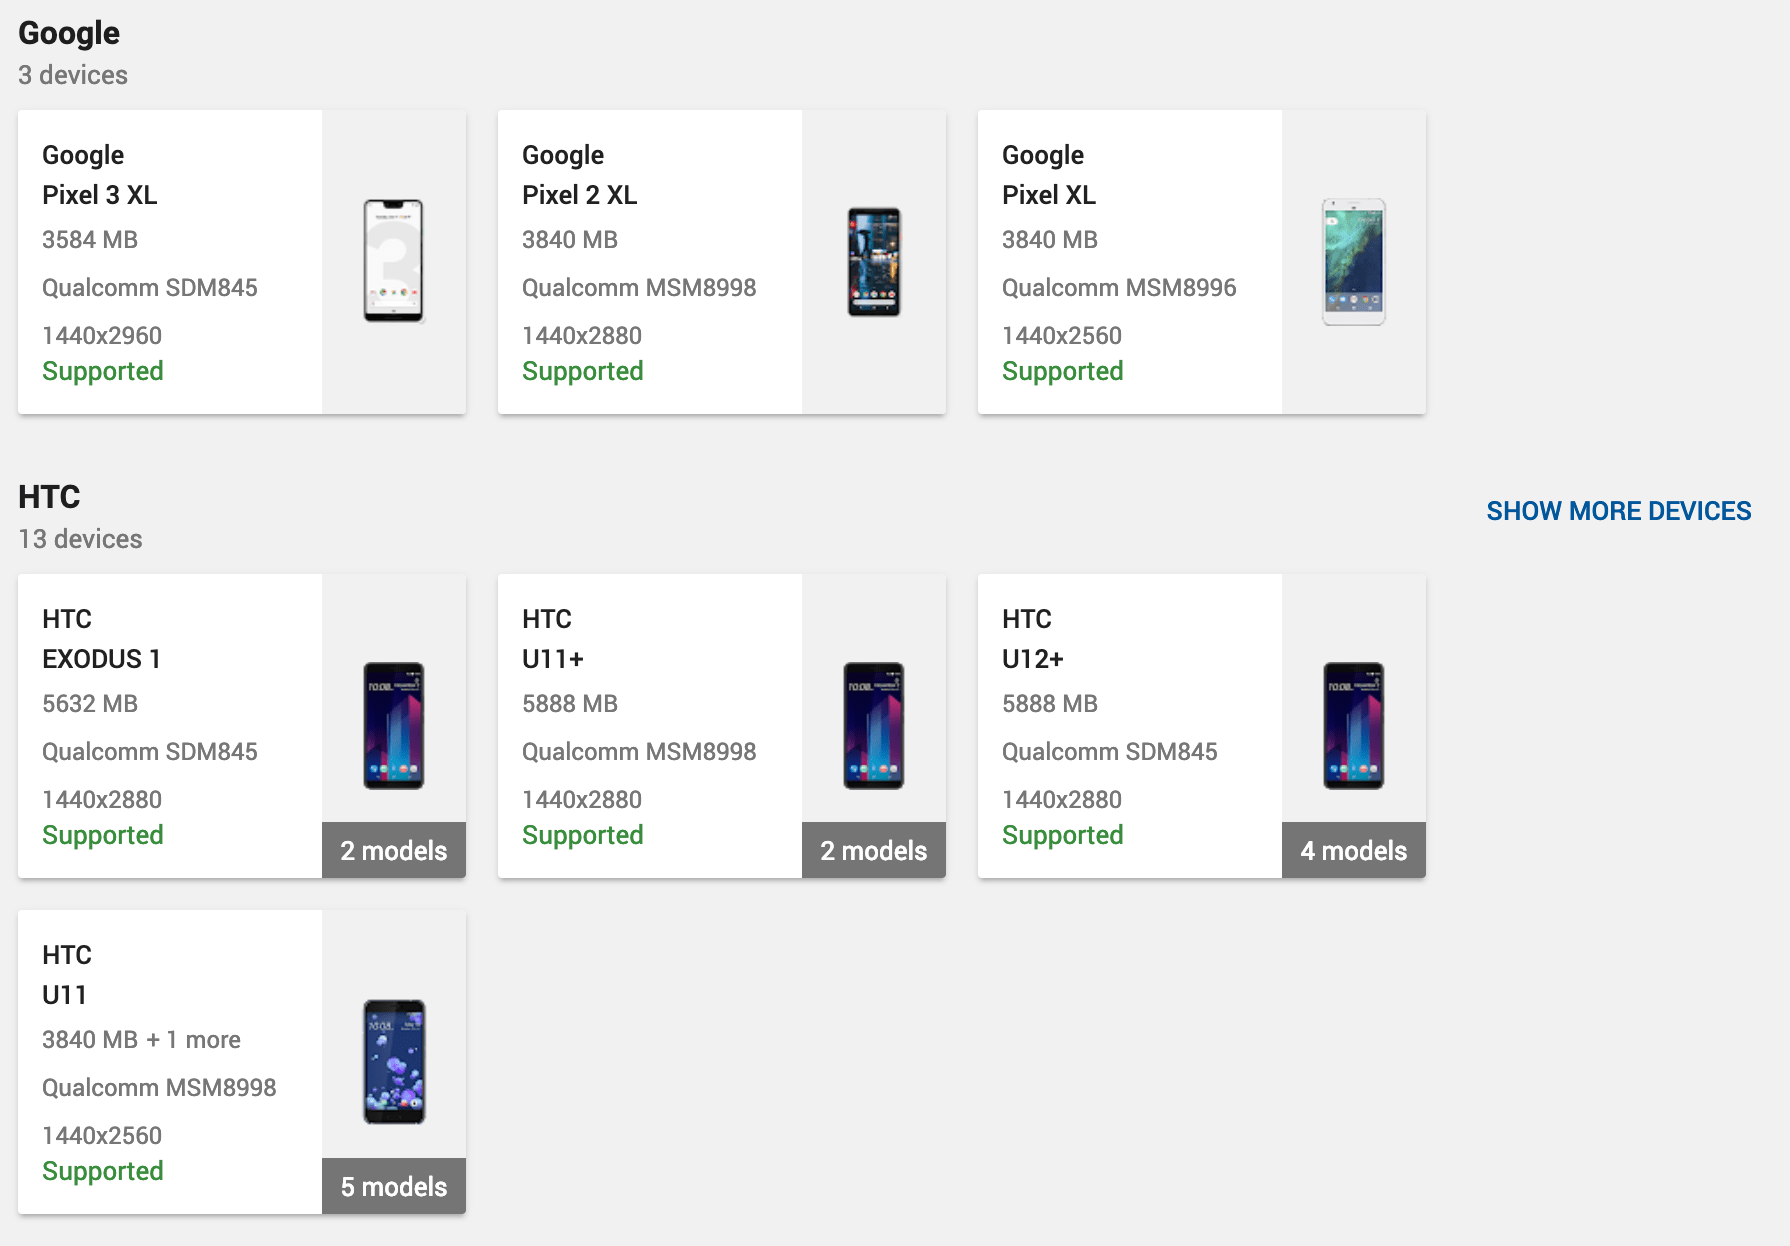
We can see that it indeed contains APKs for each possible device configuration, and it also allows you to view specific devices matching each combination. For example, there are a few mentions on the list that are shown after pressing View Devices next to the arm64-v8a ABI with xxxhdpi screen density.
Automatic Upload to Play Store
In the case of frequent application updates, it makes sense to skip the manual build and upload steps of your app bundle and instead automate this procedure, thereby making the development more efficient. If this fits your use case, we suggest you take a look at the gradle-play-publisher plugin from Triple-T, as it provides Gradle scripts to upload your app bundle and other app details (such as release notes, an app’s description, the title, etc.) to the Google Play Store.
Conclusion
And there you have it: an introduction to Android App Bundles, what they are made of, and how to make and distribute your own.