This guide will take you through the steps necessary to integrate PSPDFKit into a newly created Mac Catalyst application. By the end, you’ll be able to present a PDF document in the default PSPDFKit UI.

PSPDFKit for Mac Catalyst can be evaluated without a trial license key, but with certain limitations (such as a red watermark added to documents). To evaluate without limitations, get a trial key.
PSPDFKit does not collect any data during your evaluation of the SDK.
Requirements
-
A computer running macOS
Creating a New Xcode Project
-
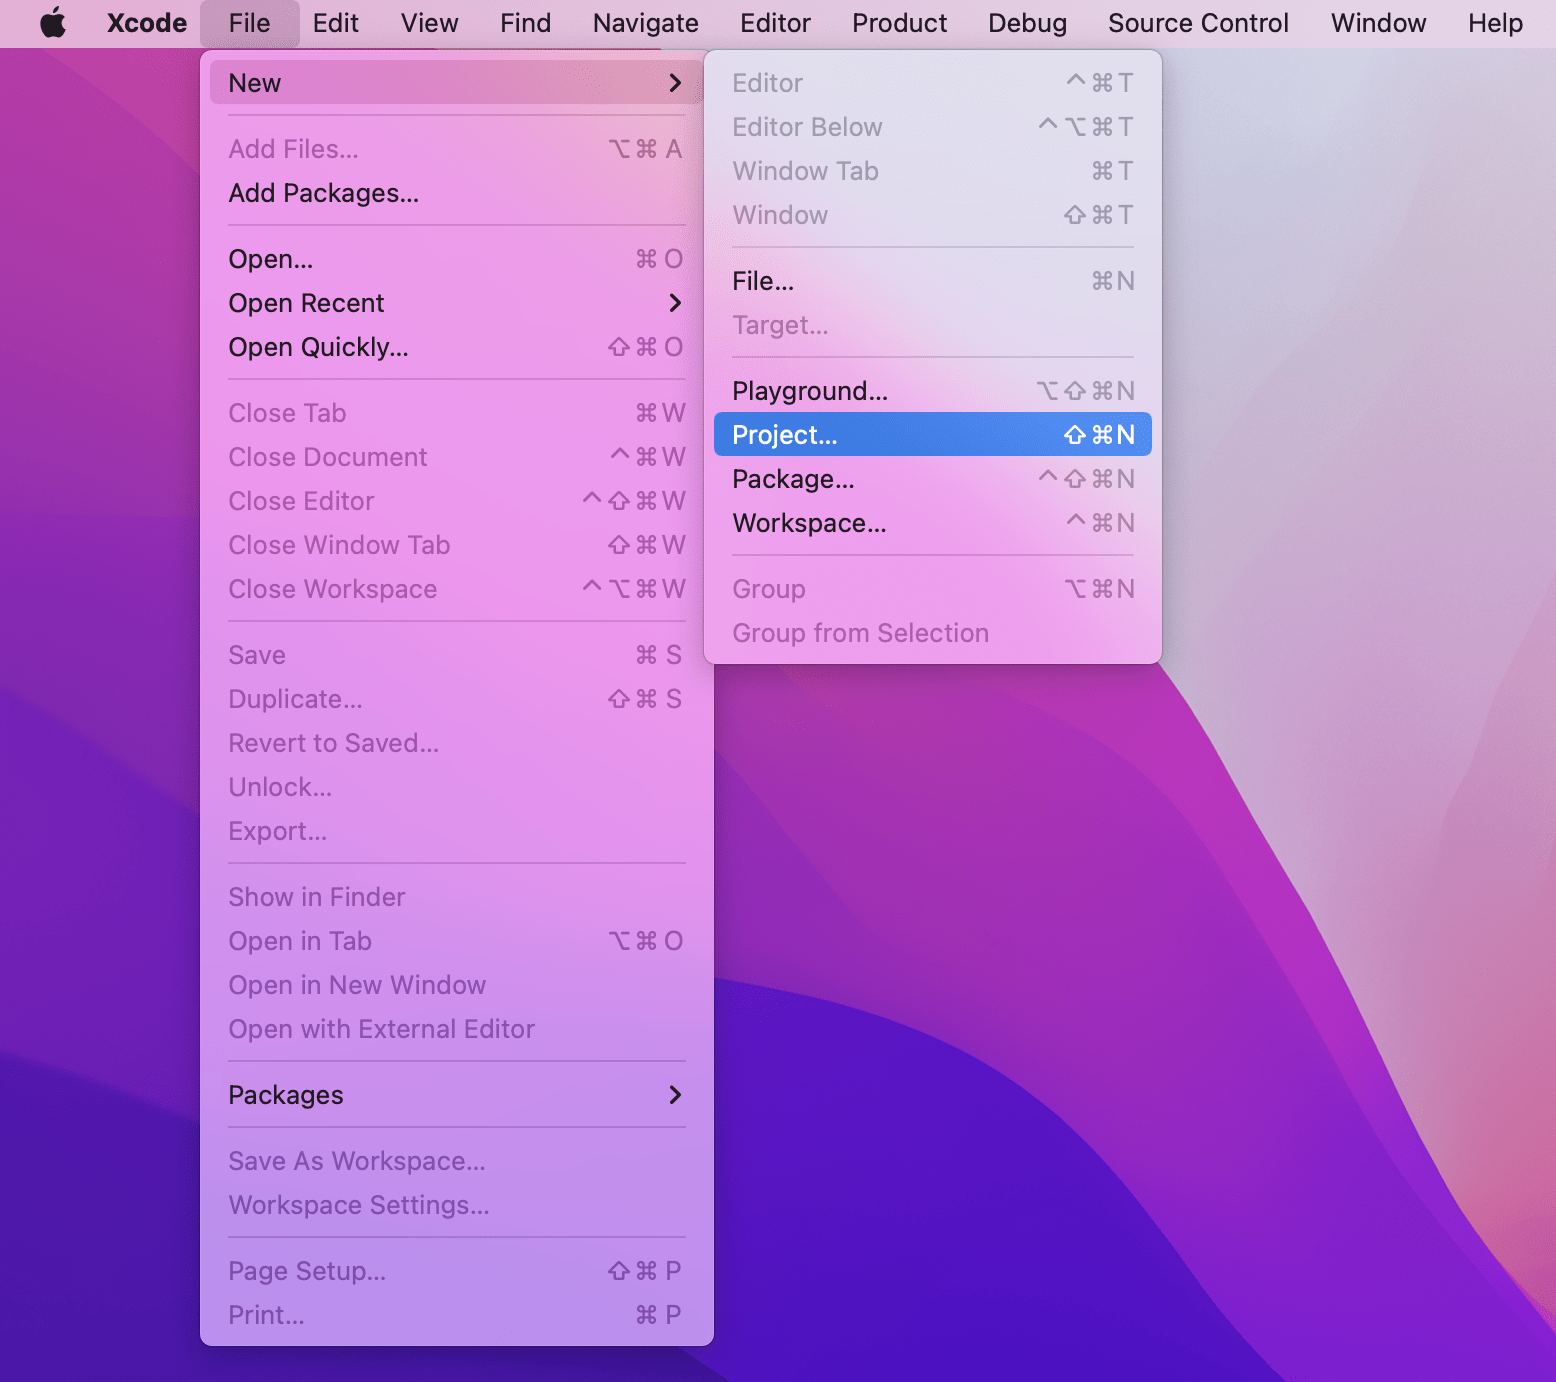
Open Xcode and select File > New > Project… to create a new project for your application:
-
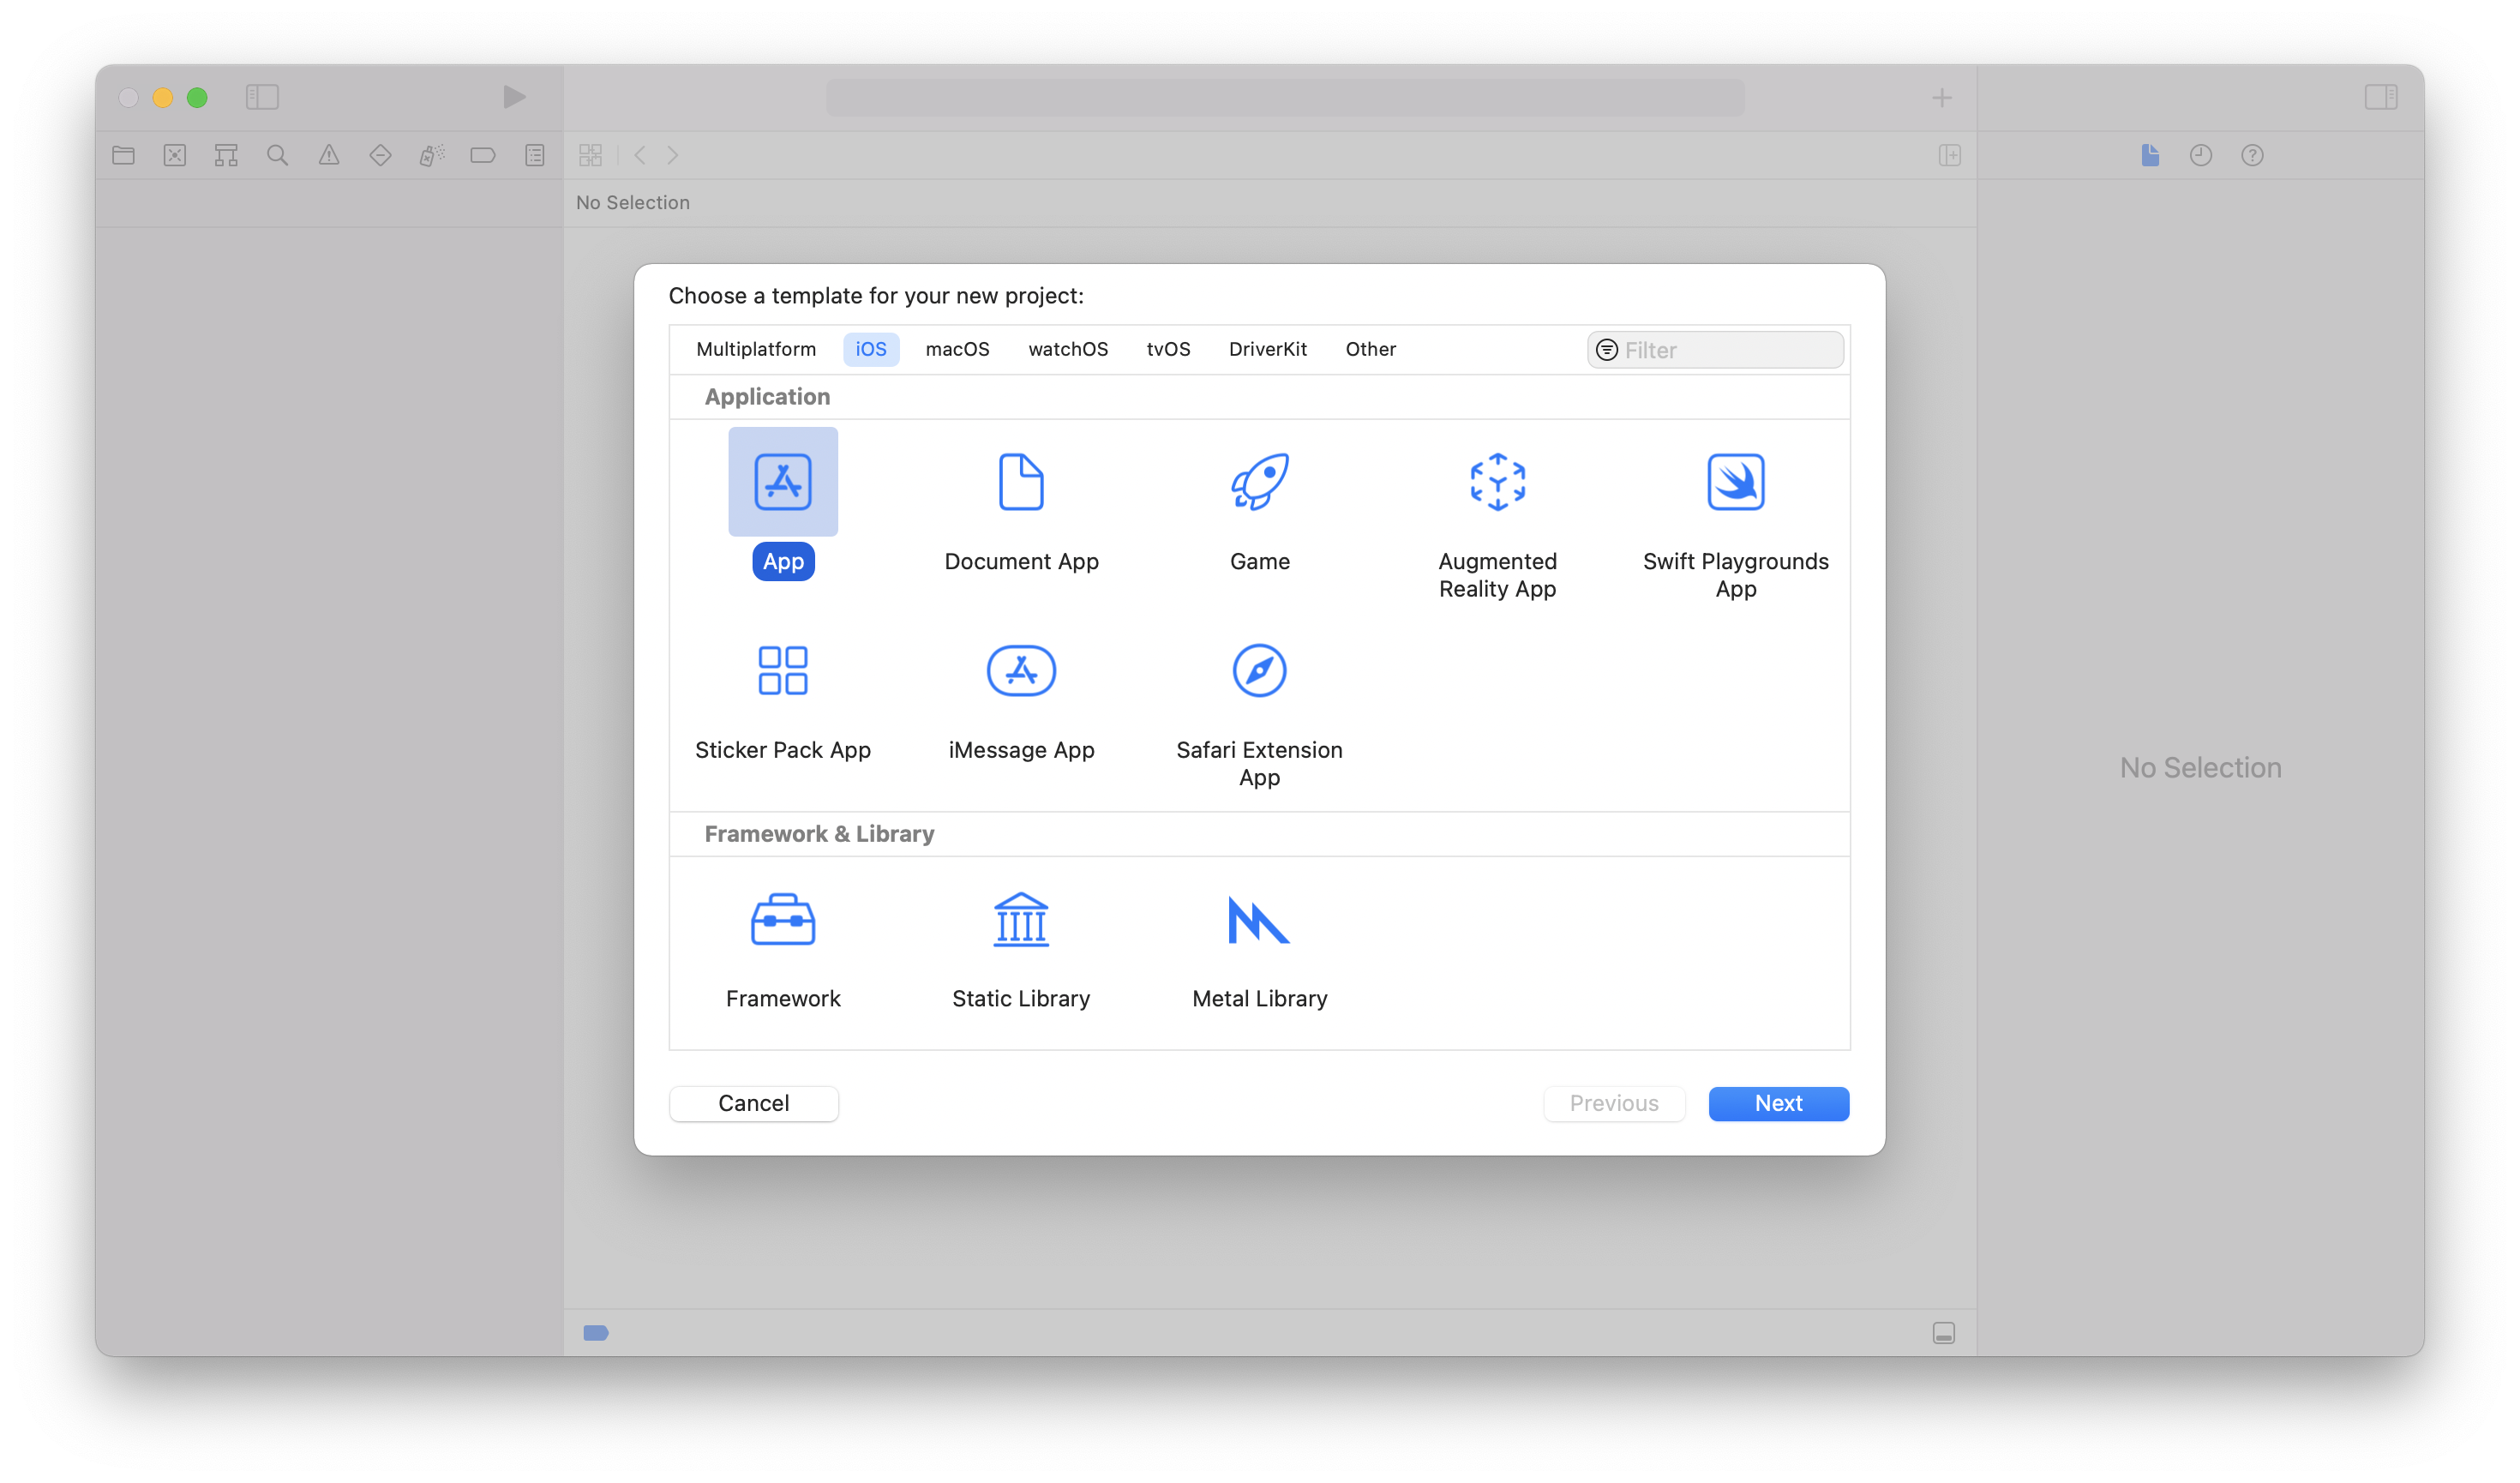
Choose the App template for your project. Mac Catalyst is a technology that enables creating Mac versions of iPad apps, so make sure to select the iOS platform at the top:
-
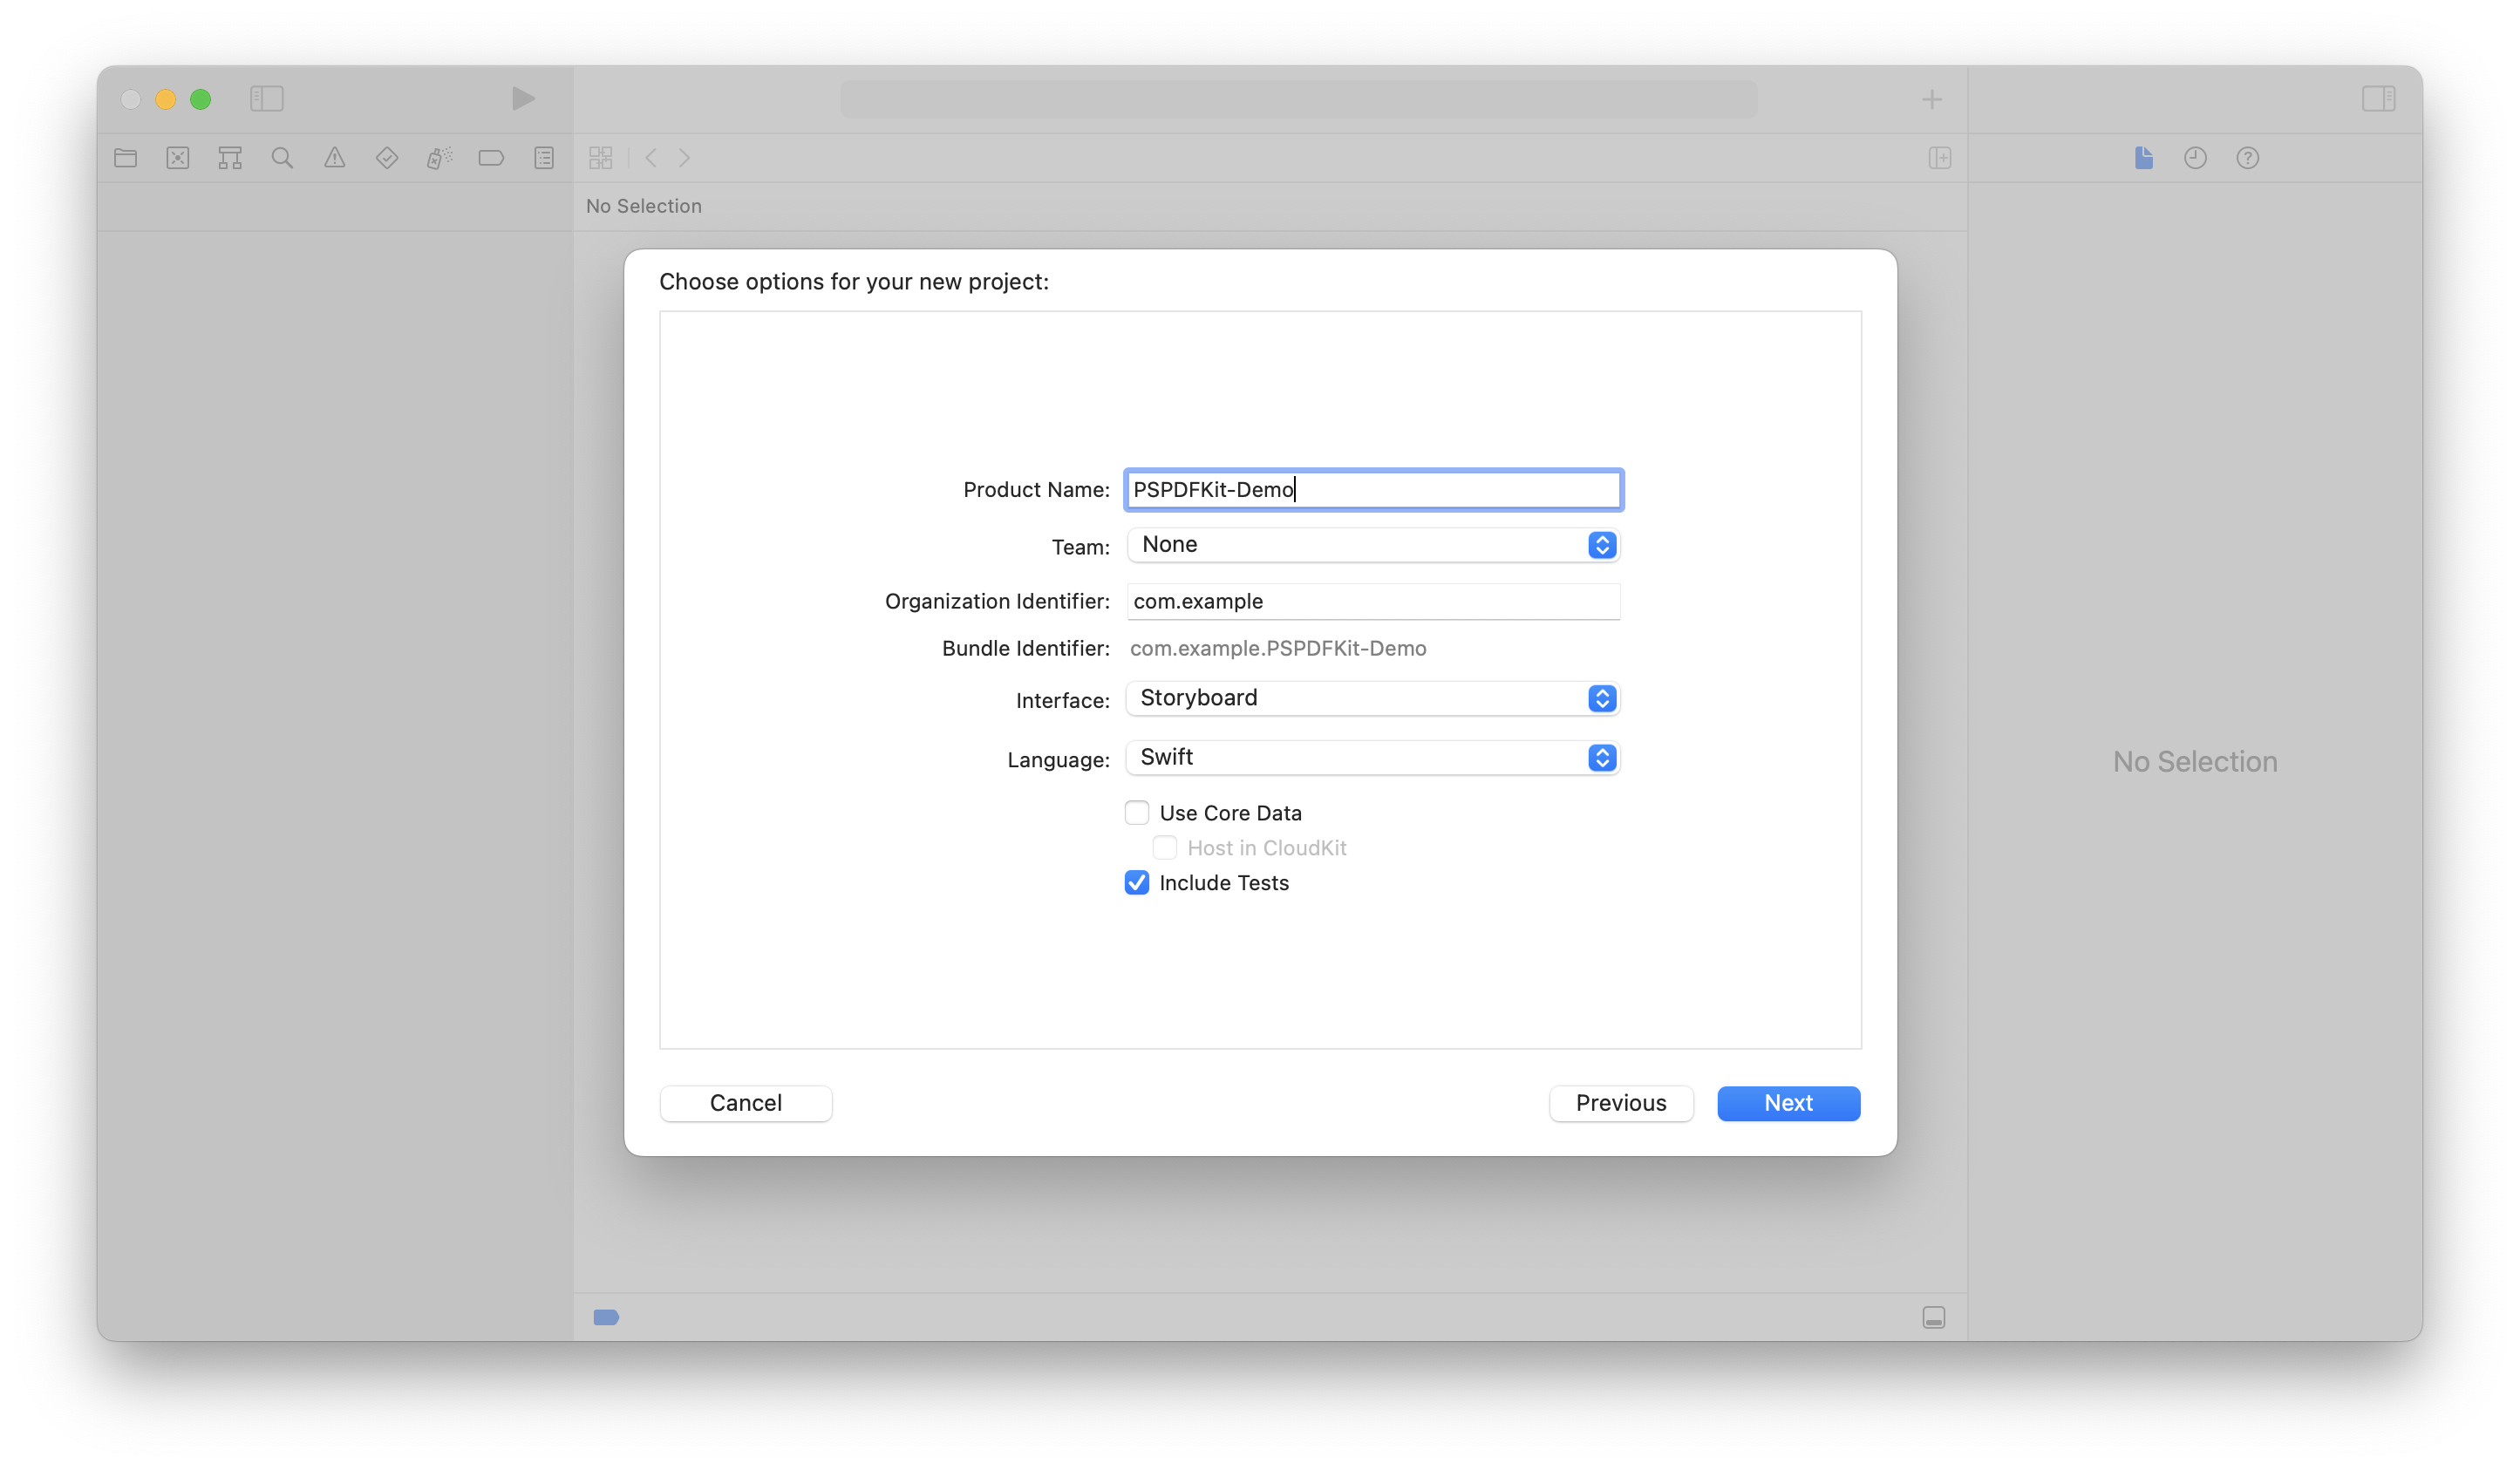
When prompted, enter your app name (PSPDFKit-Demo) and your organization identifier (com.example) and choose Storyboard for the interface:
-
Click Next and select the location to save the project.
-
Click Create to finish.
-
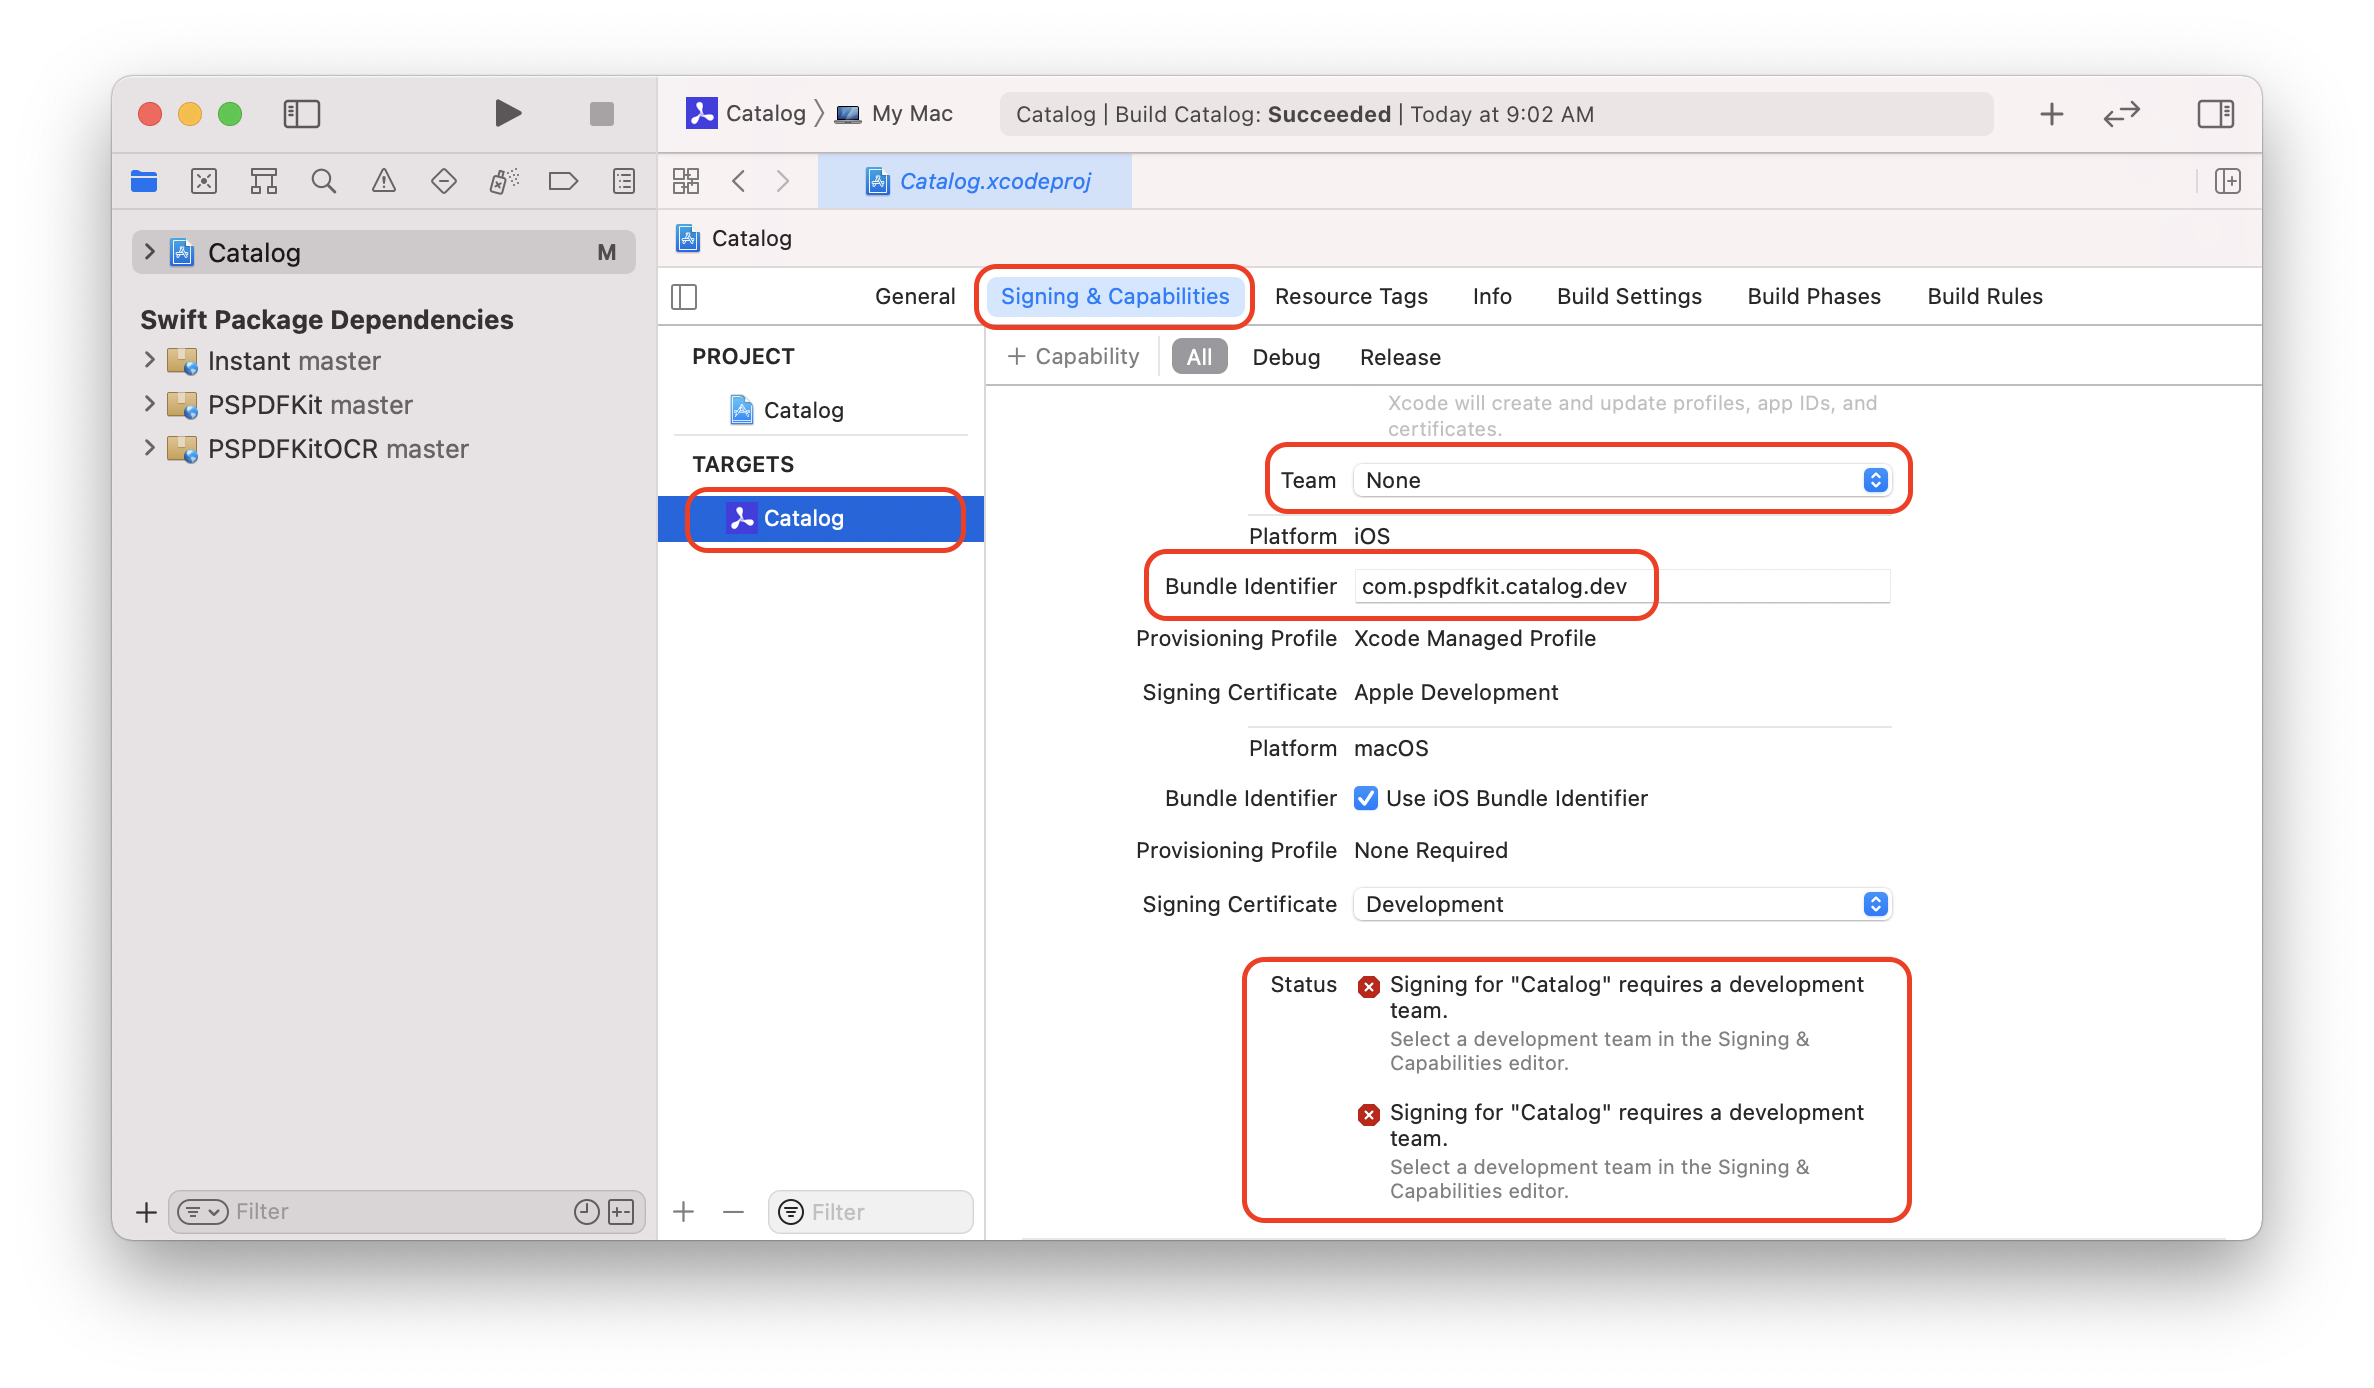
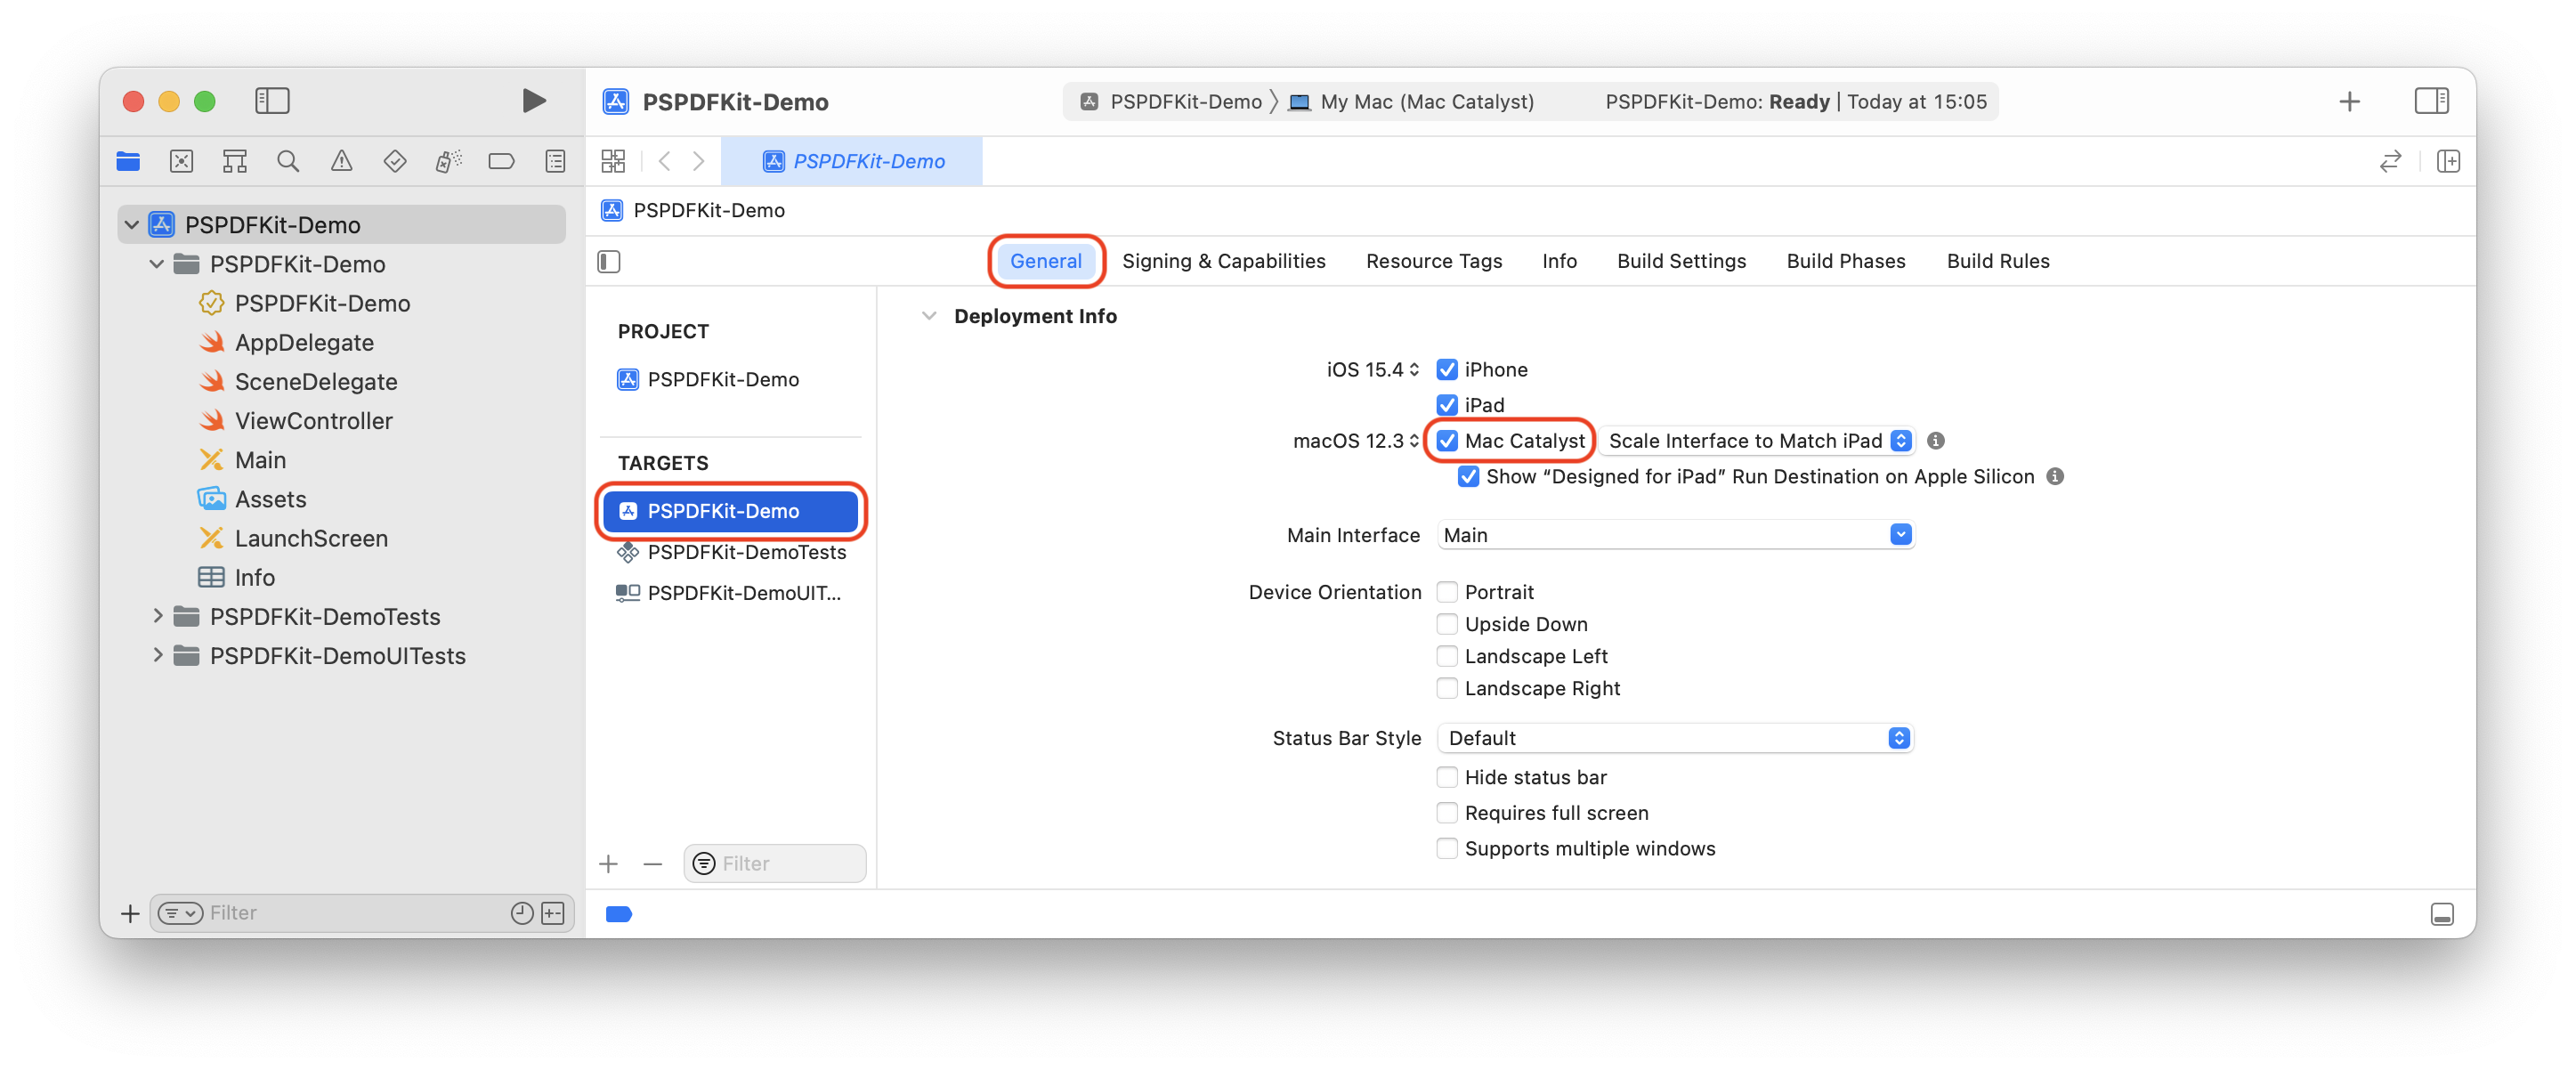
Enable Mac support for your target:
Adding the PSPDFKit Swift Package
-
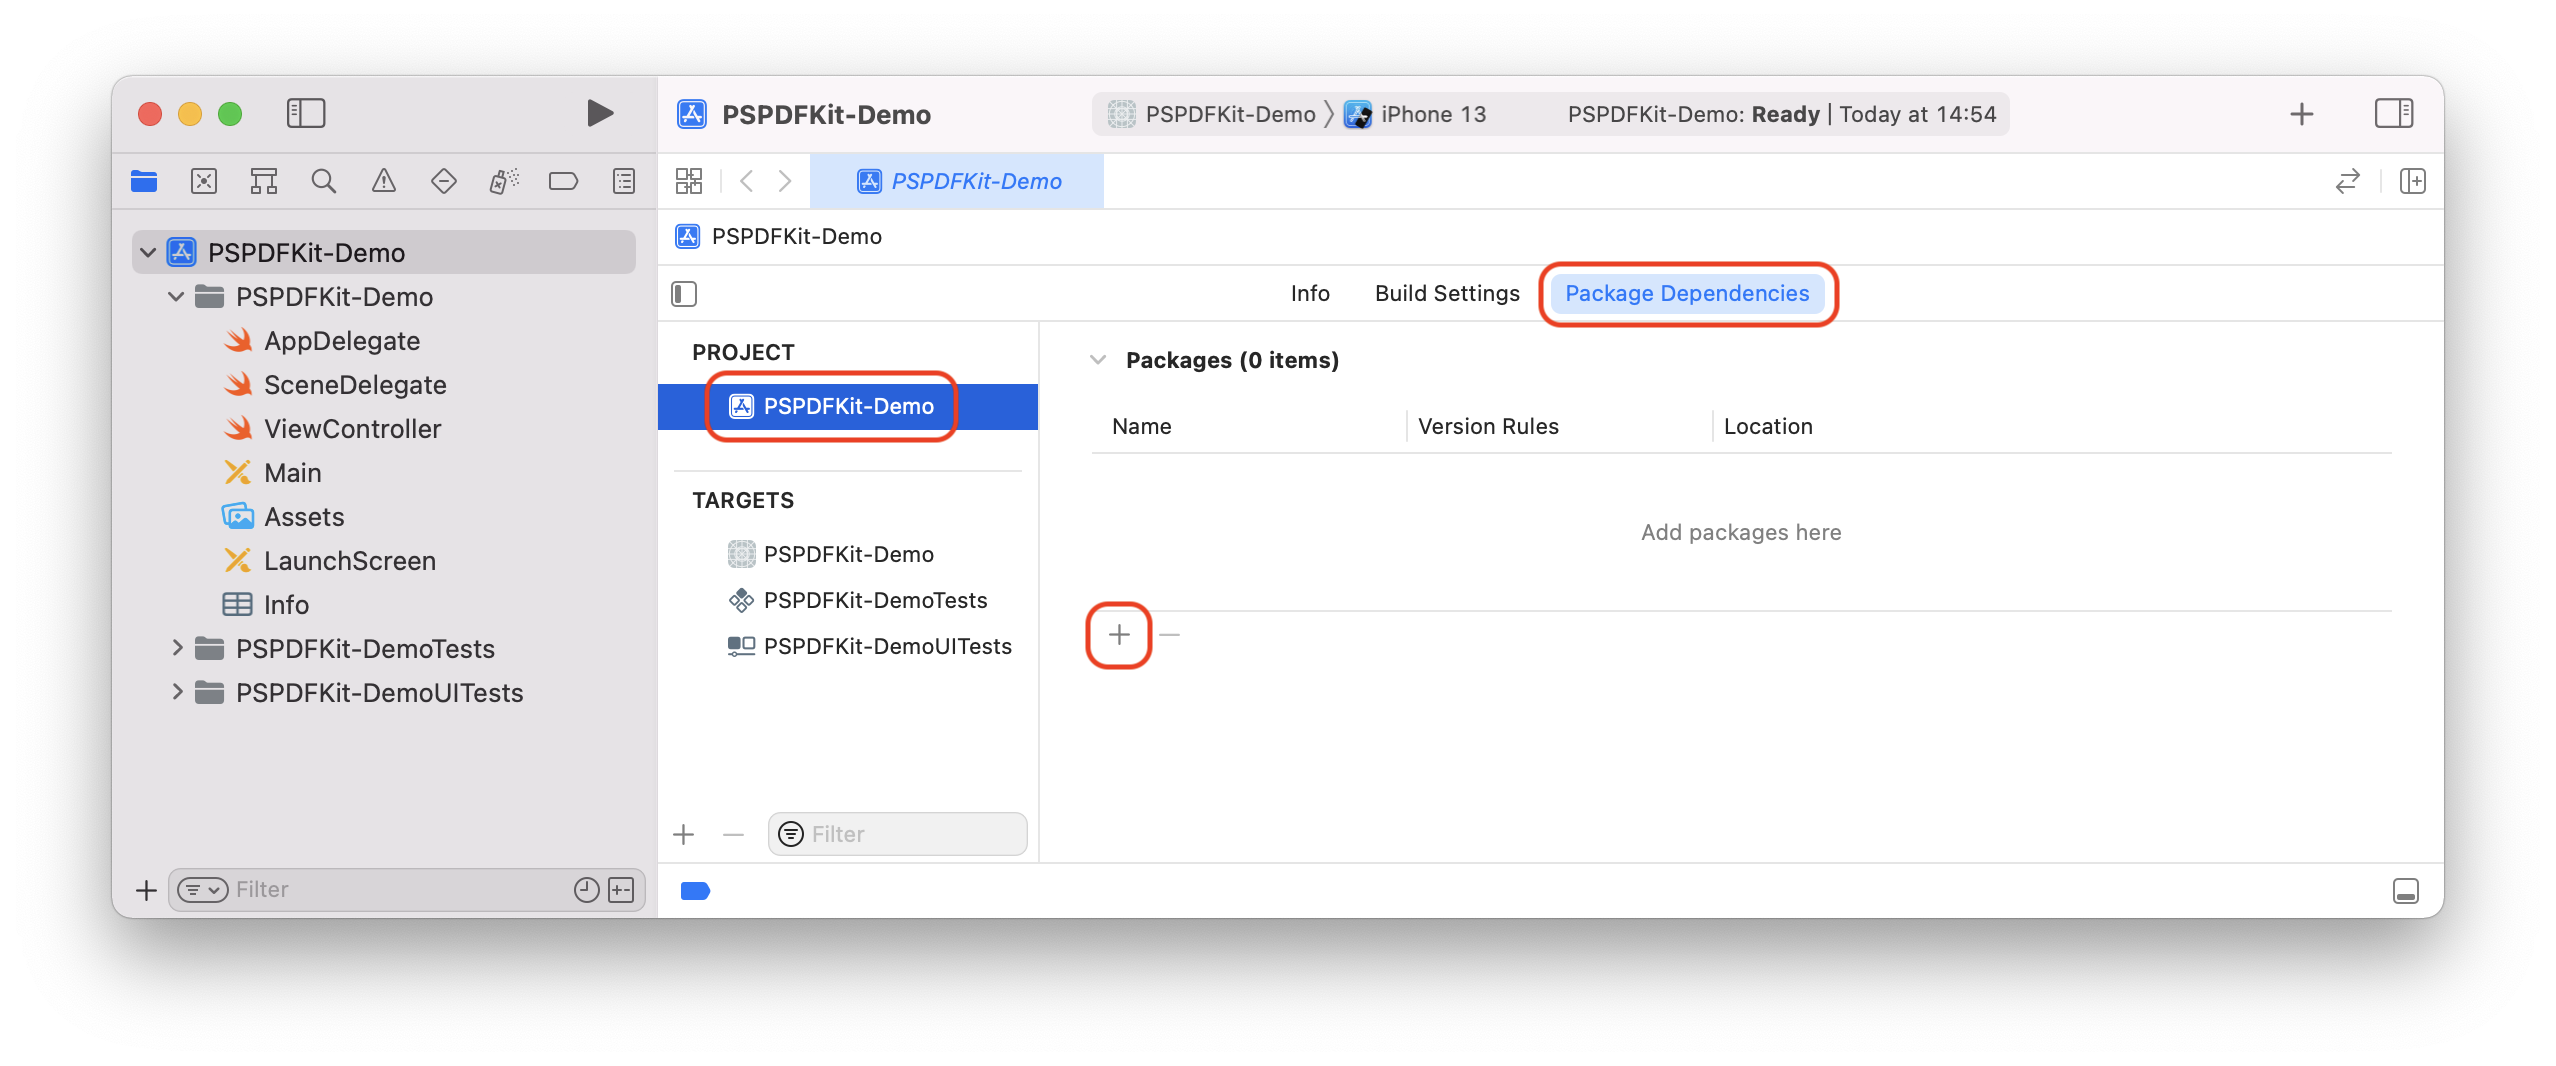
Open your application in Xcode and select your project’s Package Dependencies tab.
-
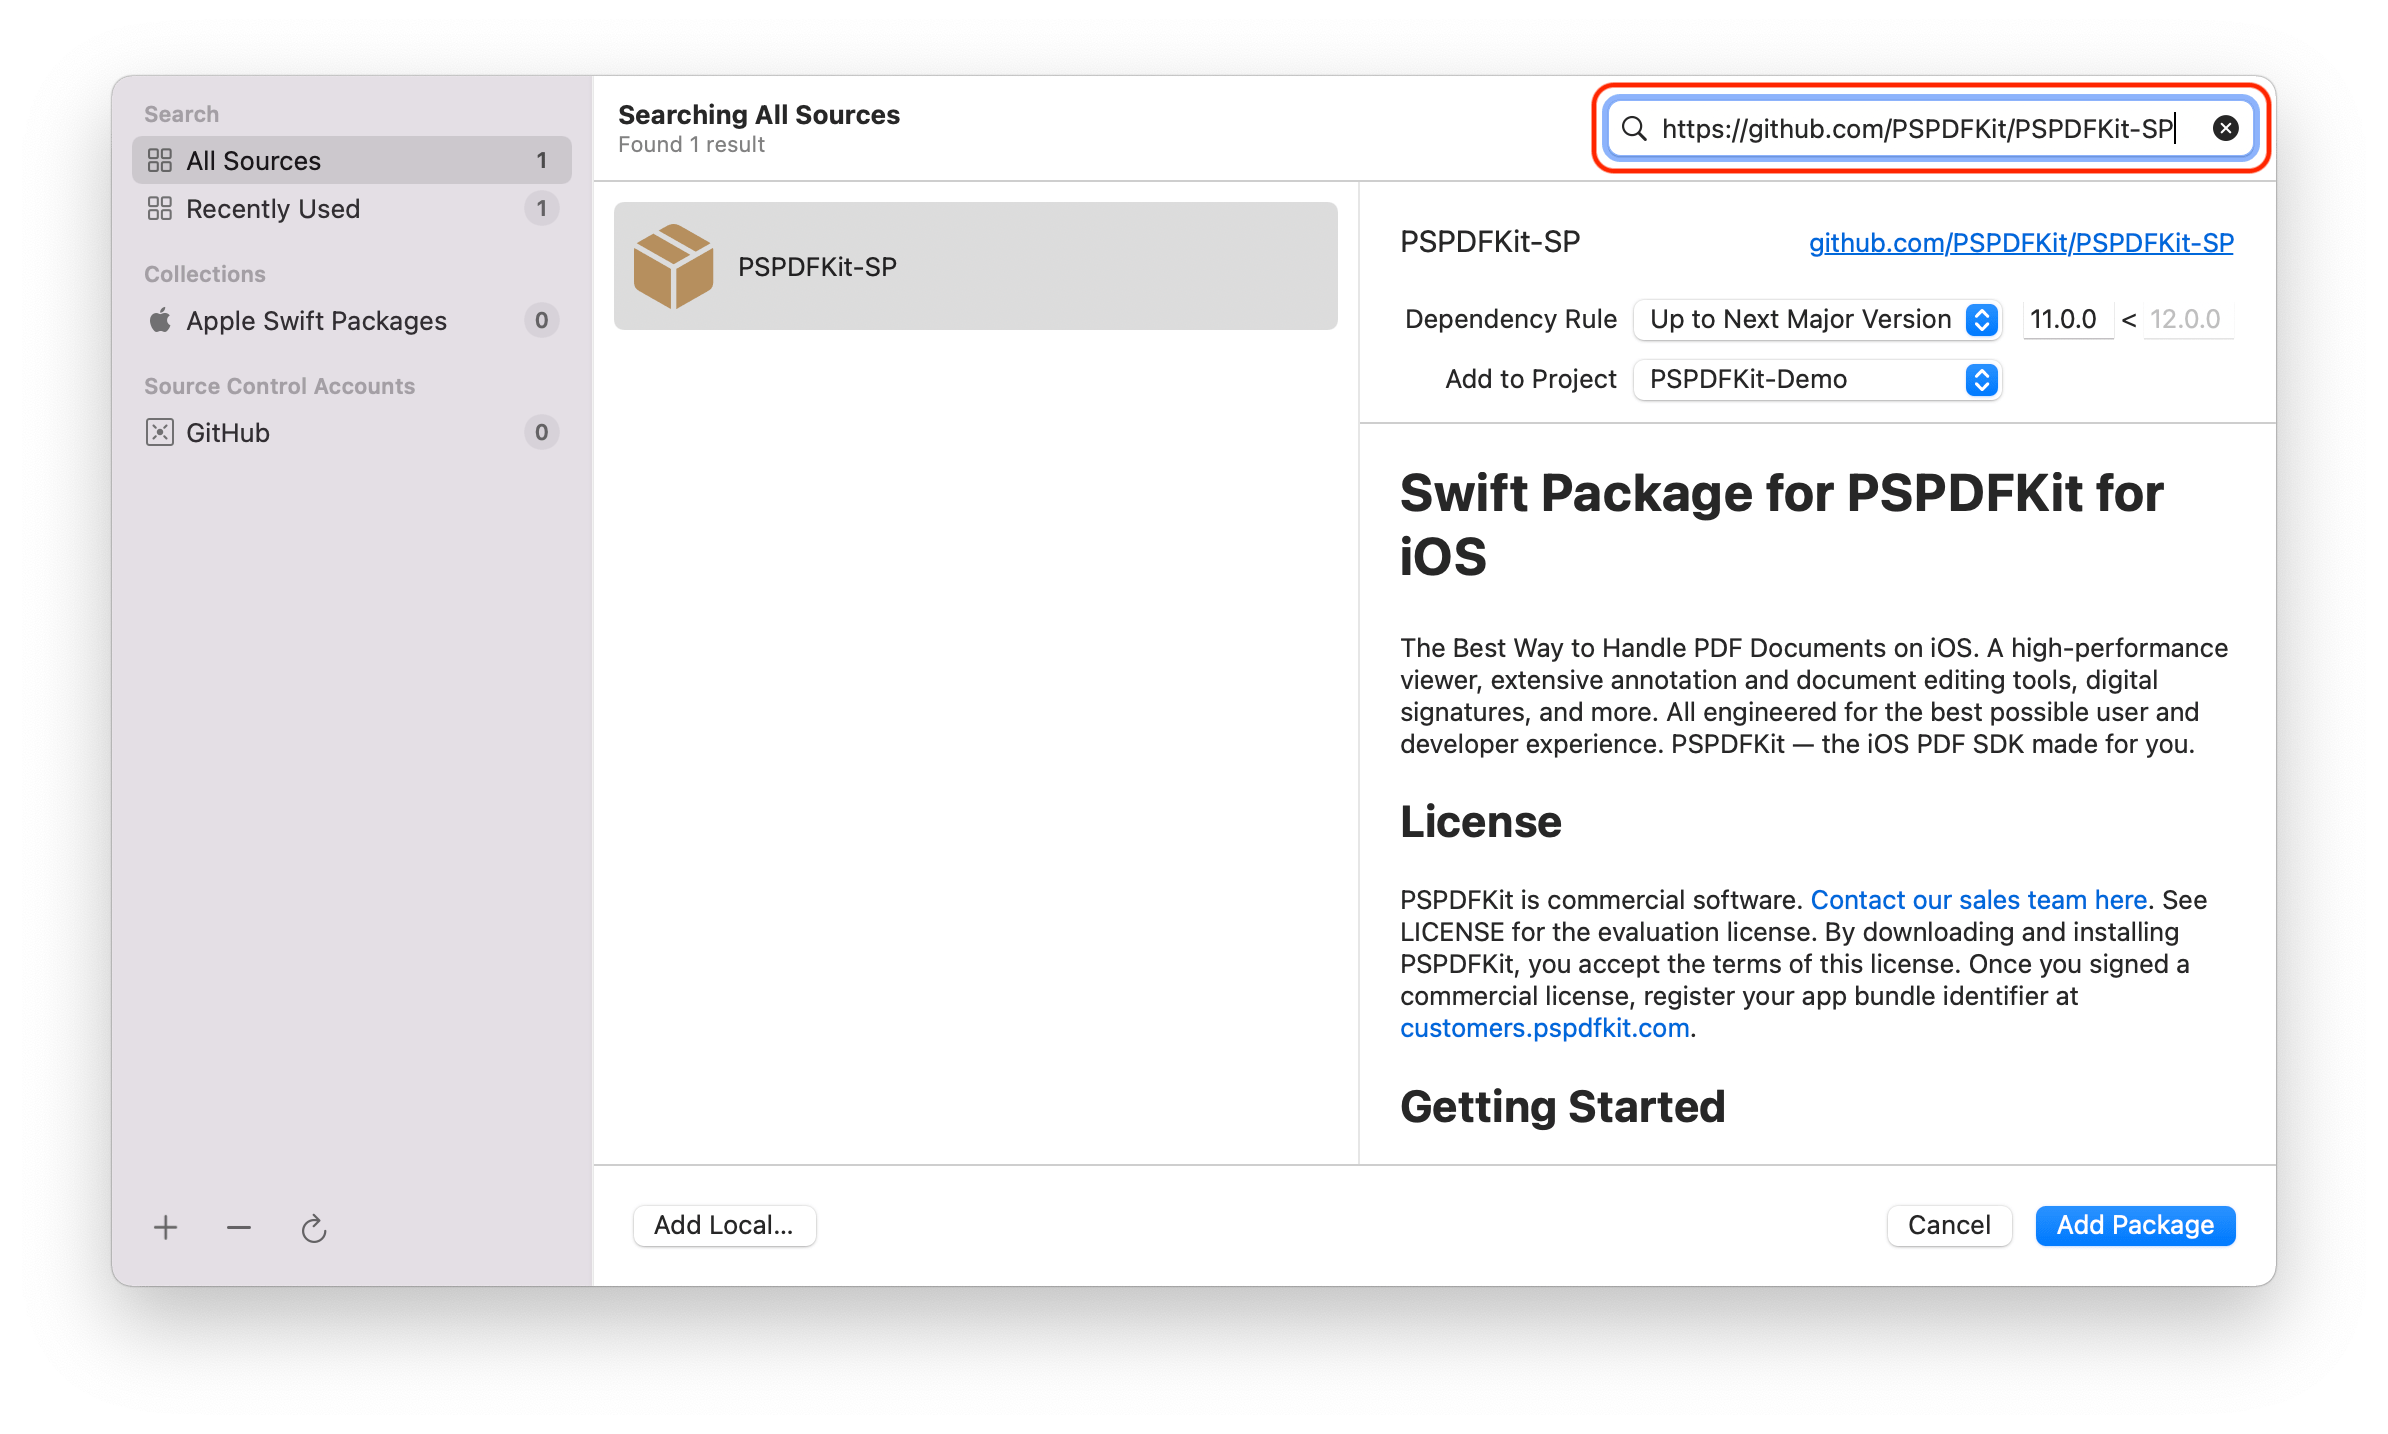
Copy the PSPDFKit Swift package repository URL into the search field:
https://github.com/PSPDFKit/PSPDFKit-SP
-
In the Dependency Rule fields, select Branch > master, and then click Add Package.
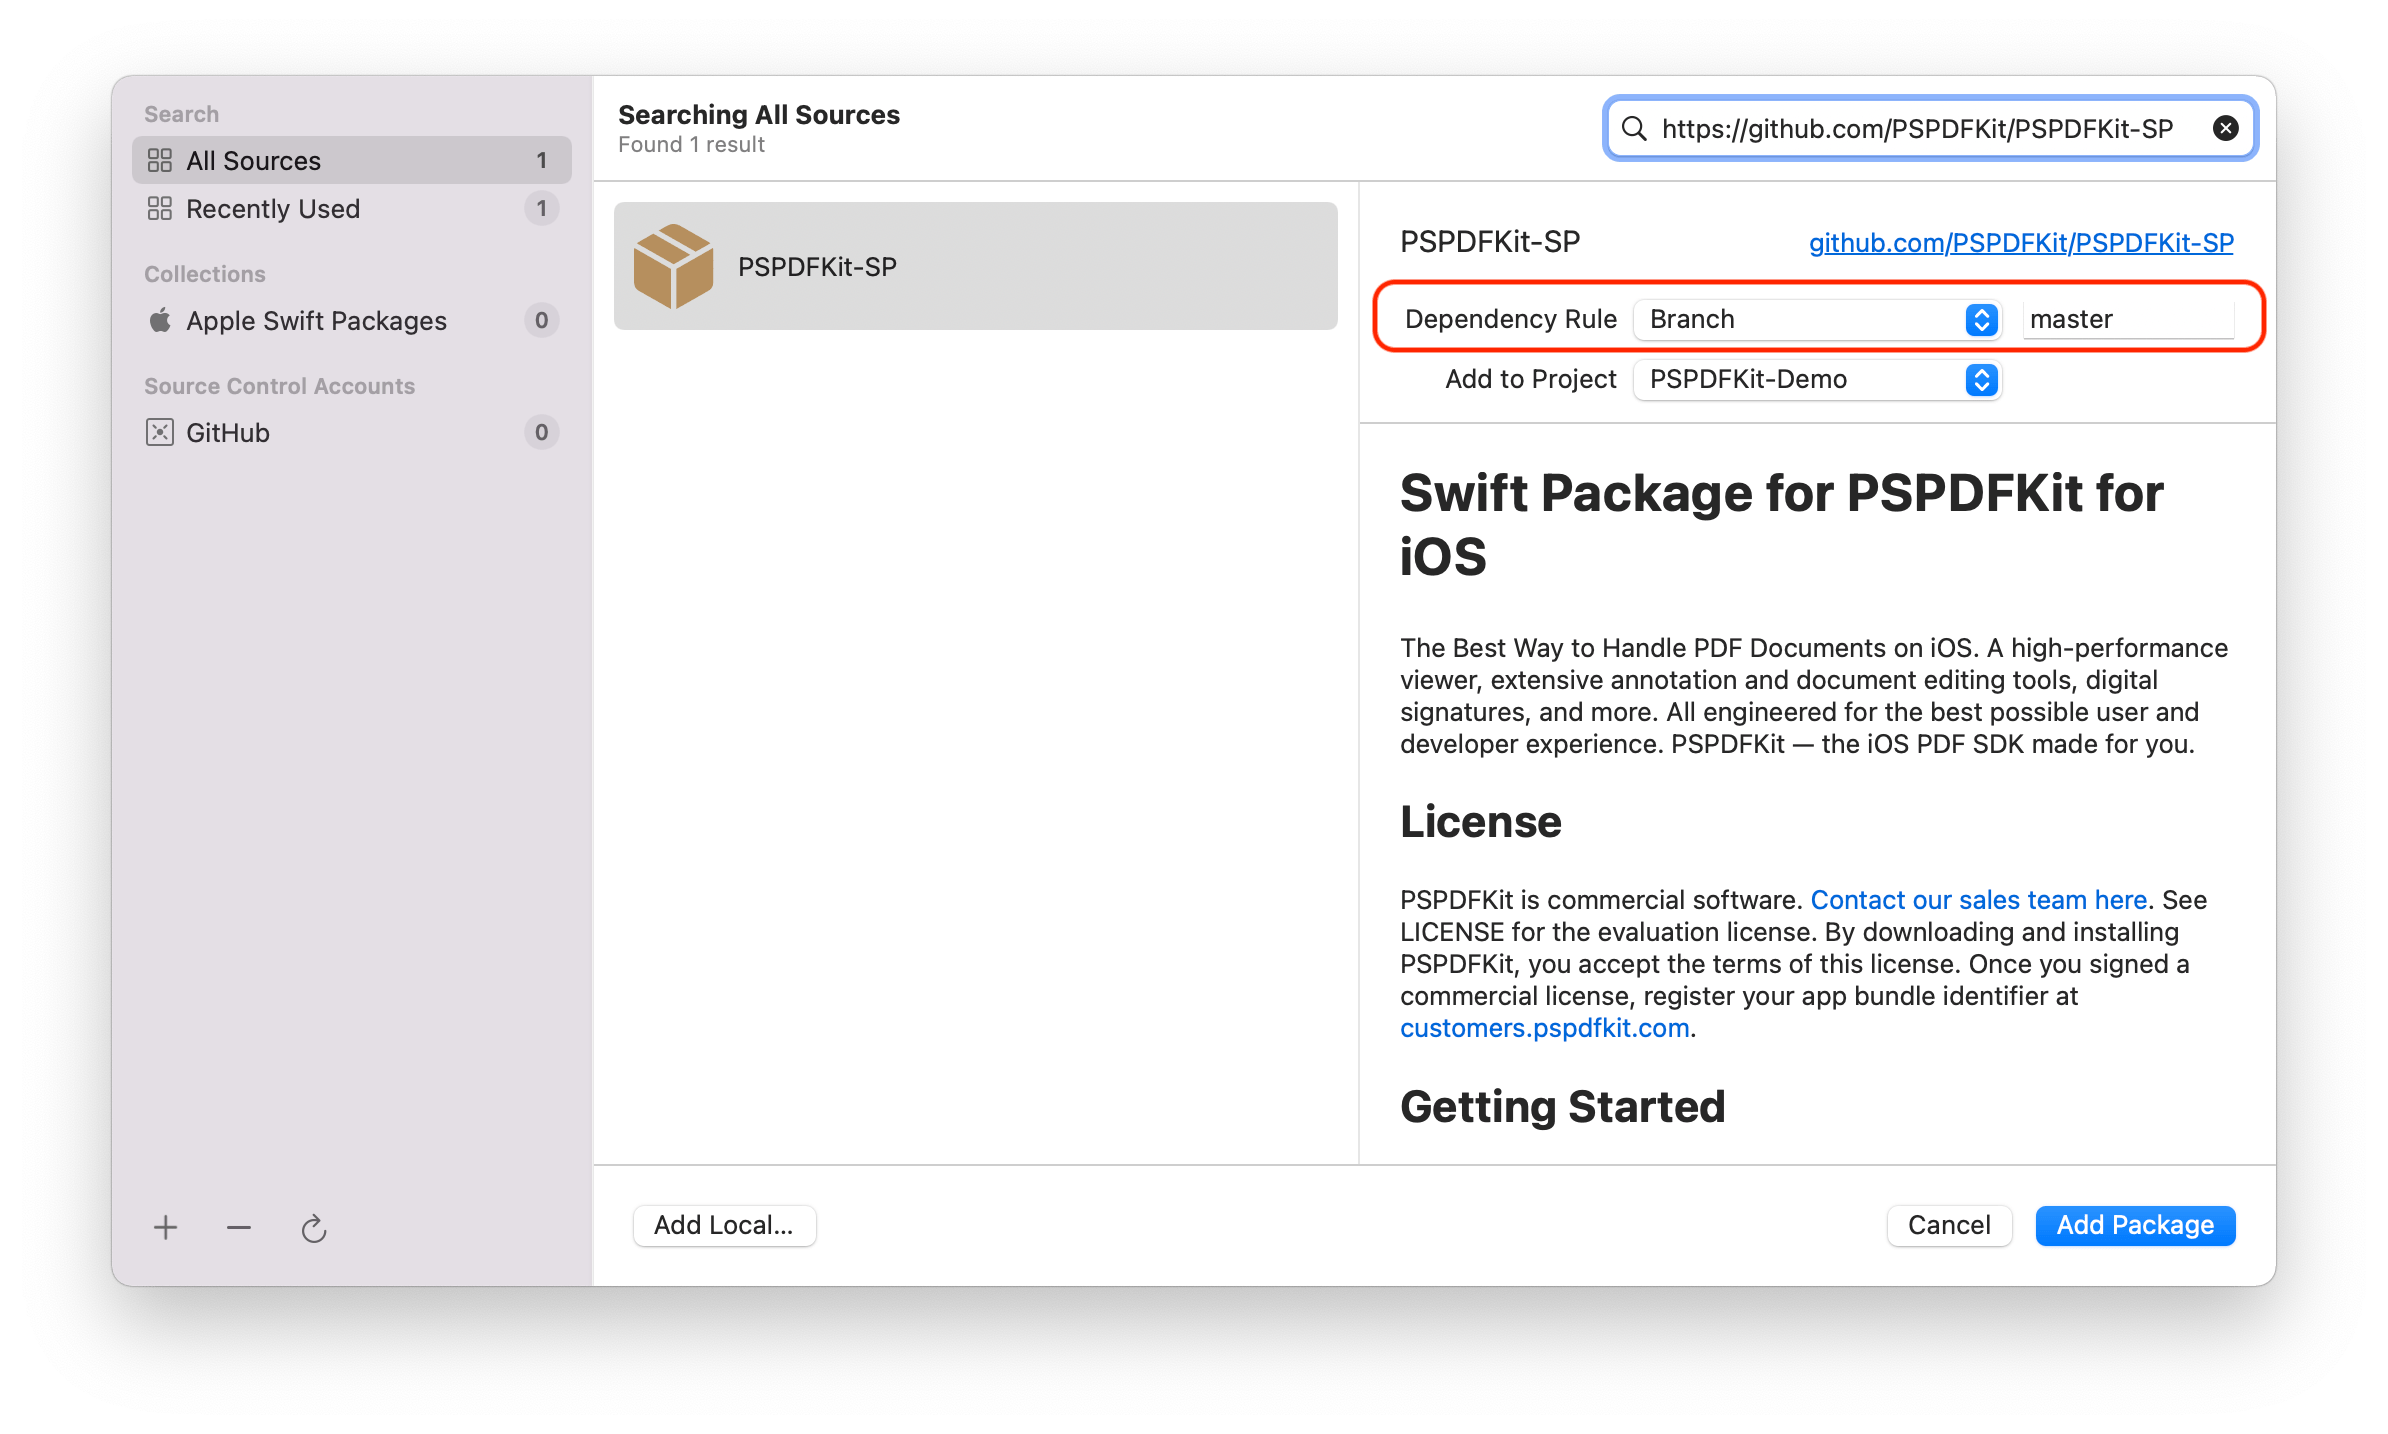
Using Branch > master will ensure you always use the latest available version of PSPDFKit. Alternatively, you can select Version > Up to Next Minor to update at your own pace.
After the package download completes, select Add Package.
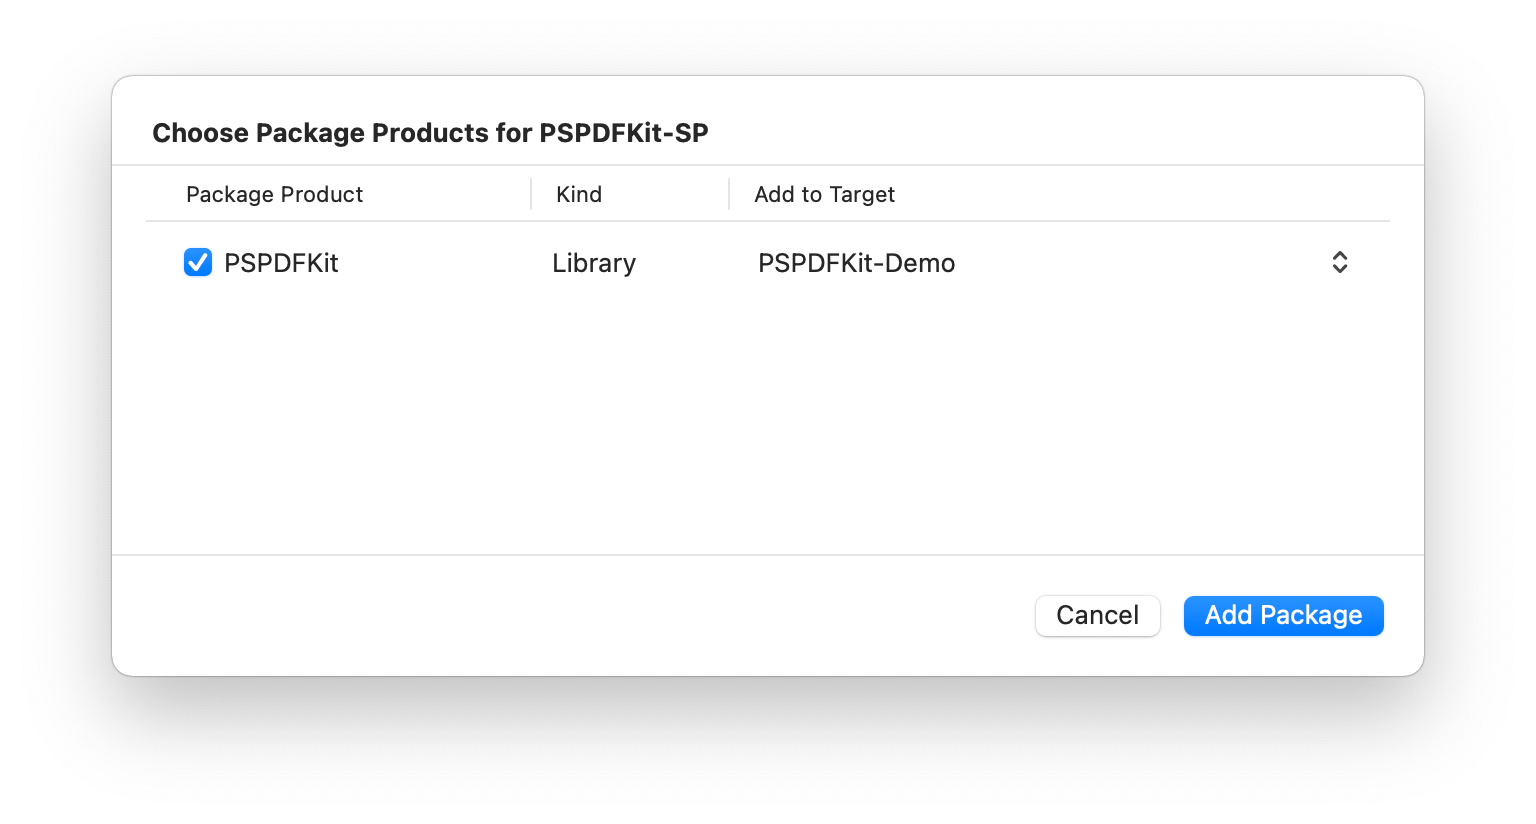
PSPDFKit should now be listed under Swift Package Dependencies in the Xcode Project navigator.
Displaying a PDF
-
Optional: If you have a trial key or license key, add
import PSPDFKitat the top of yourAppDelegatefile and set the key, like this:
func application(_ application: UIApplication, willFinishLaunchingWithOptions launchOptions: [UIApplicationLaunchOptionsKey : Any]? = nil) -> Bool {
    PSPDFKit.SDK.setLicenseKey("YOUR_LICENSE_KEY_GOES_HERE")
    return true
}
- (BOOL)application:(UIApplication *)application willFinishLaunchingWithOptions:(NSDictionary *)launchOptions {
    [PSPDFKitGlobal setLicenseKey:@"YOUR_LICENSE_KEY_GOES_HERE"];
    return YES;
}
See our license key guide for more information.
-
Add the PDF document you want to display to your application by dragging it into your project. On the dialog that’s displayed, select Finish to accept the default integration options. You can use this Quickstart Guide PDF as an example.

-
Import
PSPDFKitandPSPDFKitUIat the top of yourUIViewControllersubclass implementation:
import PSPDFKit
import PSPDFKitUI
@import PSPDFKit;
@import PSPDFKitUI;
-
Load your PDF document and display the view controller by implementing
viewDidAppear(_:)in theViewController.swiftfile like so:
override func viewDidAppear(_ animated: Bool) {
	super.viewDidAppear(animated)

	// Update to use your document name.
	let fileURL = Bundle.main.url(forResource: "Document", withExtension: "pdf")!
	let document = Document(url: fileURL)

	// The configuration closure is optional and allows additional customization.
	let pdfController = PDFViewController(document: document) {
			$0.isPageLabelEnabled = false
	}

	// Present the PDF view controller within a `UINavigationController` to show built-in toolbar buttons.
	present(UINavigationController(rootViewController: pdfController), animated: true)
}
- (void)viewDidAppear:(BOOL)animated {
	[super viewDidAppear:animated];

	// Update to use your document name.
	NSURL *documentURL = [NSBundle.mainBundle URLForResource:@"Document" withExtension:@"pdf"];
	PSPDFDocument *document = [[PSPDFDocument alloc] initWithURL:documentURL];

	// The configuration object is optional and allows additional customization.
	PSPDFViewController *pdfController = [[PSPDFViewController alloc] initWithDocument:document configuration:[PSPDFConfiguration configurationWithBuilder:^(PSPDFConfigurationBuilder *builder) {
			builder.pageLabelEnabled = NO;
	}]];

	// Present the PDF view controller within a `UINavigationController` to show built-in toolbar buttons.
	UINavigationController *navController = [[UINavigationController alloc] initWithRootViewController:pdfController];
	[self presentViewController:navController animated:YES completion:NULL];
}