HTML-to-PDF Invoice Generation with Headers and Footers
In this article, we’ll look at how we recently enhanced our PDF Generation SDK by adding the option of headers and footers. You can use it to add a custom header and footer section to your HTML file that will repeat across all the pages in the resulting PDF.
To help you get started with our PDF Generation SDK, we created a series of free HTML templates. We’ll be taking a closer look at the Invoice template to see how you can add and modify its header and footer.
Before we dig in, please download the free HTML invoice template.
Your downloaded folder should contain the following files:
-
index.html
-
Inter-Bold.ttf
-
Inter-Medium.ttf
-
Inter-Regular.ttf
-
logo.svg
-
OFL.txt
-
README.md
-
SpaceMono-Regular.ttf
Open the index.html file in your preferred code editor to follow along.
Adding a Header to Your Invoice
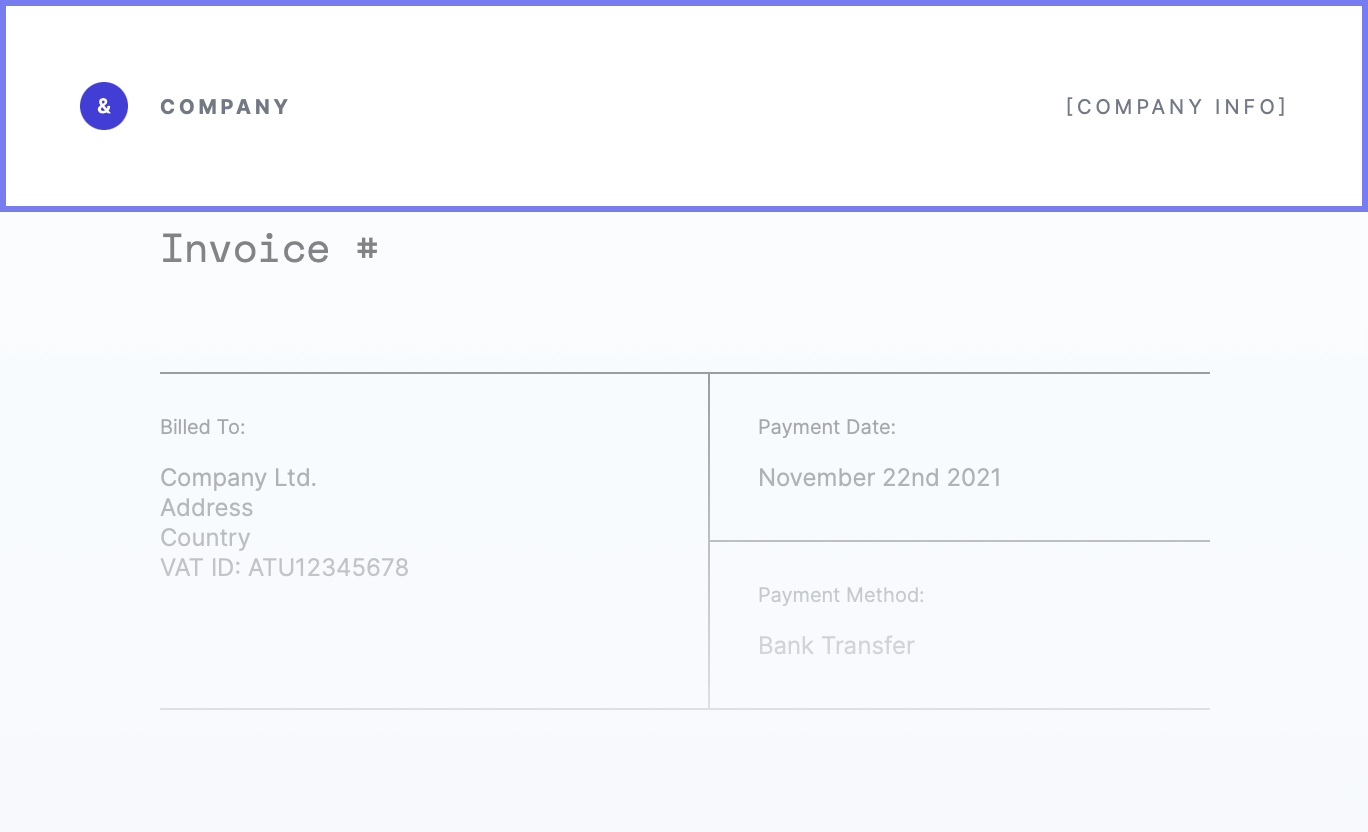
Headers are a useful way to add information about your brand and company on every page. You can use this section to brand your document by adding your logotype and add important information such as your address, VAT ID, or website URL, to name a few.
First, let’s take a look at how we added the header and how you can adjust it by adding your own company logo, name, and information.
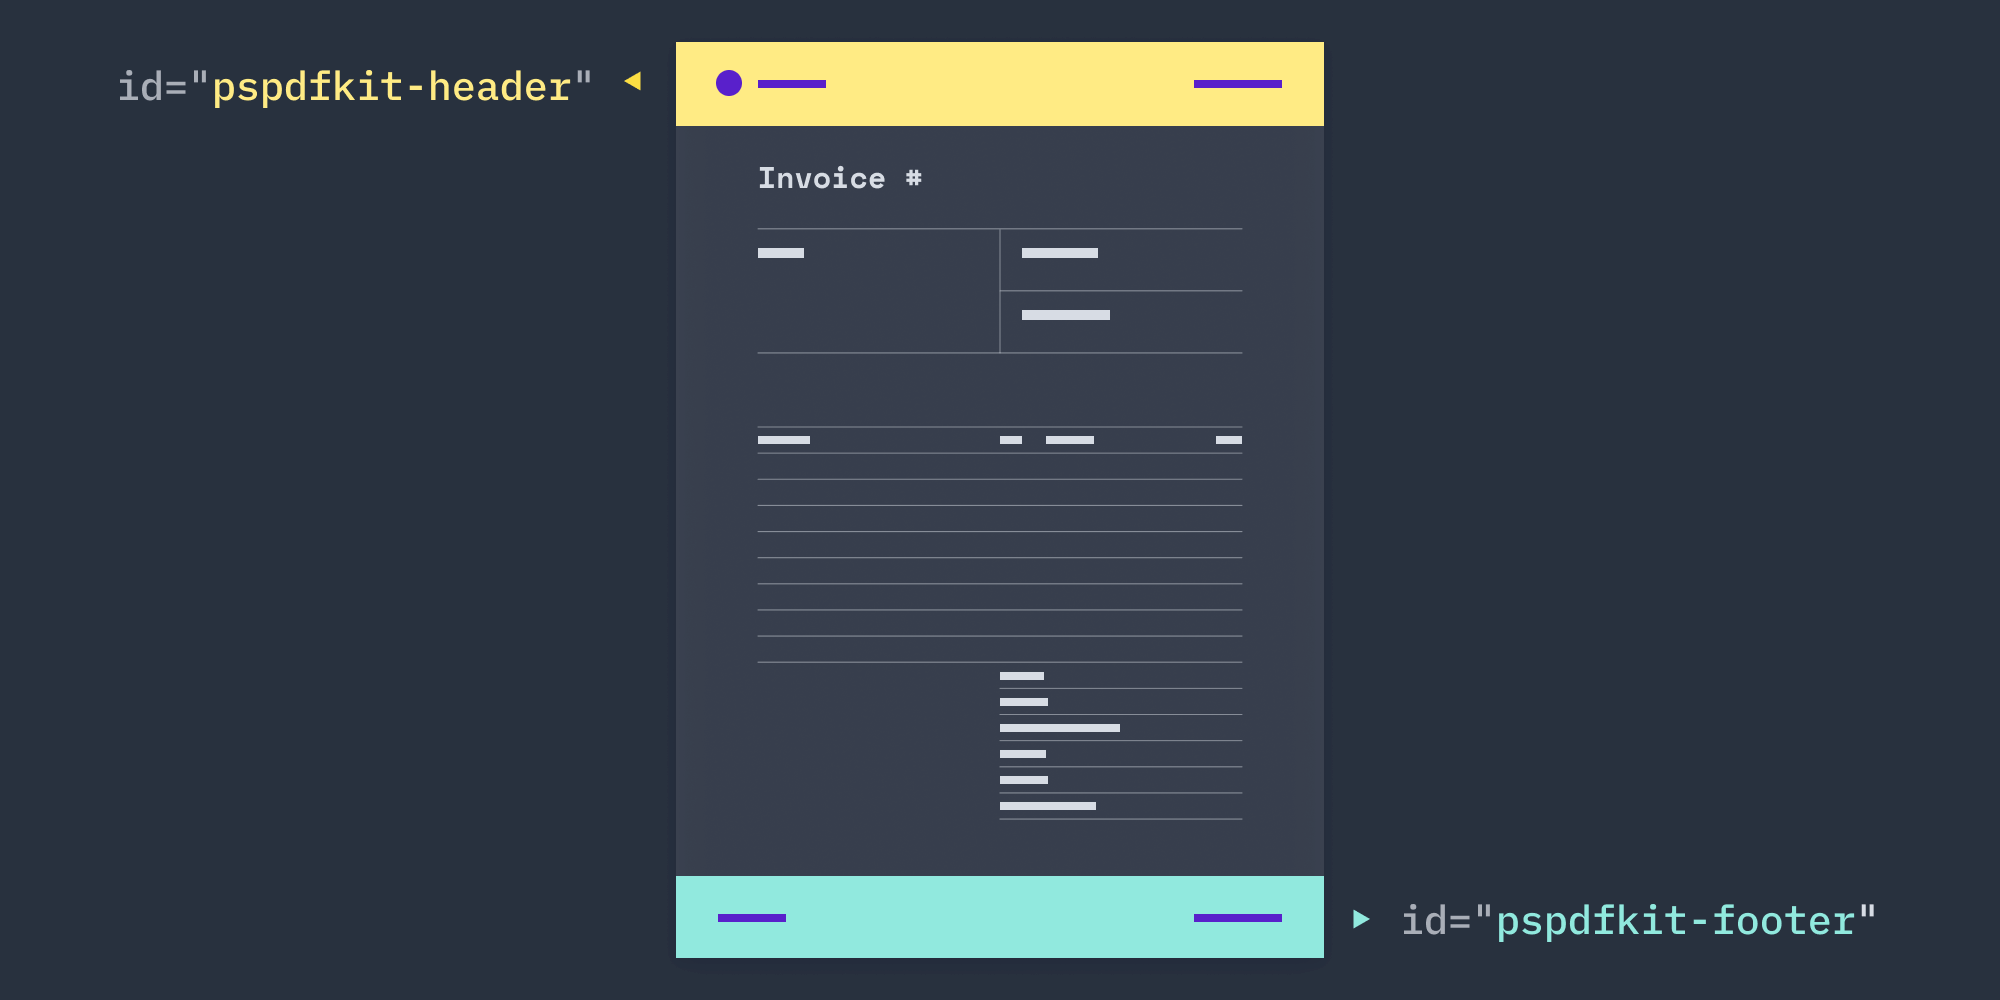
To insert a header into the file, you must assign the pspdfkit-header ID to the first child element inside the body — see line 263 of the index.html file.
Now that we have the header section prepared, we can start adding content to it.
Adding Your Own Logo to Your Invoice
First of all, we want the receiver of the document to know who it’s from. We placed the logo and company name in the top-left corner of the page, because in Western cultures, we read from left to right and from top to bottom, and this will be the first piece of information your users see. This way, they’ll immediately know who sent them the invoice.
On line 266 of the HTML file, you’ll see the following:
The logo is the purplish-blue circle with an ampersand inside it. The company name is defined in text inside our template.
Now, prepare your own logo. If you use an SVG file and name it logo.svg, you can drop it in the Invoice folder you downloaded before, and it’ll replace our placeholder logo.
We recommend exporting your logo as an SVG file. Unlike standard images, SVGs are vectors and don’t lose quality when resized or zoomed in or out in the browser. They’re also lightweight. As a comparison, a PNG file can weigh as much as 50 times more. Read more about the advantages and disadvantages of using SVG files to see what’s best for your use case.

If you name your logo differently or use a different file type, make sure to change the file name on line 266 as well.
Adding Your Company Name and Information
Replace Company on line 267 of the HTML file with your company name. To add the company information, go to line 271, and change [Company Info] to anything you’d like to add — your address, VAT ID, phone number, email, or website URL.
If your company name is already included in your logo, you can delete line 267.
Now that the header is ready, you can switch your attention to the footer.
Adding a Footer to Your Invoice
Footers are a useful way to add information about a company on every page without it being too emphasized. In case you didn’t add it to the header already, you can use this section to add information like the address, phone number, email, or website URL. For invoices, this space is especially useful for helping your customers quickly find payment information, so consider adding your VAT ID and bank account here.
In addition to the company information, this section is a good place to add information about the document, such as the document title, the date it was created, the page number, and the total number of pages. This can be advantageous in situations when official multi-page documents are printed out and the chances of the pages being misplaced are higher.
Let’s take a look at how we added a footer to the invoice example.
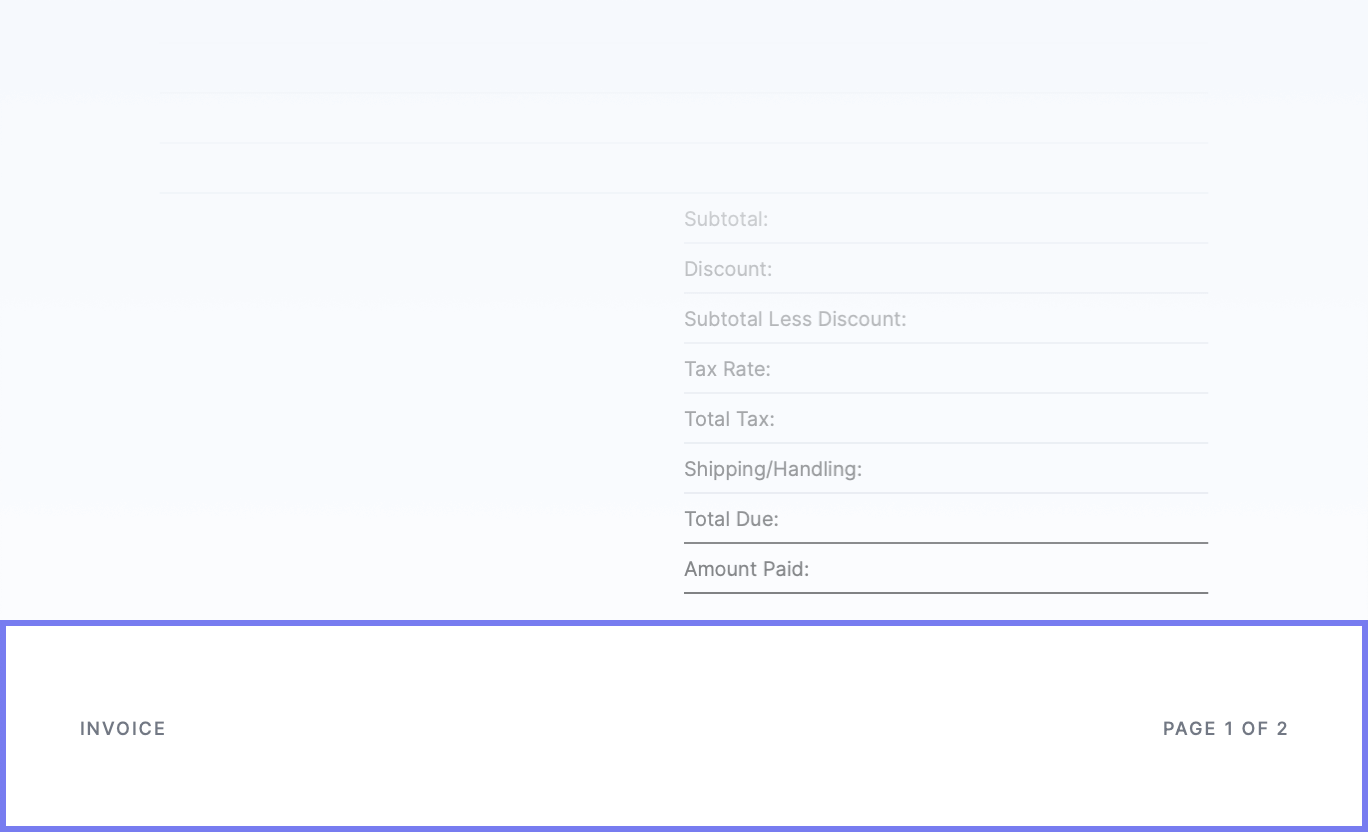
For adding a custom footer to the invoice document, you need to add a section with the ID name pspdfkit-footer as the last child element inside the body.
For this example, we decided to add the document title aligned to the left and the page number with the total page count on the right.
To display the current page number as part of the header and/or the footer, you can use the special {{ pageNumber }} token as a placeholder to tell PSPDFKit where to display the value on each page. Similarly, for the total page count, use {{ pageCount }}:
<div id="pspdfkit-footer">
	<div class="footer-columns">
		<span>Invoice</span>
		<span>Page {{ pageNumber }} of {{ pageCount }}</span>
	</div>
</div>
Et voilà! You have headers and footers on all your pages. You can now use HTML for adding more data and CSS for customizing it to fit your company’s corporate identity.
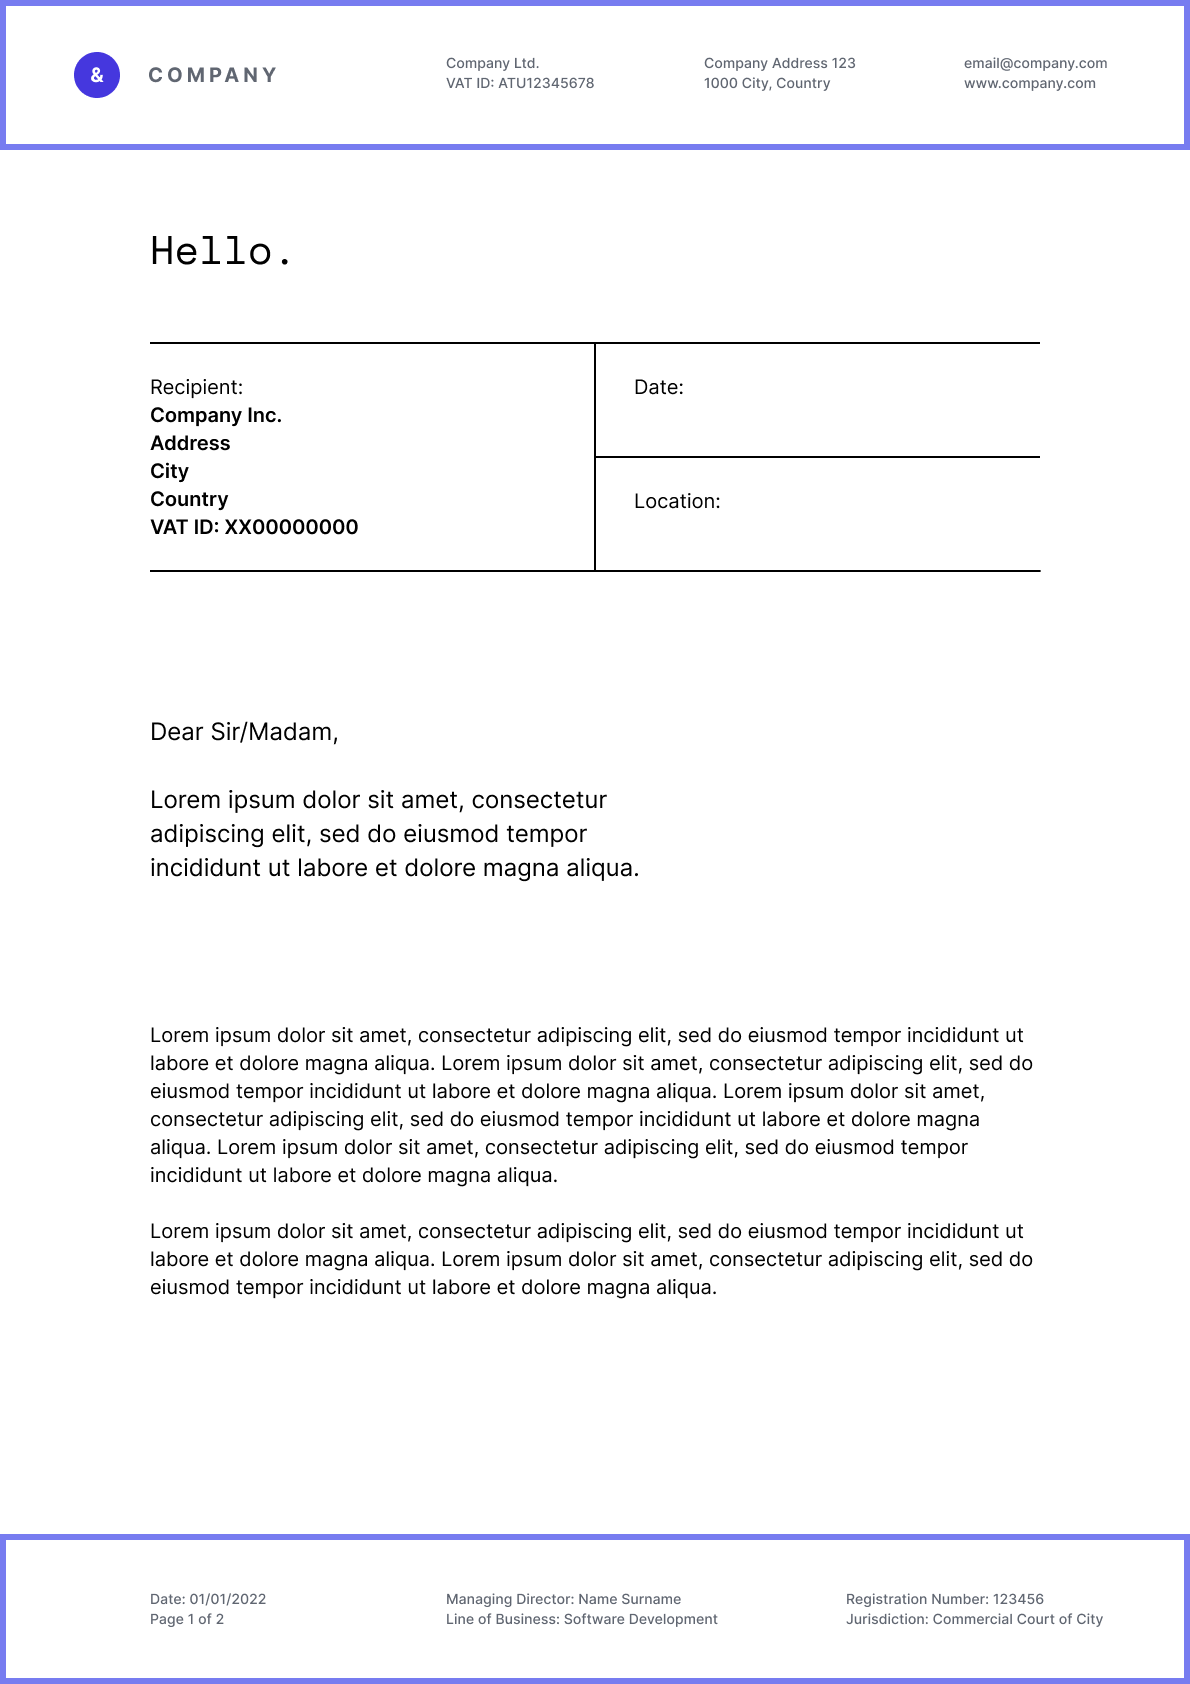
Here’s an example of a business letter design with a more complex header and footer structure.
Generating a PDF File
Now that you’ve learned how to add and modify the header and footer, it’s time to convert your HTML invoice to a PDF using our PDF Generation component.
Here’s what the end result looks like when we convert our sample Purchase Order file into a PDF. Try changing the data in the HTML file on the left to see the result on the right. You can also paste your own code below, but please note that your own images and fonts won’t work since they’re not uploaded to our server.
If you’d like to try converting the HTML file you just prepared into a PDF with all the options enabled — including your own images and fonts — you can do that with our PDF Generation component that’s available for our Web PDF SDK, Document Engine, and PSPDFKit API. Sign up for a free account on PSPDFKit API, and follow the instructions on the PDF generation API page.
Or, get started with a free trial of PSPDFKit and be sure to check out the following guides for detailed instructions on how to use PDF Generation:
Conclusion
In this article, we went through the process of adding a header and a footer to the Invoice template. In addition to the invoice, we also prepared templates for other commonly used documents. These are available for you to download here. Feel free to customize or add any CSS to the template to fit your use case or help reflect your company’s brand.

Maša is super fond of the challenges of the digital day and age. Her approach to design is driven by curiosity. You might also find her at a dance studio or exploring the streets to find inspirational architecture and design.

Petra loves to take on complex design problems. She believes that good design is a reflection of a company’s vision. When not designing, she can be found in nature or experimenting in the kitchen.


