Swift Render Tests in Practice - Part I
 Daniel Demiss

This article is the first part of a small series about render tests in Xcode. In this series, we’ll discuss what render tests are and when to use them, and we’ll show a replica of the fundamental function that’s the backbone of our iOS and macOS render tests at PSPDFKit (this article).
In the second part, we’ll show how to generate more meaningful diagnostics when such tests fail, and we’ll cover how to publish these results on your continuous integration system for convenient and more efficient inspection on your development machine.
In the final part, we’ll improve the diagnostics even further and show you how to leverage this system to generate the reference images it needs.
Motivation
Custom drawing code is always a tricky thing, because you’re working with the textbook definition of a stateful system that will — depending on the context — swing from extremely forgiving under some circumstances, to extremely pedantic. Take the following image as an example:
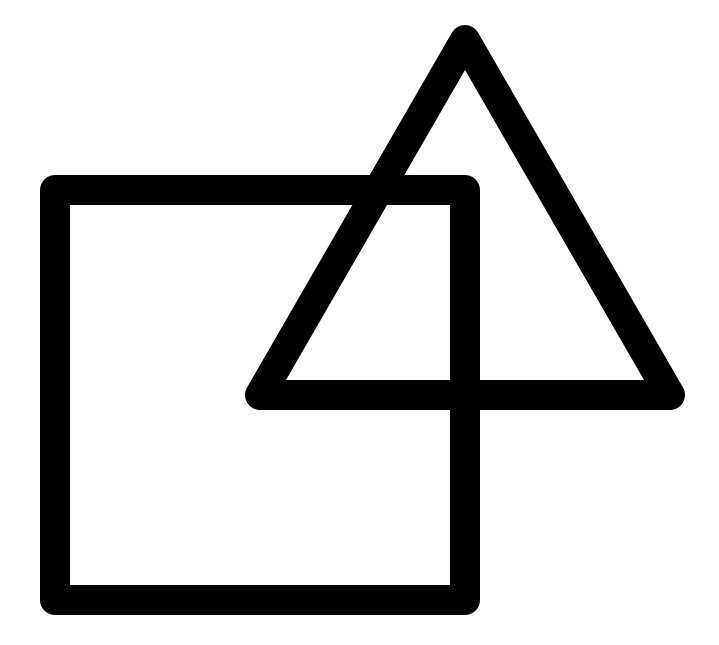
Depending on how you look at this image, there are different ways to describe it that will all lead to the same result. For example, you can say it consists of 2 elements (a square and a triangle), 7 elements (7 black lines), 14 elements (7 black rectangles and 7 small circles), etc. But as long as your first step is to paint the entire canvas white, no matter how you slice it, the order in which the other elements are drawn doesn’t matter because the image is black and white — a true bitmap.
Even when not using a contrived example like the one above, drawing code that starts out simple can become increasingly complex over time, as it tries to accommodate more and more use cases you didn’t envision in the beginning. This is often reflected in the code structure, and before you know it, you’ll end up with a maze of conditionals, or unnecessarily inadequate performance, or both.
When to Use Render Tests
At some point, you’ll find yourself wanting — if not needing — to simplify or speed up your drawing code. Or maybe you want or need to switch to another drawing pipeline altogether to, for example, leverage the GPU for your drawing needs instead of relying on the CPU.
No matter what the exact reason and kind of change you’re about to apply to your drawing code may be, traditional unit testing techniques won’t be of much help in preventing regressions in all the cases that used to work as desired before: Stubbing out the graphics subsystem, for example, would not only be extremely complex, but it’d also be for naught since many compositing operations are — in practice — not order dependent. In addition — and this is especially true when tuning performance — the execution of these operations may not even be desirable. And if that wasn’t enough, the human eye isn’t exactly the most accurate of our senses — especially when motion is involved. So depending on the exact context, output fidelity may or may not give you some additional freedom that stubbing/mocking won’t let you explore.
This is where render tests shine!
Instead of looking at the exact steps in your drawing code, a render test lets your drawing code generate a new image. The test code then compares this freshly generated image to a reference image. If the two images aren’t sufficiently similar, the test code reports a failure.
What exactly “sufficiently similar” means can differ from test to test. So, the image comparison function needs at least one additional parameter, which, in turn, lets the caller define the appropriate similarity requirement.
When Not to Use Render Tests
Just as important as knowing when to reach for one of the tools under your proverbial belt is knowing when a tool might get the job done somehow, but in a way you’ll regret later. In this regard, render tests are no different.
You could, for example, test your user interface using render tests.
This is called snapshot testing. And certainly, some graphic designers would love it if their screens had pixel-perfect implementations. But the reality is that nobody really wants to maintain a comprehensive library of snapshots and test suites — including the designer who might have thought it a neat idea when there were only twelve screens on one supported device on two different OS releases.
So, unless you’re building a library of custom UI components and you want to verify that each of those components draws a limited number of well-defined states reliably, your UI tests should probably not be based on render tests.
How We Use Render Tests
At PSPDFKit, custom drawing code sits at the core of what we do. After all, reliable visual reproduction is one of the key features of the PDF format. The file format specification goes into a great level of detail on how to achieve this. And over time, we’ve accumulated a number of PDF files for testing — some with… let’s say, “creative” ways of interpreting the specification; some that are just complex; and some that invalidate an optimization we can use in most other cases but that we still need to be able to render in finite time and space.
As you may have guessed, manually verifying the behavior of our renderer on all of these files wouldn’t be feasible. So instead, we use a very unsophisticated but effective approach:
-
We generate a pixel image from an interesting region of a PDF at a certain resolution.
-
We compare this bitmap image to a reference image of the same dimensions — allowing for some context-dependent wiggle room.
-
We count the pixels that are sufficiently different.
-
We fail the test if the number of mismatching pixels exceeds the threshold defined by the wiggle room from step 2.
The appropriate amount of wiggle room varies from test case to test case. When writing a new render test, we start with a default value and adjust it by trial and error. Our goal here is to not drown in a sea of failing tests when a new iOS release uses a slightly different anti-aliasing implementation, but to still catch unintended side effects of changes we make to our own drawing code before we ship a new release.
Here’s how this looks in code:
extension UIImage {

    func ensureMatches(reference: UIImage, requiredAccuracy: Double) throws {
        // For simplicity, require images to be backed by Core Graphics.
        // This will be true for most images. Notable exceptions are images
        // obtained from Core Image.
        guard
            let pixels = cgImage,
            let referencePixels = reference.cgImage
        else {
            throw ImageComparisonError.unsupportedBackingStore(
                referenceImage: reference,
                actualImage: self
            )
        }

        // We cannot compare images that don't have the same dimensions.
        guard
            referencePixels.width == pixels.width,
            referencePixels.height == pixels.height
        else {
            throw ImageComparisonError.dimensionMismatch(
                expectedWidth: referencePixels.width,
                expectedHeight: referencePixels.height,
                actualWidth: pixels.width,
                actualHeight: pixels.height
            )
        }

        // Unfortunately, Core Graphics doesn’t offer direct access to the
        // underlying uncompressed buffer for an image. We can use this to
        // our advantage to give us some flexibility when it comes to
        // storing/representing images for different purposes, which we’ll do
        // in a helper function.
        let deviceRGB = CGColorSpaceCreateDeviceRGB()
        let imageBuffer = try makeRGBABuffer(
            for: pixels,
            colorSpace: deviceRGB
        )
        // Since the function returns an unmanaged buffer — which makes sense
        // for what we want — never let it escape without deallocating it!
        defer {
            imageBuffer.deallocate()
        }
        let referenceBuffer = try makeRGBABuffer(
            for: referencePixels,
            colorSpace: deviceRGB
        )
        defer {
            referenceBuffer.deallocate()
        }

        // We already checked this above, but in case we made a mistake in our
        // helper, fail here.
        let pixelCount = imageBuffer.count
        precondition(
            pixelCount == referenceBuffer.count,
            "Cannot compare contents of buffer that differ in size"
        )
        // Now we iterate over all the pixels, counting the mismatches.
        var mismatchingPixelCount = 0
        for i in 0 ..< pixelCount {
            if !imageBuffer[i].isSimilar(to: referenceBuffer[i]) {
                mismatchingPixelCount += 1
            }
        }

        // Finally, throw an error if the number of mismatches exceeds what
        // the caller allowed.
        let acceptableMismatchCount = Int(
            Double(pixelCount) * (1 - requiredAccuracy)
        )
        if acceptableMismatchCount < mismatchingPixelCount {
            throw ImageComparisonError.imageMismatch(
                pixelCount: pixelCount,
                acceptableMismatchCount: acceptableMismatchCount,
                actualMismatchCount: mismatchingPixelCount
            )
        }
    }

}
Let’s look at the helper type and the function that generates a buffer full of them: The helper type is an extremely simple struct consisting of four fields for the red, green, blue, and alpha channel of each pixel. We’ll use one byte (or eight bits) per channel, so the properties are all of type UInt8. And we’ll consider two of these as similar if none of the components differ by more than one bit:
/// The memory layout of a single RGBA pixel.
struct RGBA {
    /// The red channel of the pixel.
    let r: UInt8
    /// The green channel of the pixel.
    let g: UInt8
    /// The blue channel of the pixel.
    let b: UInt8
    /// The alpha channel of the pixel.
    let a: UInt8

    func isSimilar(to other: RGBA) -> Bool {
        (r.distance(to: other.r) < 2
         && g.distance(to: other.g) < 2
         && b.distance(to: other.b) < 2
         && a.distance(to: other.a) < 2
        )
    }
}
Now that we have the helper type, let’s put it to use and make a buffer full of helper types for a given CGImage:
private func makeRGBABuffer(for image: CGImage, colorSpace: CGColorSpace)
    -> UnsafeMutableBufferPointer<RGBA> {
    precondition(
        colorSpace.numberOfComponents == 3
        && colorSpace.model == .rgb,
        "For RGBA, we need a compatible colorspace"
    )

    let bitsPerComponent = 8
    let bytesPerPixel = 4 // 3 components plus alpha.
    let width = image.width
    let height = image.height
    // We make a buffer that can fit all the pixels to back a `CGContext`.
    let imageBuffer = UnsafeMutableBufferPointer<RGBA>
        .allocate(capacity: width * height)
    // And we make sure the buffer is empty.
    imageBuffer.initialize(repeating: .init(r: 0, g: 0, b: 0, a: 0))
    // Since we’ve handpicked the configuration, we know this can’t fail.
    let context = CGContext(
        data: imageBuffer.baseAddress,
        width: width,
        height: height,
        bitsPerComponent: bitsPerComponent,
        bytesPerRow: width * bytesPerPixel,
        space: colorSpace,
        bitmapInfo: (
            CGImageAlphaInfo.premultipliedFirst.rawValue
            | CGBitmapInfo.byteOrder32Big.rawValue
        )
    )!

    // Draw the image into the context to get the pixel data into our buffer.
    context.draw(image, in: .init(x: 0, y: 0, width: width, height: height))

    return imageBuffer
}
With this code as part of your test target, render testing can become as simple as the following:
func assert(
    image: @autoclosure () -> UIImage,
    matches reference: UIImage,
    requiredAccuracy: Double,
    _ message: @autoclosure () -> String,
    file: StaticString = #file,
    line: UInt = #line
) {
    XCTAssertNoThrow(
        try image().ensureMatches(
            reference: reference,
            requiredAccuracy: requiredAccuracy
        ),
        message(),
        file: file,
        line: line
    )
}
Conclusion
In this article, we discussed what render tests are and when (not) to use them. We showed a method of comparing two images on a per-pixel basis, and we identified mismatches using a simple threshold criterion — no computer vision or complex machinery needed. Lastly, we used that functionality to implement render tests when they make sense.
⚠️ Limitations:
The code shown in this article works. And it’ll help catch accuracy regressions in your drawing code. You can also run it after a performance measurement to verify that an optimization you made not only had the desired performance improvement, but also produced an image that still shows what it’s supposed to. (The trivial performance optimization to just not do something can sometimes go too far. 😅)
However, “computer says no” isn’t too helpful. Locally, you can work around this by setting breakpoints on the last
throwexpression of the method we added toUIImageand use Xcode’s Quick Look capabilities to look at the two images. But that won’t work for test failures reported by your continuous integration system, which would catch regressions in the parts you didn’t expect to be affected by your changes. Even when you reproduce such a failure by running locally, those discrepancies will likely be in parts you don’t know too well. And for more complex renderings, the unwanted effect may not be immediately obvious either.
In our next installment, we’ll show you how to bundle and access these images after a test run completes. We’ll also have a look into using these bundles to more efficiently navigate and triage test failures.