Creating Images from Text on the Web Using Canvas
 Guillermo Peralta Scura
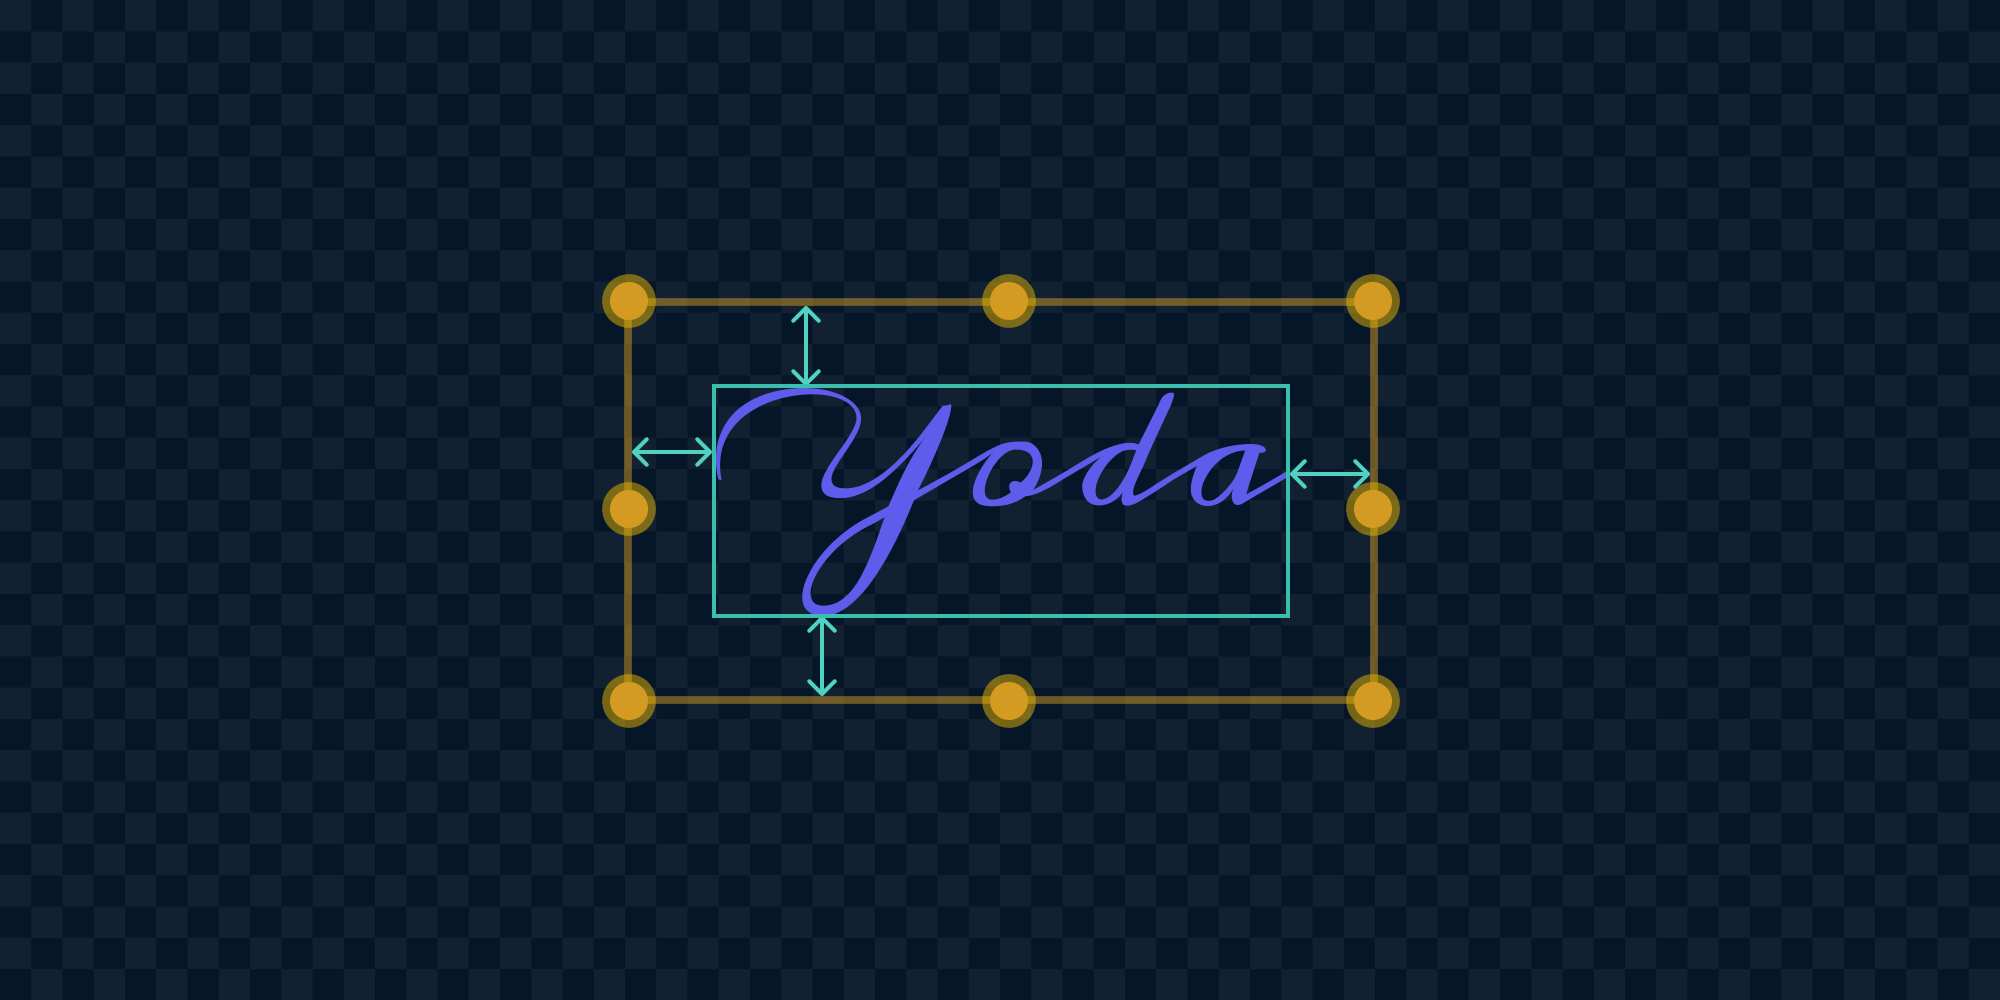
When implementing the new Electronic Signatures component for PSPDFKit for Web, one aspect that required some research was allowing users to generate image signatures out of any text with their own choice of font and color. While typing text, a live preview is generated natively on the DOM, and after it’s confirmed, a new image annotation appears.
Based on that functionality, today we’ll be building a tool that takes a line of text and generates an image out of it. In the demo below, you can input any text you want, and after clicking the Generate button, you’ll get a PNG image as a result (although other formats are possible as well).
So, let’s get started.
APIs
The HTML5 specification introduced the <canvas> element and a set of APIs to interact with. Nowadays, this element is used for building complex user interfaces that are difficult or sometimes near-impossible to build using native DOM elements. For instance, Google Docs started using <canvas> for rendering, and native-like design tools like Figma did as well.
Now, let’s take a look at APIs we’ll need to build our solution.
Exporting Image Data from Canvas
The toBlob method of the Canvas API allows us to generate an image from a canvas. The supported formats vary from browser to browser, but PNG and JPEG are well supported across most of them:
canvas.toBlob((blob) => console.log(blob));
Drawing Text
For drawing text onto the canvas, we’ll use the fillText method of the CanvasRenderingContext2D drawing context object that we receive when running canvas.getContext('2d').
Implementation Approaches
The main challenge is to correctly set the dimensions of the canvas, because that will determine the dimensions of the generated image asset as well. Since we’re allowing text of a dynamic length, we need to measure the length of the text while also considering the desired font and size.
If we don’t handle this correctly, once we export an image from the canvas, we’ll see that the text isn’t entirely visible and certain glyphs are cropped out.
We could solve this in a couple different ways, which we’ll cover next.
TextMetrics API Approach
The measureText method of the context member of the canvas returns a TextMetrics object with information about the size of the text. MDN contains a good overview of what the different properties returned by measureText mean.
For our use case, we’re interested in the dimensions of the bounding rectangle that fully contains the given text: the actualBoundingBoxLeft, actualBoundingBoxRight, actualBoundingBoxAscent, and actualBoundingBoxDescent properties. Additionally, fontBoundingBoxAscent and fontBoundingBoxDescent are available on a limited set of browsers. These consider the font, regardless of the actual string rendered.
In theory, to get the full height of the rendered text, it’d be enough to use actualBoundingBoxAscent and actualBoundingBoxDescent, since they represent the distance between the top (or bottom) of the bounding box that contains the text and the textBaseline attribute (which, for our use case, don’t need any adjustment since the sum of actualBoundingBoxAscent and actualBoundingBoxDescent will remain constant regardless of what the value of textBaseline is). Here’s how an implementation using these values works:
const ctx = canvas.getContext('2d');
ctx.font = `100px "${font}"`;

const {
	actualBoundingBoxLeft,
	actualBoundingBoxRight,
	actualBoundingBoxAscent,
	actualBoundingBoxDescent,
	width,
} = ctx.measureText(text);

canvas.height = actualBoundingBoxAscent + actualBoundingBoxDescent;

// Take the larger of the width and the horizontal bounding box
// dimensions to try to prevent cropping of the text.
canvas.width = Math.max(
	width,
	Math.abs(actualBoundingBoxLeft) + actualBoundingBoxRight,
);

// Set the font again, since otherwise, it's not correctly set when filling.
ctx.font = `100px ${font}`;
ctx.textBaseline = 'top';
ctx.fillText(text, 0, 0);
canvas.toBlob(callback);
Drawbacks
Unfortunately, it’s not accurately and consistently rendered across browsers.
 |
 |
 |
Notice how the text doesn’t appear completely on any of the browsers, and on each browser, it’s cropped out differently.
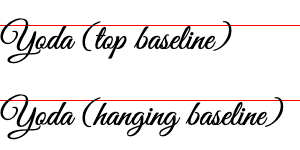
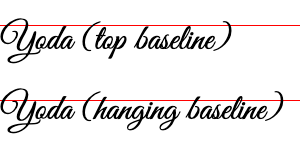
What happens is that each rendering engine ships with a different implementation for its text metrics calculation. For instance, here’s how different browsers position the textBaseline attribute value at different heights.
 |
 |
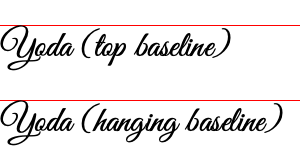 |
Notice that the top baseline on both Chrome and Firefox appears at a different vertical position than on Safari. The hanging baseline also appears at a different position on each browser.
This serves as an indication that relying on these metrics for a cross-platform implementation won’t work out of the box, and exhaustive testing would be needed to make sure that an adjustment on one browser doesn’t affect the result in others.
Cross-Browser Approach
In addition to the TextMetrics API discrepancies between environments outlined in the previous section, there are a plethora of differences and limitations when considering the level of support for our goal that each browser represents.
For instance, there’s this “How can you find the height of text on an HTML canvas?” Stack Overflow question in which there are multiple approaches outlined. When considering cross-browser stability, our options become limited.
Trimming the Canvas
One interesting element of the Canvas API is the getImageData method, which returns the underlying pixel data of the image drawn in the canvas. What this means for us is that we can determine which portions of the canvas contain image information and which don’t.
In our case, we’re rendering text onto an empty canvas, so what we need to do is inspect each pixel and check whether it’s transparent or not (i.e. checking if the alpha channel for that pixel is different than zero).
Furthermore, we only need four values:
-
The lowest horizontal coordinate that isn’t transparent (left)
-
The highest horizontal coordinate that isn’t transparent (right)
-
The lowest vertical coordinate that isn’t transparent (top)
-
The highest vertical coordinate that isn’t transparent (bottom)
We can rely on a trimming logic originally written by Remy Sharp. I modified it slightly to mutate the received canvas instead of generating a copy, and to update it to a modern ECMAScript syntax:
function trimCanvas(canvas) {
	const ctx = canvas.getContext('2d');
	const pixels = ctx.getImageData(0, 0, canvas.width, canvas.height);
	const length = pixels.data.length;
	let topCoord = null;
	let bottomCoord = null;
	let leftCoord = null;
	let rightCoord = null;
	let x = 0;
	let y = 0;

	// Iterate over every pixel to find the highest one
	// and determine where it ends on the vertical axis.
	// Each pixel is represented as RGBA.
	for (let i = 0; i < length; i += 4) {
		// We inspect the alpha channel to check
		// if the pixel is fully transparent or not.
		if (pixels.data[i + 3] !== 0) {
			x = (i / 4) % canvas.width;
			y = Math.trunc(i / 4 / canvas.width);

			if (topCoord === null) {
				// Since we inspect from top to bottom,
				// the initial not-transparent pixel must
				// be the `topBound` one.
				topCoord = y;
			}

			if (leftCoord === null || x < leftCoord) {
				// Since we walk in the left-right top-bottom
				// direction, we need to find the lowest
				// x coordinate as the `leftCoord`.
				leftCoord = x;
			}

			if (rightCoord === null || x > rightCoord) {
				// Since we walk in the left-right top-bottom
				// direction, we need to find the highest
				// x coordinate as the `rightCoord`.
				rightCoord = x;
			}

			if (bottomCoord === null || bottomCoord < y) {
				bottomCoord = y;
			}
		}
	}

	// If some value was left as `null`, we use `0`.
	topCoord = topCoord || 0;
	bottomCoord = bottomCoord || 0;
	leftCoord = leftCoord || 0;
	rightCoord = rightCoord || 0;

	// Calculate height and width. Add 20 pixels
	// for some negative space (i.e. padding) around
	// the canvas edges.
	const trimHeight = bottomCoord - topCoord + 20;
	const trimWidth = rightCoord - leftCoord + 20;
	const trimmed = ctx.getImageData(leftCoord, topCoord, trimWidth, trimHeight);

	canvas.width = trimWidth;
	canvas.height = trimHeight;
	ctx.putImageData(trimmed, 10, 10);
}
Placing the Text
Now, with our trimCanvas function in place, we still need to have a large enough canvas size that allows the text to fit entirely, even if there’s wasted additional empty space. After all, that’s what the trimCanvas will take care of.
The TextMetrics API, although not entirely consistent across platforms, is still vital for this. We can reuse the same measurement logic as before, but we prevent edge cases by deliberately adding extra empty space around the text. This way, even fonts with large ascenders and descenders that might otherwise result in undesired cropping can still have all of the glyphs correctly rendered in the additional empty space available.
The amount of empty space to add is important though, since having too much empty space will result in a slower trimming, as we need to process all the pixels.
Another important aspect is deciding where in the canvas fillText should start drawing the text. Assuming a textBaseline of "top", for which fillText knows the vertical origin from which to start drawing, using 0, 0 could potentially result in overflowing ascenders not being part of the canvas at all.
A viable strategy can be to take the width and height of the canvas and start rendering at the center of it.
With all of these aspects put into play, here’s how the text drawing logic looks:
const FONT_SIZE = 100;
const VERTICAL_EXTRA_SPACE = 5;
const HORIZONTAL_EXTRA_SPACE = 2;

const ctx = canvas.getContext('2d');
ctx.textBaseline = 'top';
ctx.font = `${FONT_SIZE}px "${font}"`;

const {
	actualBoundingBoxLeft,
	actualBoundingBoxRight,
	fontBoundingBoxAscent,
	fontBoundingBoxDescent,
	width,
} = ctx.measureText(text);

// Render a large canvas to handle edge cases, with some cases with large
// ascenders and descenders that otherwise could end up cropped out.
// `5` is chosen as a multiplier after trying out rendering multiple fonts on different
// browser engines while keeping the necessary room before vertically trimming the
// canvas to ensure proper rendering of text (`VERTICAL_EXTRA_SPACE`).
// Horizontal trimming is also applied with a similar logic to handle edge cases there.
const canvasHeight =
	Math.max(
		Math.abs(actualBoundingBoxAscent) + Math.abs(actualBoundingBoxDescent),
		(Math.abs(fontBoundingBoxAscent) || 0) +
			(Math.abs(fontBoundingBoxDescent) || 0),
	) * VERTICAL_EXTRA_SPACE;
canvas.height = canvasHeight;

const canvasWidth =
	Math.max(width, Math.abs(actualBoundingBoxLeft) + actualBoundingBoxRight) *
	HORIZONTAL_EXTRA_SPACE;
canvas.width = canvasWidth;
ctx.textBaseline = 'top';
ctx.font = `${FONT_SIZE * dpr}px "${font}"`;
ctx.fillStyle = fontColor;

// Do not start rendering the text at the very top of the canvas, so as to
// prevent cutting out ascender strokes on certain fonts.
// `4` is chosen so that text starts being rendered at the upper half of
// the canvas.
ctx.fillText(text, canvasWidth / 4, canvasHeight / 4);
trimCanvas(canvas);
And that’s it! 🎉 Here’s a quick test of how the same text as before is rendered across Chrome, Firefox, and Safari.
 |
 |
 |
Conclusion
In this post, we learned about an interesting application of the Canvas API. First, we considered some inconsistencies between browsers when trying to solely rely on the native TextMetrics API, and then, we came up with a suitable solution based on preparing a large enough canvas and manually cropping it out so that all empty regions are removed when generating the final image.
The source code of the live example contains some additional interesting tricks that are out of the scope of this blog post. It uses an OffscreenCanvas instead of a Canvas, if available; promisifies the toBlob method; and handles HDPI devices. Please check the CodeSandbox of this blog post to learn more.
If you want to check out the Electronic Signatures component of PSPDFKit for Web, please follow this Catalog example and select the Sign toolbar item. Depending on the width of your screen, the tool may be hidden inside the Annotations group, which you’ll need to select first.

