How to Split a PDF in .NET
In today’s blog post, we’re going to continue our journey of document editing with the PSPDFKit .NET Library. When working with PDFs — and PDF forms in particular — it’s often useful to split a PDF into two or more parts for logical archiving. We’re going to look at how this is possible with the PSPDFKit .NET Library and then discuss a few extra document editing features that may help keep your data in order and easily discoverable in the future.
ℹ️ Note: Sometimes the opposite of splitting PDFs is required to collate information for a report. If you’re looking for this kind of functionality, I suggest heading over to our blog post all about merging PDFs in .NET.
Use Case
Let’s start with a hypothetical example. Say you have a financial service where you offer advice to customers based upon their personal data and answers to questions relating to their financial situation.
You collect all the information with an initial signup form detailing three distinct sections:
-
Personal information
-
Current financial situation
-
A subjective questionnaire to determine risk tolerance
All this information comes to your team as part of a single PDF, and it’s your job not only to archive this information, but also to ensure that you can easily scrape the data for future projects.
For example, one of these projects could be to anonymously gather the financial information across your entire customer base to understand the financial stability of your customers. For this, you wouldn’t need any personal information, nor would you need the questionnaire section, so it’d be useful to have all the customer financial information in one place independent of the other sections. That’s where splitting a PDF comes into play.
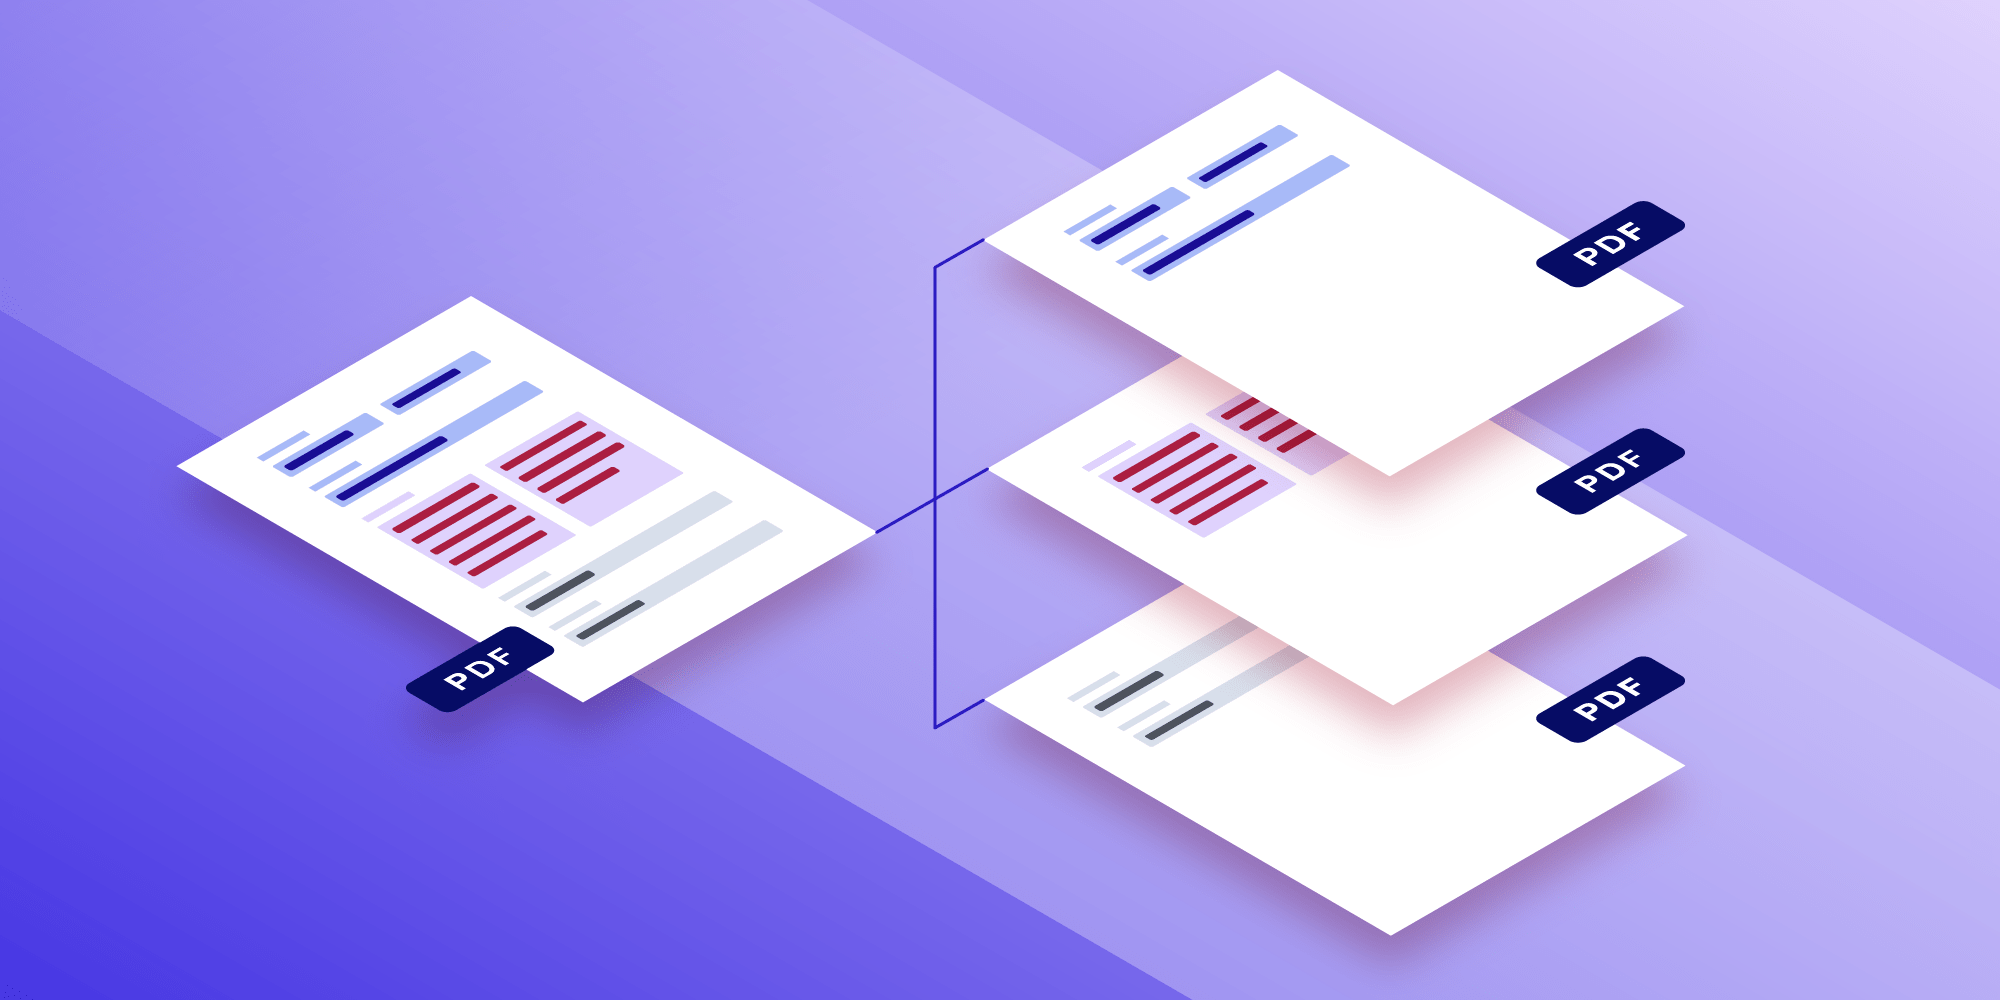
Splitting a PDF
To split a PDF in the PSPDFKit .NET Library, we’ll use the Document Editor. We want to make three distinct PDFs: one with personal information, one with financial information, and one with the completed questionnaire.
To do so, we are going to create three similar operations to work on different sections of the document.
First we’ll create a DocumentEditor object from the original document in order to make structural changes:
var document = new Document(new FileDataProvider("customerDocument.pdf"));
var documentEditor = document.CreateDocumentEditor();
At this point, we select the section we want to export. We do this by calling RemovePages with the pages we do not want to export:
documentEditor.RemovePages(new []{3,4,5,6,7});
All that’s left to do is save the results of the document to a new location:
// Save the document to an output file.
const string filename = "personalInformation.pdf";
// Create the file and close it to ensure it is not used by this process.
File.Create(filename).Close();
documentEditor.SaveDocument(new FileDataProvider(filename));
We’ll repeat the steps above for the additional two sections. To make this a little simpler, let’s make a helper function with all the code in it:
private static void ExportSectionOfPDF(string originalDocument, string outputDocument, IEnumerable<int> pagesToExport)
{
    var document = new Document(new FileDataProvider(originalDocument));
    var documentEditor = document.CreateDocumentEditor();

    var pageRange = Enumerable.Range(0, (int) document.GetPageCount());
    var pagesToRemove = pageRange.Where(pageIndex => !pagesToExport.Contains(pageIndex));

    documentEditor.RemovePages(pagesToRemove);

    File.Create(outputDocument).Close();
    documentEditor.SaveDocument(new FileDataProvider(outputDocument));
}
Simple, eh?! Now there are three distinct documents that can be filed away in the relevant locations for future work.
But I did say I’ll be showing you a few extra features that may help with the archiving, so let’s get into them.
Adding Informational Pages
You now have three separate PDFs, but you can’t possibly know who these belong to. This could be a data privacy issue — for example, if you cannot track down all the information you have about a customer in order to delete it at a later date.
Rather than just naming the file, we can add some extra information to the PDF in order for us to link the data with the customer name and a reference ID.
To do that, we’re going to extend the ExportSectionOfPDF function above to add an extra page. Then we’ll embed the customer name and ID on a blank page at the start of each document.
First, let’s edit the ExportSectionOfPDF function to add an initial blank page:
private static void ExportSectionOfPDF(string originalDocument, string outputDocument,
    IEnumerable<int> pagesToExport)
{
   ...

    documentEditor.RemovePages(pagesToRemove);

    const int pageHeight = 100;
    const int pageWidth = 100;
    documentEditor.AddPage(0, DocumentEditor.IndexPosition.BeforeIndex, pageHeight, pageWidth,
        Rotation.Degrees0, Color.White, new Insets());

    File.Create(outputDocument).Close();
    documentEditor.SaveDocument(new FileDataProvider(outputDocument));
}
With the output from this function, we’re able to add a text annotation with the customer name at the top of the blank page:
var document = new Document(new FileDataProvider("personalInformation.pdf"));
const string customerName = "John";
var annotationJson = new JObject
{
    {"bbox", new JArray(10, 10, 50, 20)},
    {"creatorName", "Me"},
    {"font", "Helvetica"},
    {"fontColor", "#000000"},
    {"fontSize", 16},
    {"isFitting", true},
    {"opacity", 1},
    {"pageIndex", 0},
    {"text", $"Customer Name : {customerName}"},
    {"type", "pspdfkit/text"},
    {"horizontalAlign", "left"},
    {"verticalAlign", "bottom"},
    {"v", 1},
};
document.GetAnnotationProvider().AddAnnotationJson(annotationJson);
We have the information on the page, so let’s save the document. We’re also going to flatten annotations during the save operation so that the customer name and ID are embedded as part of the first page:
document.Save(new DocumentSaveOptions{flattenAnnotations = true});
Voila! You have now split the PDF and added extra information to the output document to ensure you can always track this information down in the future.
Conclusion
After reading this blog post, you should now have a simple grasp of how the Document Editor works in the PSPDFKit .NET Library. Feel free to explore what else the Document Editor is capable of, and if you’re looking for extra features, check out our other guides and API documentation.
If you’d like to try out the PSPDFKit .NET Library for yourself, head over to the trial page and download the library today.

When Nick started tinkering with guitar effects pedals, he didn’t realize it’d take him all the way to a career in software. He has worked on products that communicate with space, blast Metallica to packed stadiums, and enable millions to use documents through PSPDFKit, but in his personal life, he enjoys the simplicity of running in the mountains.