Integrating PSPDFKit with GatsbyJS
I’ve been following GatsbyJS, a modern site generator for React, for quite a long time. Using React as a template engine for static sites sounded interesting on its own, but the flexibility GatsbyJS offers by allowing users to combine data of almost any possible source made it even more appealing. That said, what I most loved about it was how easy it was to obtain results.
The last time I played around with GatsbyJS, it was v1. In the time since, it has matured and grown and become so popular that I felt the urge to check it out again and see if it had learned any new tricks. So to put it to the test, I decided to see how I could use it with PSPDFKit for Web.
GatsbyJS is, as mentioned above, a static site generator. This means it’s aimed at presenting static content. If you want to share some PDF files in it, for example, you’d just generate a bunch of links from local files, which is a very easy task when using the GatsbyJS plugins. But what if you also wanted to offer capabilities for interacting with local PDF documents?
PSPDFKit for Web is a PDF framework that allows you to render and annotate PDF documents using its UI or its powerful API. If we found the way to add PSPDFKit to our GatsbyJS recipe, we could improve the user experience of dealing with PDF documents on our static site.
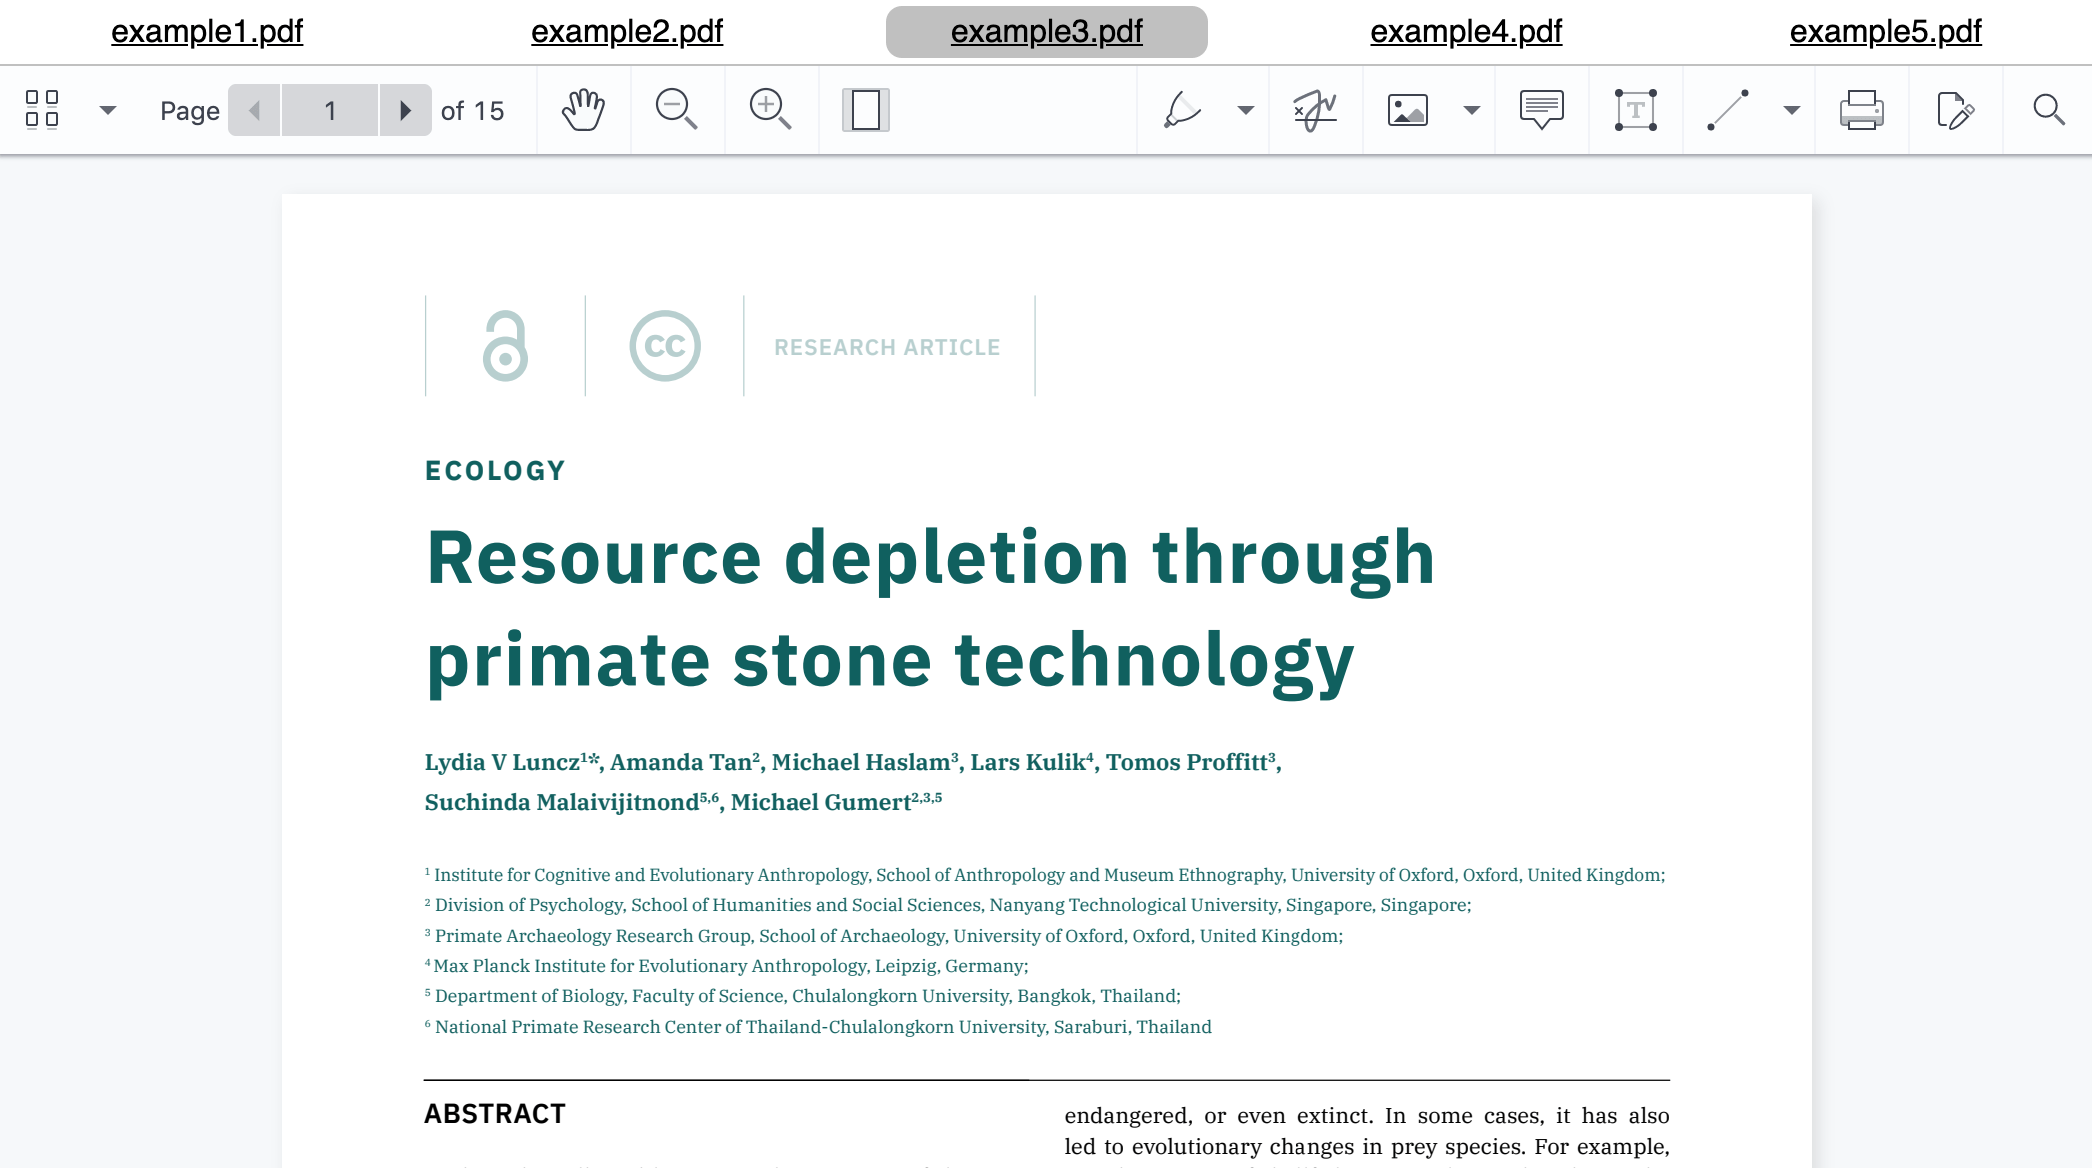
We’ll go through the steps needed to integrate PSPDFKit for Web in a GatsbyJS site by building a very simple PDF navigator with a top bar menu made up of links to our PDF files and a main area viewport to open and annotate those PDFs.
Setting Up GatsbyJS
Following the provided GatsbyJS tutorial, part 0, we install Node.js, Git, etc., and finally, we choose a package manager (npm is used in this document; refer to the yarn documentation for yarn usage instructions):
npm install -g gatsby-cli
Then we create our site using the hello-world template:
gatsby new pspdfkit-web-example-gatsbyjs https://github.com/gatsbyjs/gatsby-starter-hello-world
cd pspdfkit-web-example-gatsbyjs
If we ran the example at this point, we’d only see “Hello world!” in our browser window. This means that the installation succeeded and we can add our content to the site. But how do we include that content?
GatsbyJS can be configured to use different data as a content source; this data typically consists of local or remote files or databases. The generated site is built following the structure and template we specify, both of which are then applied to the content.
Structuring the Site
We’ll organize each PDF viewer on its own page (see part 1 of the Gatsby tutorial) and put the navigation menu in a layout component (see part 3 of the Gatsby tutorial) for sharing among pages.
To gather the information of the PDF files we want to make available, we’ll use the gatsby-source-filesystem plugin, which retrieves information from the local file system and makes it available to the GatsbyJS data query system.
So in the project folder, we’ll do the following:
npm install --save gatsby-source-filesystem
Let’s set up the plugin in our gatsby-config.js file so that it walks through the ./static/assets folder, which is where we put our PDF documents.
gatsby-config.js:
module.exports = {
	plugins: [
		{
			resolve: `gatsby-source-filesystem`,
			options: {
				name: `assets`,
				path: `${__dirname}/static/assets/`,
			},
		},
	],
};
We also need to make sure our components receive the data in its proper form and that a page is generated for each PDF document found. We do that in gatsby-node.js:
gatsby-node.js:
const path = require('path');
const { createFilePath } = require('gatsby-source-filesystem');

exports.onCreateNode = ({ node, getNode, actions }) => {
	const { createNodeField } = actions;
	if (node.internal.type === 'File') {
		const slug = createFilePath({ node, getNode, basePath: 'pages' });
		createNodeField({
			node,
			name: 'slug',
			value: slug,
		});
		createNodeField({
			node,
			name: 'title',
			value: node.base,
		});
	}
};

exports.createPages = async ({ graphql, actions }) => {
	const { createPage } = actions;
	const result = await graphql(`
		query {
			allFile {
				edges {
					node {
						fields {
							slug
							title
						}
					}
				}
			}
		}
	`);
	result.data.allFile.edges.forEach(({ node }) => {
		createPage({
			path: node.fields.slug,
			component: path.resolve('./src/templates/Viewport.js'),
			context: {
				slug: node.fields.slug,
			},
		});
	});
};
Now that we have our content ready, let’s make some room for it on our site by placing the PDF list in a navigation bar.
src/components/Menu.js:
import React from 'react';
import { useStaticQuery, graphql, Link } from 'gatsby';

const Menu = () => {
	const {
		allFile: { edges },
	} = useStaticQuery(graphql`
		query SidebarItemsQuery {
			allFile(sort: { fields: { title: ASC } }) {
				edges {
					node {
						fields {
							slug
							title
						}
					}
				}
			}
		}
	`);

	const pdfFiles = edges.filter(
		({ node }) =>
			node.fields.title && node.fields.title.endsWith('.pdf'),
	);

	return (
		<ul>
			{pdfFiles.map(({ node: { fields: { slug, title } } }) => (
				<li key={slug} className="menuItem">
					<Link
						to={slug}
						target="viewport"
						activeClassName="active"
					>
						{title}
					</Link>
				</li>
			))}
		</ul>
	);
};

export { Menu };
Then we’ll place the navigation bar accordingly in our layout’s higher-order component (HOC), which determines the overall structure of the site.
src/components/Layout.js:
import React from 'react';
import { Menu } from './Menu';

const withLayout = (Viewport) => (props) => (
	<div>
		<Menu />
		<Viewport {...props} />
	</div>
);

export { withLayout };
You may have noticed that the HOC receives a component named Viewport as its argument, and this component will contain the PSPDFKit for Web instance.
Let’s add a template for our PSPDFKit viewer and wrap it with our new Layout component.
src/templates/Viewport.js:
import * as React from 'react';
import { graphql } from 'gatsby';
import { withLayout } from '../components/Layout';

const Viewport = (props) => {
	const { title } = props.data.allFile.edges[0].node.fields;

	const containerRef = React.useRef();

	React.useEffect(() => {
		let PSPDFKit;

		import('pspdfkit').then(({ default: _PSPDFKit }) => {
			PSPDFKit = _PSPDFKit;
			return PSPDFKit.load({
				container: containerRef.current,
				document: `../assets/${title}`,
			});
		});

		return () => {
			PSPDFKit && PSPDFKit.unload(containerRef.current);
		};
	}, []);

	return <div className="viewport" ref={containerRef} />;
};

export default withLayout(Viewport);

export const pageQuery = graphql`
	query FilesQuery($slug: String) {
		allFile(filter: { fields: { slug: { eq: $slug } } }) {
			edges {
				node {
					fields {
						title
					}
				}
			}
		}
	}
`;
Things have suddenly become a bit more complicated. What’s happening in this component? To understand it easily, we’ll have to pause a minute to explain how GatsbyJS is able to make navigating static sites such a seamless experience.
In an ordinary single-page application (SPA), routing cannot be handled on the client side only. Let’s say your SPA is deployed in https://example.com. If you navigate directly to https://example.com/about-us, the server will send back the same index.html file you get when accessing https://example.com, but the application code it embeds will be aware of the current route, and it’ll fetch and render the corresponding data.
Now GatsbyJS is a static site generator that’s meant to be deployed on a static HTTP server (think S3, for example), which will just pass along the file you request as long as it’s there. And if it’s not there, it’ll issue a 404 error instead. So with GatsbyJS, when you navigate directly to https://example.com/about-us, you get served https://example.com/about-us/index.html. But once there, if you use one of the internal links to switch to, say, https://example.com/contact, you won’t “navigate” there. Rather, GatsbyJS will fetch only the assets it needs to build the corresponding content, and then it’ll render them.
This means that, for each navigable URL in the site, there’s an HTML file that can be opened directly and that includes the rendered content corresponding to the section of the site in question. Moreover, it contains the logic necessary to fetch the “chunks” of content of other navigable sections in the site. This way, when the user navigates from one section to another, the latter can be rebuilt without having to load another entire HTML file.
Now let’s go back to our current example: It should contain a URL for each PDF document that’s found in the ./static/assets folder, along with a server-side rendered HTML file that includes PSPDFKit for Web in it.
However, it’s currently not possible to render PSPDFKit for Web on the server. This means that our static site HTML files will have to fetch PSPDFKit for Web to be able to use it.
This is exactly what we do in the above component’s useEffect() hook. To have it run only when the component mounts, we need to pass it an empty dependencies array:
React.useEffect(() => {
	let PSPDFKit;

	import('pspdfkit').then(({ default: _PSPDFKit }) => {
		PSPDFKit = _PSPDFKit;
		// Once the script is loaded, load the PDF document.
		return PSPDFKit.load({
			container: containerRef.current,
			document: `../assets/${title}`,
		});
	});

	return () => {
		// Unload the instance when unmounting.
		PSPDFKit && PSPDFKit.unload(containerRef.current);
	};
	// Pass the empty dependencies array so the hook runs only on mount.
}, []);
Now the only thing left is adding some CSS salt into the mix. We’ll use global styles so we don’t complicate our example further.
src/styles/global.css:
body {
	font-family: Helvetica, sans-serif;
	margin: 0;
}

ul {
	display: flex;
	flex-direction: row;
	justify-content: space-around;
	height: 2rem;
	align-items: center;
	margin: 0;
	padding: 0;
	border-bottom: 1px solid #c0c0c0;
}

li {
	list-style-type: none;
}

.viewport {
	height: calc(100vh - 2rem);
}

.centered {
	height: calc(100vh - 2rem);
	justify-content: center;
	display: flex;
	flex-direction: column;
	align-items: center;
}

.menuItem a {
	border-radius: 0.5rem;
	padding: 0.25rem 2rem;
	color: black;
}

.active {
	background-color: #c0c0c0;
}
Then we’ll make it available to our site.
gatsby-browser.js:
import './src/styles/global.css';
Now we can just run npm run start, navigate to http://localhost:8000, and enjoy navigating between our PDF files with the viewing and annotating power of PSPDFKit for Web!
Conclusion
Integrating PSPDFKit for Web in your GatsbyJS site just takes a little bit of fiddling with the configuration. Feel free to clone and play with the source code for this example, which is available on our public repo. And if you want to have a look at what PSPDFKit for Web is capable of, don’t forget to check out our public demo!

As part of the Web Team, Miguel loves finding new challenges and trying to determine what the newest technologies can do to improve our product. Writing fiction, reading, and traveling are his passions the rest of the time.


