Create PDFs from Scratch in Linux

PSPDFKit Processor has been deprecated and replaced by PSPDFKit Document Engine. All PSPDFKit Processor licenses will work as before and be supported until 15 May 2024 (we will contact you about license migration). To start using Document Engine, refer to the migration guide. With Document Engine, you’ll have access to robust new capabilities (read the blog for more information).
This guide will take you through the process of designing a PDF using the PDF Generation feature.
Before you get started, make sure Processor is up and running.
You can download and use either of the following sample documents for the examples in this guide:
You’ll be sending multipart POST requests with instructions to Processor’s /build endpoint. To learn more about multipart requests, refer to our blog post on the topic, A Brief Tour of Multipart Requests.
Check out the API Reference to learn more about the /build endpoint and all the actions you can perform on PDFs with PSPDFKit Processor.
Document Content
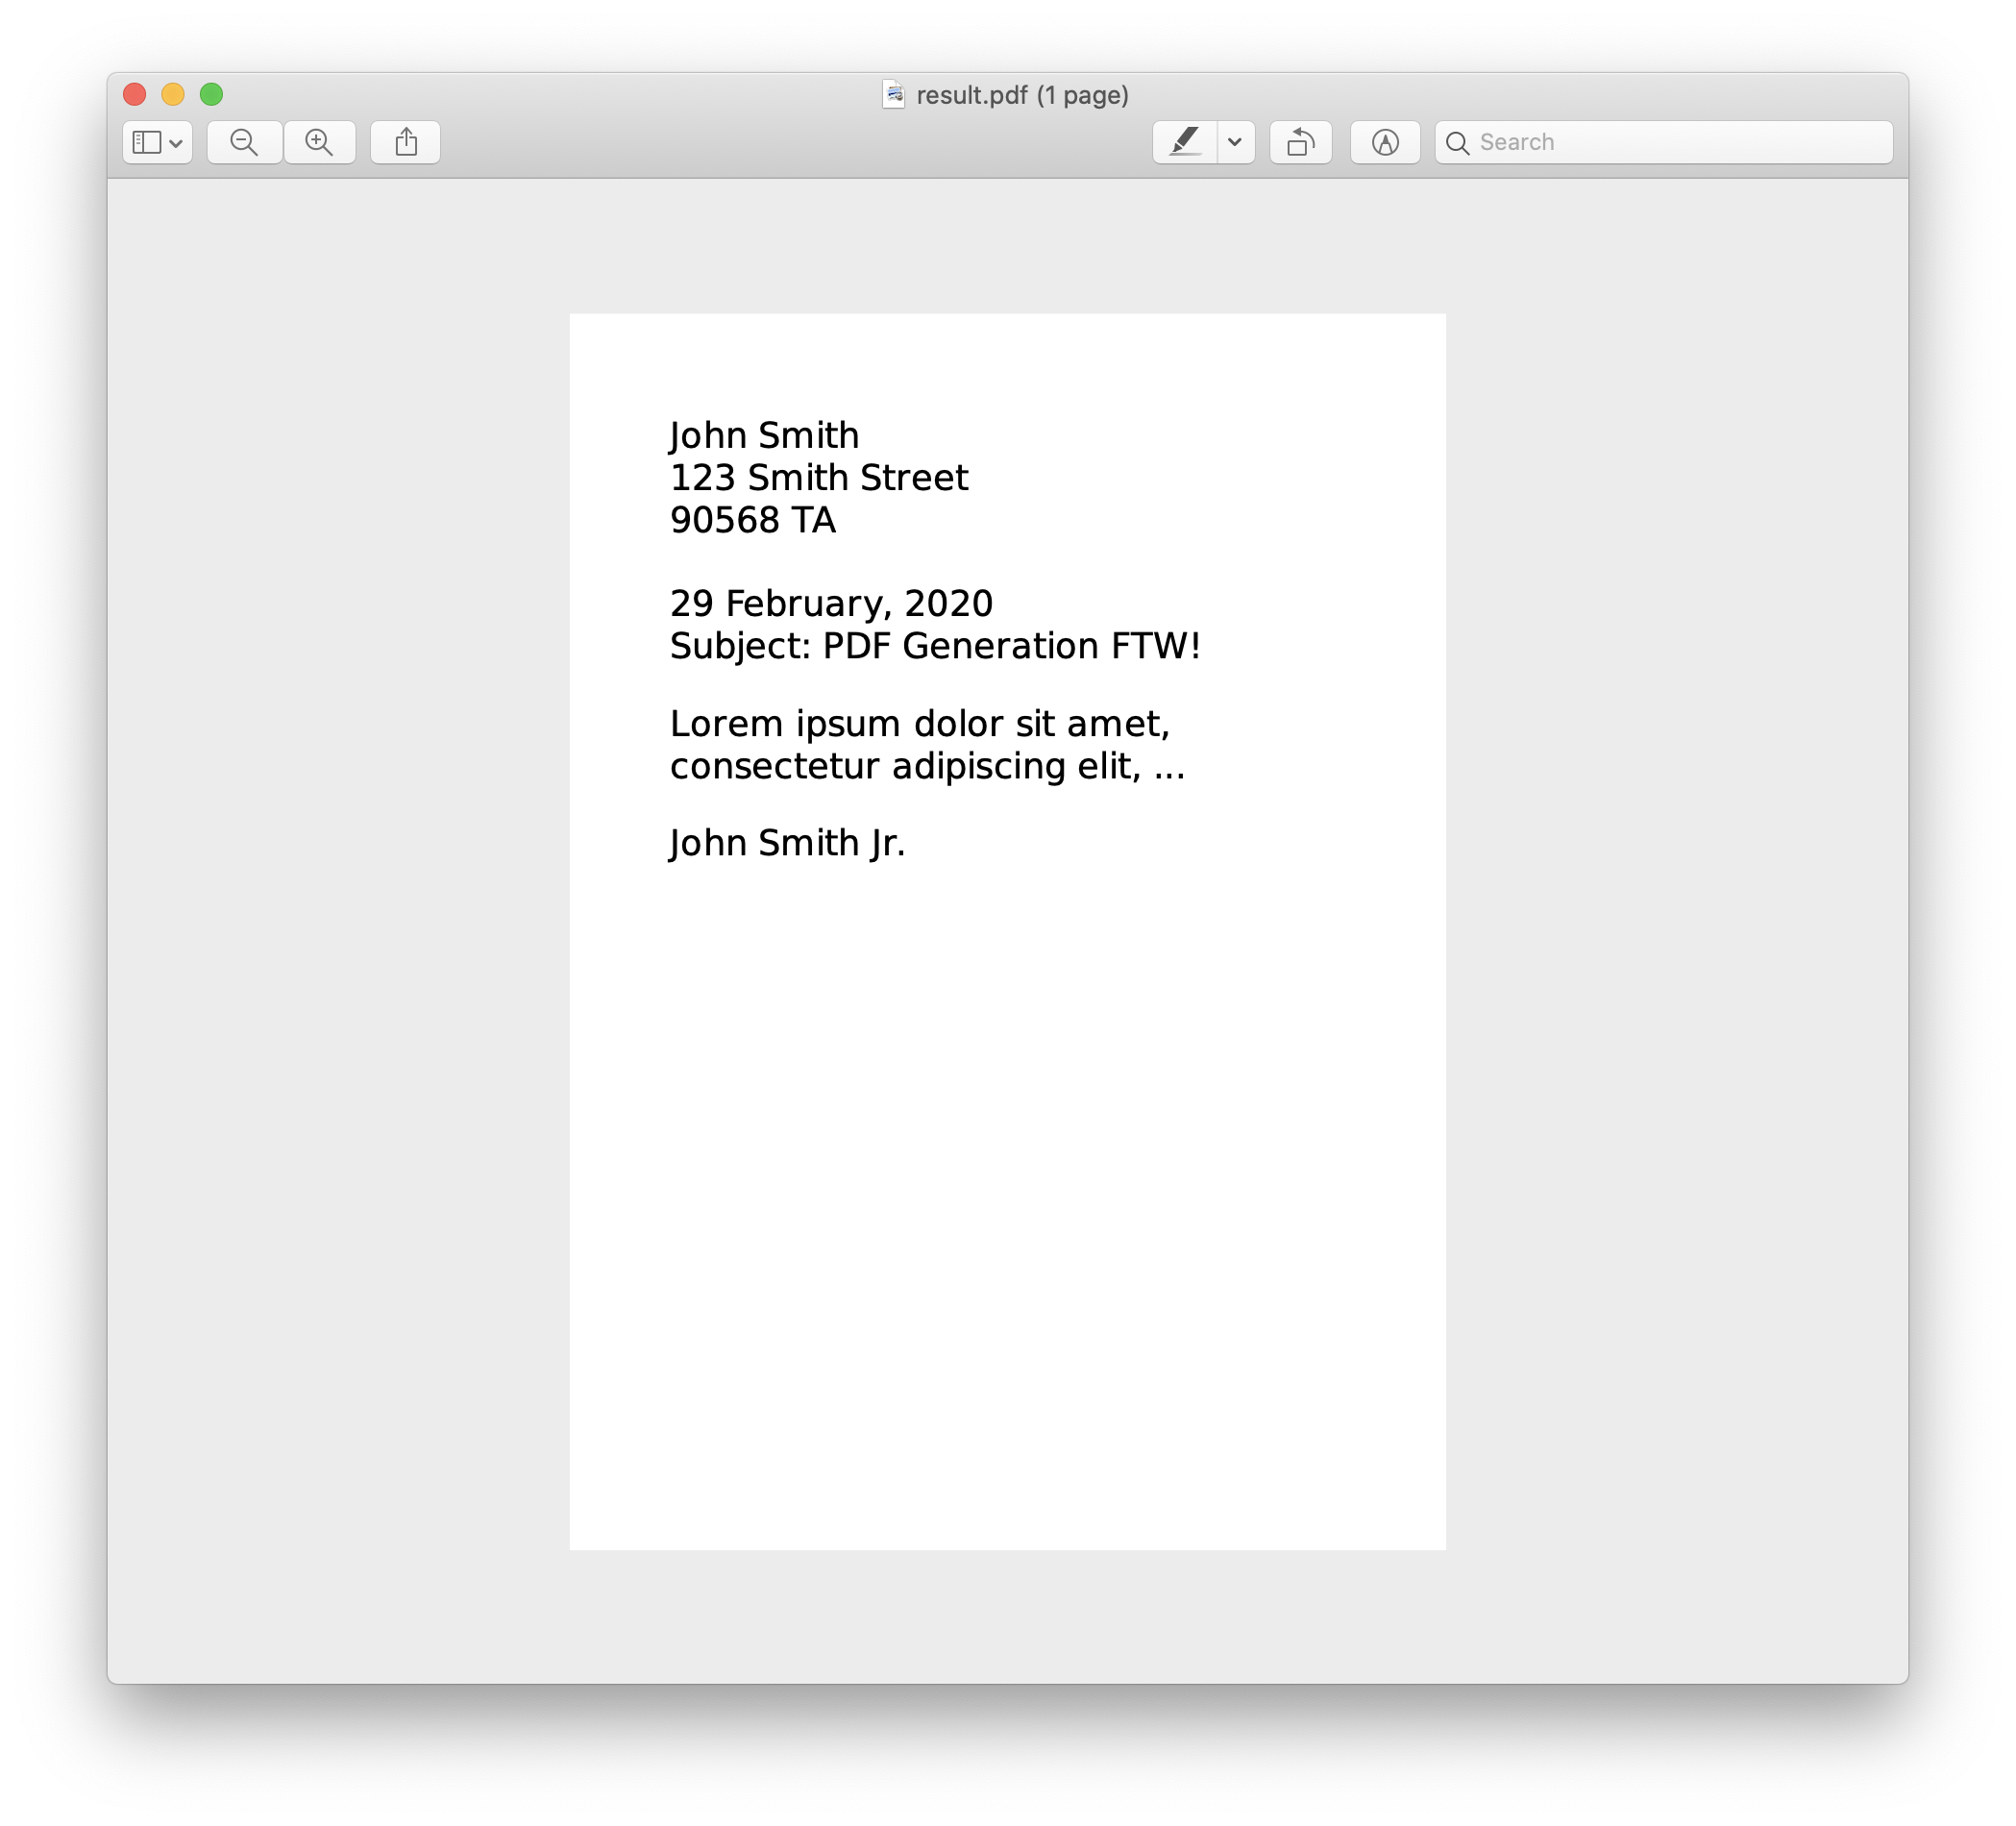
The PDF Generation component leverages HTML’s prominence and wide-reaching support to describe the content and layout of a desired PDF. To produce your first PDF, it’s as simple as passing a basic HTML document, as shown in the following letter example. The letter holds an address, subject, main body, and sign off, all in separate div blocks:
<!DOCTYPE html>
<html>
  <body>
    <div>
      John Smith<br />
      123 Smith Street <br />
      90568 TA <br />
      <br />
      29 February, 2020
    </div>
    <div>Subject: PDF Generation FTW!</div>
    <div>
      <p>
        Lorem ipsum dolor sit amet, consectetur adipiscing elit, ...
      </p>
    </div>
    <div>John Smith Jr. <br /></div>
  </body>
</html>
Next, send the HTML file from above to Processor for generation. This is done by sending a multipart request to the /build endpoint. Attach the instructions JSON, along with the HTML file from above:
curl -X POST http://localhost:5000/build \
  -F page.html=@/path/to/page.html \
  -F style.css=@/path/to/style.css \
  -F my-image.jpg=@/path/to/my-image.jpg \
  -F instructions='{
  "parts": [
    {
      "html": "page.html",
      "assets": [
        "style.css",
        "my-image.jpg"
      ]
    }
  ]
}' \
  -o result.pdf
POST /process HTTP/1.1
Content-Type: multipart/form-data; boundary=customboundary

--customboundary
Content-Disposition: form-data; name="page.html"; filename="page.html"
Content-Type: text/html

<HTML data>
--customboundary
Content-Disposition: form-data; name="style.css"; filename="style.css"


--customboundary
Content-Disposition: form-data; name="my-image.jpg"; filename="my-image.jpg"


--customboundary
Content-Disposition: form-data; name="instructions"
Content-Type: application/json

{
  "parts": [
    {
      "html": "page.html",
      "assets": [
        "style.css",
        "my-image.jpg"
      ]
    }
  ]
}
--customboundary--
After performing the above curl command, you’ll receive a PDF that looks like the following.

To help design your PDF, preview your HTML in Chrome or another Chromium-based browser. Minor differences, outlined in the [HTML layout and CSS considerations][html-css-considerations] guide, are to be expected. To further enhance the design experience, you can use the Chrome DevTools to resize your viewport to match your desired page size.
Document Layout
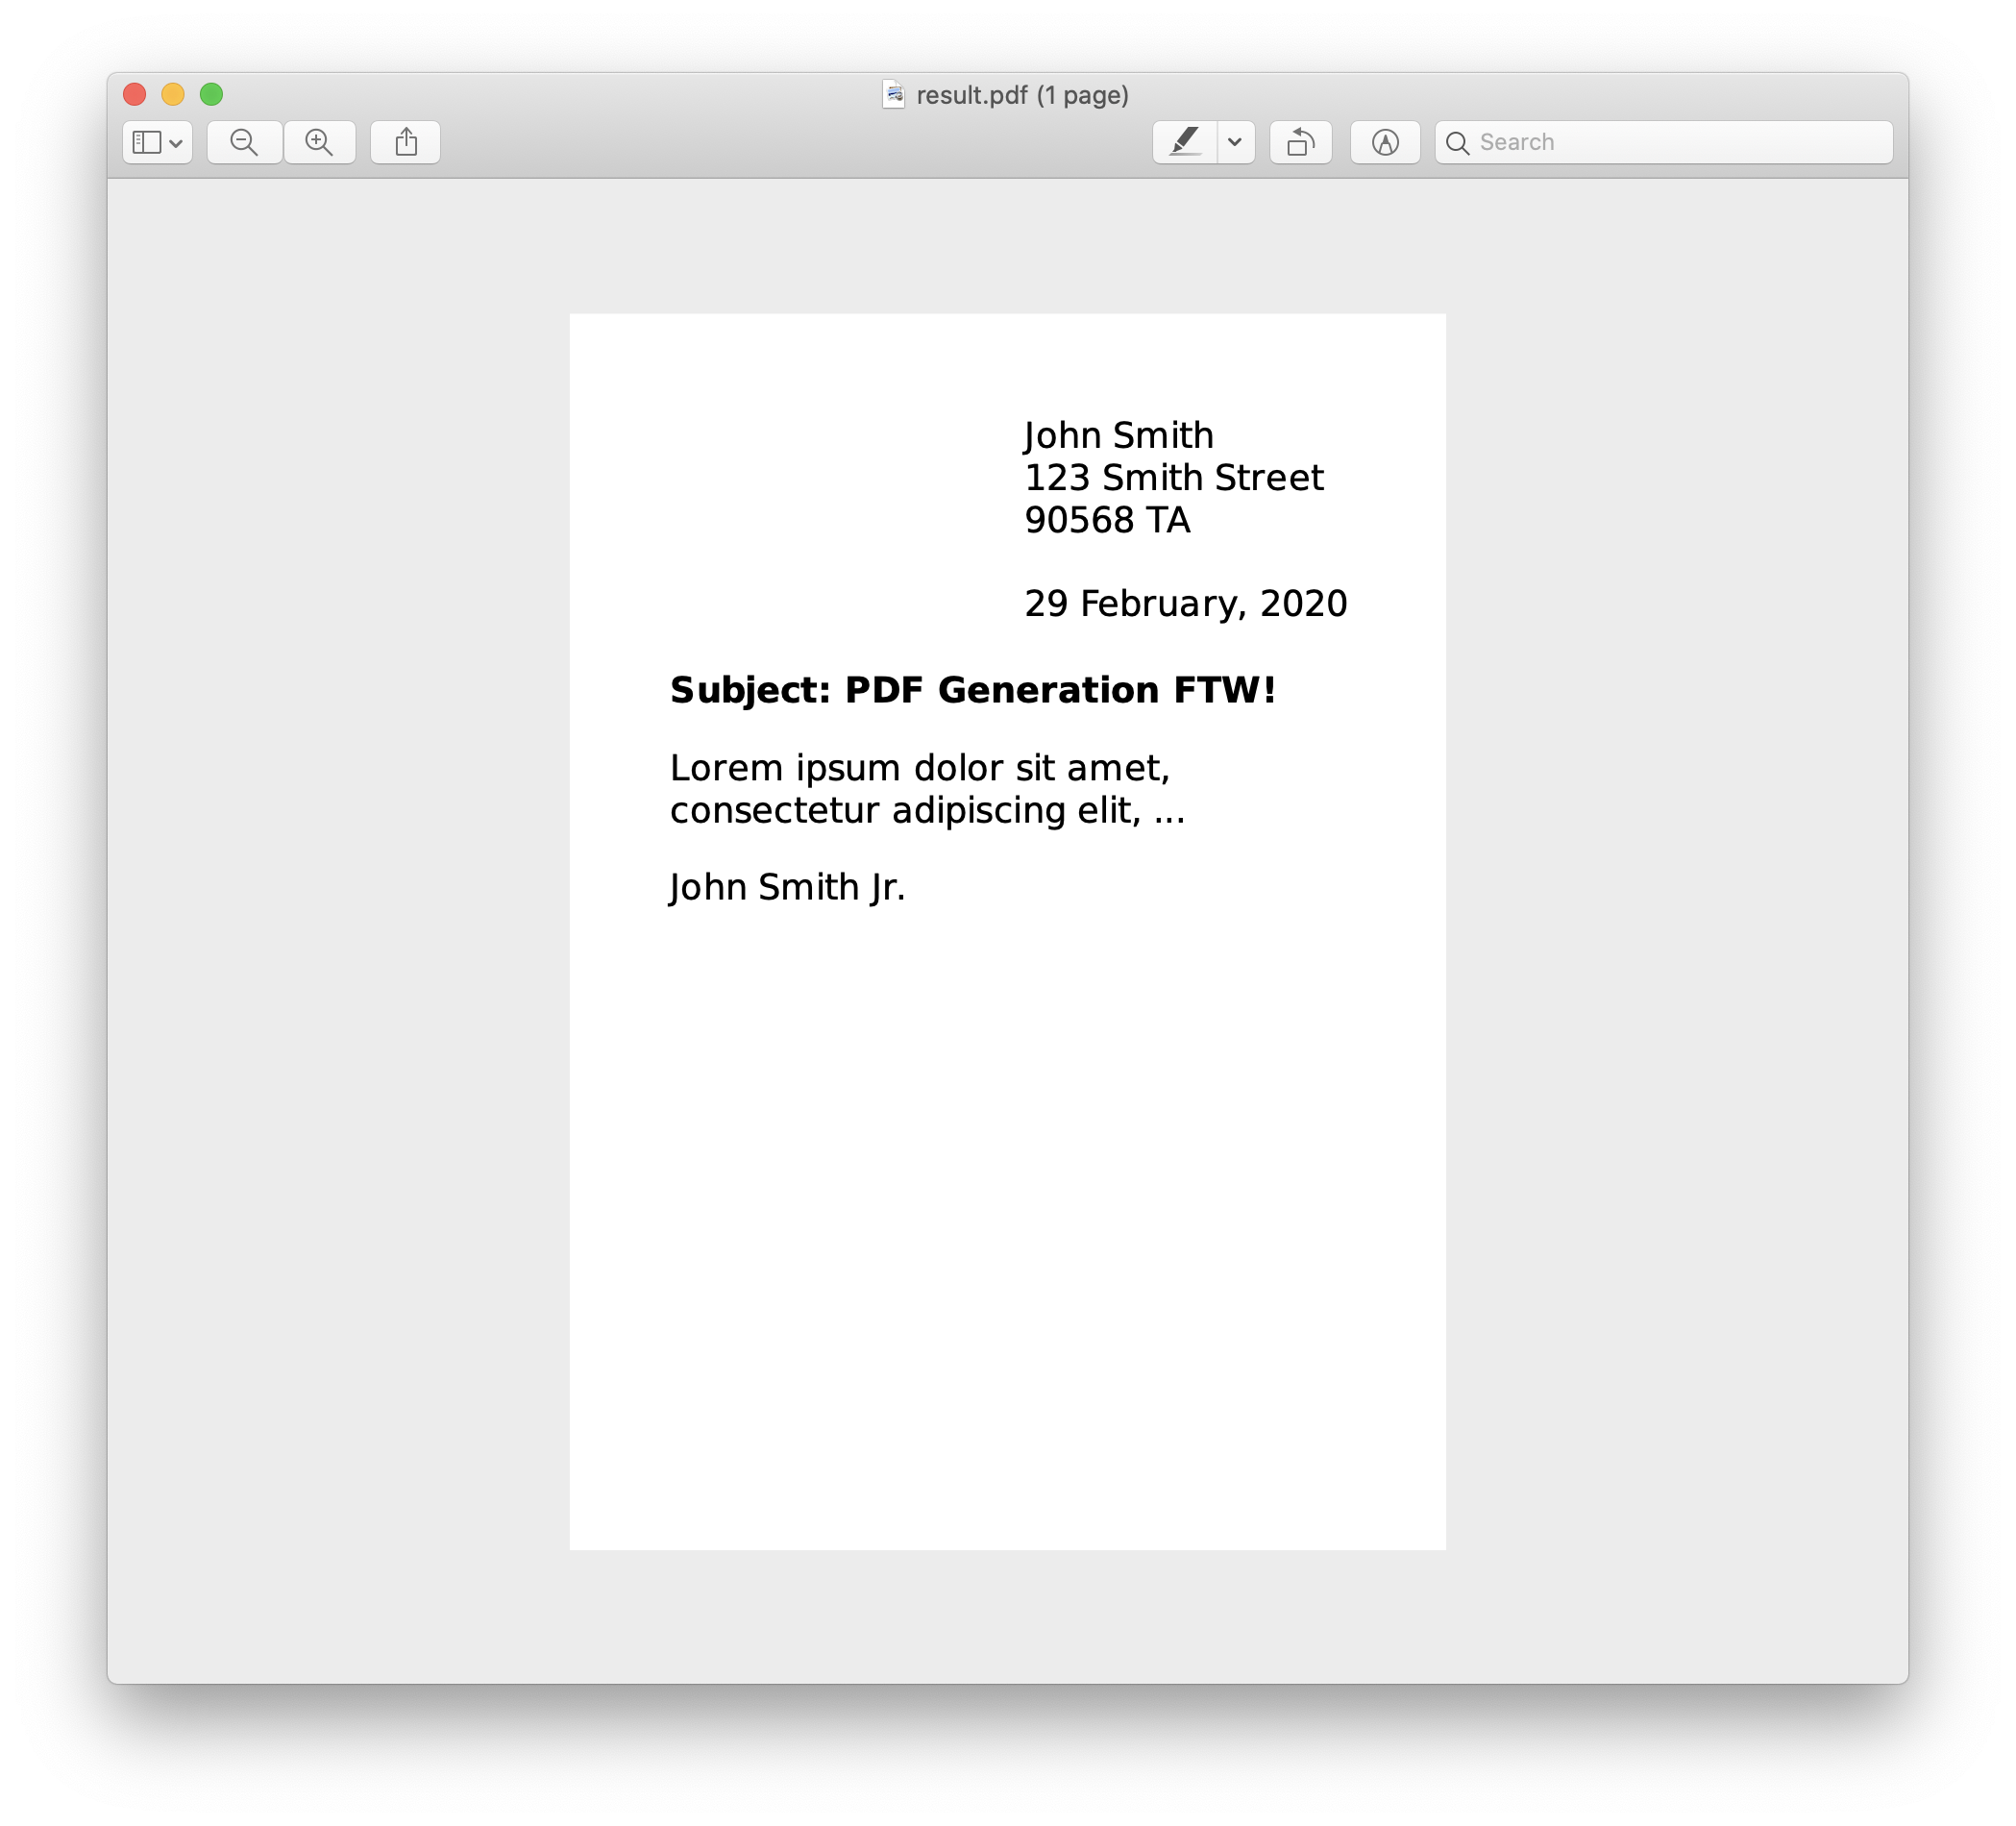
Now that you have the content you want, the next step is to improve the layout.
From the last example, you can see the text was pushing up to the side of the page, and the page size was A4. With the PDF Generation feature, the page size and margins are adjustable. To change them, include the extra information in the PDF Generation schema:
curl -X POST http://localhost:5000/build \
  -F page.html=@/path/to/page.html \
  -F instructions='{
  "parts": [
    {
      "html": "page.html",
      "layout": {
        "size": "a6",
        "margin": {
          "top": 10,
          "left": 10,
          "bottom": 10,
          "right": 10
        }
      }
    }
  ]
}' \
  -o result.pdf
POST /process HTTP/1.1
Content-Type: multipart/form-data; boundary=customboundary

--customboundary
Content-Disposition: form-data; name="page.html"; filename="page.html"
Content-Type: text/html

<HTML data>
--customboundary
Content-Disposition: form-data; name="instructions"
Content-Type: application/json

{
  "parts": [
    {
      "html": "page.html",
      "layout": {
        "size": "a6",
        "margin": {
          "top": 10,
          "left": 10,
          "bottom": 10,
          "right": 10
        }
      }
    }
  ]
}
--customboundary--
The size of the page has been reduced to A6, and all the edges have a margin of 10 mm.
Document Styling
To style various aspects of the documents, it’s possible to use CSS, much like you would on the web. CSS is well supported and expressive, which helps you achieve any look you desire.
Continuing with the letter example, move the address over to the right-hand side of the page, and style the subject line to make it more prominent:
<!DOCTYPE html>
<head>
  <style type="text/css">
    .address {
      text-align: left;
      float: right;
      margin-bottom: 20px;
    }
    .subject {
      clear: both;
      font-weight: bold;
    }
  </style>
</head>
<html>
  <body>
    <div class="address">
      John Smith<br />
      123 Smith Street <br />
      90568 TA <br />
      <br />
      29 February, 2020
    </div>
    <div class="subject">Subject: PDF Generation FTW!</div>
    <div>
      <p>
        Lorem ipsum dolor sit amet, consectetur adipiscing elit, ...
      </p>
    </div>
    <div>John Smith Jr. <br /></div>
  </body>
</html>
Send the same multipart request to Processor with the new HTML file. The result is a PDF document with certain elements styled as described in the following CSS file:
curl -X POST http://localhost:5000/build \
  -F page.html=@/path/to/page.html \
  -F instructions='{
  "parts": [
    {
      "html": "page.html",
      "layout": {
        "size": "a6",
        "margin": {
          "top": 10,
          "left": 10,
          "bottom": 10,
          "right": 10
        }
      }
    }
  ]
}' \
  -o result.pdf
POST /process HTTP/1.1
Content-Type: multipart/form-data; boundary=customboundary

--customboundary
Content-Disposition: form-data; name="page.html"; filename="page.html"
Content-Type: text/html

<HTML data>
--customboundary
Content-Disposition: form-data; name="instructions"
Content-Type: application/json

{
  "parts": [
    {
      "html": "page.html",
      "layout": {
        "size": "a6",
        "margin": {
          "top": 10,
          "left": 10,
          "bottom": 10,
          "right": 10
        }
      }
    }
  ]
}
--customboundary--
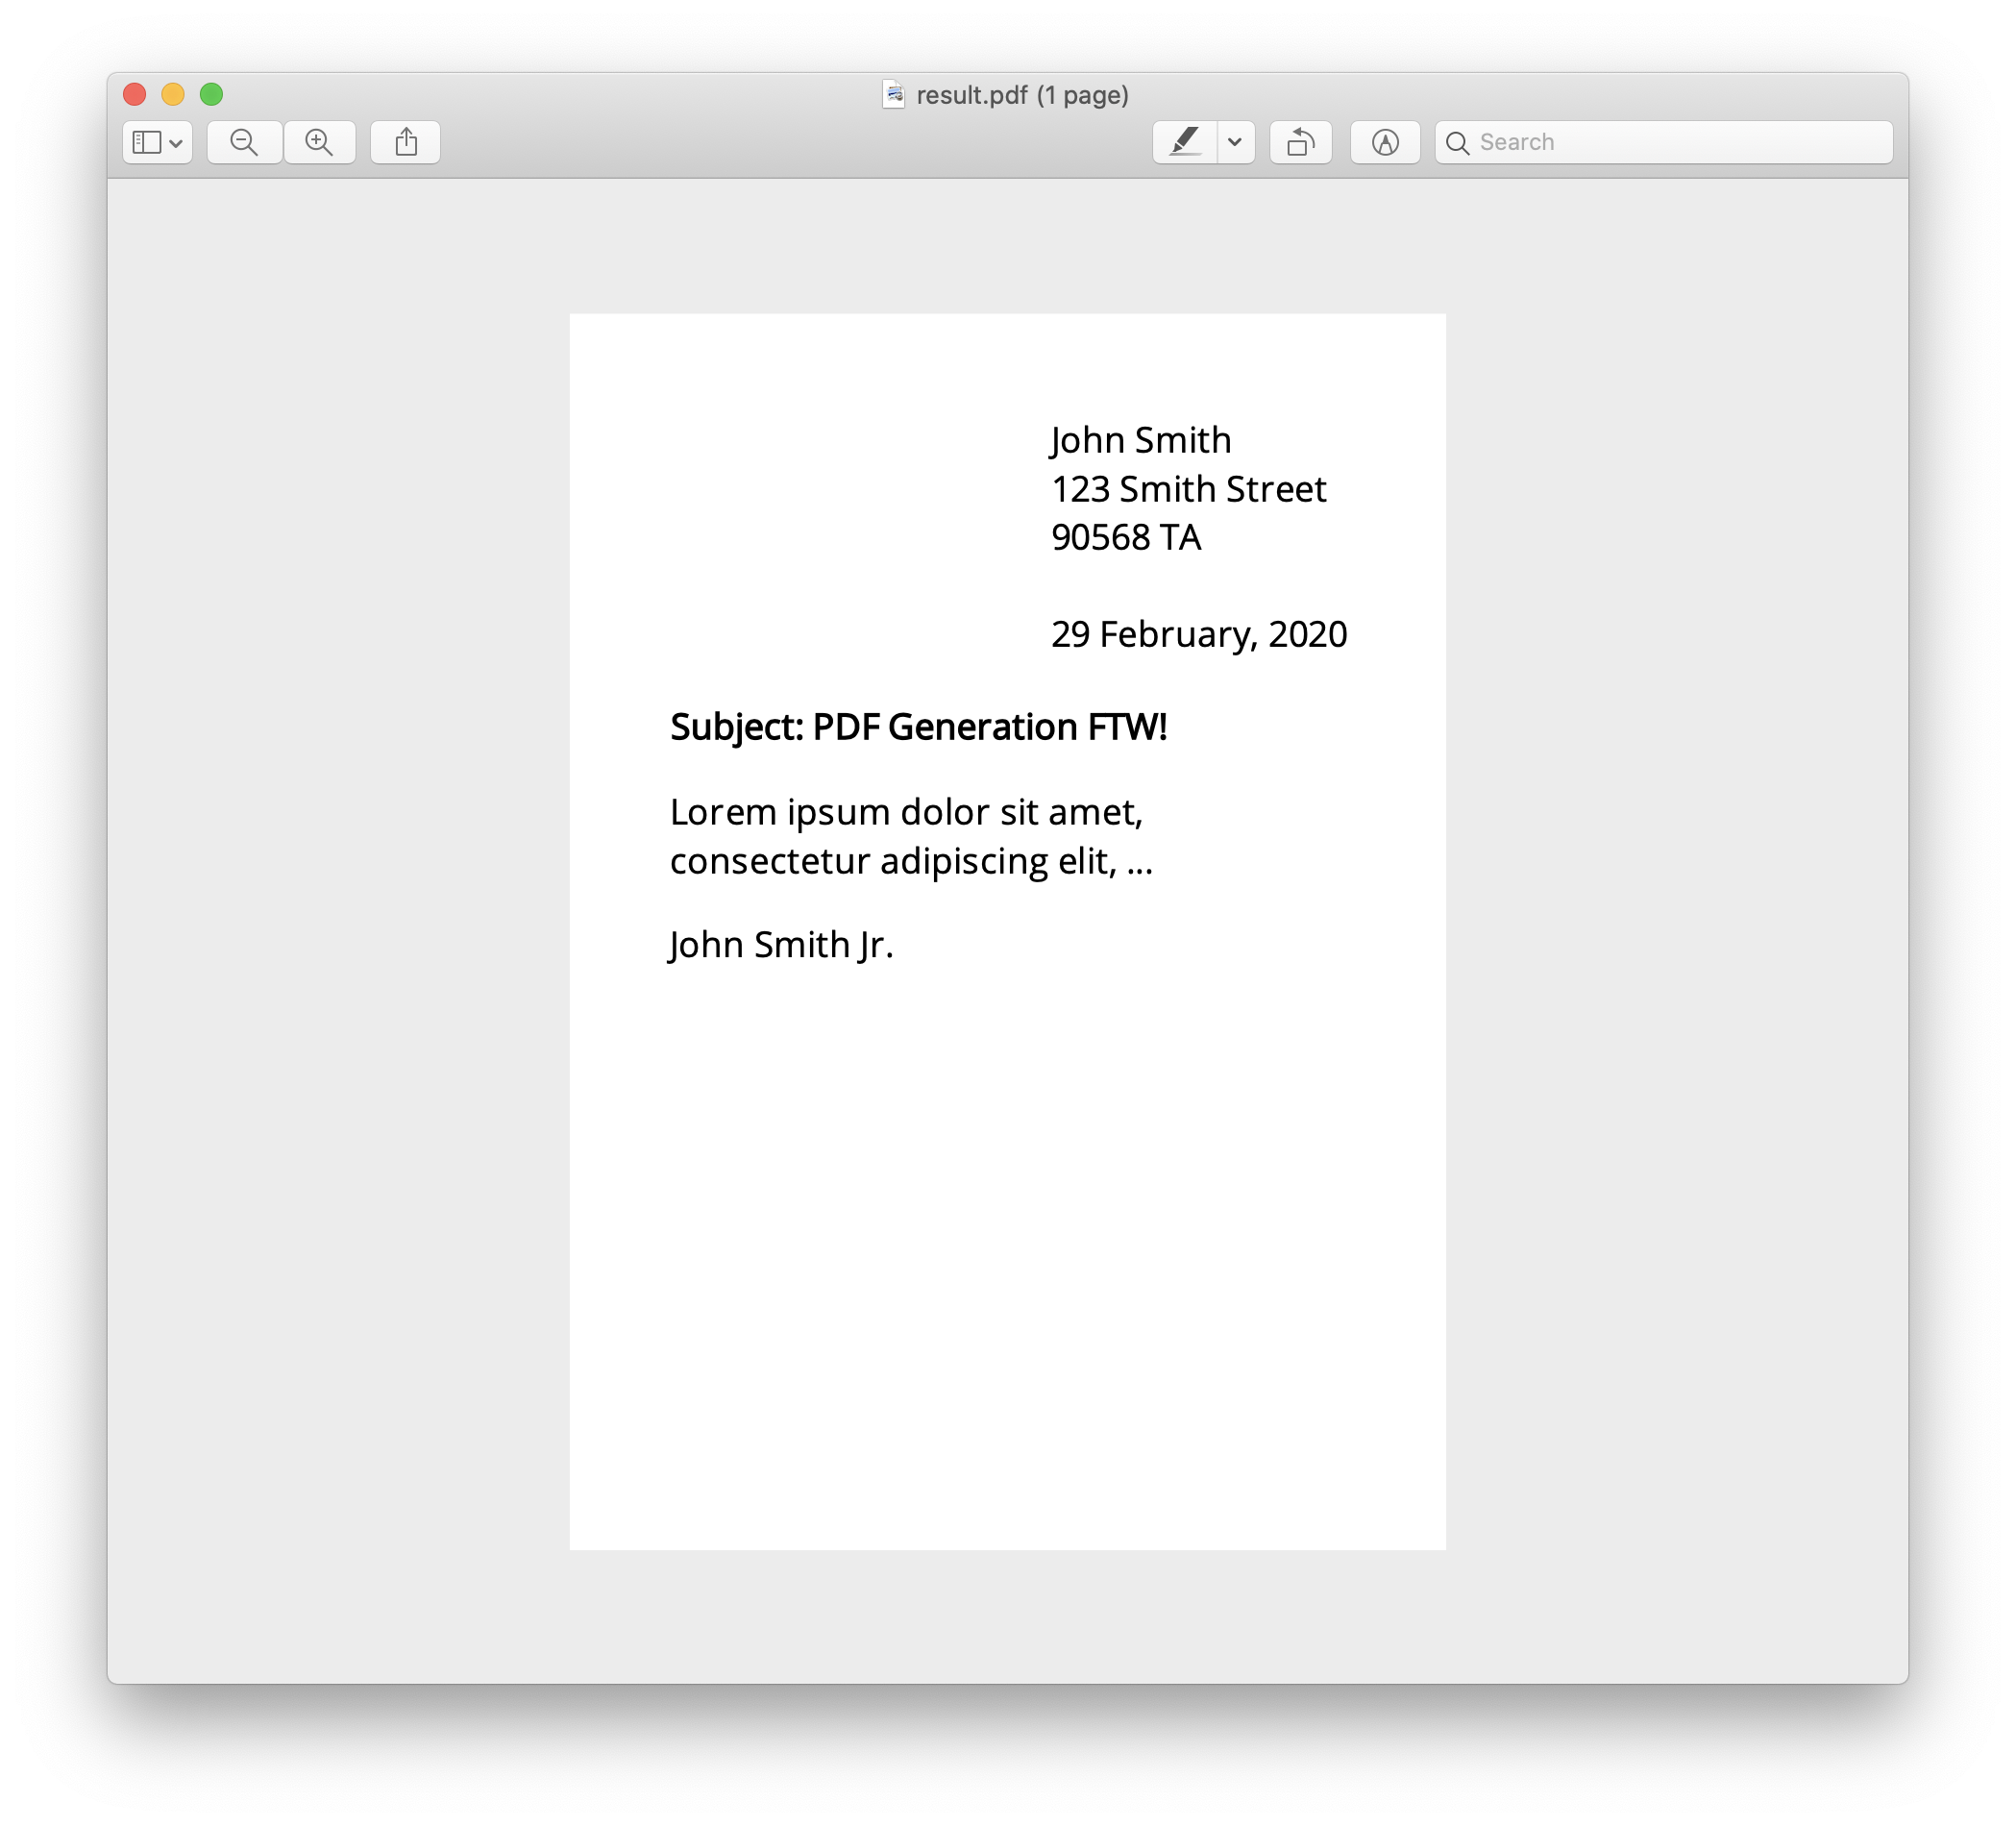
Font Selection
Rather than using the default font, it may be desirable to use a custom font to enhance the look of your final document.
You can do so by providing a font file in the generation schema and specifying the font in your HTML.
In the following example, you can use an Open Sans font, which you can retrieve from the Google Fonts repository.
First, adjust the HTML to both use the font file and specify the font family. Note that the src of the font file is referenced with no subdirectories, as though the file were residing next to the HTML. This is because PDF Generation only supports a flat-like directory structure:
<!DOCTYPE html>
<head>
  <style type="text/css">
    @font-face {
      font-family: "Open Sans";
      src: url("OpenSans-Regular.ttf") format("truetype");
    }
    body {
      font-family: "Open Sans", sans-serif;
    }
    .address {
      text-align: left;
      float: right;
      margin-bottom: 20px;
    }
    .subject {
      clear: both;
      font-weight: bold;
    }
  </style>
</head>
<html>
  <body>
    <div class="address">
      John Smith<br />
      123 Smith Street <br />
      90568 TA <br />
      <br />
      29 February, 2020
    </div>
    <div class="subject">Subject: PDF Generation FTW!</div>
    <div>
      <p>
        Lorem ipsum dolor sit amet, consectetur adipiscing elit, ...
      </p>
    </div>
    <div>John Smith Jr. <br /></div>
  </body>
</html>
Send the multipart request to Processor. Be sure that the extra OpenSans-Regular.tff asset is referenced in the HTML. The example below shows how the multipart request is formed.
The font file, OpenSans-Regular.ttf, doesn’t reside in a subdirectory, and its name in the multipart request is the same name that’s referenced in the HTML file.
curl -X POST http://localhost:5000/build \
  -F page.html=@/path/to/page.html \
  -F OpenSans-Regular.ttf=@/path/to/OpenSans-Regular.tff \
  -F instructions='{
  "parts": [
    {
      "html": "page.html",
      "layout": {
        "size": "a6",
        "margin": {
          "top": 10,
          "left": 10,
          "bottom": 10,
          "right": 10
        },
        "assets": [
          "OpenSans-Regular.ttf"
        ]
      }
    }
  ]
}' \
  -o result.pdf
POST /process HTTP/1.1
Content-Type: multipart/form-data; boundary=customboundary

--customboundary
Content-Disposition: form-data; name="page.html"; filename="page.html"
Content-Type: text/html

<HTML data>
--customboundary
Content-Disposition: form-data; name="OpenSans-Regular.ttf"; filename="OpenSans-Regular.tff"


--customboundary
Content-Disposition: form-data; name="instructions"
Content-Type: application/json

{
  "parts": [
    {
      "html": "page.html",
      "layout": {
        "size": "a6",
        "margin": {
          "top": 10,
          "left": 10,
          "bottom": 10,
          "right": 10
        },
        "assets": [
          "OpenSans-Regular.ttf"
        ]
      }
    }
  ]
}
--customboundary--
result.pdf will now have the font applied to the whole document and will render like the following.
Next Steps
You’ve walked through each step of defining, aligning, and styling, and now you should have the skills to design a wide range of unique PDFs. For an enhanced design experience, we suggest using a Chromium-based browser, which will speed up the development process.
After refining your skills, you may realize you have the need to inject elements and values into the HTML prior to sending the document for generation. In the following guides, we demonstrate how to inject data into an HTML template to produce highly customized PDFs — such as invoices with multiple line items, order forms with unique products, or runtime-generated graphs — so as to provide additional context for your customers.
Choose your language-specific Variable Data guide to learn how to inject elements and values at runtime: