Configure Measurements in a PDF on iOS
Measure distance and area in a PDF using PSPDFKit for iOS starting with version 11.5. With version 13.0, PSPDFKit added support to store multiple scales in a document and improved the calibration tool. To measure distance and area in your app, contact the Sales team to add the Measurement Tools component to your license, or run the SDK in trial mode.
Configure measurements in one of the following ways:
-
Configure the scale and the precision of the measurements. The scale determines the size of an object on a page relative to the size of a corresponding real-world object. For example, a document shows the floor plan of a house where one centimeter on the floor plan represents two meters in the house. The precision determines the decimal places or fractions displayed in the measured value.
The configuration for scale and precision is stored in a document, and it persists when you close and reopen the document on any device. The configuration for snapping isn’t stored in the document, and it persists only when you close and reopen the document on your own device.
The snapping setting persists over app restarts, but it isn’t stored in the document like scale and precision are.
Configuring Scale and Precision
The scale determines the size of an object on a page relative to the size of a corresponding real-world object. For example, a document shows the floor plan of a house where one centimeter on the floor plan represents two meters in the house.
A scale is stored within a MeasurementValueConfiguration, which also includes an optional name for the scale and the precision.
The precision determines the number of decimal places or fractions displayed in the measured value. You can select fractional precision for inches, feet, and yards. The fractional value in the measurement displays fractions of an inch.
There can be multiple scales stored in the document.
Configure scale in one of the following ways:
Configuring Scale and Precision Using the Built-In UI
You can configure the precision of each measurement individually. Configuring the precision on one measurement sets the initial precision value for all future measurements.
You can configure the scale and precision of each measurement individually or make multiple annotations use the same one. Configuring the scale and precision on one measurement sets the initial scale value for all future measurements. The measurement displays a maximum of four decimal places.
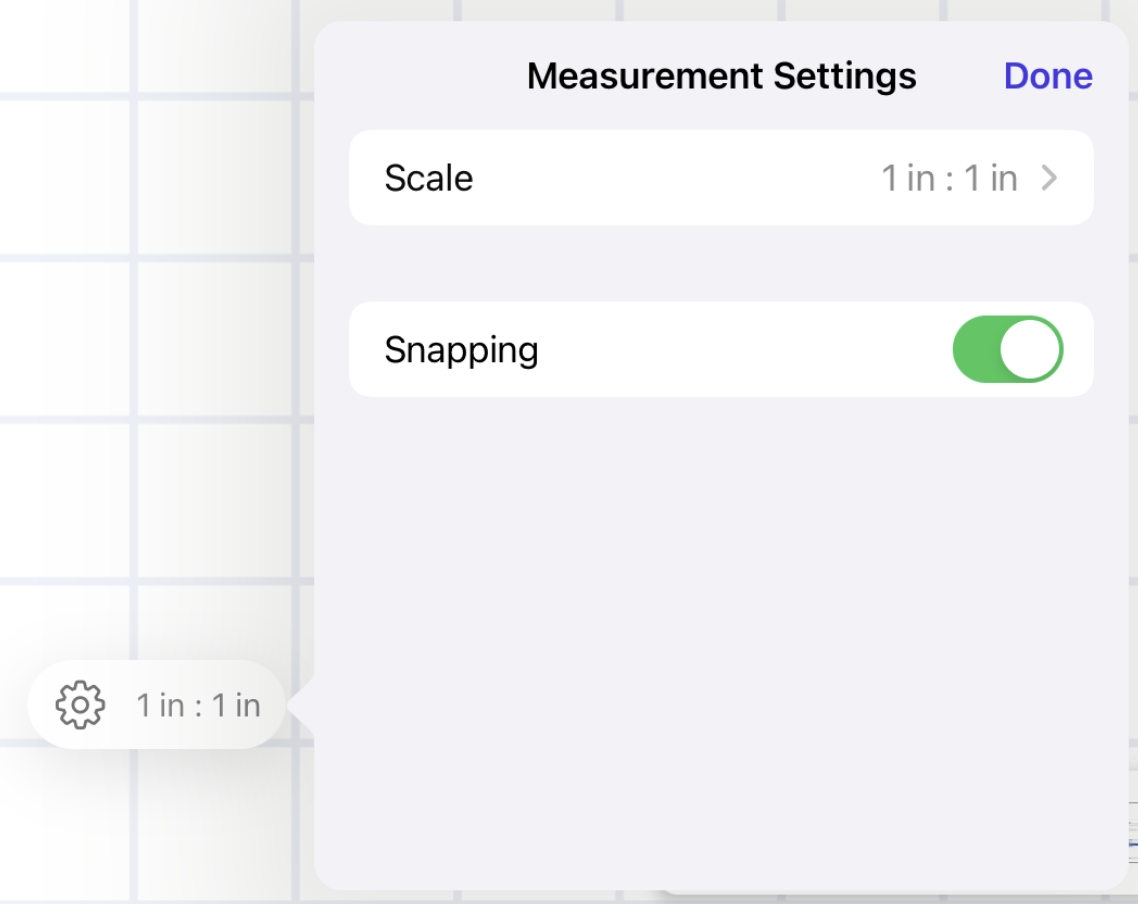
Use the Measurement Settings
-
Select a measurement on the page or select a measurement tool on the annotation toolbar.
-
Tap the floating scales button on the bottom left of the UI to show Measurement Settings.
-
Choose Scale.
-
Either tap Edit to modify an existing scale, or choose Add Scale….
-
In Scale, specify the scale based on how length on a page corresponds to length in the real world.
-
In Precision, specify the number of decimal places or fractions to display. You can display a maximum of four decimal places or fractions up to one sixteenth.

Use the Annotation Inspector
To configure the scale of a measurement and the number of decimal places and fractions displayed in a measured value using the built-in UI, follow the steps below.
-
Touch and hold the measurement.
-
In the dialog that appears, tap Inspector.
-
Tap Scale.
-
Either tap Edit to modify an existing scale, or choose Add Scale….
-
In Scale, specify the scale based on how length on a page corresponds to length in the real world.
-
In Precision, specify the number of decimal places or fractions to display. You can display a maximum of four decimal places or fractions up to one sixteenth.
The example below configures the scale so that one centimeter in a floor plan document represents two meters in a house, and it configures the precision so that three decimal places are displayed.
Using the Calibration Tool
-
Select the calibration tool from the annotation toolbar or Use Calibration Tool… from the annotation inspector.
-
Draw a line on the page.
-
In Calibrate Length, specify the real-world length corresponding to the measurement.
-
Tap Done to add the scale to the document.
The example below configures the scale so that the length of an existing distance measurement represents eight feet in the real world.
Configuring Default Units and Precision Programmatically
When a user sets the scale and precision using the built-in UI as outlined in the section above, you can programmatically set default units and precision shown in this UI using the defaultMeasurementValueConfiguration property of Document:
let defaultScale = MeasurementScale(from: 1, unitFrom: .millimeter, to: 1, unitTo: .millimeter)
document.defaultMeasurementValueConfiguration = MeasurementValueConfiguration(name: nil, scale: defaultScale, precision: .whole)
The user is expected to modify the from and to values — either directly when entering a new scale, or indirectly using the calibration tool — so the values used here don’t matter much. If you already know what these values should be for the document, don’t use this API. Instead, set the entire scale programmatically, as described in the section directly below.
Configuring Scale and Precision Programmatically
To configure the scale of a measurement programmatically, use the MeasurementValueConfiguration class. This allows setting the precision, as well as an optional name for the scale. Setting the precision only affects the visible value label. You can retrieve the unrounded measurement value via the API.
The example below configures the scale so that one centimeter in a floor plan document represents two meters in a house and configures precision so that four decimal values are displayed:
let scale = MeasurementScale(from: 1, unitFrom: .centimeter, to: 2, unitTo: .meter)
let valueConfiguration = MeasurementValueConfiguration(name: "House Scale", scale: scale, precision: .fourDecimalPlaces)
To configure the initial scale value for all future measurements, use the activeMeasurementValueConfiguration property:
let scale = MeasurementScale(from: 1, unitFrom: .centimeter, to: 2, unitTo: .meter)
document.activeMeasurementValueConfiguration = MeasurementValueConfiguration(name: "House Scale", scale: scale, precision: .fourDecimalPlaces)
Disabling Snapping
By default, PSPDFKit snaps measurements to existing drawings on a page. This helps you make precise measurements. A built-in magnifier displays the zoomed-in view of the currently drawn measurement.
To disable snapping in a document using the built-in UI, follow these steps:
-
Select a measurement on the page or select a measurement tool on the annotation toolbar.
-
Tap the floating scales button on the bottom left of the UI to show Measurement Settings.
-
Disable the Snapping toggle.
Disabling Measurement Tools
By default, measurement tools are enabled if your license includes the Measurement Tools component.
To remove measurement tools from the toolbar, see Customizing the Annotation Toolbar on iOS.