This guide will walk you through the steps necessary to integrate PSPDFKit for MAUI into your desktop or mobile project. By the end, you’ll be able to present a PDF document in the PSPDFKit UI.

PSPDFKit for MAUI can be evaluated without a trial license key, but with certain limitations (such as a red watermark added to documents). To evaluate without limitations, get a trial key.
PSPDFKit does not collect any data during your evaluation of the SDK.
Requirements
-
For developing on Windows, you need Visual Studio 2022 17.3 or greater. For more information, see the prerequisites for MAUI installation on Windows.
-
For developing on a Mac, you need Visual Studio 2022 for Mac 17.4 or greater. For more information, see the prerequisites for MAUI installation on Mac.
Creating a New Project
-
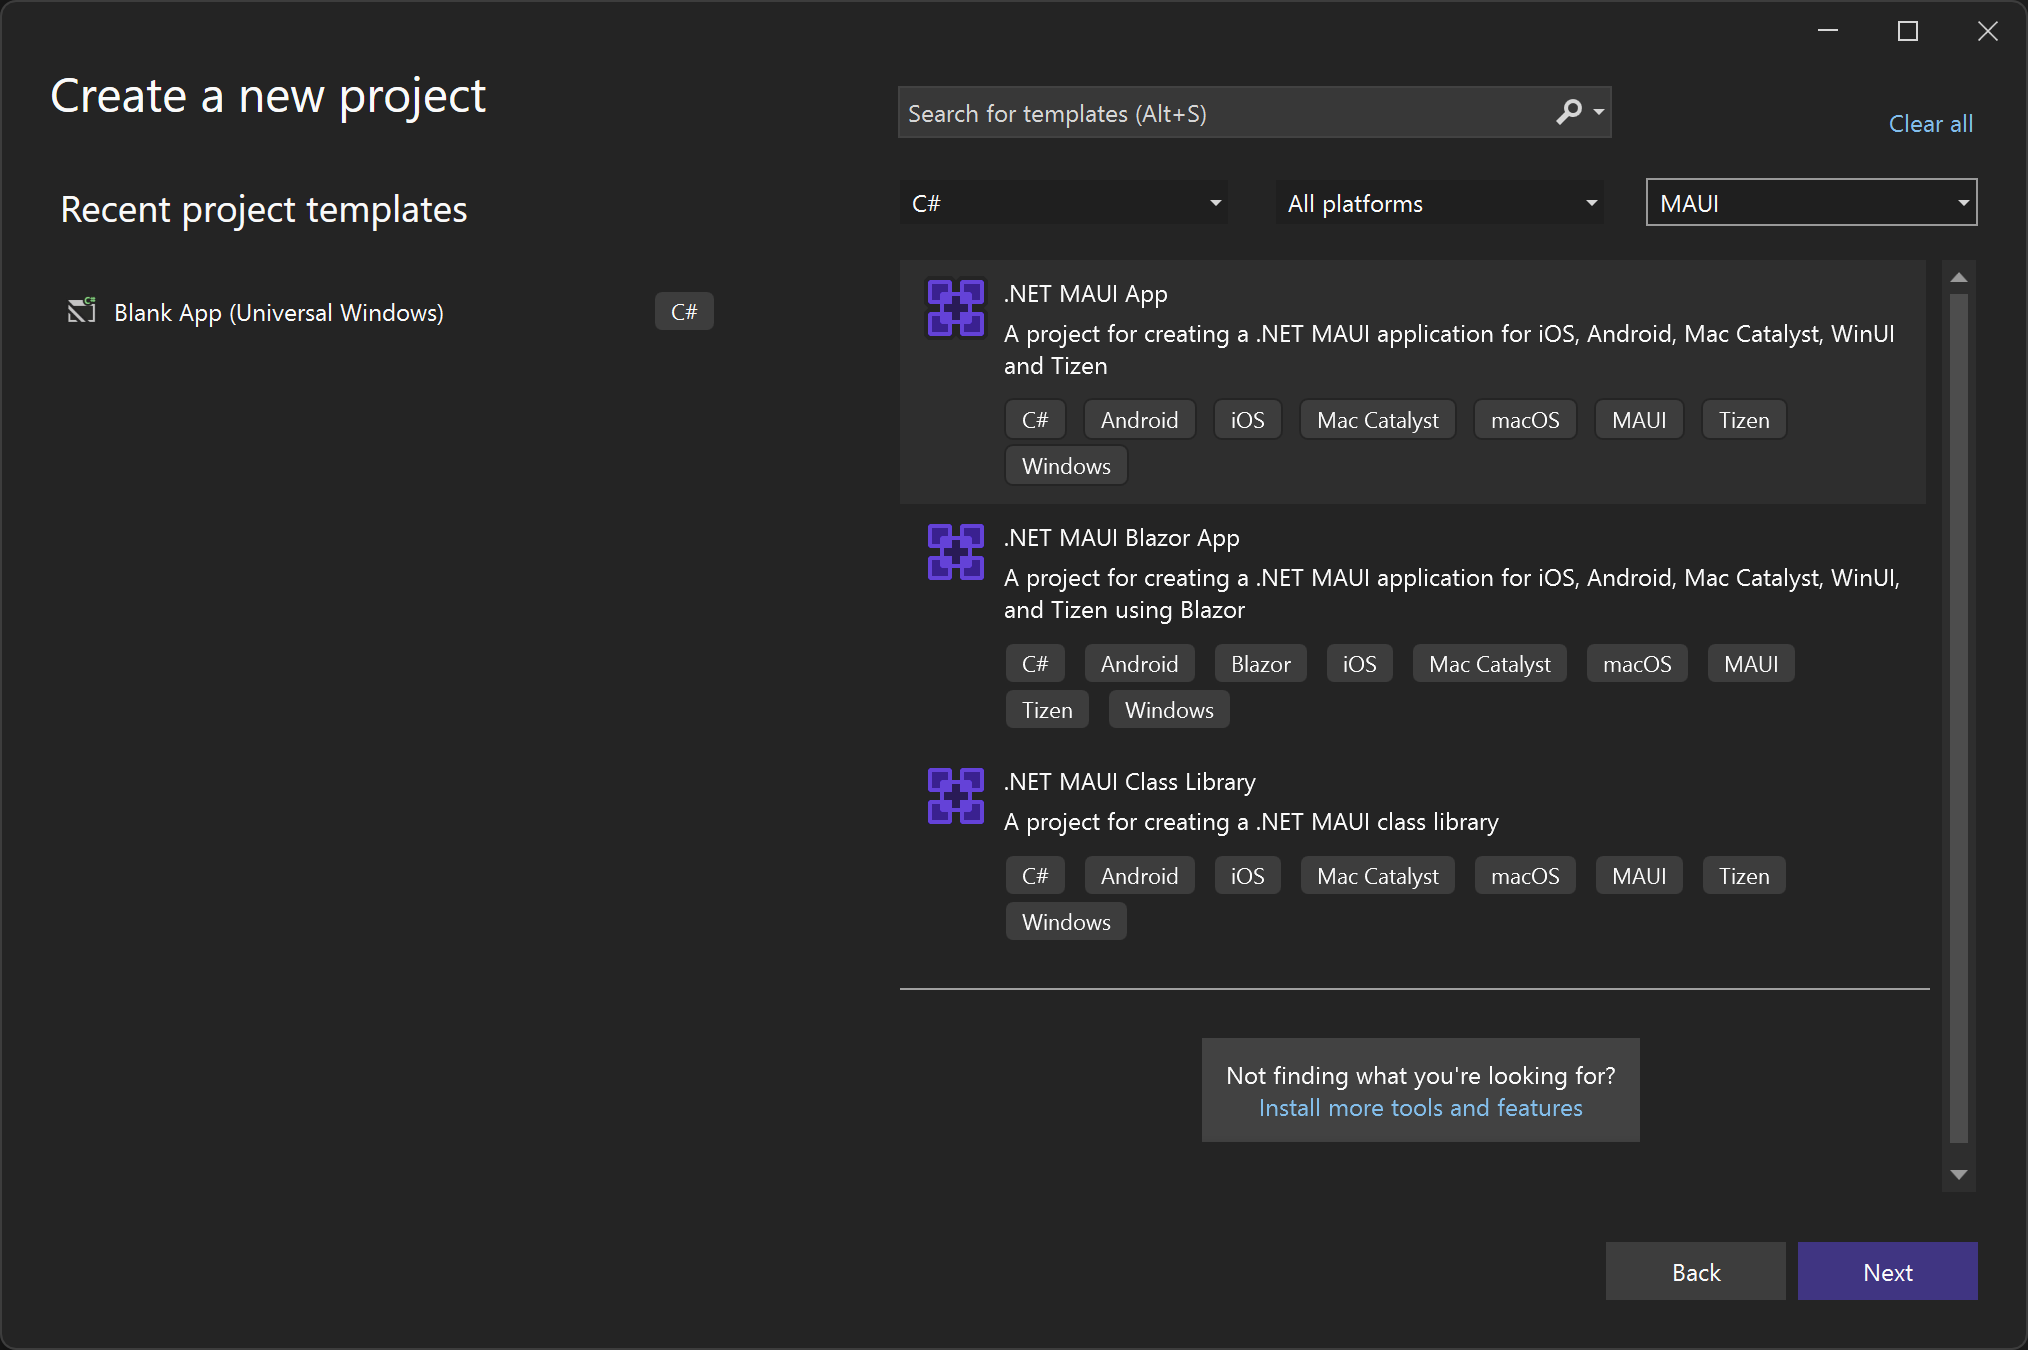
Open Visual Studio. Select Create a new project.

-
In the new project wizard, select .NET MAUI App and click Next.
-
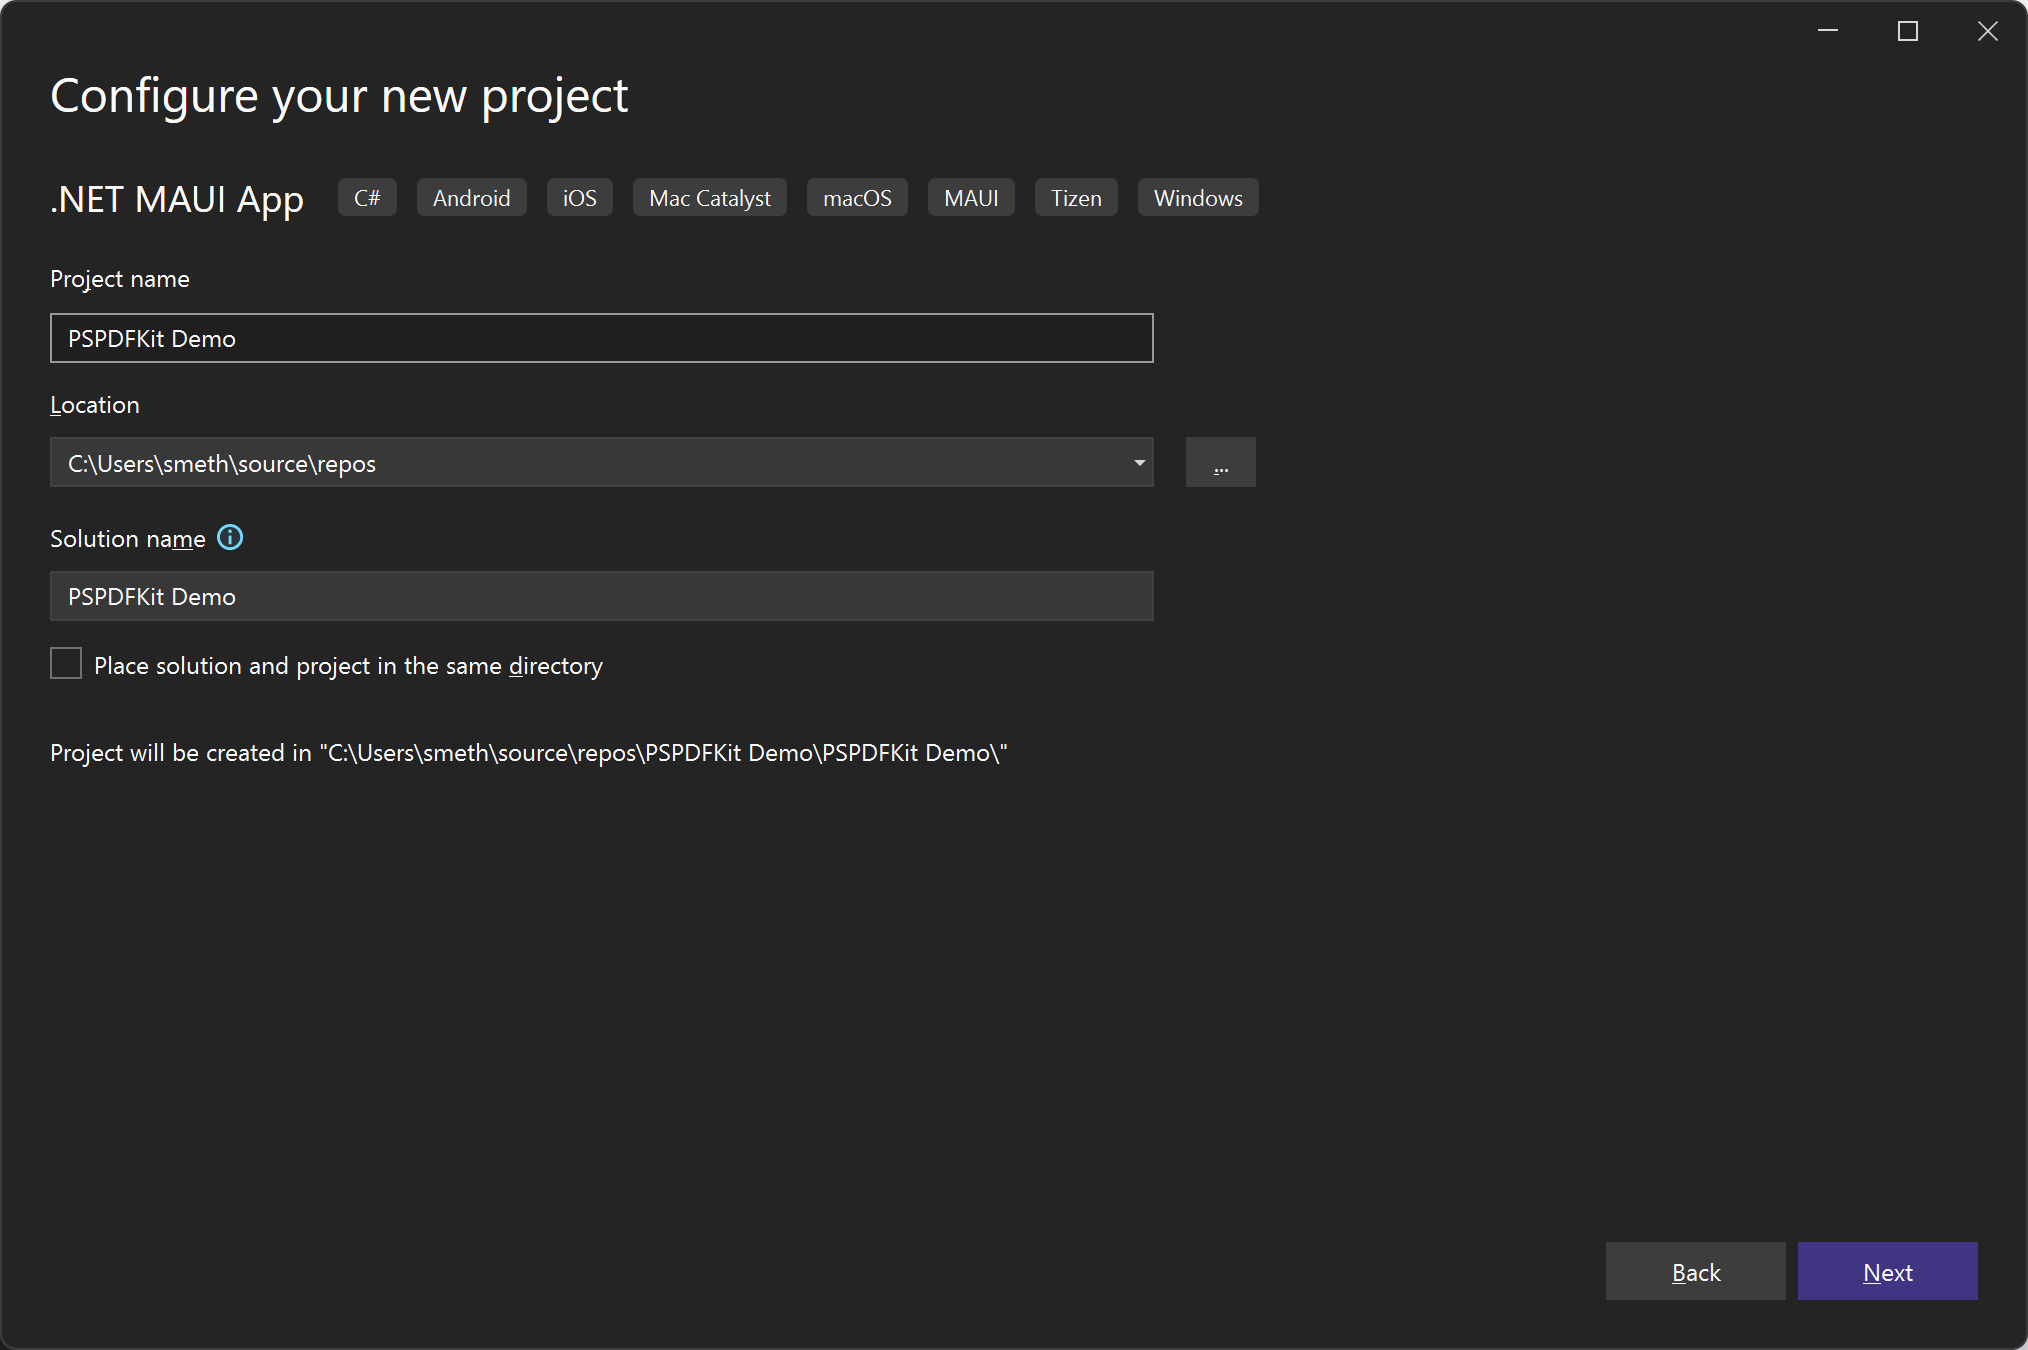
Configure your project by setting the name and location, as shown in the image below.
-
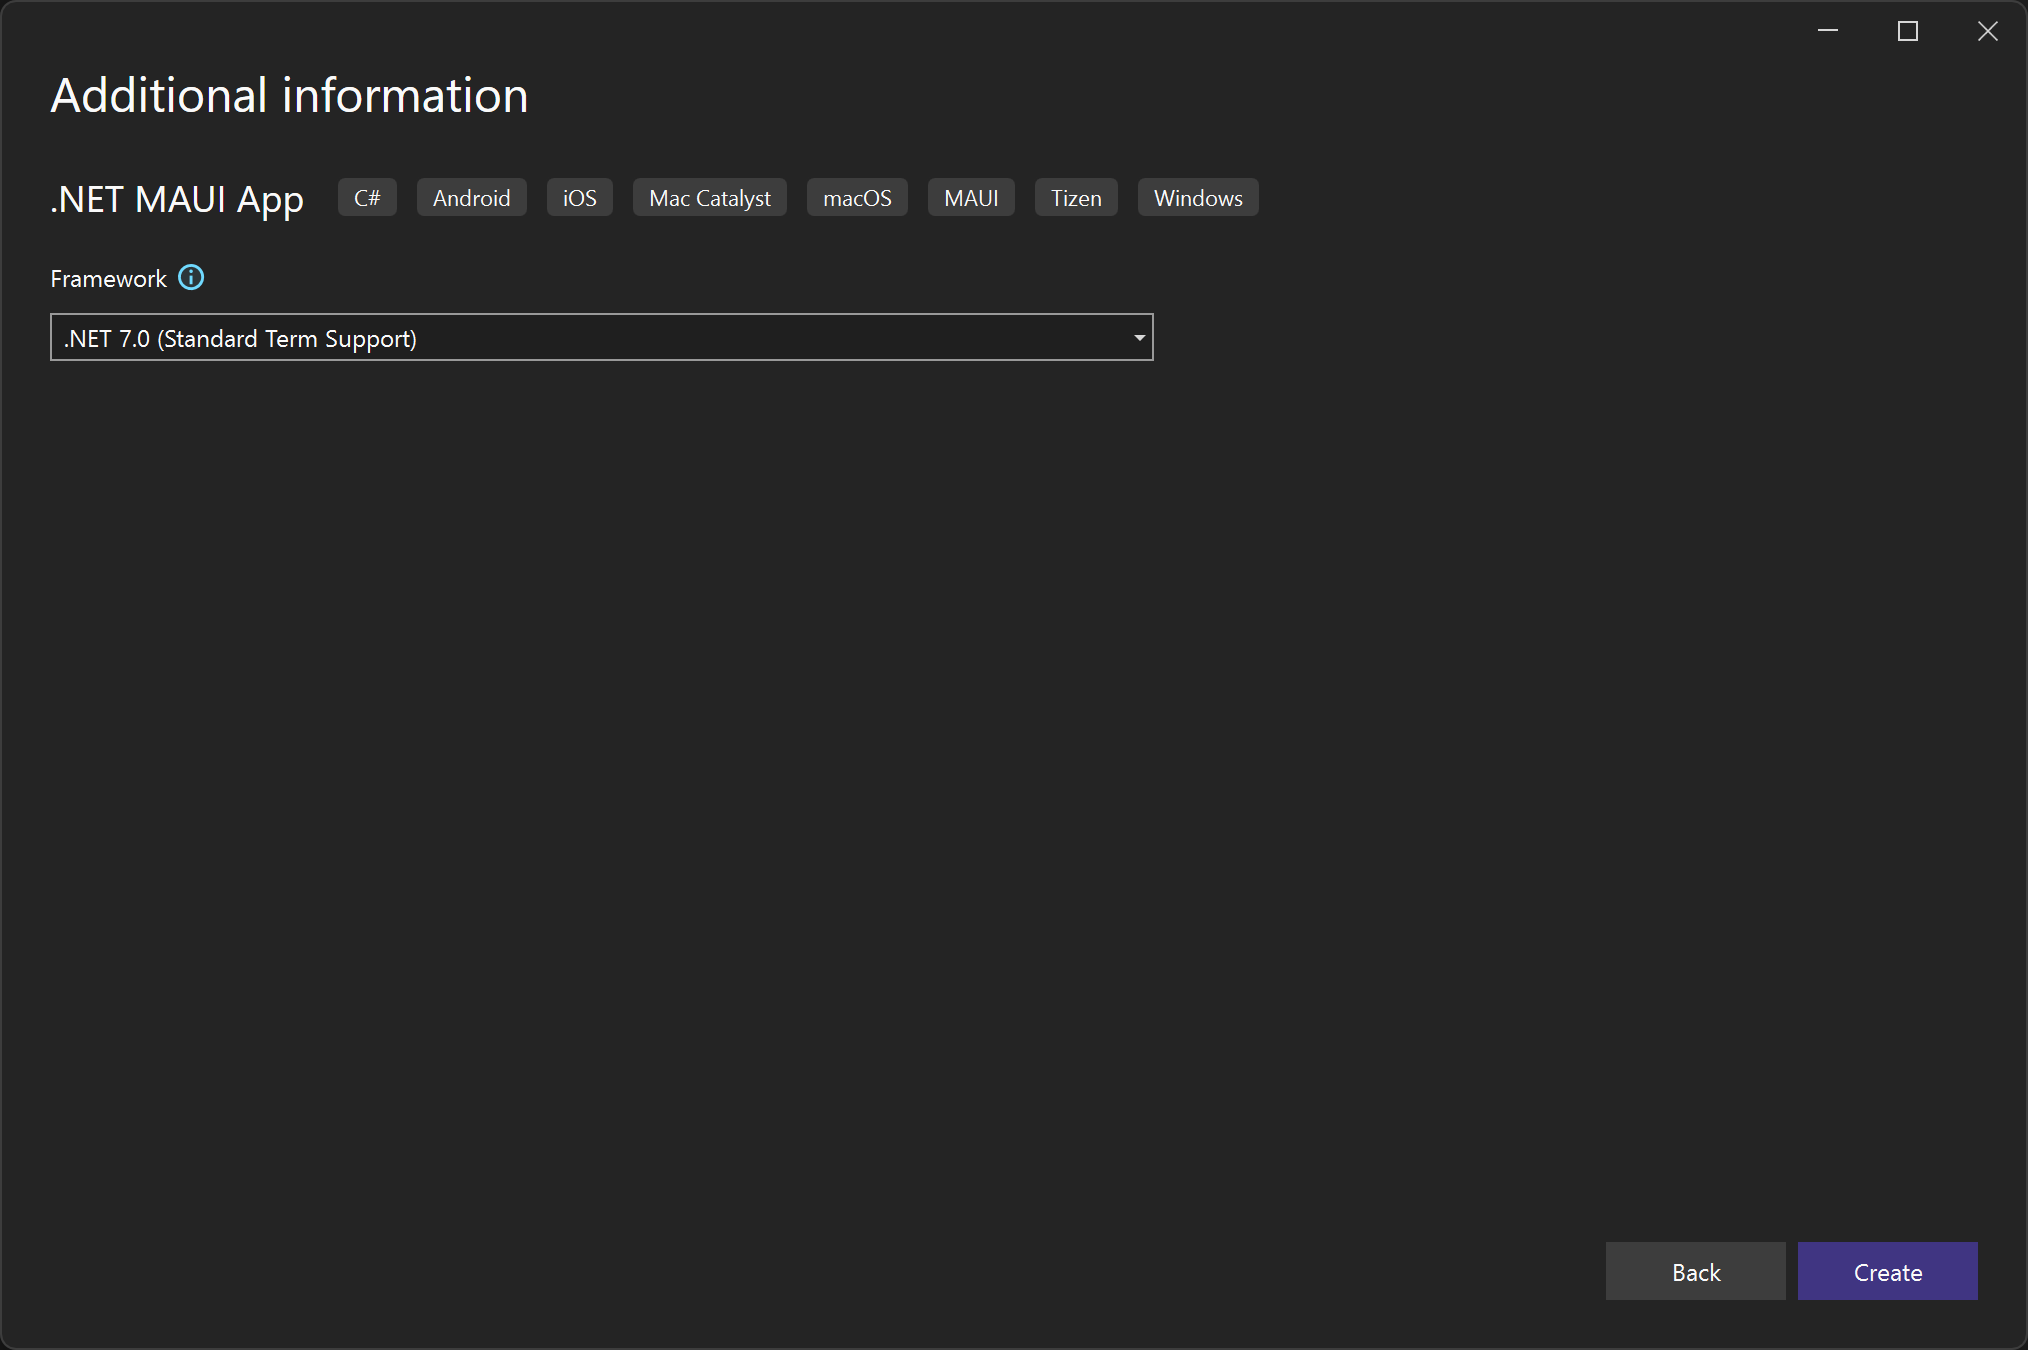
Specify the target framework. This example uses the default.
Adding PSPDFKit to Your Project
-
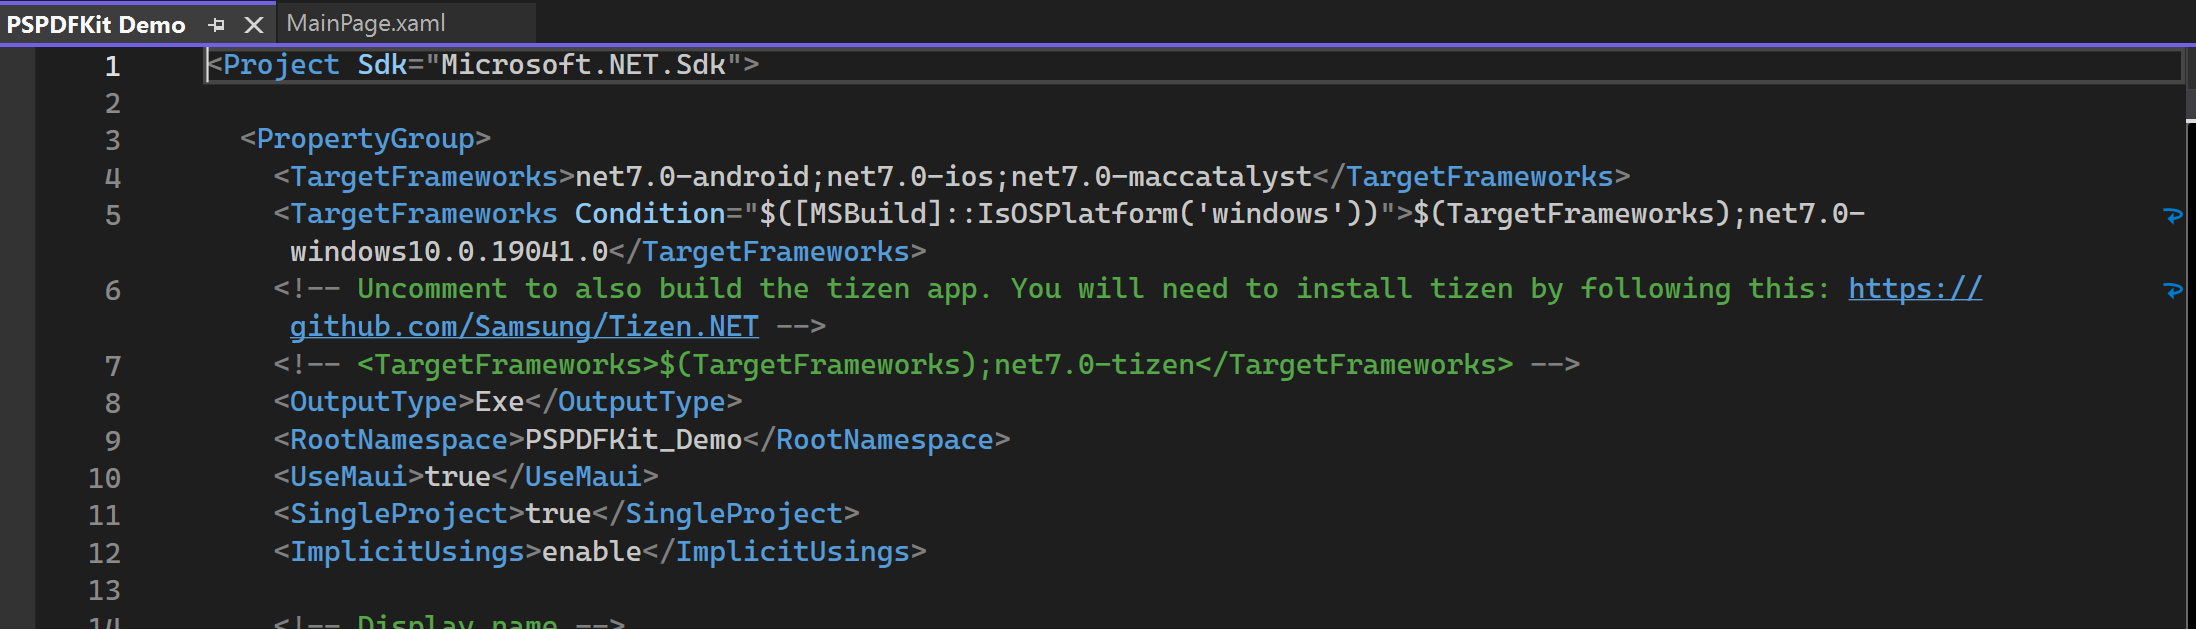
Double-click the project name to access the project file. It will look similar to the image below.
-
Change the first line from
<Project Sdk="Microsoft.NET.Sdk">to<Project Sdk="Microsoft.NET.Sdk.Razor">and save the project file. -
Open your app’s solution, and in the Solution Explorer, right-click on your project and click the Manage NuGet Packages… menu item. This will open the NuGet Package Manager for your solution.
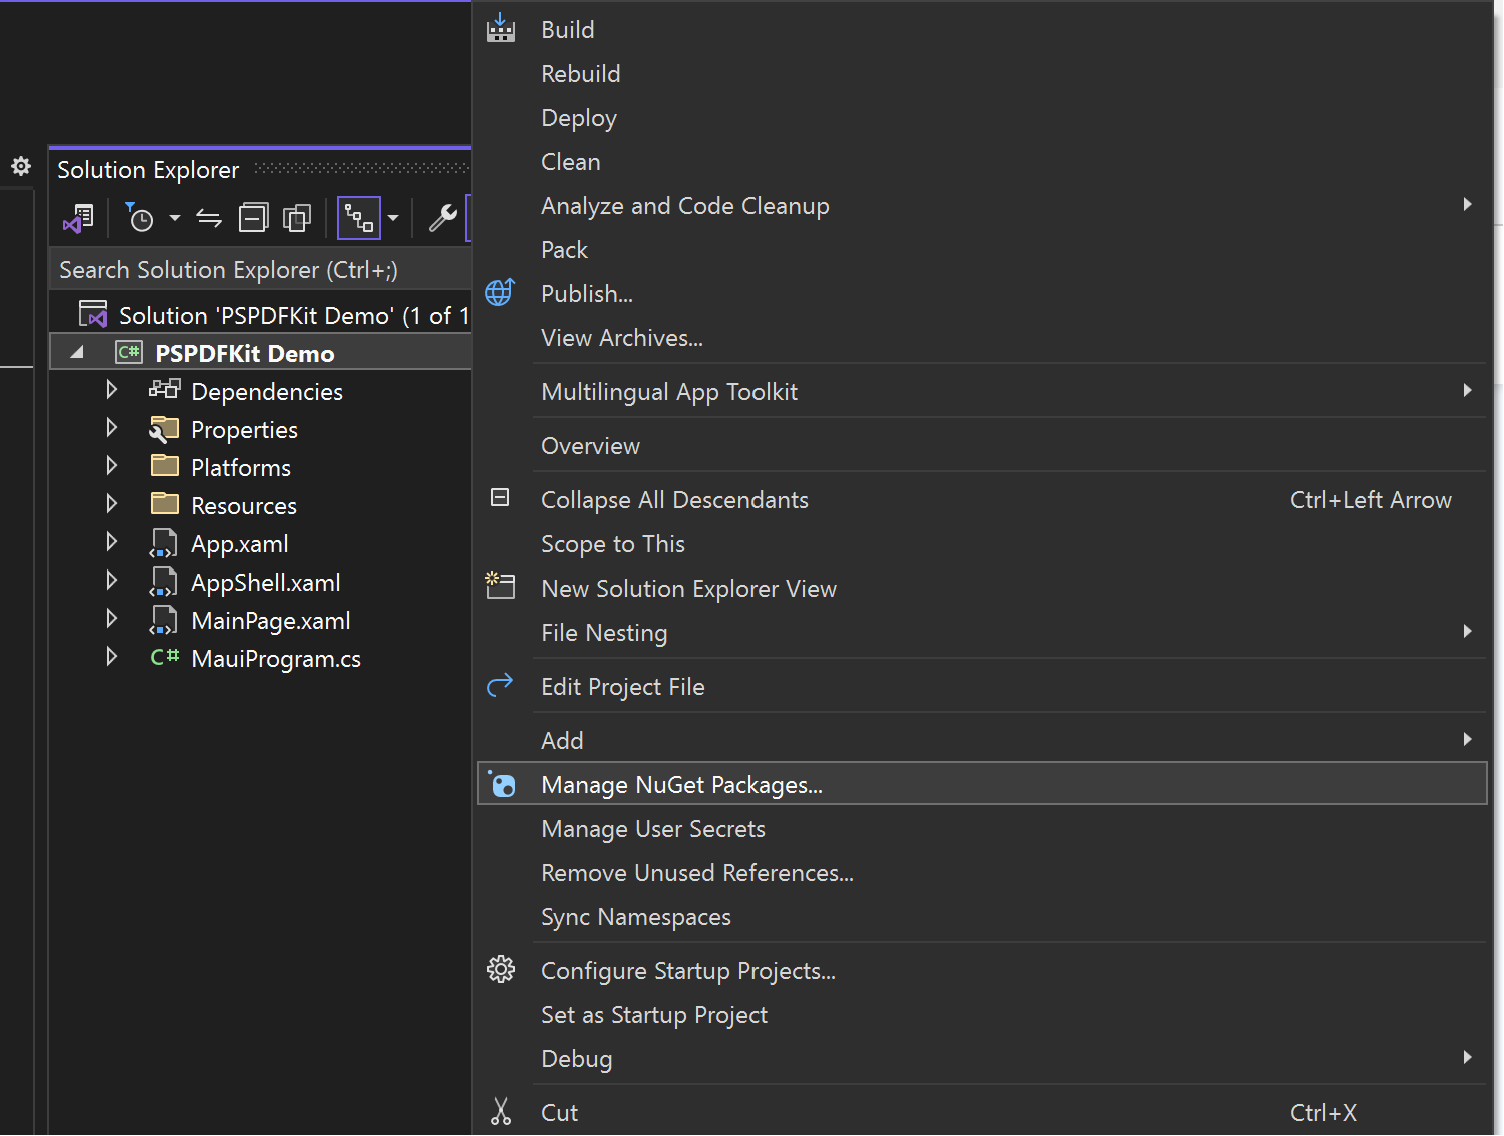
-
Search for
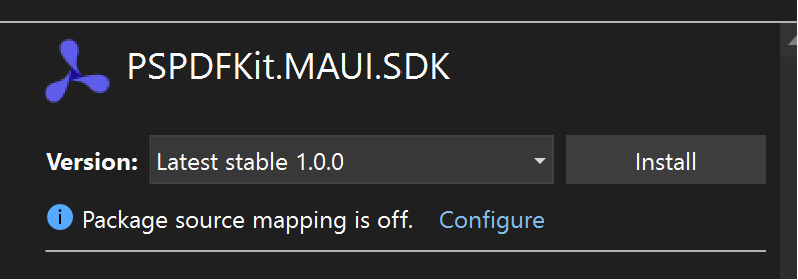
PSPDFKit MAUI, and you’ll find the package on nuget.org. -
On the right side, in the panel describing the package, click Install to install the package.
-
Once the package is installed, click
MauiProgram.csand call theRegisterPSPDFKitSdk()method on the builder. The resultingCreateMauiAppfunction will look like the following:
public static MauiApp CreateMauiApp()
{
	var builder = MauiApp.CreateBuilder();
	builder
		.UseMauiApp<App>()
        .RegisterPSPDFKitSdk() // added
        .ConfigureFonts(fonts =>
		{
			fonts.AddFont("OpenSans-Regular.ttf", "OpenSansRegular");
			fonts.AddFont("OpenSans-Semibold.ttf", "OpenSansSemibold");
		});

#if DEBUG
    builder.Logging.AddDebug();
#endif

    return builder.Build();
	}
Displaying a PDF
-
In the
Resources/Rawfolder, create anAssetsfolder and add a PDF file nameddemo.pdf.
Note that this is a special folder and it has to be named Assets. PDFs located in this folder can be loaded in the application using a specially designed API, LoadDocumentFromAssetsAsync.
-
Open
MainPage.xaml, remove all the content ofContentPage, and paste the following XML as its content:
<pspdfkit:PDFView x:Name="PDFView" />-
You’ll see a green line under
pspdfkit:PDFView. If you hover over it, you’ll be given the option for potential fixes. Apply the suggested fix, which will add the following namespace to<ContentPage>:
xmlns:pspdfkit="clr-namespace:PSPDFKit.Sdk;assembly=Sdk"
-
If you’ve purchased a license and assigned it to a bundle ID, you can add it to the correct platform here:
<pspdfkit:PDFView x:Name="PDFView"
				  License="{OnPlatform
				  	Android={StaticResource AndroidLicenseKey},
				  	iOS={StaticResource iOSLicenseKey},
				  	MacCatalyst={StaticResource MacCatalystLicenseKey},
				  	WinUI={StaticResource WindowsLicenseKey}}" />
If not, omitting the License property will initialize the PDFView in trial mode.
-
To subscribe to the
Initializedevent ofPDFView, add the following code to theMainPage.xamlandMainPage.xaml.csfiles. In this event handler, use thePDFView.Controller.LoadDocumentFromAssetsAsyncfunction to load thedemo.pdffile that was added to theAssetsfolder:
<pspdfkit:PDFView x:Name="PDFView" Initialized="OnPDFViewInitialized" />
private async void OnPDFViewInitialized(object sender, EventArgs e)
{
	try
	{
		await PDFView.Controller.LoadDocumentFromAssetsAsync("demo.pdf");
	}
	catch (Exception ex)
	{
		// Handle exception.
	}
}
Note that you must wait for initialization of the PDFView to be complete before using PdfView.Controller.
-
In the Build toolbar, choose Debug, and select the platform you’d like to build on — for example,
x86orx64. -
Then, in the menu, select Build > Build Solution.
-
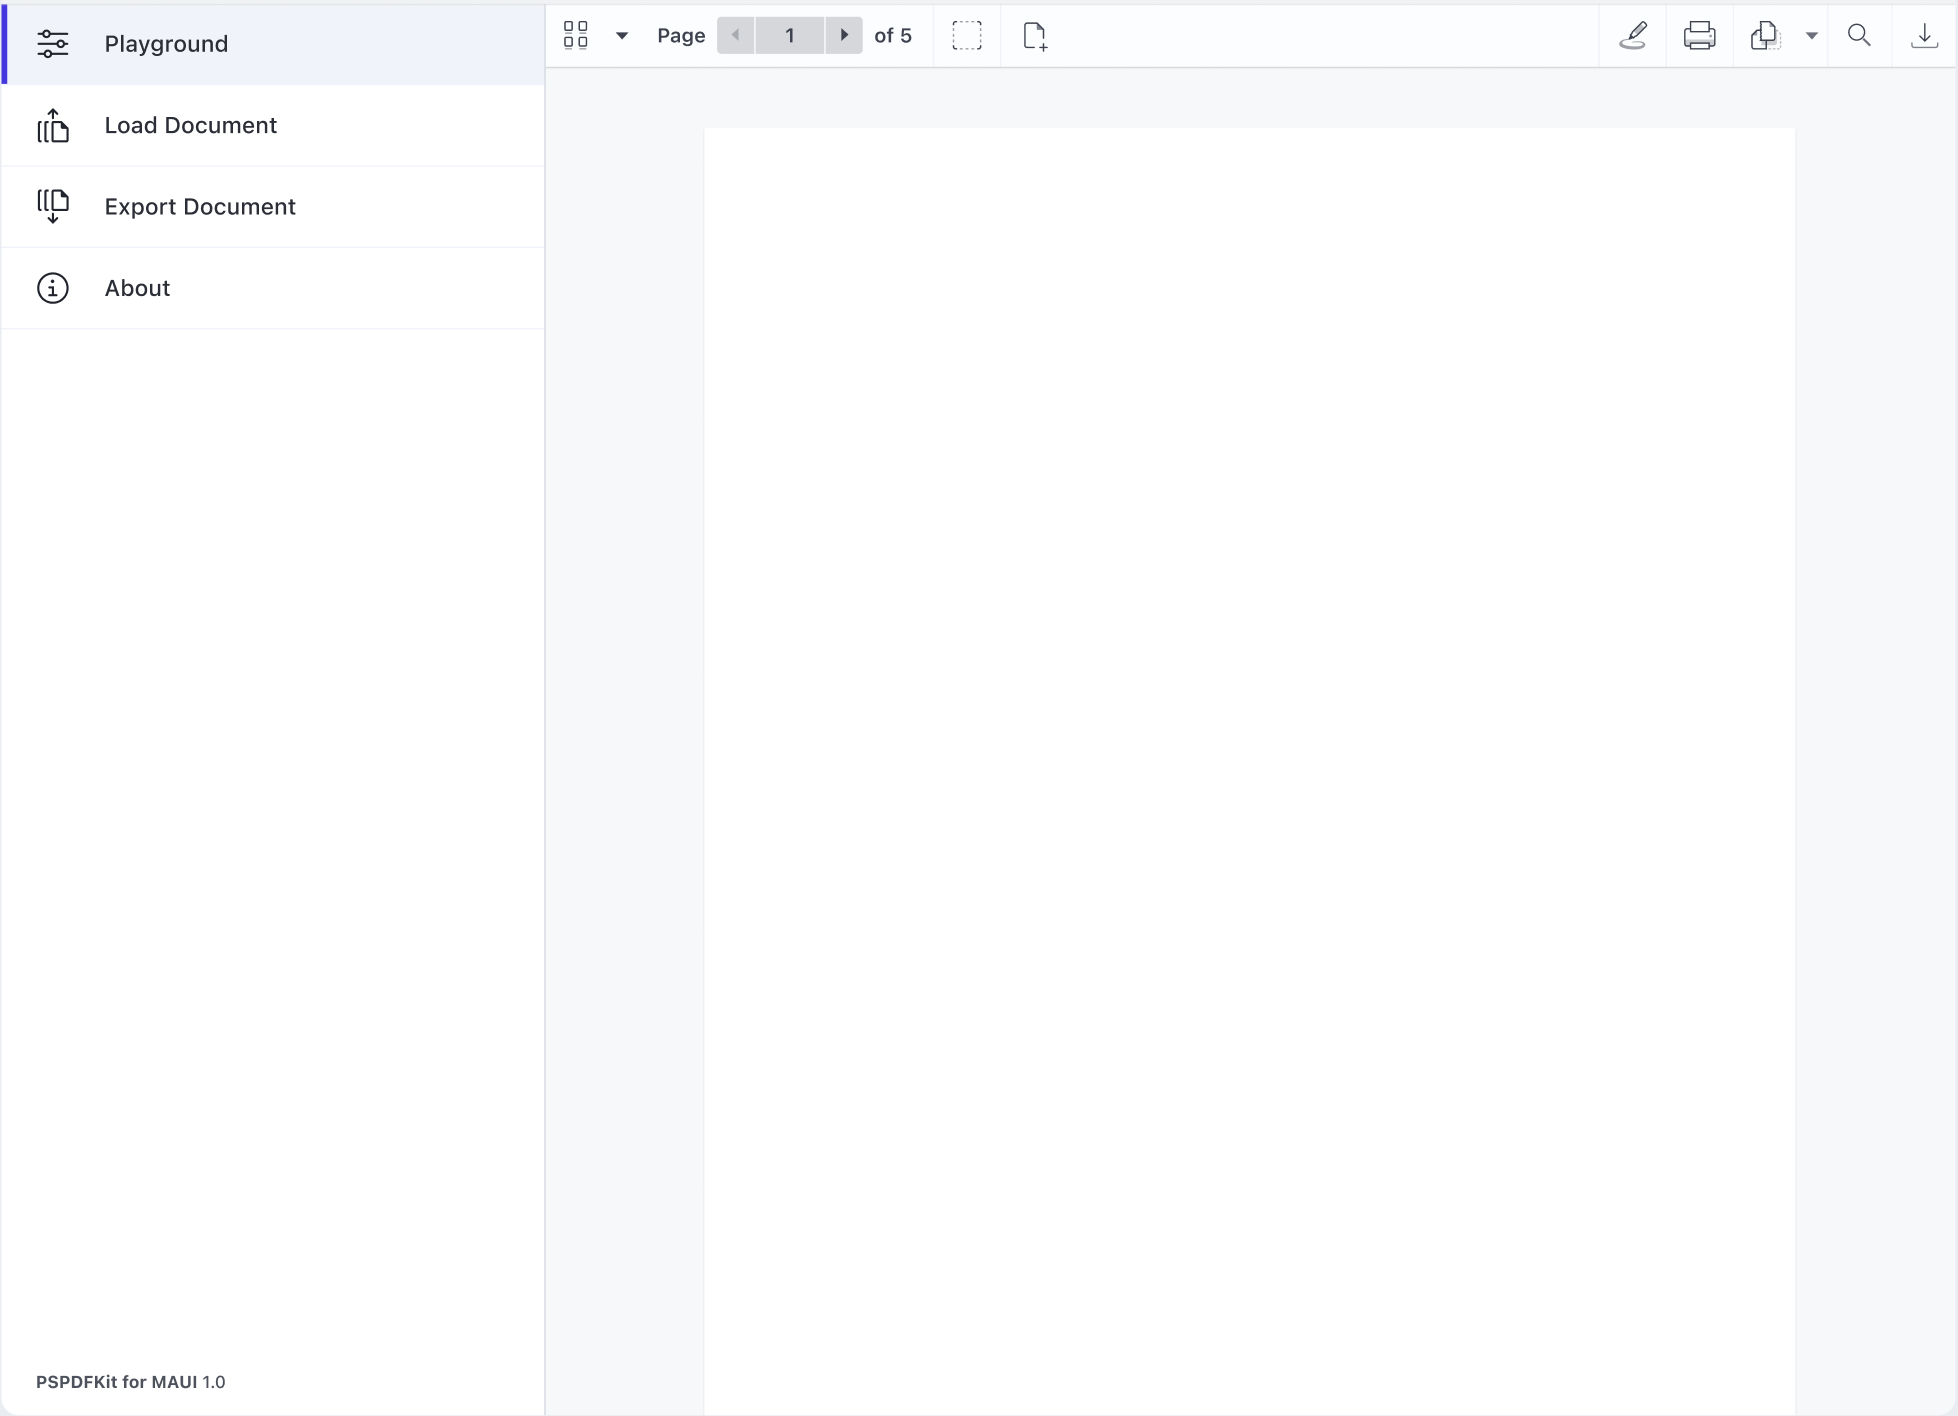
Start the application, and you’ll see
demo.pdfloaded inPDFView.