How Xcode Indexing Works and How You Can Fix IDE Problems with Your Projects

Xcode is the IDE most people use for developing Mac and iOS apps. It supports the creation of apps all the way from idea to deployment, and it integrates things like a debugger, a visual designer, and a profiler in one single application. Integration with Apple frameworks like Cocoa or Cocoa Touch is also great when you have a code editor that offers code assistance in the form of syntax highlighting, API suggestions, and fixits as you type code. But what can you do when those code assistance features don’t work correctly? Before you file a bug report with Apple, you can follow some steps to debug your project configuration. This article will explain how the code assistance features of Xcode work and what you can do to try to fix them when they don’t behave as they should.
What Are the Common Symptoms of a Suboptimal Xcode Code Assistance Experience?
You might have experienced one or more of the following symptoms in Xcode:
-
Some parts of a source file are not shown with different colors or parts of your codebase may not be colored at all.
-
Clicking Jump to Definition shows a question mark overlay and you hear an alert sound.
-
You see some red underlining in your code, but if you build and run the project, everything works fine.
-
You only see unrelated words when Xcode offers code completion suggestions or some suggestions for your own types are prefixed by “<
>”, like in the following screenshot.

These are the typical symptoms of the code assistance features of Xcode being unable to compile and index your project correctly, and as a result, the information they have about your project is incomplete. Before I give you some hints to debug and try to fix this problem, let’s see how the code intelligence features of Xcode work on a high level.
How Do the Code Assistance Features of Xcode Work?
Like any modern IDE, Xcode offers a set of code assistance features — including syntax highlighting, code completion, and searching for definitions and references for Objective-C and Swift code — that help us develop better iOS and macOS applications. These features are certainly helpful when we are writing code, as they mean we don’t need to remember the details of how to use an API or how our code is organized. In fact, nowadays it’s difficult to think about developing a modern app without these kinds of helpers.
Xcode is an application that is actually modularized in many different frameworks. The most popular ones are probably IDEKit and IDEFoundation, which are internal frameworks that provide the view/controller and model layer functionality, respectively, but there are many more. Xcode also has the concept of “plugins,” which are internal programs with the .ideplugin extension that extends the functionality of the IDE in some regard. Note that if you want to extend Xcode, the only supported way of doing this is by writing your extensions using XcodeKit; the .ideplugin extension is intended to be used only by Apple.
A Client-Server Architecture for Code Assistance
The code assistance features in Xcode are implemented using a client-server architecture. Xcode is the client, and it is more or less independent of the details of any programming language. There is another component, the server, which is implemented as a separate process and with which Xcode communicates to get code assistance information via the XPC mechanism. This client-server architecture has several advantages over implementing everything inside Xcode, namely:
-
It decouples the code assistance features from how they are implemented. This decoupling makes it easier to add code assistance for a new programming language.
-
A crash on the server component does not crash the entire IDE.
-
The server part could potentially be reused by other clients, provided that the communication protocol is stable and publicly documented.
SourceKit, the Server Process That Provides Code Assistance to Xcode
SourceKit, or more accurately, the SourceKit daemon (sourcekitd), is the server part that provides code assistance to Xcode. It uses the compiler to gather semantic information about your project and build a database index with that information. Constructing a database index is necessary to answer queries like “Where are the references to this method?” and “What are the implementations of this protocol?” When you open a file that is part of a project, Xcode notifies SourceKit by sending a source.request.editor.open message. This message includes things like the source file path, the source code as text, and the compiler flags. The compiler flags are a crucial part, because if your project is complex, you have probably set custom header paths, compile options, or bridging headers, all of which are compiler flags that are needed to compile the project correctly.
What to Do When Code Assistance Features Don’t Work: Compile the Code Like the Code Indexer Would
When you have code assistance problems with Xcode, you can follow these steps:
-
Configure Xcode to emit detailed log information about the code assistance features.
-
Compile your source files the same way SourceKit would do it. If the compilation fails for any reason, SourceKit won’t be able to generate a good index of your project.
I’ll detail both steps next.
How to Configure Xcode to Log SourceKit Information
In order to see the list of requests and responses that Xcode and SourceKit exchange while your project is being indexed, you need to set a special environment variable before you open Xcode. So close Xcode, open a terminal window, and type this command:
SOURCEKIT_LOGGING=3 /Applications/Xcode.app/Contents/MacOS/Xcode &> ~/Documents/xcode.log
The SOURCEKIT_LOGGING environment variable configures the verbosity level, with 3 being the level where most information is emitted.
An instance of Xcode will open. Now open your project and the source file that is having code assistance problems. Once you have reproduced the code assistance issues, close Xcode and check that a ~/Documents/xcode.log file with some recorded information has been created. Analyzing that file is the topic of the next section.
Compile the Code as SourceKit Would
Open ~/Documents/xcode.log in Console.app and search for key.compilerargs. Your search should find a SourceKit-client request of type source.request.editor.open that refers to the affected file in key.name and that passes the compiler arguments in key.compilerargs.
Now create a file named Compilation.sh in your favorite text editor and paste the contents of key.compilerargs in it. Remove the commas that separate each argument flag and add the following to the beginning of the file:
#/bin/bash                                                                                                                                                                                                                        \
                                                                                                                                                                                                                                  \
DEVELOPER_DIR=/Applications/Xcode.app xcrun swift -frontend
For example, if the content of key.compilerargs is this:
"-module-name",
"MyAppTests",
"-Onone",
"-enable-batch-mode",
"-enforce-exclusivity=checked",
"-DDEBUG",
"-sdk",
"/Applications/Xcode.app/Contents/Developer/Platforms/iPhoneSimulator.platform/Developer/SDKs/iPhoneSimulator12.2.sdk",
"-target",
"x86_64-apple-ios11.0-simulator",
[...]
Then in Compilation.sh, you should have this:
#/bin/bash                                                                                                                                                                                                                        \
                                                                                                                                                                                                                                  \
DEVELOPER_DIR=/Applications/Xcode.app xcrun swift -frontend "-module-name"
"MyAppTests"
"-Onone"
"-enable-batch-mode"
"-enforce-exclusivity=checked"
"-DDEBUG"
"-sdk"
"/Applications/Xcode.app/Contents/Developer/Platforms/iPhoneSimulator.platform/Developer/SDKs/iPhoneSimulator12.2.sdk"
"-target"
"x86_64-apple-ios11.0-simulator"
[...]
Note that some of the flags do not apply when you invoke the compiler frontend directly, so you need to remove them. Search for -Xfrontend and remove every occurrence you find, and do the same for -jX, where X is a number.
Save Compilation.sh and open a terminal window. Mark the file as executable as follows:
chmod +x Compilation.sh
Then run it:
./Compilation.sh
The script will compile the source file just like SourceKit would. You may see a compiler error like this:
HeaderFile.h:10:9: error: 'MyApp.h' file not found
#import "MyApp.h"
This means the compiler cannot compile HeaderFile.h because it can’t find MyApp.h. If you have a hybrid Objective-C/Swift app, this file might be included by the Objective-C bridging header, and the Clang compiler will emit a note indicating this:
SomeBridging-Header.h:1:9: note: in file included from SomeBridging-Header.h:1:
#import "HeaderFile.h"
A header file that cannot be found typically indicates that there’s a problem with the header path configuration in your project. Open Compilation.sh again and take a look at the include paths (search for -iquote and -I to identify those). In the previous example, MyApp.h could not be included by the preprocessor, so add the directory that contains that file as a new compiler flag. Supposing that MyApp.h is inside MyProject/Main, you would need to add the following to the end of Compilation.sh:
"-Xcc"                                                                                                                                                                                                                        \
"-I/Users/User/Projects/MyProject/Main"                                                                                                                                                             \
Run Compilation.sh again. You may now see a different compilation error, and if that’s the case, you need to repeat the same steps as before. Finally, when the output of Compilation.sh does not show any error message, the compilation for that file has completed successfully. Take note of the include path directories that you needed to add and add them to your Xcode project/target build settings configuration, like shown below.
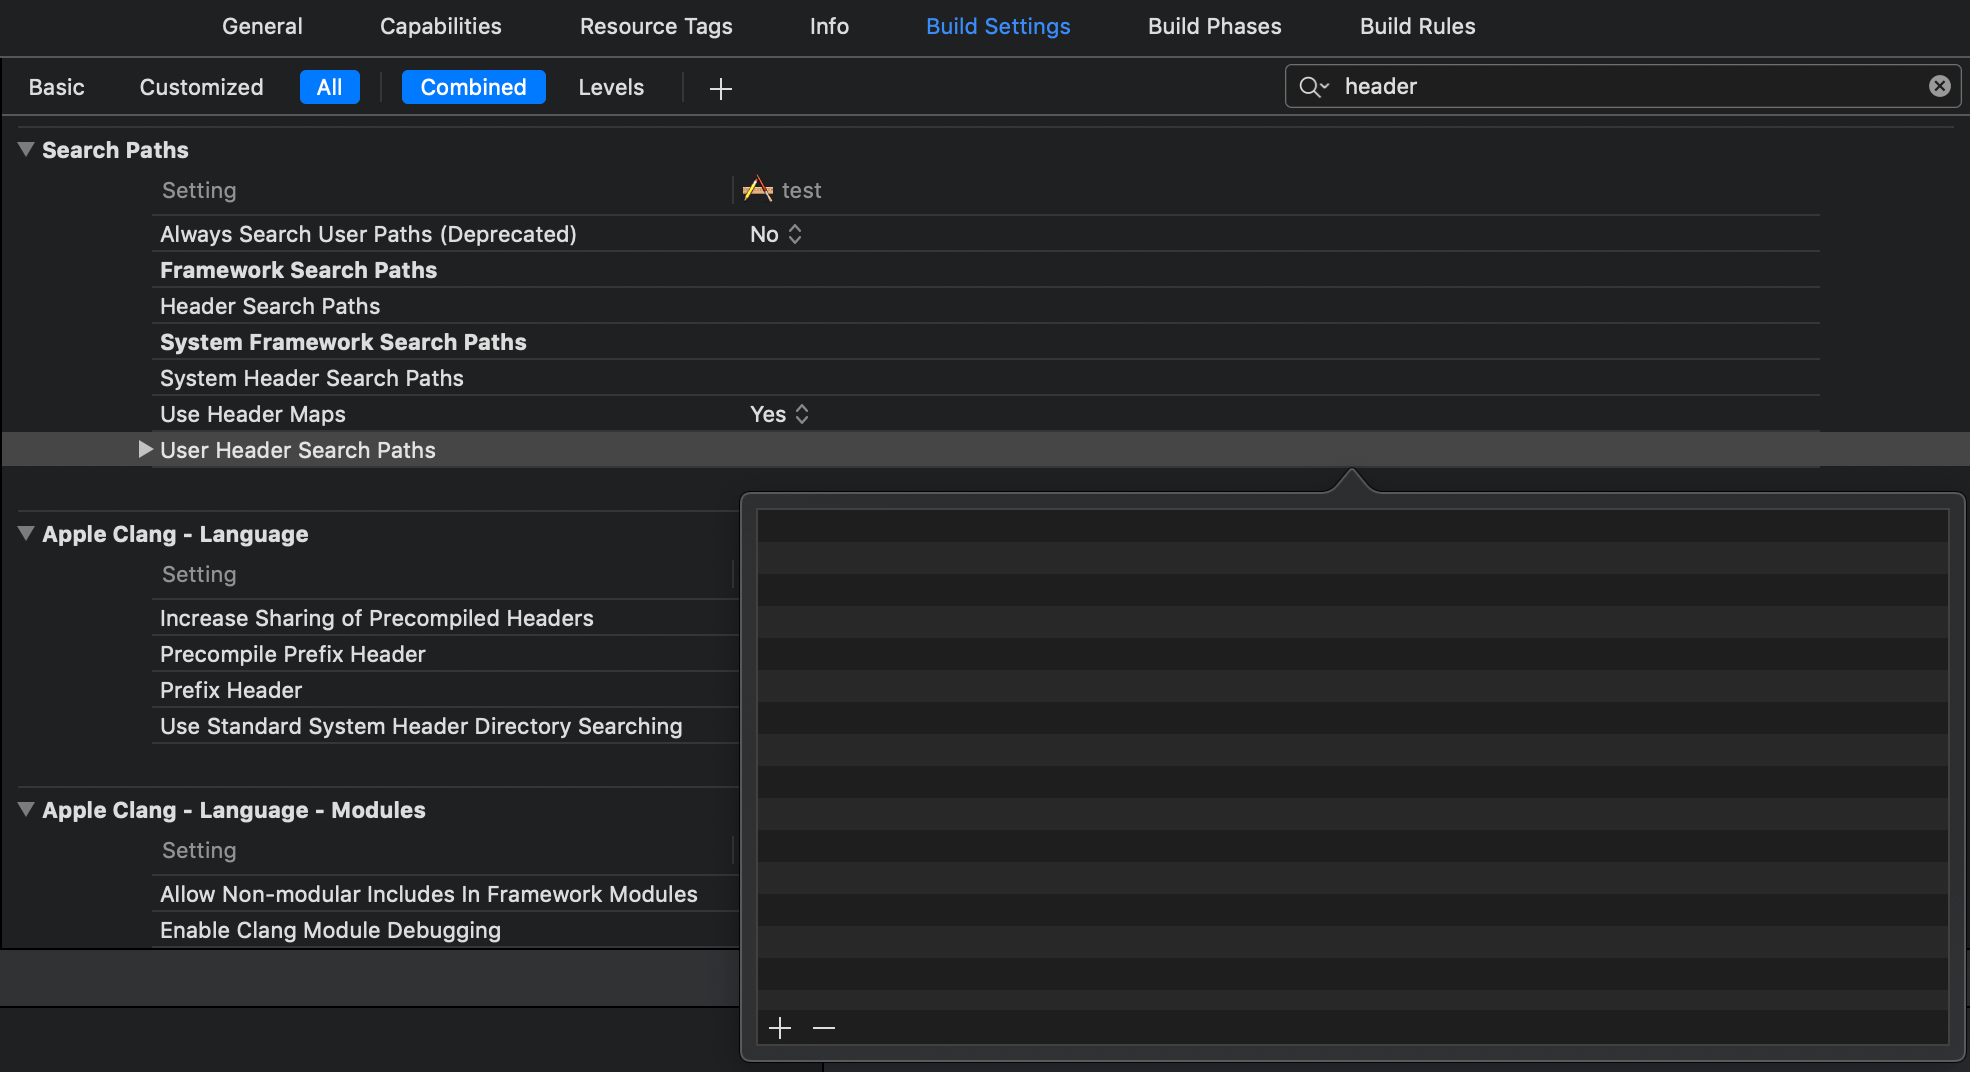
The error in your case may be different, so you’ll need to investigate differently depending upon your scenario. In certain cases, some build settings are known to cause problems with Xcode code assistance. For example, enabling Clang modules (-fmodules) may cause issues when a Clang module and non-modular includes are present.
Update! There’s an even simpler way to enable logging:
If you're using the logging only to find compiler arguments and see diagnostics, there's an easier way. defaults write https://t.co/uaX9il5BRK.dt.Xcode IDEIndexShowLog YES, then open the Report Navigator in Xcode and look for the Index log.
— Ben Langmuir (@benlangmuir) May 30, 2019
Conclusion
In this article, we saw a brief overview of how the code assistance features in Xcode work and how they rely on the ability to compile the project source files correctly. It’s in this process where things often go wrong, so this article presented an approach to diagnosing those problems and regaining development productivity, and we hope it’s helped.

Daniel is part of the Core Team at PSPDFKit and has worked on multiple topics, ranging from cryptography and text systems, to file format support and JavaScript engines. Outside of work, he likes spending time with his family, football, reading books, and watching films.