Creating Better User Experiences with Animations and Lottie


Lottie is a fairly new library that enables rendering After Effects animations in real time in your apps, available for iOS (and macOS), Android and React Native and was introduced by Airbnb in February 2017.
It enhances the user experience of your apps with animations created in Adobe After Effects, by exporting them using the bodymovin plugin as a JSON file and integrating them in your apps using the same exported file on all platforms. Making it super easy to implement animations without having to worry about recreating them from scratch natively.
We have recently adopted Lottie for animations in PDF Viewer for iOS and will soon be on Android as well. You can check it out in the upcoming version of PDF Viewer 1.6 for iOS, soon available on the App Store, or you can download and try the pre-release version already by signing up for the beta.

Lottie can be used to create and enhance otherwise complex animations using an exported After Effects animation. This exported file can be read by Lottie, and the animation will be played back inside the app.
Creating the Animations
The animations themselves can be created with Adobe After Effects, and are exported to a JSON file that your app loads into a view. You can create the animations from scratch in After Effects, or import the vector drawings from Adobe Illustrator.
Illustrator Document Setup
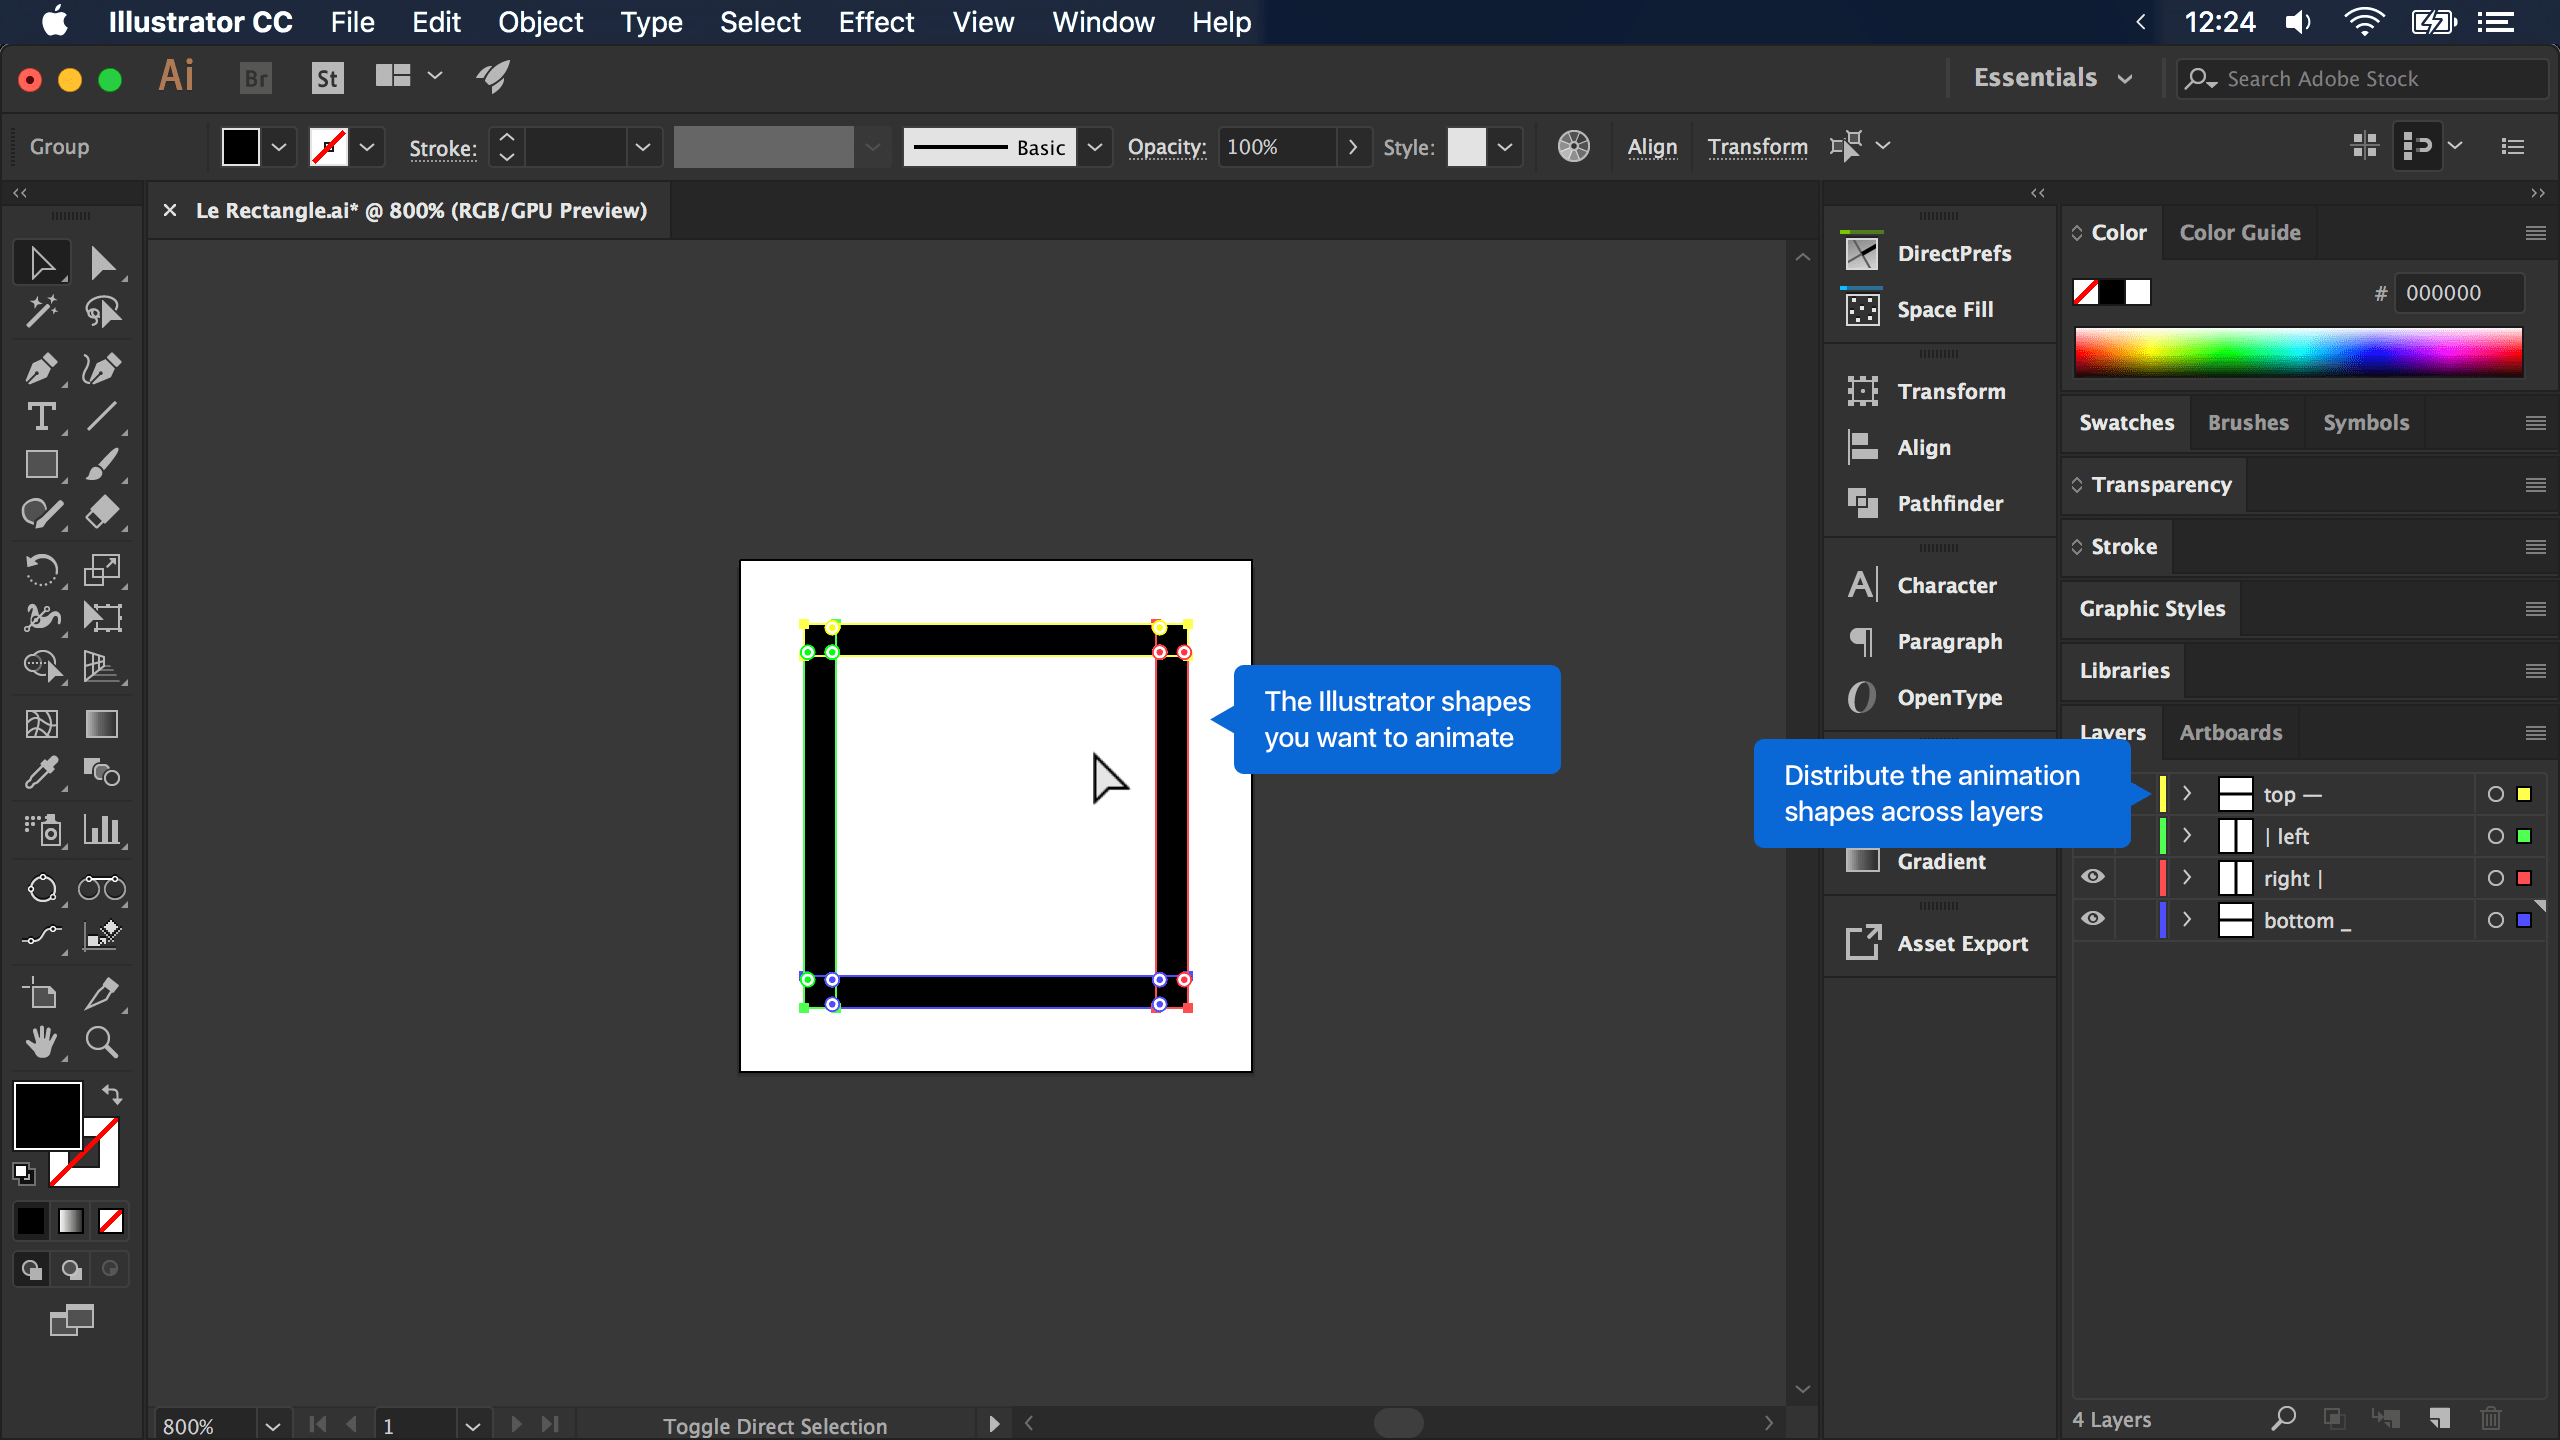
When preparing your Illustrator document for import into After Effects, you can spread the different animation elements across Illustrator layers. The layer names you set up in Illustrator will translate to After Effects later.
After Effects
When importing the .ai file into After Effects, make sure to toggle the additional options in the file open view, as seen below:
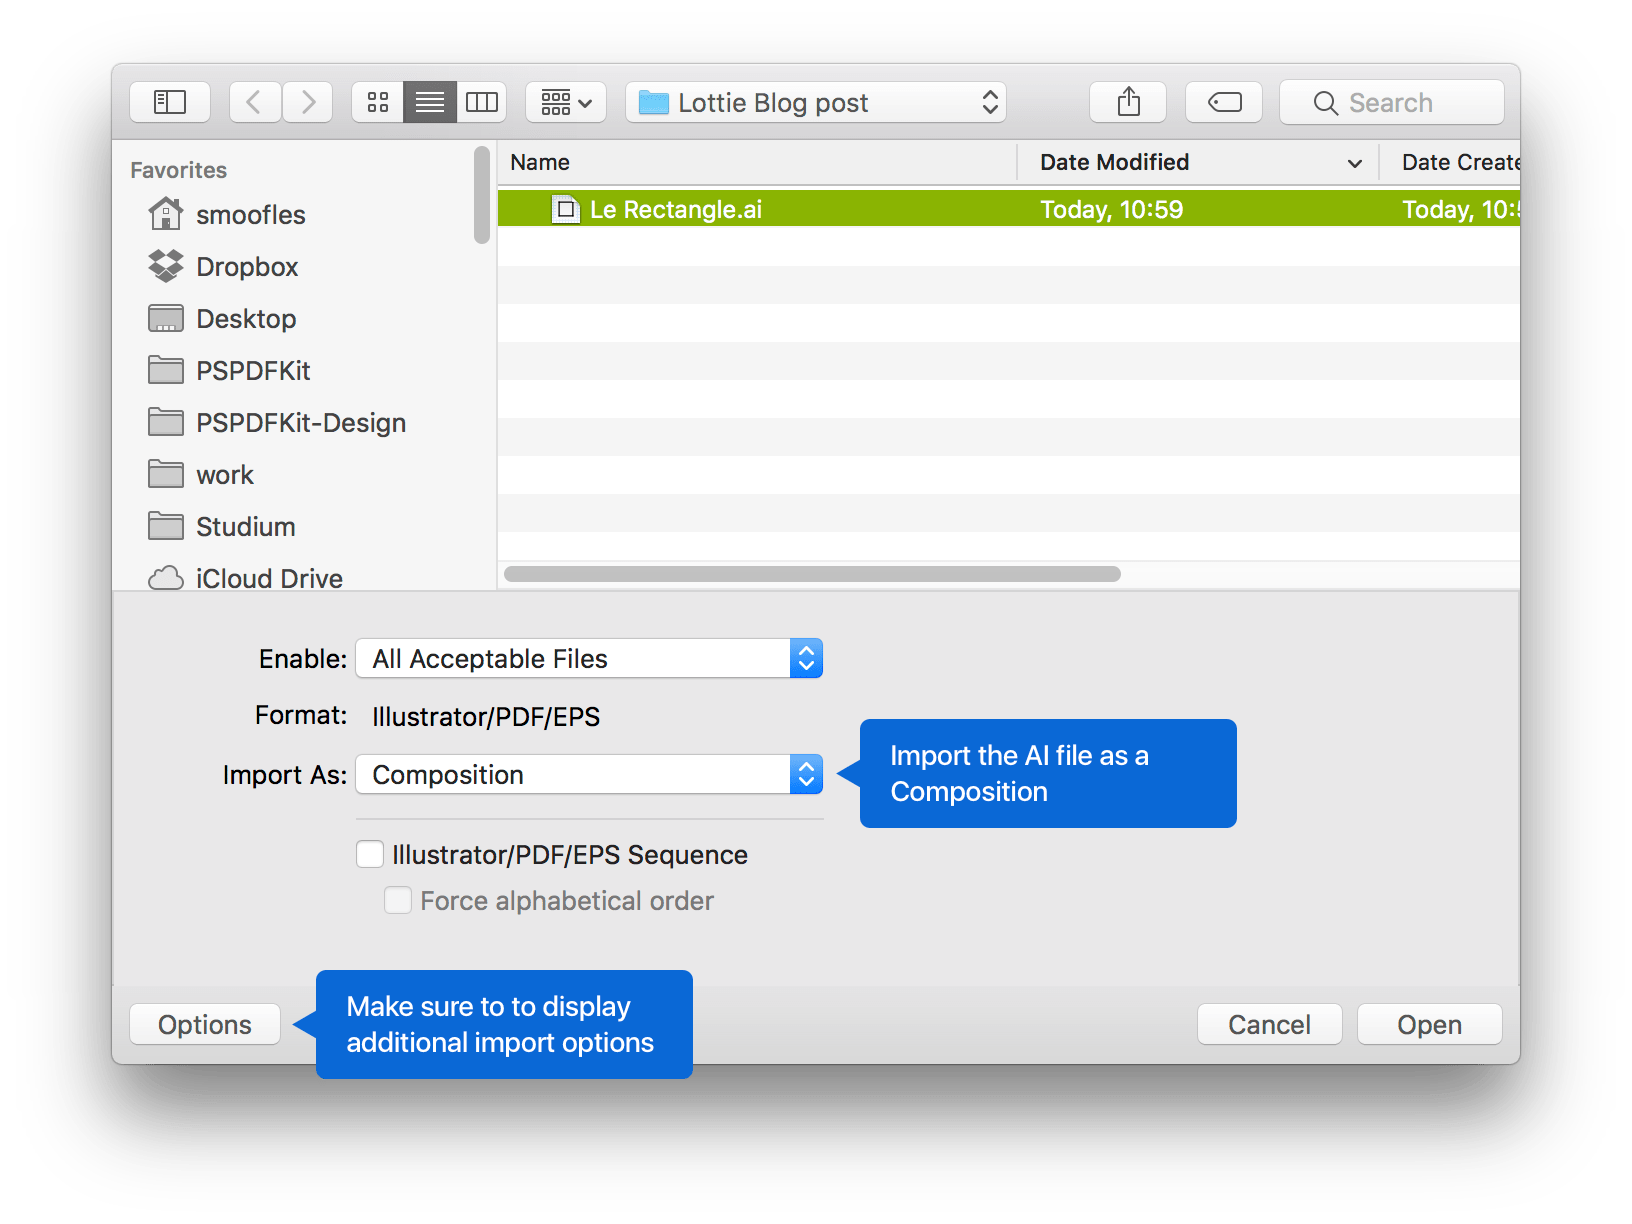 and import the file as a
 Composition. The result should look something like this:
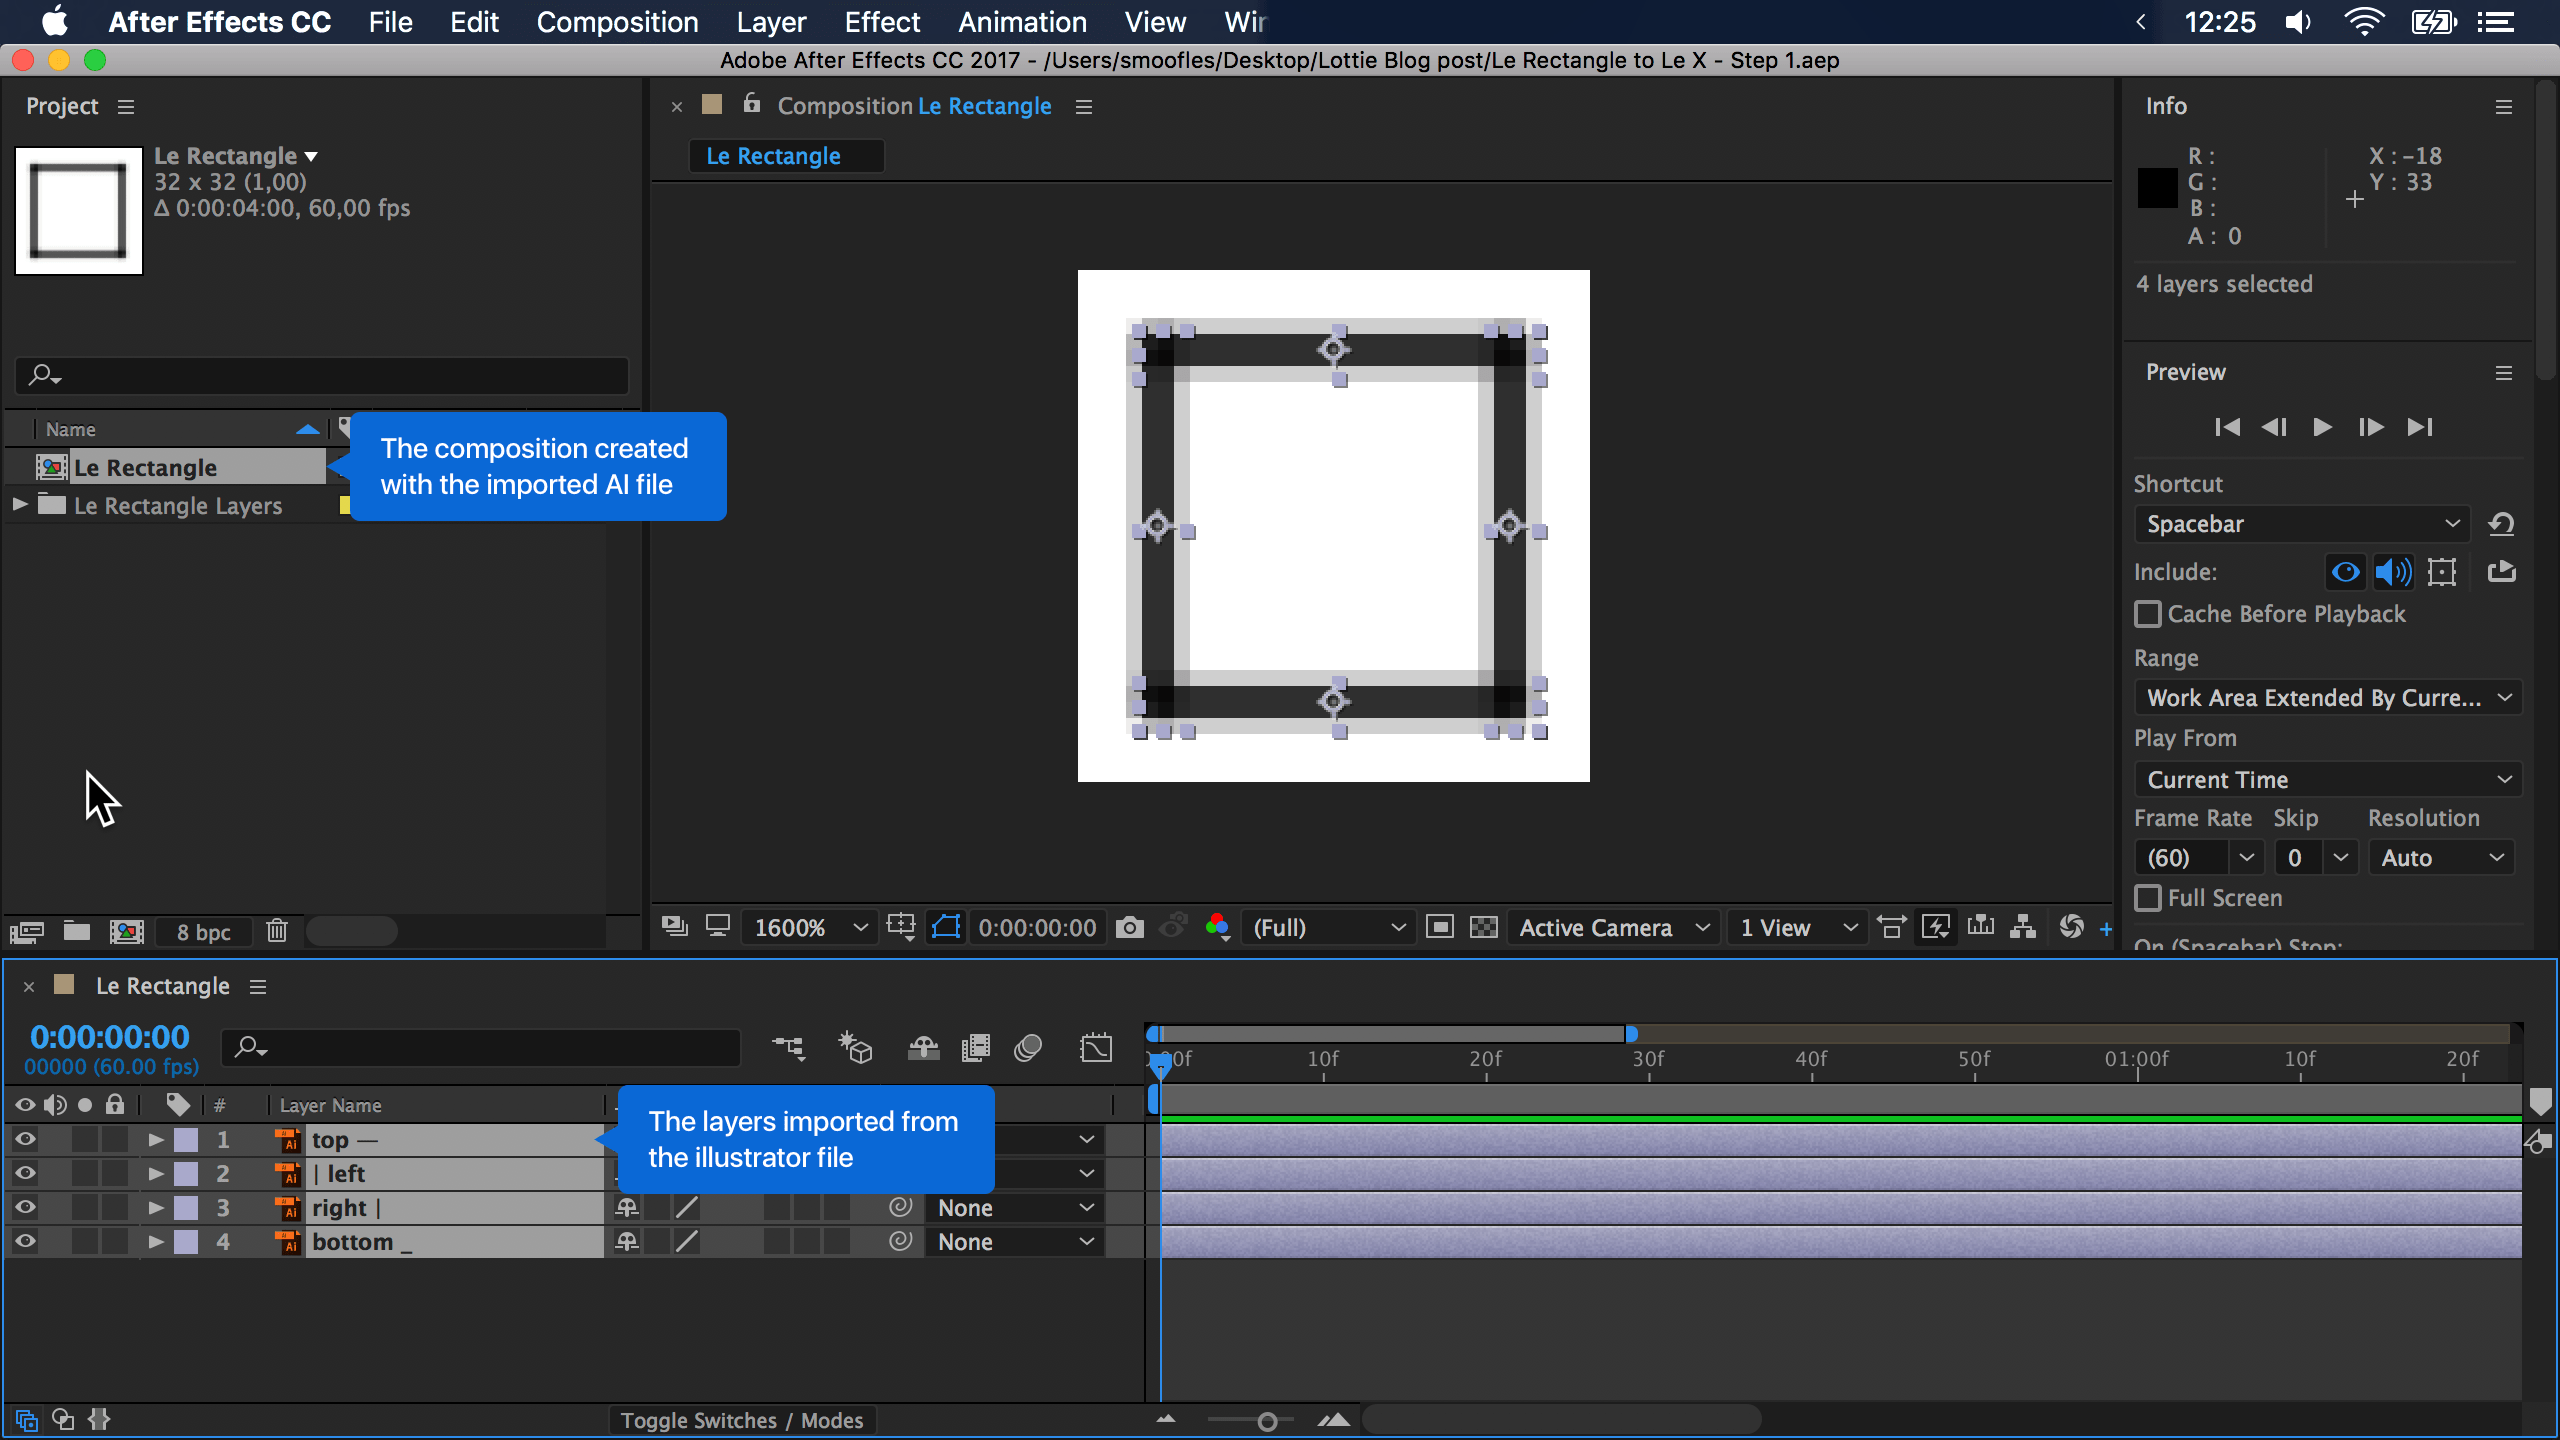
In the left Project panel, you can see the Composition named after your Illustrator file. Double-clicking the Composition will open its timeline and layers in a panel named after the Composition’s name, shown in the lower part of the screen.
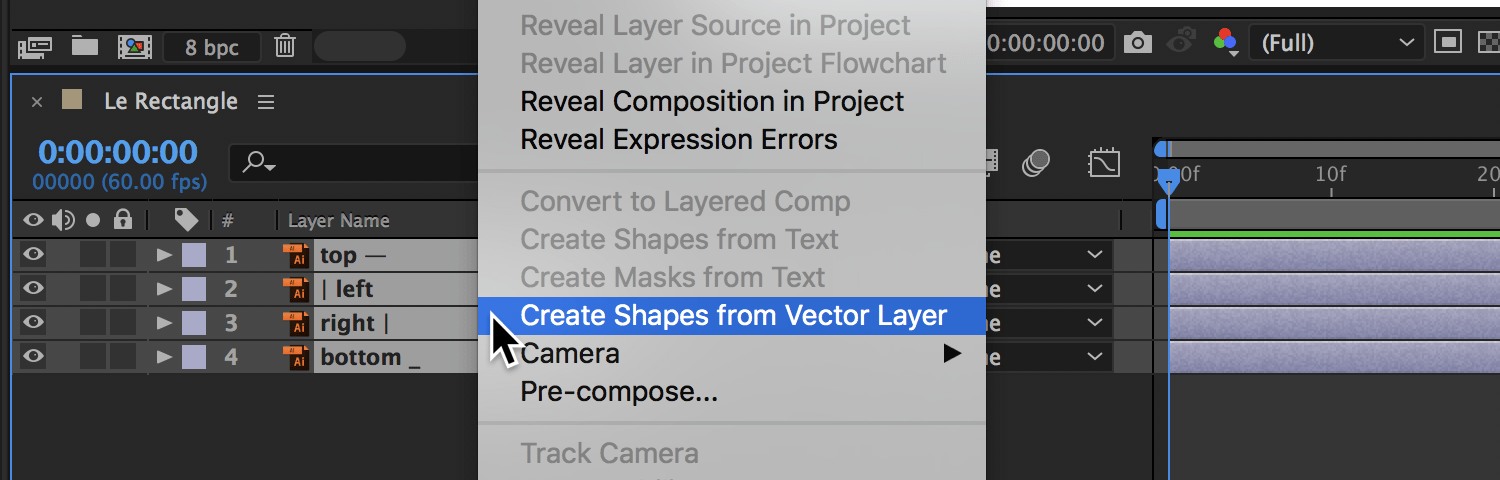
As you can see, though, the shapes are not particularly sharp — which was our reason for using vector graphics in the first place — and if you exported a Lottie animation now, you would get image files generated from the Illustrator layers.
In order to get actual vector graphics, which you can later also edit in After Effects directly, you should select all Illustartor layers, right-click them and pick Create Shapes from Vector Layers in the context menu, like this:
After Effects will now create new Shapes and hide the Illustrator layers. All of a sudden, you get all the pretty sharpness.

Note that the Create Shapes step can actually be done at a later stage, too, meaning that your work won’t be lost if you already animated some of the layers.
In our sample project, we’re animating a box shape ☐ into a multiplication sign × (let’s pretend it’s a window open button morphing into a window close one). The finished After Effects file with keyframes looks like this:
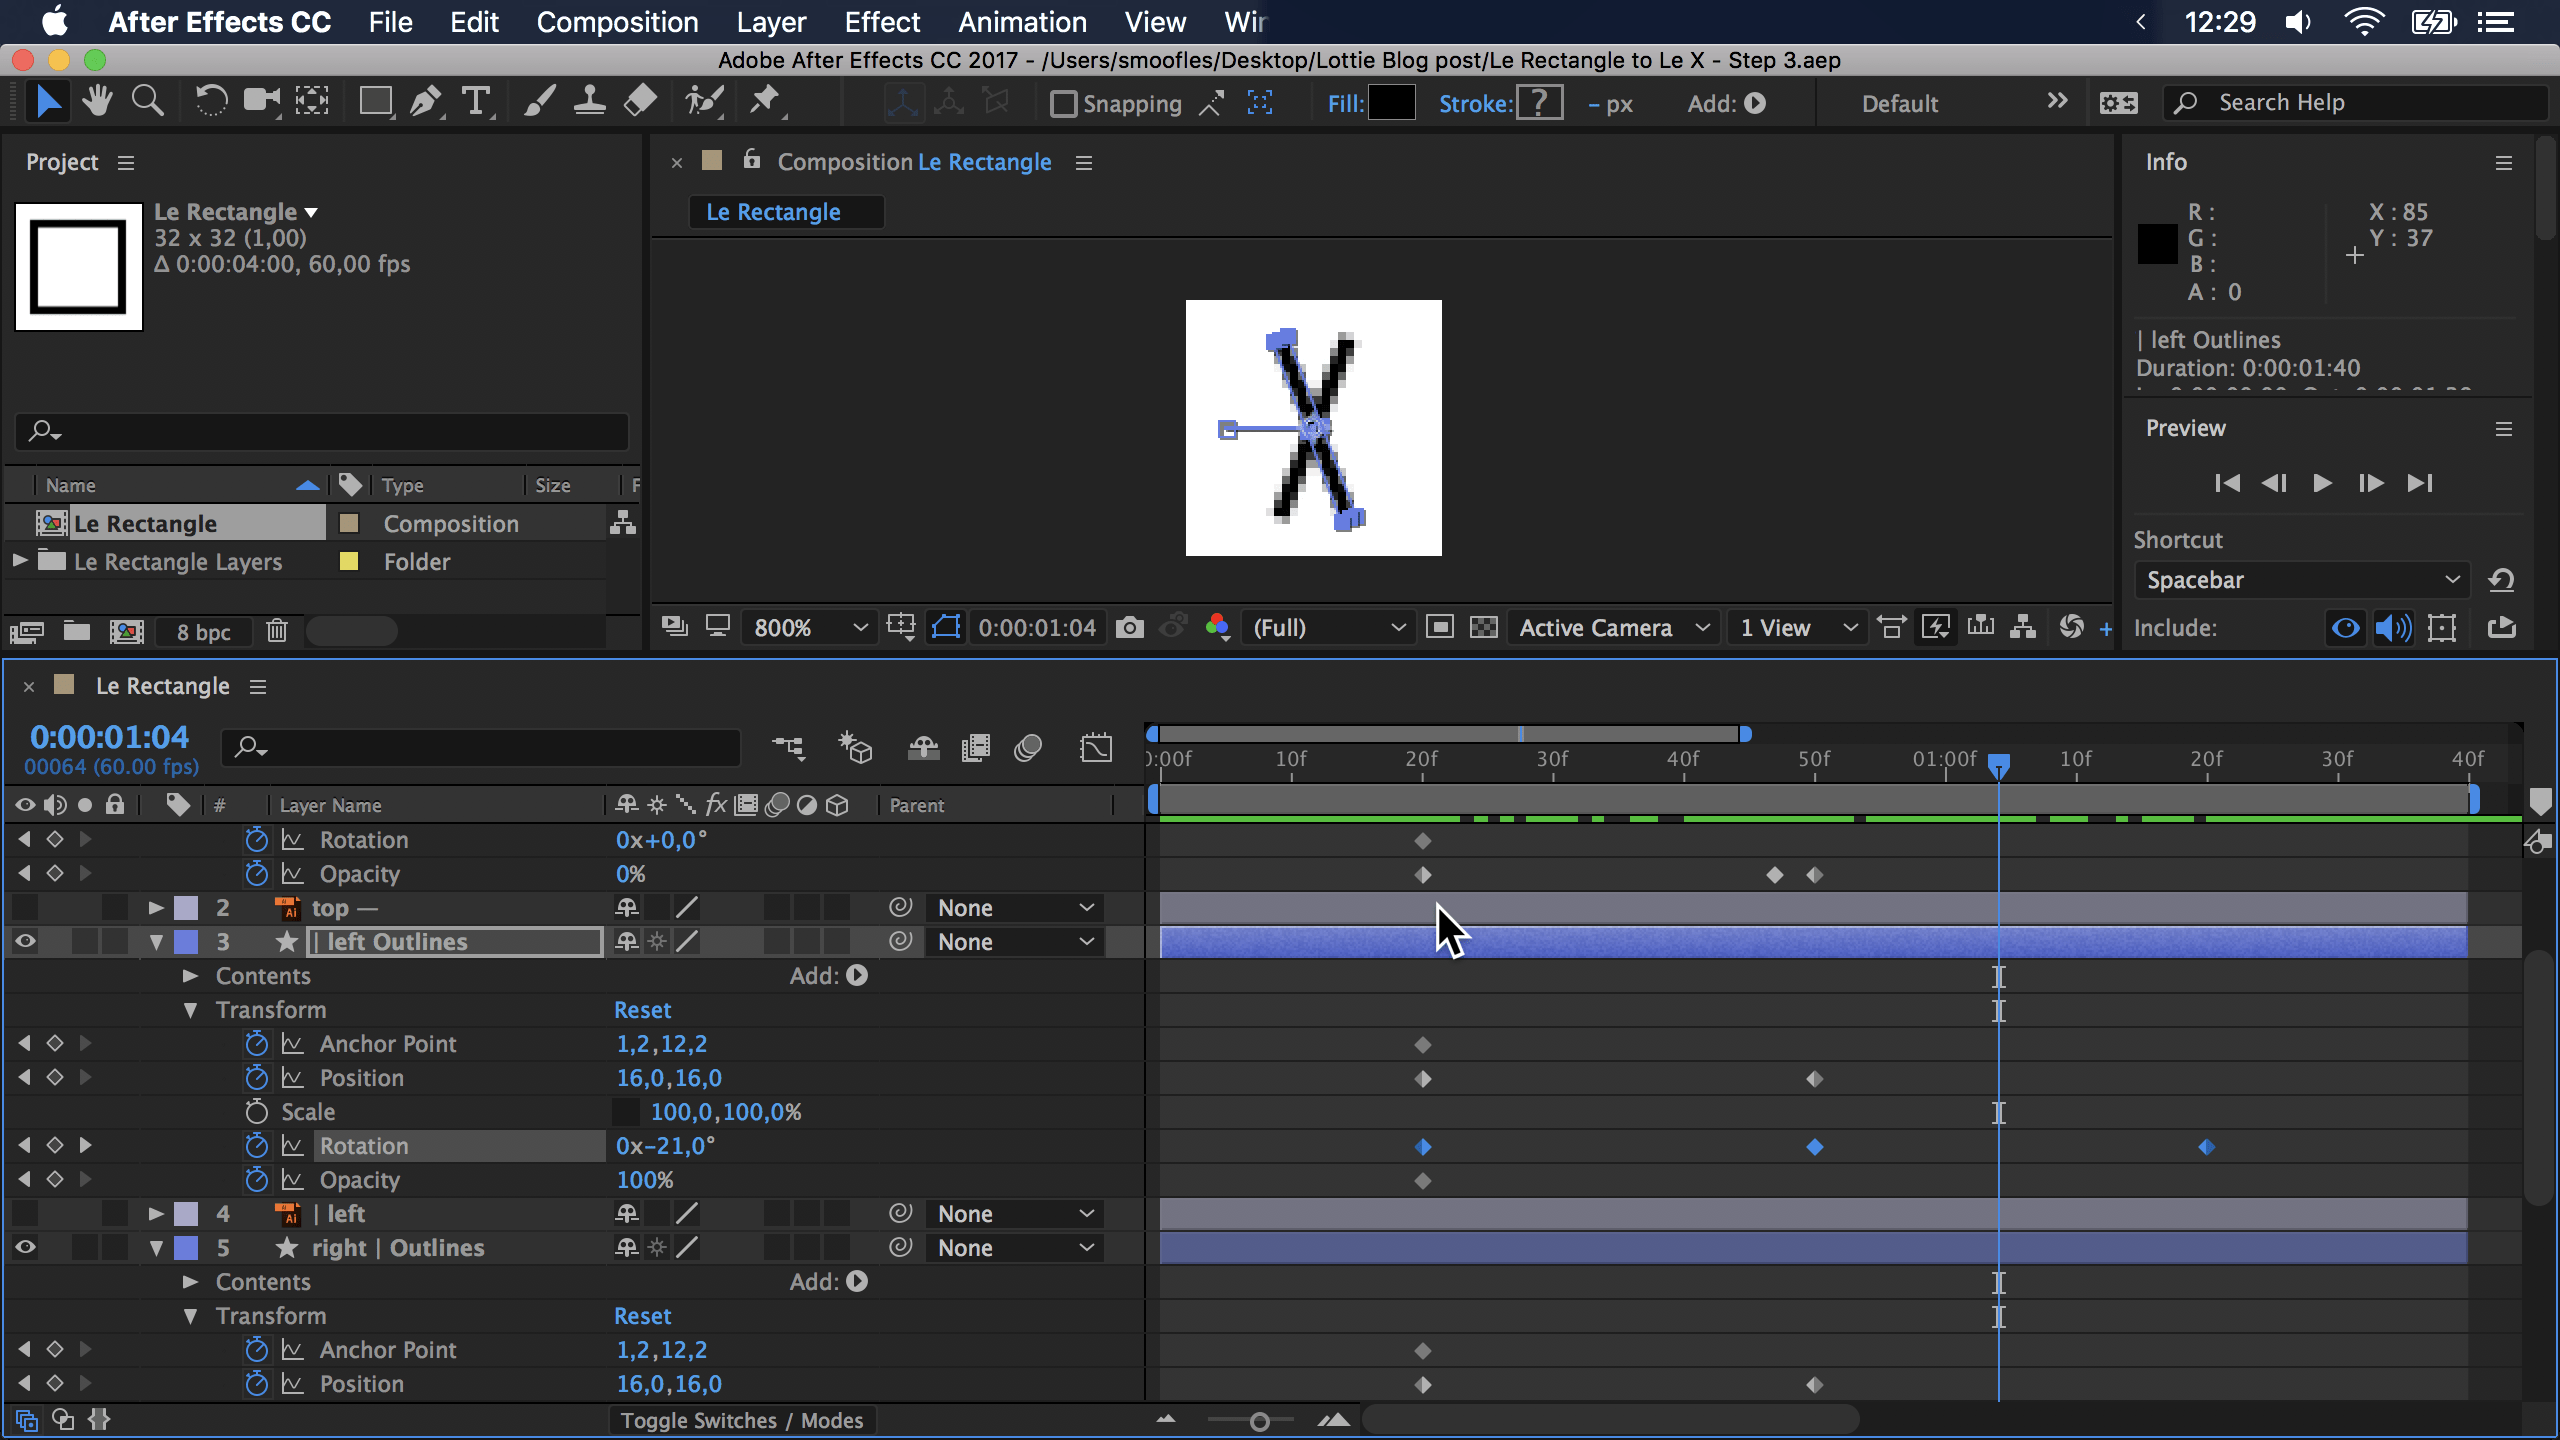
while the resulting animation looks like this:
![]()
Normally a UI element would be animated faster, to not annoy our users. In our case, however, we mainly want to see what the animation looks like, so slower is better. Besides, you can change the animation speed with Lottie in code, later.
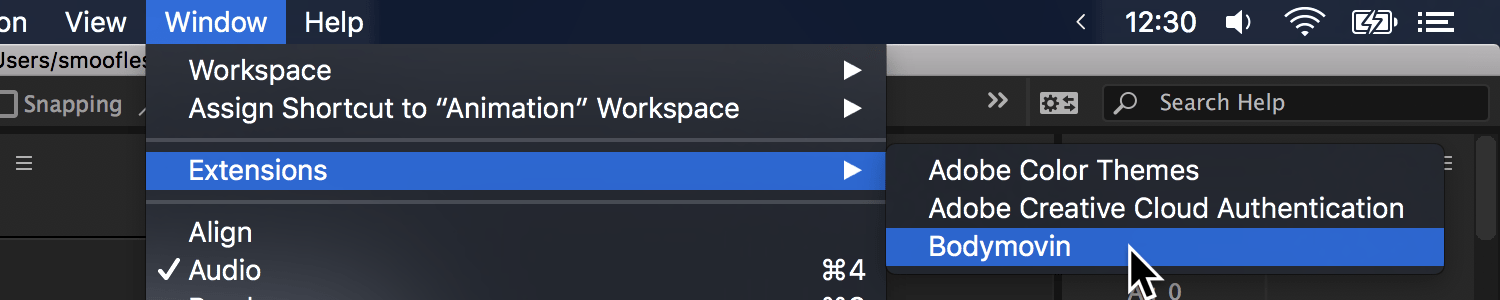
The last step, after you’re happy with your animation, is to export the whole animation into a single JSON file that Lottie can work with. Assuming you’ve installed the bodymovin plug-in from the Adobe Store, you’ll find it in the Window → Extensions menu in After effects:
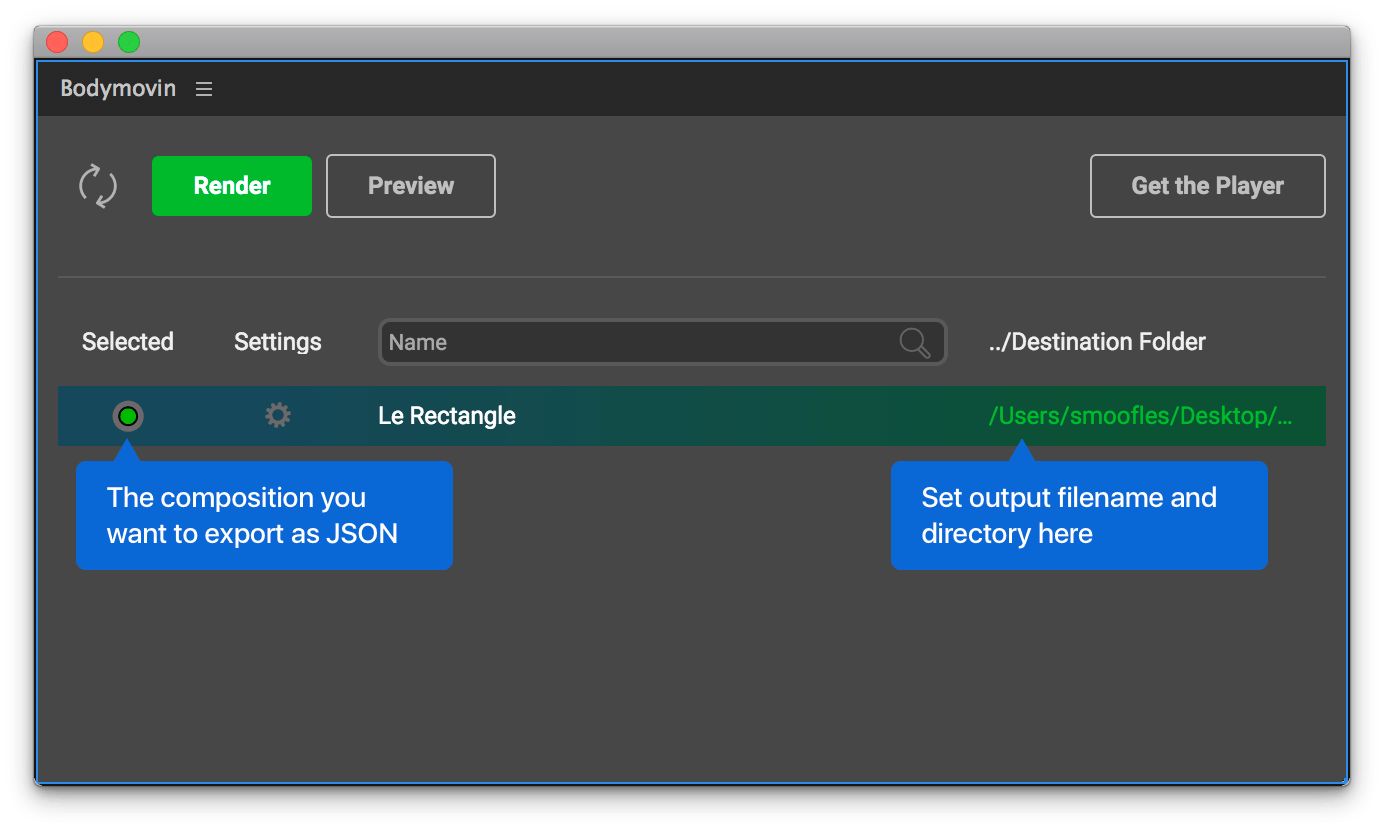
Bodymovin itself is pretty straightforward to use; you need to select which Composition you want to render (export) into a JSON file, and then pick the directory and filename for said JSON file. After you’ve done as much, hit the big, green Render button and bodymovin will export your animation.
After the JSON has been rendered, you can also click Preview to get to a timeline-based, rendered view of the animation. In Preview, you can scrub back and forth through the animation to see how it looks. If you search the respective mobile app stores for “Lottie”, you’ll also find apps that can preview Lottie animations, including the ability to zoom the previews in and out.
Sample Files
In order for you to hit the ground running, we’re providing a few sample files that you can play with. The ZIP archive includes the original Illustrator and After Effects source files, a MOV video rendered from After Effects, a GIF Brewery 3 project file for the movie and the resulting GIF animation, as well as the JSON file created by the bodymovin After Effects plugin. That way you can easily compare the different approaches.
Using Lottie on iOS
You can try out Lottie on iOS, by cloning the GitHub repository and running the example app, which has some bundled animations and UI that for various Lottie features. You can also load your animations from a URL to try them out quickly while creating the animations without having to recompile your app.
You can integrate Lottie into your project via CocoaPods, Carthage or manually include Lottie.xcodeproj from the cloned repository to your Xcode project.
The main entry point for adding animations via Lottie is LOTAnimationView. You can create a new LOTAnimationView with a bundled JSON file or a URL.
Lottie provides a simple API allowing you to play or pause an animation, loop it, set a custom speed and duration while supporting different content modes.
import Lottie

// ...

guard let animationView = LOTAnimationView(name: "animation") else { return }
animationView.contentMode = .scaleAspectFit
animationView.loopAnimation = true
self.view.addSubview(animationView)

animationView.play { animationFinished in
    // ...
}
#import <Lottie/Lottie.h>

// ...

LOTAnimationView *animationView = [LOTAnimationView animationNamed:@"animation"];
animationView.contentMode = UIViewContentModeScaleAspectFit;
animationView.loopAnimation = YES;
[self.view addSubview:animationView];

[animationView playWithCompletion:^(BOOL animationFinished) {
    // ...
}];
You can also create custom view controller transitions with LOTAnimationTransitionController by using custom defined After Effect layers to animate a transition with a given animation.
Using Lottie on Android
You can try Lottie on Android by downloading the Lottie app on the Google Play Store.
Use Gradle to integrate Lottie for Android into your project.
Just like on iOS, Lottie for Android provides various API to customize and configure animations.
import com.airbnb.lottie.LottieAnimationView;

LottieAnimationView animationView = (LottieAnimationView) findViewById(R.id.animation_view);
animationView.setAnimation("animation.json");
animationView.loop(true);

animationView.playAnimation();
Conclusion
It’s never been easier to implement animations as it is now with Lottie. And since it’s open source, you can take the opportunity to help improve Lottie even more by contributing to the library, just like we did!