Customize the Electronic Signatures UI on iOS
The Electronic Signatures UI can be customized to fit your needs.
You can customize aspects such as which signature creation modes are available and in which order, and what signing fonts to offer when creating signatures by typing.
These options are set via SignatureCreationViewController.Configuration. You can change the available mode via availableModes and the fonts via fonts.
Setting Available Signature Creation Modes
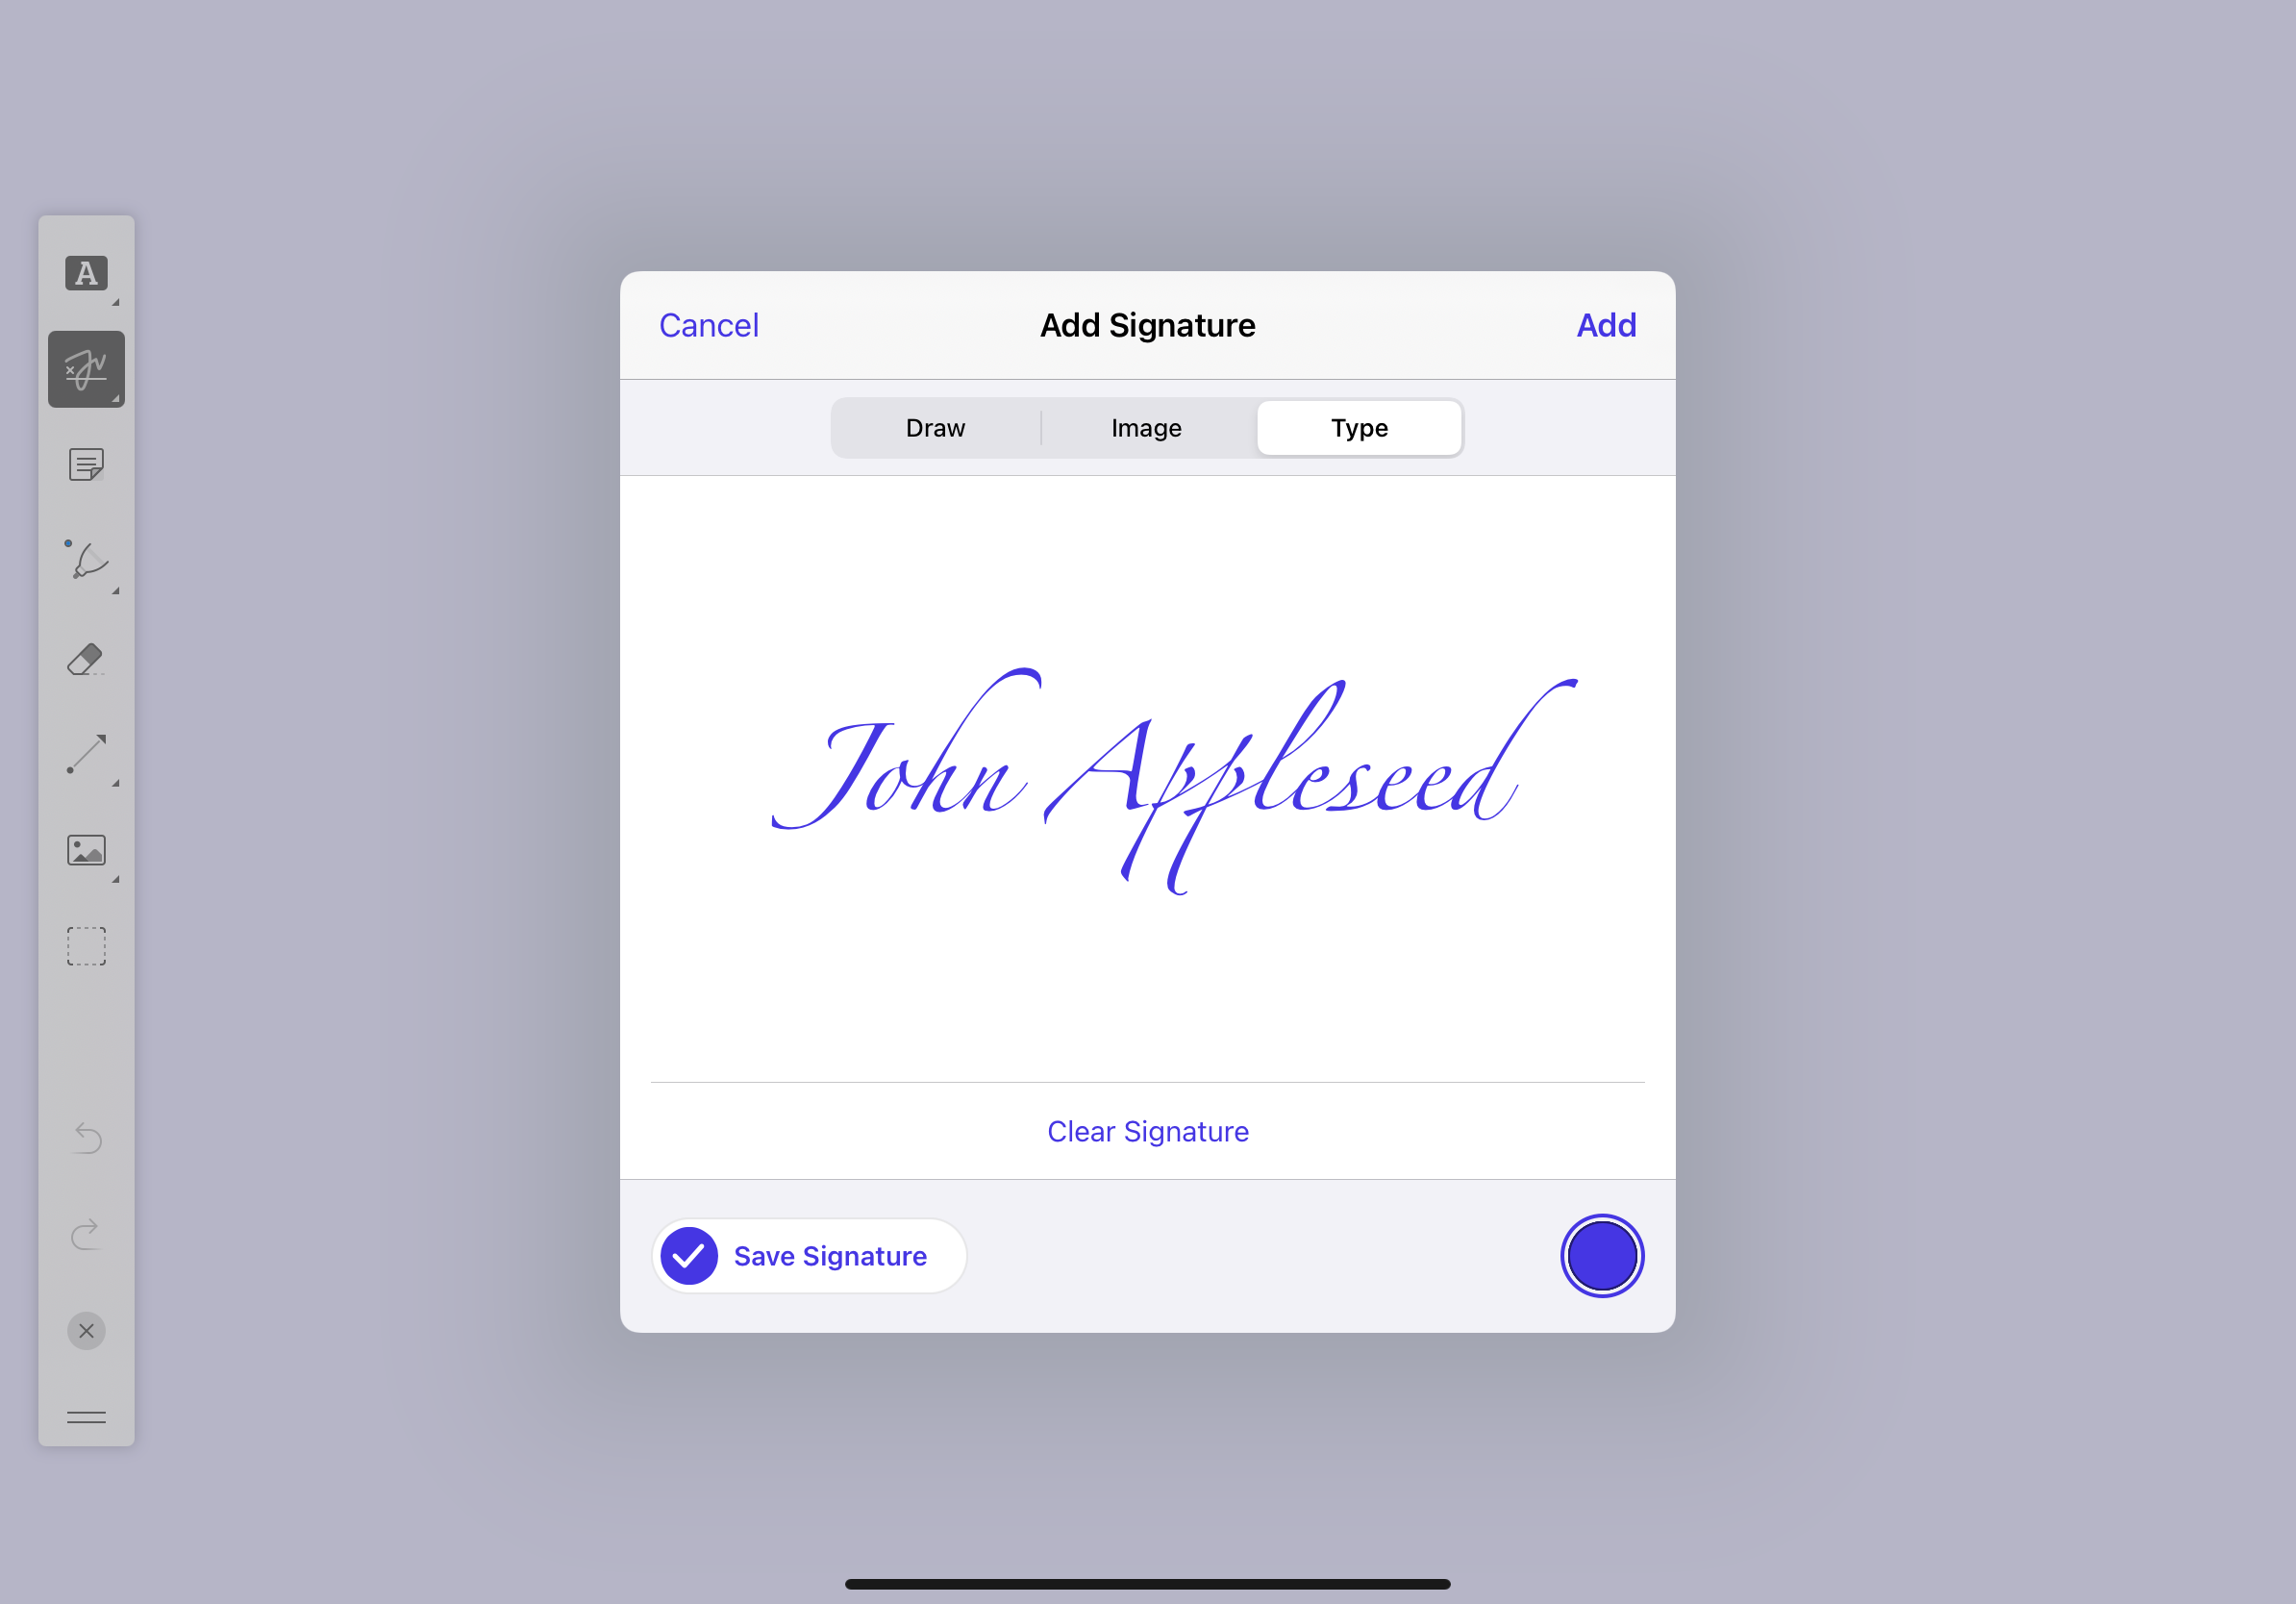
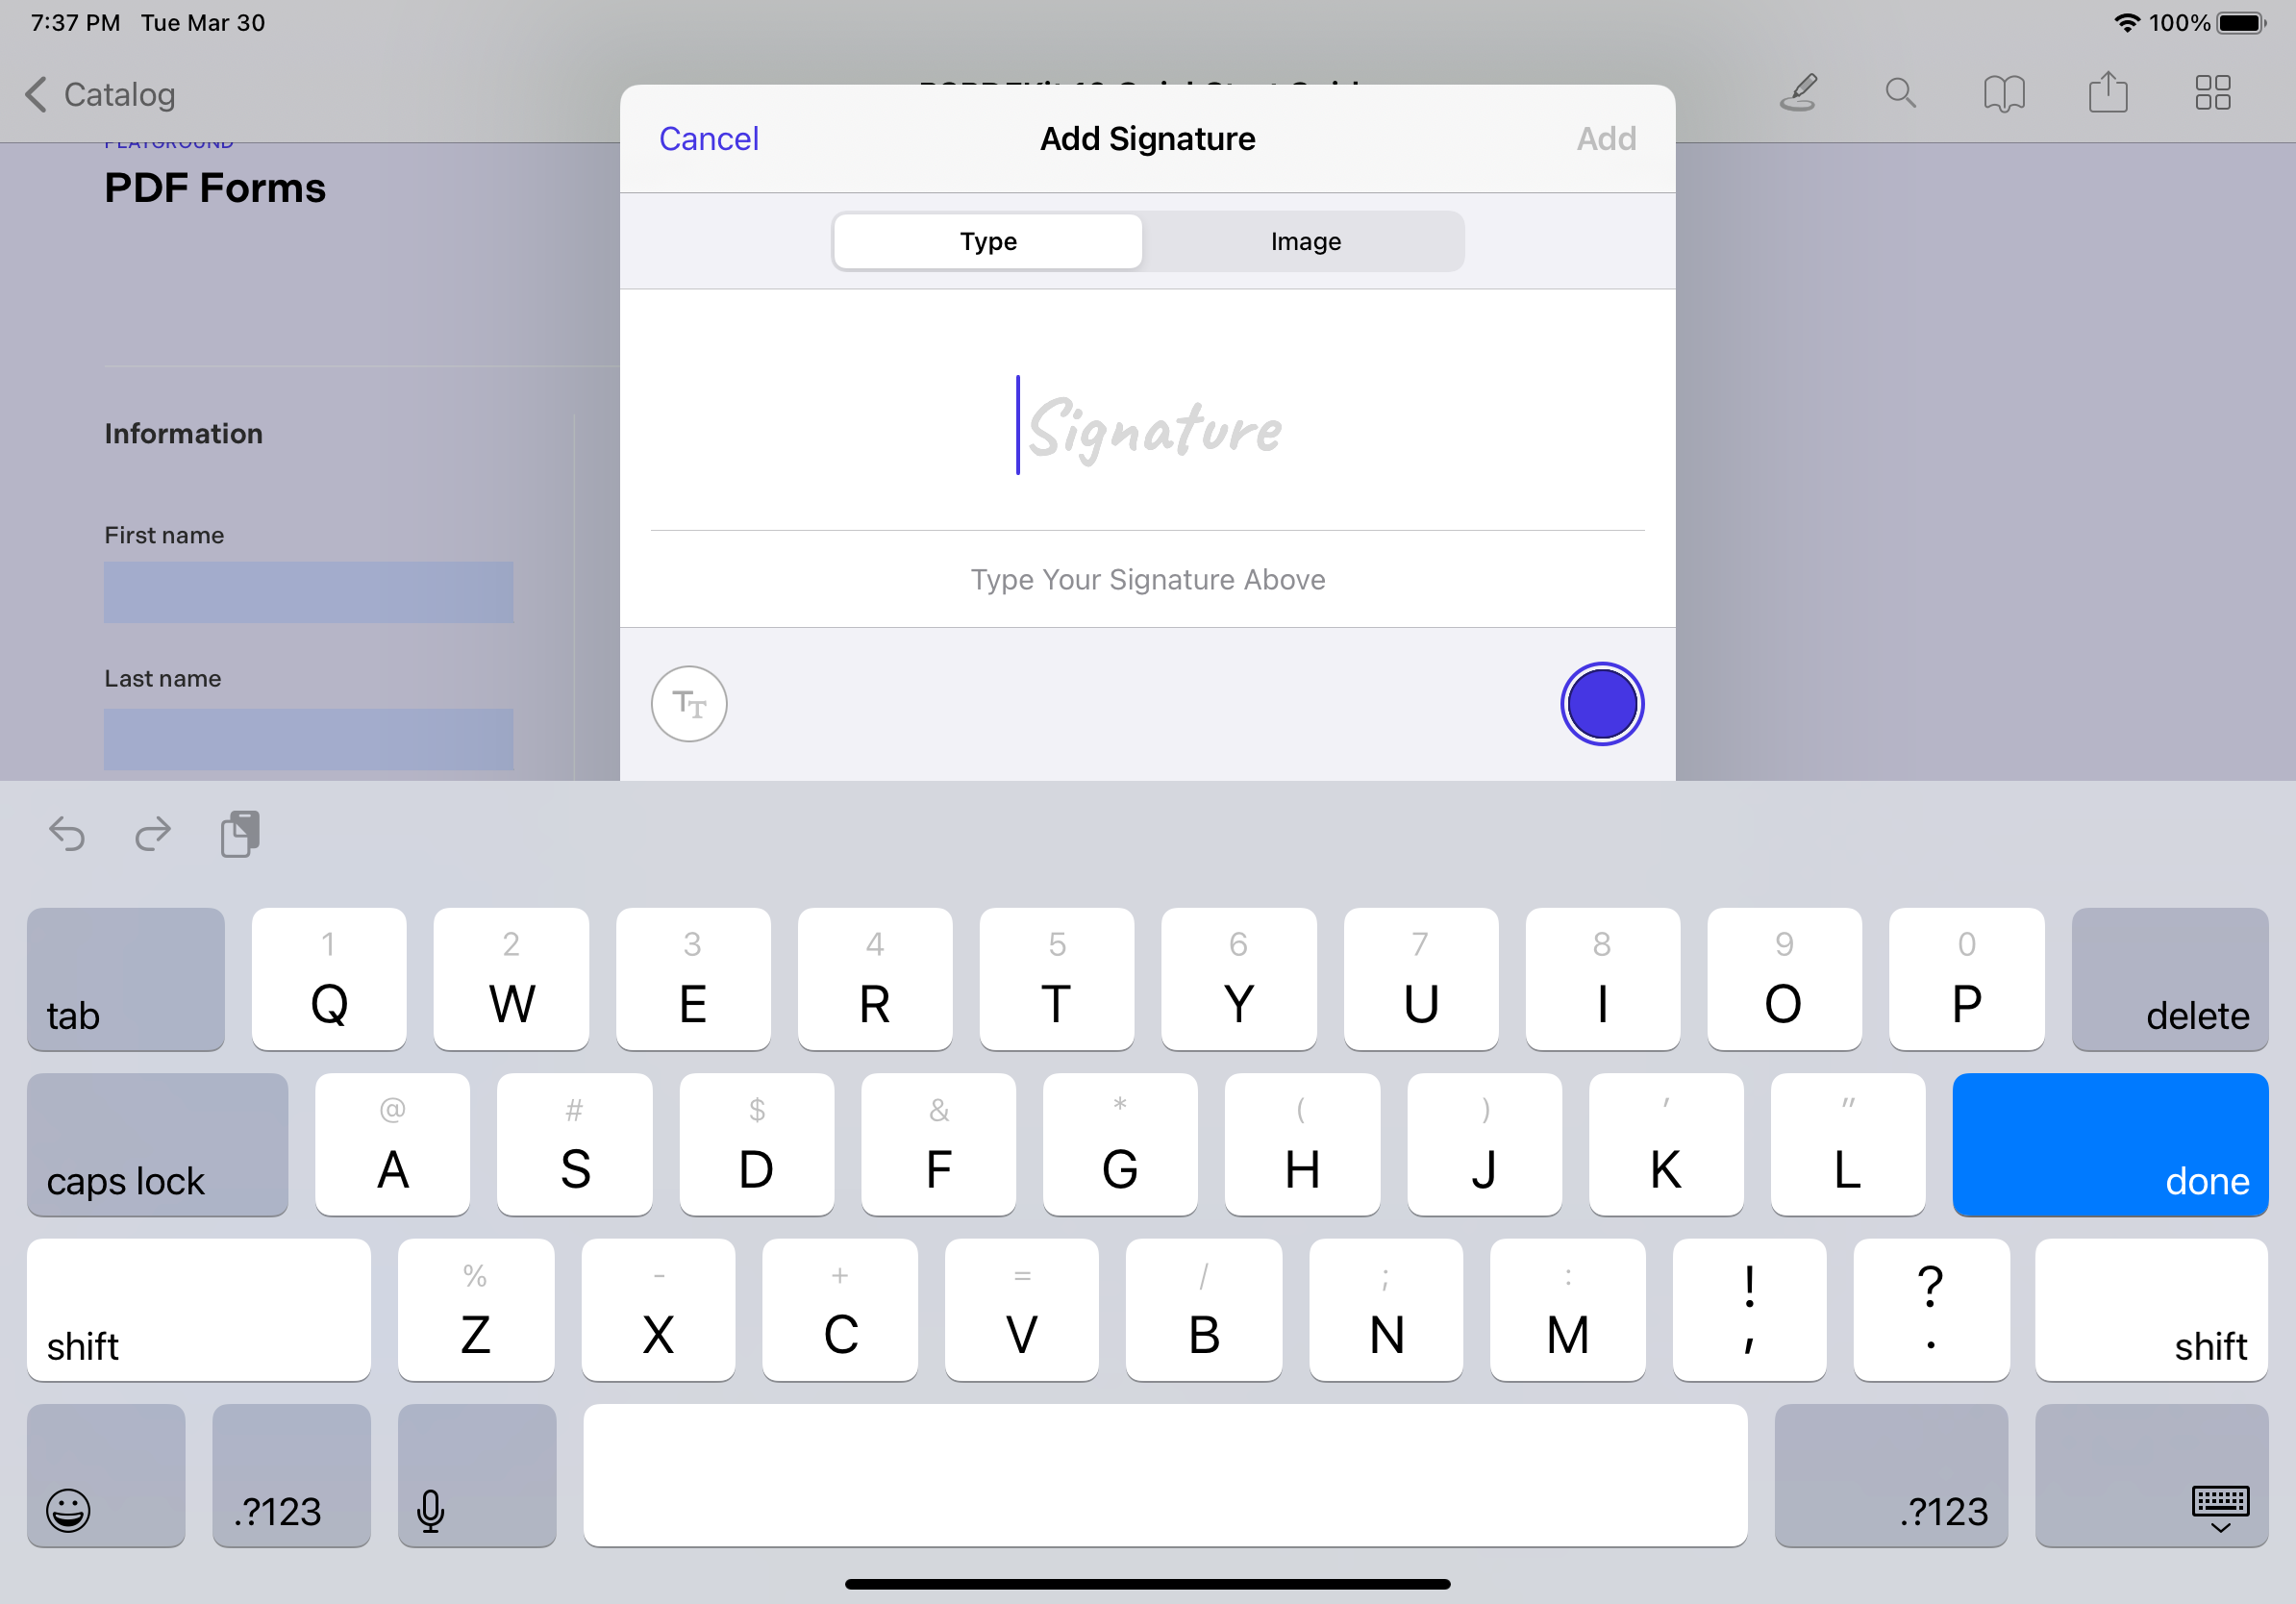
availableModes accepts an array of SignatureCreationViewController.Mode members. Based on these entries, the UI will display the tabs specified in the array, respecting the order in which they were added. It defaults to [.draw, .image, .type].
Here’s an example offering Type, followed by Image, as signature creation modes:
let controller = PDFViewController(document: document) { builder in
	 builder.signatureCreationConfiguration.availableModes = [.type, .image]
}
Setting Available Fonts to Sign With
The fonts property contains an array of UIFont objects that can be selected in the typing tab of the signing UI.
By default, this property contains four predefined fonts that are bundled with the SDK. However, you can change, add, or remove these fonts however you like. You must provide at least one font. If you only provide one, then the UI will be simplified by removing the list of styles.
Please note that the size of the provided UIFont will be ignored, as the signing UI will display the font in an appropriate size by overriding the previously used font size.
To change the fonts that are used by default, you can use code like this:
let controller = PDFViewController(document: document) { builder in
	 builder.signatureCreationConfiguration.fonts = [UIFont(name: "Zapfino", size: 1)!]
}