Edit a Generated PDF

PSPDFKit Processor has been deprecated and replaced by PSPDFKit Document Engine. All PSPDFKit Processor licenses will work as before and be supported until 15 May 2024 (we will contact you about license migration). To start using Document Engine, refer to the migration guide. With Document Engine, you’ll have access to robust new capabilities (read the blog for more information).
After generating a PDF, you may still want to perform extra operations to finalize your document. Examples of these operations include adding a cover page, adding watermarks, setting page labels, and more. Any action provided by Processor can be used with PDF Generation. To learn more about the actions you can perform with Processor, see the API Reference.
This guide shows how PDF Generation and additional actions are combined in one command to produce the final document.
Before you get started, make sure Processor is up and running.
You can download and use either of the following sample documents for the examples in this guide:
You’ll be sending multipart POST requests with instructions to Processor’s /build endpoint. To learn more about multipart requests, refer to our blog post on the topic, A Brief Tour of Multipart Requests.
Check out the API Reference to learn more about the /build endpoint and all the actions you can perform on PDFs with PSPDFKit Processor.
Generating a PDF from HTML
The example consists of a simple styled form, which can be seen in the following HTML:
<!DOCTYPE html>
<html>
  <head>
    <style>
      body {
        font-size: 16px;
        line-height: 1.6em;
        font-family: "Helvetica", Arial, sans-serif;
        color: #3d434e;
      }

      h1 {
        font-size: 42px;
        font-weight: normal;
        color: #142132;
        margin-block-start: 0.3em;
      }

      h2 {
        font-size: 32px;
        font-weight: normal;
        color: #142132;
        margin-block-start: 0.3em;
      }

      h3 {
        font-size: 12px;
        font-weight: normal;
        text-transform: uppercase;
        letter-spacing: 0.1em;
        color: #4739e5;
      }

      .container {
        max-width: 500px;
        margin: 100px auto auto;
        page-break-after: always;
      }

      .grid {
        display: flex;
        flex-direction: row;
        justify-content: space-between;
      }

      .column {
        display: flex;
        flex-direction: column;
      }

      .form-list {
        list-style: none;
        padding: 0;
      }

      .list-item {
        margin-bottom: 1.5rem;
      }

      .form-border {
        padding: 15px 10px;
        border-width: 2px;
      }

      .form-text {
        font-size: 18px;
        line-height: 1.5;
      }

      .full-width {
        width: 100%;
      }

      .expanded-checkbox {
        width: 30px;
        height: 30px;
      }

      .checkbox-label {
        display: flex;
        align-items: center;
        padding-left: 10px;
      }

      .checkbox-list {
        display: flex;
      }
    </style>
    <title>Data Science Online Course</title>
  </head>

  <body>
    <div class="container">
      <h3>Data Science</h3>
      <h1>Course Signup</h1>
      <p>
        Learn how to make informed decisions, create beautiful visualizations,
        and even try to predict future events through Machine Learning.
      </p>

      <form>
        <ul class="form-list">
          <li class="list-item">
            <label for="knowledge-level"></label>
            <select
              id="knowledge-level"
              class="full-width form-text form-border"
            >
              <option selected>-- Knowledge level --</option>
              <option value="beginner">Beginner</option>
              <option value="intermediate">Intermediate</option>
              <option value="professional">Professional</option>
            </select>
          </li>
          <li class="list-item">
            <div class="grid">
              <div class="column">
                <label for="first-name">First Name</label>
                <input
                  type="text"
                  id="first-name"
                  class="form-text form-border"
                />
              </div>
              <div class="column">
                <label for="last-name">Last Name</label>
                <input
                  type="text"
                  id="last-name"
                  class="form-text form-border"
                />
              </div>
            </div>
          </li>
          <li class="list-item">
            <div class="column">
              <label for="email">Email</label>
              <input type="text" id="email" class="form-text form-border" />
            </div>
          </li>
          <li class="list-item">
            <div class="column">
              <label for="phone-number">Phone Number</label>
              <input
                type="text"
                id="phone-number"
                class="form-text form-border"
              />
            </div>
          </li>
          <li class="checkbox-list">
            <input type="checkbox" id="terms" class="expanded-checkbox" />
            <label class="checkbox-label" for="terms"
              >I have read and agreed with the terms and conditions.</label
            >
          </li>
        </ul>
      </form>
    </div>
    <div class="container">
      <h2>Terms and Conditions</h2>
      <p>Lorem ipsum dolor sit amet, consectetur adipiscing elit. ...</p>
    </div>
  </body>
</html>
This form includes some text boxes, a select box, and a checkbox. These have all been styled to ensure they display nicely on an A4 page.
In addition to the form, there’s a Terms and Conditions section, which is referenced on the form. To ensure this section is generated on a separate page, set the page-break-after property to always in the container class. This forces a page break when generated.
To generate a PDF with the form and the terms and conditions, send a multipart message using the curl example below. This code has margins defined for the page layout of the generated PDF:
curl -X POST http://localhost:5000/build \
  -F page.html=@/path/to/page.html \
  -F instructions='{
  "parts": [
    {
      "html": "page.html",
      "layout": {
        "size": "a4",
        "margin": {
          "left": 10,
          "right": 10,
          "top": 40,
          "bottom": 10
        }
      }
    }
  ]
}' \
  -o result.pdf
POST /process HTTP/1.1
Content-Type: multipart/form-data; boundary=customboundary

--customboundary
Content-Disposition: form-data; name="page.html"; filename="page.html"
Content-Type: text/html

<HTML data>
--customboundary
Content-Disposition: form-data; name="instructions"
Content-Type: application/json

{
  "parts": [
    {
      "html": "page.html",
      "layout": {
        "size": "a4",
        "margin": {
          "left": 10,
          "right": 10,
          "top": 40,
          "bottom": 10
        }
      }
    }
  ]
}
--customboundary--
Adding a Cover Page
To add a cover page to the generated PDF, send a request like in the example below to the /build endpoint. To learn more about combining various documents and pages, read our merging documents guide.
The name of the cover page in the multipart request needs to be the same name referenced by file in the FilePart. If you don’t have a suitable PDF document, use the sample cover page PDF:
curl -X POST http://localhost:5000/build \
  -F page.html=@/path/to/page.html \
  -F cover-page=@/path/to/cover-page.pdf \
  -F instructions='{
  "parts": [
    {
      "file": "cover-page"
    },
    {
      "html": "page.html",
      "layout": {
        "size": "a4",
        "margin": {
          "left": 10,
          "right": 10,
          "top": 40,
          "bottom": 10
        }
      }
    }
  ]
}' \
  -o result.pdf
POST /process HTTP/1.1
Content-Type: multipart/form-data; boundary=customboundary

--customboundary
Content-Disposition: form-data; name="page.html"; filename="page.html"
Content-Type: text/html

<HTML data>
--customboundary
Content-Disposition: form-data; name="cover-page"; filename="cover-page.pdf"
Content-Type: application/pdf

<PDF data>
--customboundary
Content-Disposition: form-data; name="instructions"
Content-Type: application/json

{
  "parts": [
    {
      "file": "cover-page"
    },
    {
      "html": "page.html",
      "layout": {
        "size": "a4",
        "margin": {
          "left": 10,
          "right": 10,
          "top": 40,
          "bottom": 10
        }
      }
    }
  ]
}
--customboundary--


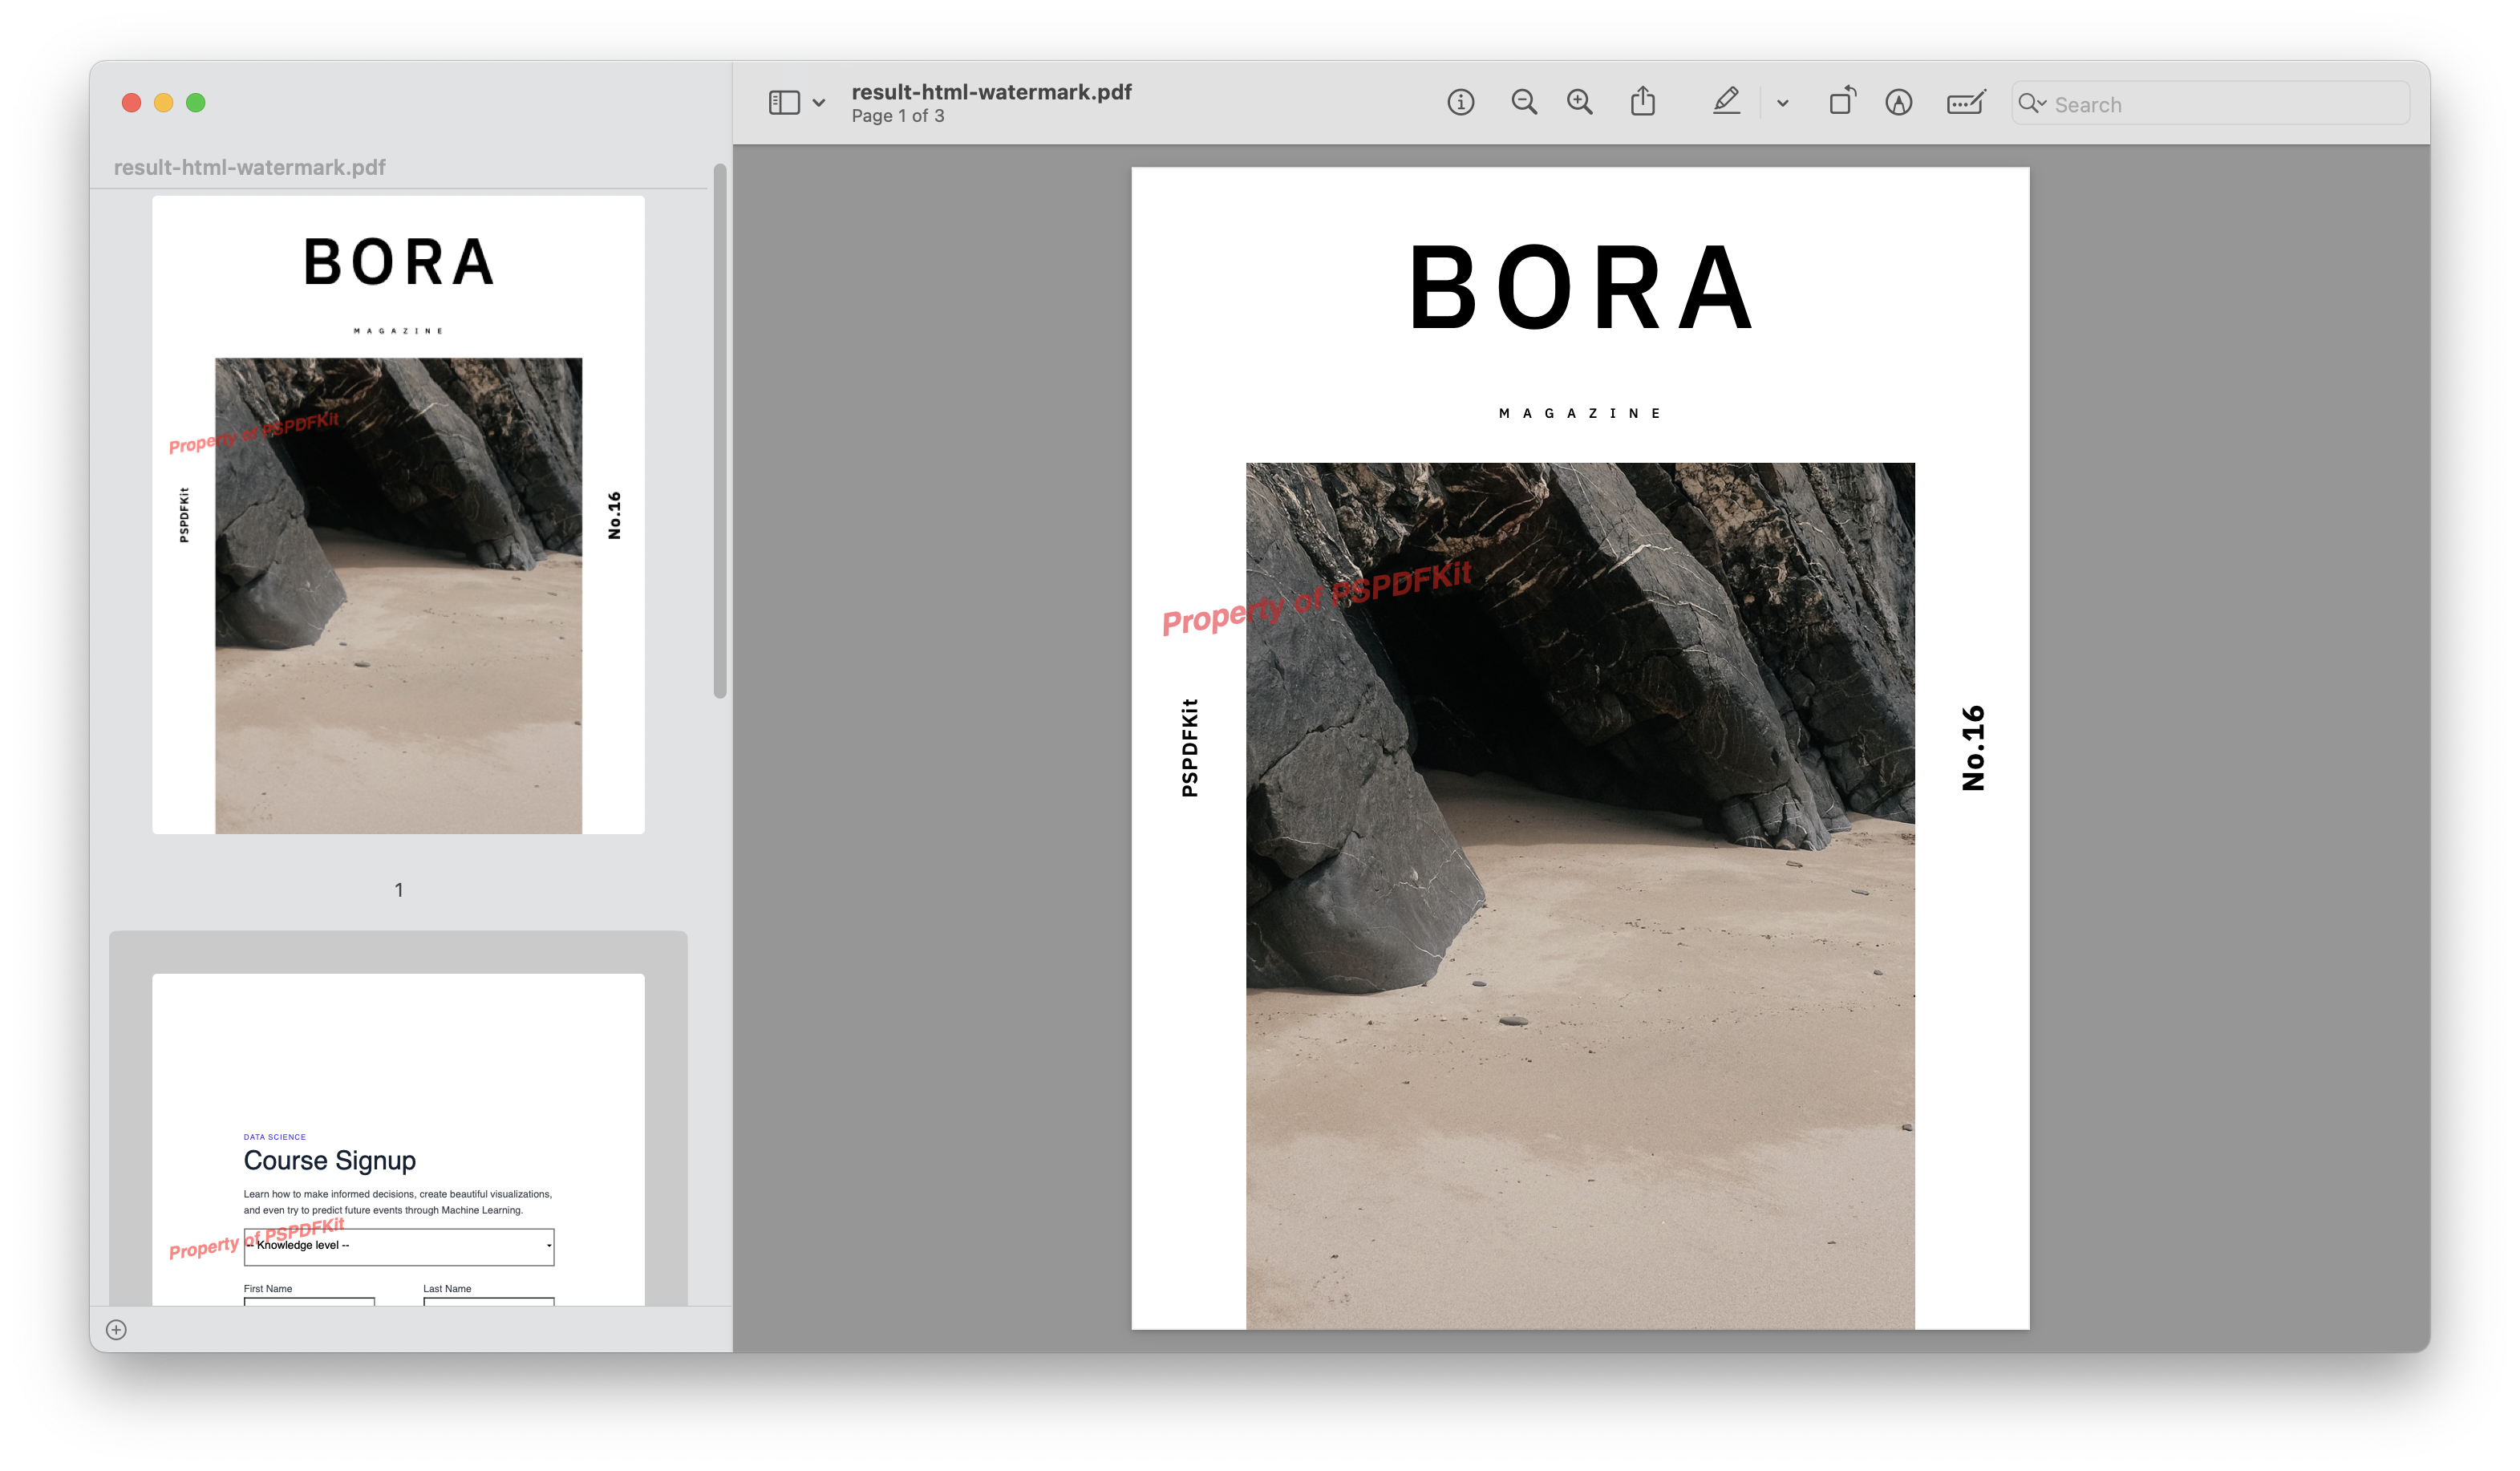
Adding a Watermark
To add a watermark to the document, use the example below.
To learn more about how to add watermarks to documents, refer to our watermark guide.
curl -X POST http://localhost:5000/build \
  -F page.html=@/path/to/page.html \
  -F cover-page=@/path/to/cover-page.pdf \
  -F instructions='{
  "parts": [
    {
      "file": "cover-page"
    },
    {
      "html": "page.html",
      "layout": {
        "size": "a4",
        "margin": {
          "left": 10,
          "right": 10,
          "top": 40,
          "bottom": 10
        }
      }
    }
  ],
  "actions": [
    {
      "type": "watermark",
      "text": "Property of PSPDFKit",
      "width": 250,
      "height": 200,
      "left": 0,
      "bottom": "50%",
      "opacity": 0.5,
      "rotation": 10,
      "fontSize": 50,
      "fontColor": "#FF0000",
      "fontStyle": [
        "italic",
        "bold"
      ],
      "fontFamily": "Helvetica"
    }
  ]
}' \
  -o result.pdf
POST /process HTTP/1.1
Content-Type: multipart/form-data; boundary=customboundary

--customboundary
Content-Disposition: form-data; name="page.html"; filename="page.html"
Content-Type: text/html

<HTML data>
--customboundary
Content-Disposition: form-data; name="cover-page"; filename="cover-page.pdf"
Content-Type: application/pdf

<PDF data>
--customboundary
Content-Disposition: form-data; name="instructions"
Content-Type: application/json

{
  "parts": [
    {
      "file": "cover-page"
    },
    {
      "html": "page.html",
      "layout": {
        "size": "a4",
        "margin": {
          "left": 10,
          "right": 10,
          "top": 40,
          "bottom": 10
        }
      }
    }
  ],
  "actions": [
    {
      "type": "watermark",
      "text": "Property of PSPDFKit",
      "width": 250,
      "height": 200,
      "left": 0,
      "bottom": "50%",
      "opacity": 0.5,
      "rotation": 10,
      "fontSize": 50,
      "fontColor": "#FF0000",
      "fontStyle": [
        "italic",
        "bold"
      ],
      "fontFamily": "Helvetica"
    }
  ]
}
--customboundary--
To learn more, go to the API Reference and the overview guide.