Validating a Digital Signature on Android
PSPDFKit supports validating digital signatures embedded in PDF documents. The digital signature validation process consists of two steps.
-
In the first step, it checks if the signature certificate embedded during signing can be trusted. To do this, the trusted certificate from the authority that issued it, a root CA certificate, or an intermediate CA certificate is necessary. For your convenience, PSPDFKit already provides the Adobe Root CA. This CA is also typically loaded by third-party readers.
-
In the second step, it verifies the signature. This process essentially applies the public key (from the certificate embedded in the PDF file) to the digital signature and compares the result with the message digest built from the PDF file, excluding the signature itself. If the result is the same, the signature is valid.
The DigitalSignatureValidator extracts the DigitalSignatureInfo from a signed SignatureFormField and performs a validation check on the signature. Validation can be performed using validateSignature() and validateSignatureAsync() and will return a DigitalSignatureValidationResult once complete. The result will hold information about both the validity of the digital signature and a variety of possible validation warnings and errors:
val result = DigitalSignatureValidator.validate(signatureFormField)
if (result.validationStatus == ValidationStatus.SUCCESS) {
	onSignatureValidated()
} else {
	showValidationProblems(result.problems)
}
final DigitalSignatureValidationResult result = DigitalSignatureValidator.validate(signatureFormField);
if (result.getValidationStatus() == ValidationStatus.SUCCESS) {
	onSignatureValidated();
} else {
	showValidationProblems(result.getProblems());
}
Validation Statuses
If you validate a digital signature with PSPDFKit, either programmatically or using our UI, there can be several possible statuses for the signature. Programmatically, the DigitalSignatureValidationResult class contains an enum, DigitalSignatureValidationResult.DocumentIntegrityStatus, that can be queried to determine if the document was altered in some way after it was digitally signed.
The image below shows the validation UI when the document is signed with a self-signed certificate.
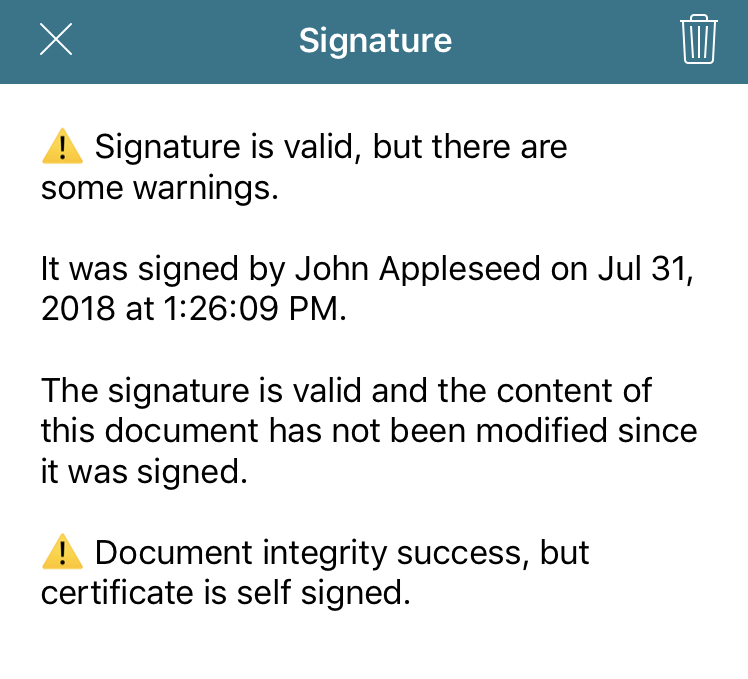
In this sample case, the first paragraph informs you of the general status of the digital signature. Next, the signer name and signing date is shown. This information always comes from the certificate itself, so you don’t have programmatic access to modify it. Following that paragraph, the integrity status of the document is displayed. In this case, the document hasn’t been modified since it was signed, which is a good sign. Finally, the UI lets you know that the certificate used for signing was a self-signed certificate. This isn’t necessarily bad, but you find out about this situation with a severity level of “warning.”
Below, you can see what happens if you try to validate a signature with an expired certificate.
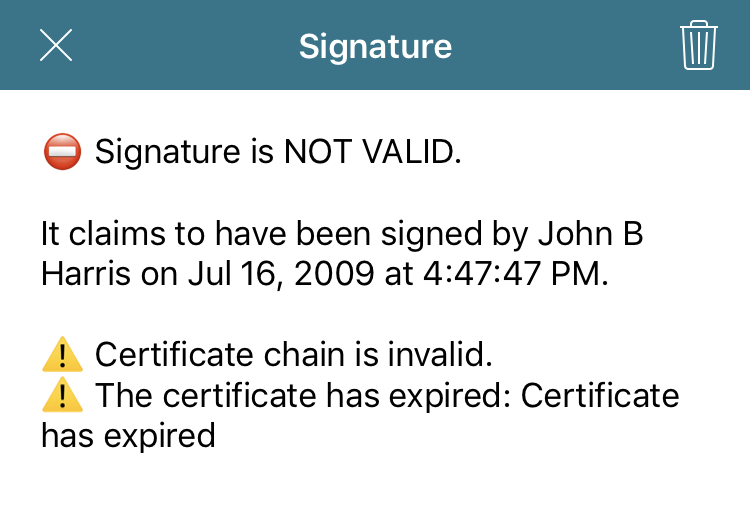
In this case, you’re informed that the certificate isn’t valid because it has expired. To prevent confusing our users, our default UI doesn’t show the integrity status of a document if the certificate validation failed (that is, if the general signature status is “error”).
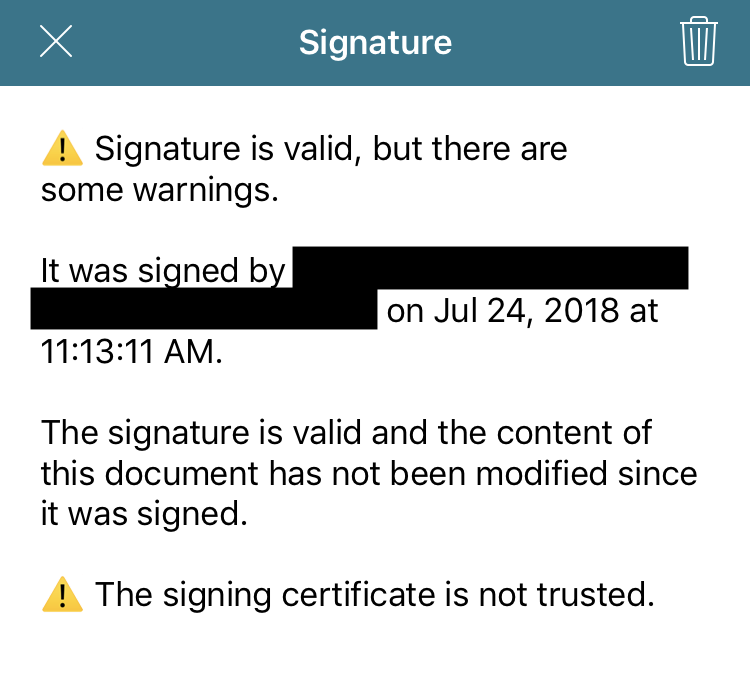
Below is the validation UI that’s shown when the certificate isn’t self-signed or hasn’t expired but isn’t yet trusted by PSPDFKit.
Validation in Adobe Acrobat
Once you’ve signed a PDF document using PSPDFKit, you’ll notice that after opening it in Adobe Acrobat, you might get the following validation status.
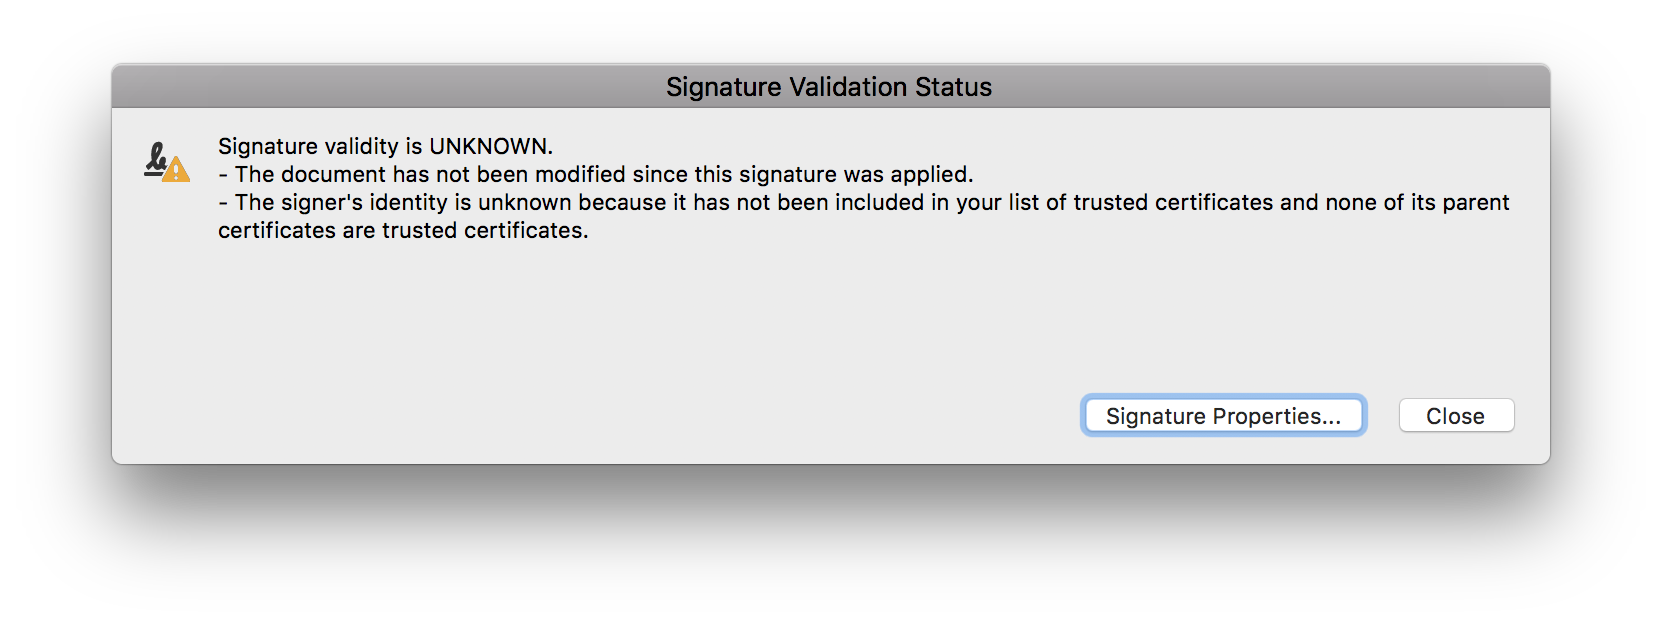
This warning is informing you that the reader application has verified that the document hasn’t been modified since the last time it was signed, but that the certificate isn’t yet trusted. You can configure the certificate as a trusted anchor in Adobe Acrobat by following the instructions provided by Adobe.
Alternatively, if the PDF is opened in a Windows environment, you can configure Adobe Acrobat to automatically trust every certificate in the Windows Certificate Store by clicking Edit > Preferences > Security > Advanced Preferences and then checking Enable searching the Windows Certificate Store for the following operations. Use this option with caution, as it might pose a security risk.
Adobe Acrobat 9 introduced a new program to make the validation process more user-friendly: the Adobe Approved Trust List (AATL). Businesses that provide certificates to their users can apply to this program by submitting application materials and their root certificates. Once approved, Adobe Acrobat will automatically download and trust every certificate that is part of this program.