This guide will walk you through the steps necessary to integrate PSPDFKit for Web into your project. By the end, you’ll be able to present a PDF document in the PSPDFKit UI.
Select the preferred products
The Web SDK uses the Standalone operational mode, where our JavaScript library renders and edits documents directly in the browser. It’s powered by WebAssembly technology, and it doesn’t require a server, plugins, or internet access. Compare operational modes.
PSPDFKit for Web can be evaluated without a trial license key, but with certain limitations (such as a red watermark added to documents). To evaluate without limitations, get a trial key.
A package manager compatible with npm. This guide contains usage examples for Yarn and the npm client. The npm client is installed with Node.js by default.
You need Node.js to complete this guide, but in general, Node.js isn’t a requirement for using PSPDFKit for Web.
Adding to Your Project
PSPDFKit for Web library files are distributed as an archive that can be installed as an npm module.
Add the PSPDFKit dependency:
yarn add pspdfkit
npm install --save pspdfkit
Copy the PSPDFKit for Web distribution to the assets directory in your project’s folder:
cp -R ./node_modules/pspdfkit/dist/ ./assets/
Make sure your assets directory contains the pspdfkit.js file and a pspdfkit-lib directory with the library assets.
Make sure your server has the Content-Type: application/wasm MIME typeset. Read more about this in the troubleshooting section.
Integrating into Your Project
Rename the PDF document you want to display in your application to document.pdf, and then add the PDF document to your project’s root directory. You can use this demo document as an example.
Add an empty <div> element with a defined width and height to where PSPDFKit will be mounted:
Import pspdfkit into your application and initialize PSPDFKit for Web in JavaScript by calling PSPDFKit.load():
import "./assets/pspdfkit.js";
// We need to inform PSPDFKit where to look for its library assets, i.e. the location of the `pspdfkit-lib` directory.const baseUrl = `${window.location.protocol}//${window.location.host}/assets/`;
PSPDFKit.load({
baseUrl,
container: "#pspdfkit",
document: "document.pdf"
})
.then(instance => {
console.log("PSPDFKit loaded", instance);
})
.catch(error => {
console.error(error.message);
});
Import index.js into your HTML page:
<script type="module" src="index.js"></script>
See the full index.html file below:
<!DOCTYPE html>
<html>
  <head>
    <title>My App</title>
    <!-- Provide proper viewport information so that the layout works on mobile devices. -->
    <meta
      name="viewport"
      content="width=device-width, initial-scale=1.0, minimum-scale=1.0, maximum-scale=1.0, user-scalable=no"
    />
  </head>
  <body>
    <!-- Element where PSPDFKit will be mounted. -->
    <div id="pspdfkit" style="width: 100%; height: 100vh;"></div>

    <script type="module" src="index.js"></script>
  </body>
</html>
Serving Your Website
You’ll use the npm serve package as a simple HTTP server.
When the Web SDK is combined with Document Engine, it uses the Server-Backed operational mode, where rendering is handled by the server and documents are streamed down to the web viewer. It’s delivered as a Docker container, and it offers the fastest performance, along with more advanced capabilities. Compare operational modes.
PSPDFKit for Web can be evaluated without a trial license key, but with certain limitations (such as a red watermark added to documents). To evaluate without limitations, get a trial key.
A package manager compatible with npm. This guide contains usage examples for Yarn and the npm client. The npm client is installed with Node.js by default.
You need Node.js to complete this guide, but in general, Node.js isn’t a requirement for using PSPDFKit for Web.
Adding to Your Project
PSPDFKit for Web library files are distributed as an archive that can be installed as an npm module.
Add the PSPDFKit dependency:
yarn add pspdfkit
npm install --save pspdfkit
Copy the PSPDFKit for Web distribution to the assets directory in your project’s folder:
cp -R ./node_modules/pspdfkit/dist/ ./assets/
Make sure your assets directory contains the pspdfkit.js file and a pspdfkit-lib directory with the library assets.
Make sure your server has the Content-Type: application/wasm MIME typeset. Read more about this in the troubleshooting section.
Integrating into Your Project
Rename the PDF document you want to display in your application to document.pdf, and then add the PDF document to your project’s root directory. You can use this demo document as an example.
Add an empty <div> element with a defined width and height to where PSPDFKit will be mounted:
Import pspdfkit into your application and initialize PSPDFKit for Web in JavaScript by calling PSPDFKit.load():
import "./assets/pspdfkit.js";
// We need to inform PSPDFKit where to look for its library assets, i.e. the location of the `pspdfkit-lib` directory.const baseUrl = `${window.location.protocol}//${window.location.host}/assets/`;
PSPDFKit.load({
baseUrl,
container: "#pspdfkit",
document: "document.pdf"
})
.then(instance => {
console.log("PSPDFKit loaded", instance);
})
.catch(error => {
console.error(error.message);
});
Import index.js into your HTML page:
<script type="module" src="index.js"></script>
See the full index.html file below:
<!DOCTYPE html>
<html>
  <head>
    <title>My App</title>
    <!-- Provide proper viewport information so that the layout works on mobile devices. -->
    <meta
      name="viewport"
      content="width=device-width, initial-scale=1.0, minimum-scale=1.0, maximum-scale=1.0, user-scalable=no"
    />
  </head>
  <body>
    <!-- Element where PSPDFKit will be mounted. -->
    <div id="pspdfkit" style="width: 100%; height: 100vh;"></div>

    <script type="module" src="index.js"></script>
  </body>
</html>
Serving Your Website
You’ll use the npm serve package as a simple HTTP server.
To set up Document Engine so that it’ll be the backend for PSPDFKit for Web, follow the instructions in the Getting Started with Document Engine guide.
Once Document Engine has been set up, you’ll need to update your code to open a document from Document Engine. This is accomplished by replacing properties included in the configuration object passed to PSPDFKit.load(). Refer to the code snippets located earlier in this guide to find where PSPDFKit.load() will need to be updated.
The document property in PSPDFKit.load() will be replaced with the documentId provided by Document Engine, while the authPayload and the serverUrl properties will be added. If you’d like to enable Instant synchronization, set the instant property to true. See the following example:
This guide will walk you through the steps necessary to integrate PSPDFKit for Web into your project. By the end, you’ll be able to present a PDF document in the PSPDFKit UI.
Select the preferred products
The Web SDK uses the Standalone operational mode, where our JavaScript library renders and edits documents directly in the browser. It’s powered by WebAssembly technology, and it doesn’t require a server, plugins, or internet access. Compare operational modes.
PSPDFKit for Web can be evaluated without a trial license key, but with certain limitations (such as a red watermark added to documents). To evaluate without limitations, get a trial key.
You need Node.js to complete this guide, but in general, Node.js isn’t a requirement for using PSPDFKit for Web.
Adding to Your Project
PSPDFKit for Web library files are distributed as an archive that can be extracted manually.
Download the framework here. The download will start immediately and will save a .tar.gz archive like PSPDFKit-Web-binary-2024.3.0.tar.gz to your computer.
Once the download is complete, extract the archive and copy the entire contents of its dist folder to your project’s assets folder.
Make sure your assets folder contains the pspdfkit.js file and a pspdfkit-lib directory with the library assets.
Make sure your server has the Content-Type: application/wasm MIME typeset. Read more about this in the troubleshooting section.
Integrating into Your Project
Rename the PDF document you want to display in your application to document.pdf, and then add the PDF document to your project’s root directory. You can use this demo document as an example.
Add an empty <div> element with a defined width and height to where PSPDFKit will be mounted:
When the Web SDK is combined with Document Engine, it uses the Server-Backed operational mode, where rendering is handled by the server and documents are streamed down to the web viewer. It’s delivered as a Docker container, and it offers the fastest performance, along with more advanced capabilities. Compare operational modes.
PSPDFKit for Web can be evaluated without a trial license key, but with certain limitations (such as a red watermark added to documents). To evaluate without limitations, get a trial key.
You need Node.js to complete this guide, but in general, Node.js isn’t a requirement for using PSPDFKit for Web.
Adding to Your Project
PSPDFKit for Web library files are distributed as an archive that can be extracted manually.
Download the framework here. The download will start immediately and will save a .tar.gz archive like PSPDFKit-Web-binary-2024.3.0.tar.gz to your computer.
Once the download is complete, extract the archive and copy the entire contents of its dist folder to your project’s assets folder.
Make sure your assets folder contains the pspdfkit.js file and a pspdfkit-lib directory with the library assets.
Make sure your server has the Content-Type: application/wasm MIME typeset. Read more about this in the troubleshooting section.
Integrating into Your Project
Rename the PDF document you want to display in your application to document.pdf, and then add the PDF document to your project’s root directory. You can use this demo document as an example.
Add an empty <div> element with a defined width and height to where PSPDFKit will be mounted:
To set up Document Engine so that it’ll be the backend for PSPDFKit for Web, follow the instructions in the Getting Started with Document Engine guide.
Once Document Engine has been set up, you’ll need to update your code to open a document from Document Engine. This is accomplished by replacing properties included in the configuration object passed to PSPDFKit.load(). Refer to the code snippets located earlier in this guide to find where PSPDFKit.load() will need to be updated.
The document property in PSPDFKit.load() will be replaced with the documentId provided by Document Engine, while the authPayload and the serverUrl properties will be added. If you’d like to enable Instant synchronization, set the instant property to true. See the following example:
This guide will walk you through the steps necessary to integrate PSPDFKit for Web into your project. By the end, you’ll be able to present a PDF document in the PSPDFKit UI.
Select the preferred products
The Web SDK uses the Standalone operational mode, where our JavaScript library renders and edits documents directly in the browser. It’s powered by WebAssembly technology, and it doesn’t require a server, plugins, or internet access. Compare operational modes.
PSPDFKit for Web can be evaluated without a trial license key, but with certain limitations (such as a red watermark added to documents). To evaluate without limitations, get a trial key.
You need Node.js to complete this guide, but in general, Node.js isn’t a requirement for using PSPDFKit for Web.
Adding to Your Project
PSPDFKit for Web library files are distributed as an archive that can be extracted manually.
Download the framework here. The download will start immediately and will save a .tar.gz archive like PSPDFKit-Web-binary-2024.3.0.tar.gz to your computer.
Once the download is complete, extract the archive and copy the entire contents of its dist folder to your project’s assets folder.
Make sure your assets folder contains the pspdfkit.js file and a pspdfkit-lib directory with the library assets.
Make sure your server has the Content-Type: application/wasm MIME typeset. Read more about this in the troubleshooting section.
Integrating into Your Project
Rename the PDF document you want to display in your application to document.pdf, and then add the PDF document to your project’s root directory. You can use this demo document as an example.
Add an empty <div> element with a defined width and height to where PSPDFKit will be mounted:
Import pspdfkit into your application and initialize PSPDFKit for Web in JavaScript by calling PSPDFKit.load():
import "./assets/pspdfkit.js";
// We need to inform PSPDFKit where to look for its library assets, i.e. the location of the `pspdfkit-lib` directory.const baseUrl = `${window.location.protocol}//${window.location.host}/assets/`;
PSPDFKit.load({
baseUrl,
container: "#pspdfkit",
document: "document.pdf"
})
.then(instance => {
console.log("PSPDFKit loaded", instance);
})
.catch(error => {
console.error(error.message);
});
Import index.js into your HTML page:
<script type="module" src="index.js"></script>
See the full index.html file below:
<!DOCTYPE html>
<html>
  <head>
    <title>My App</title>
    <!-- Provide proper viewport information so that the layout works on mobile devices. -->
    <meta
      name="viewport"
      content="width=device-width, initial-scale=1.0, minimum-scale=1.0, maximum-scale=1.0, user-scalable=no"
    />
  </head>
  <body>
    <!-- Element where PSPDFKit will be mounted. -->
    <div id="pspdfkit" style="width: 100%; height: 100vh;"></div>

    <script type="module" src="index.js"></script>
  </body>
</html>
Serving Your Website
You’ll use the npm serve package as a simple HTTP server.
When the Web SDK is combined with Document Engine, it uses the Server-Backed operational mode, where rendering is handled by the server and documents are streamed down to the web viewer. It’s delivered as a Docker container, and it offers the fastest performance, along with more advanced capabilities. Compare operational modes.
PSPDFKit for Web can be evaluated without a trial license key, but with certain limitations (such as a red watermark added to documents). To evaluate without limitations, get a trial key.
You need Node.js to complete this guide, but in general, Node.js isn’t a requirement for using PSPDFKit for Web.
Adding to Your Project
PSPDFKit for Web library files are distributed as an archive that can be extracted manually.
Download the framework here. The download will start immediately and will save a .tar.gz archive like PSPDFKit-Web-binary-2024.3.0.tar.gz to your computer.
Once the download is complete, extract the archive and copy the entire contents of its dist folder to your project’s assets folder.
Make sure your assets folder contains the pspdfkit.js file and a pspdfkit-lib directory with the library assets.
Make sure your server has the Content-Type: application/wasm MIME typeset. Read more about this in the troubleshooting section.
Integrating into Your Project
Rename the PDF document you want to display in your application to document.pdf, and then add the PDF document to your project’s root directory. You can use this demo document as an example.
Add an empty <div> element with a defined width and height to where PSPDFKit will be mounted:
Import pspdfkit into your application and initialize PSPDFKit for Web in JavaScript by calling PSPDFKit.load():
import "./assets/pspdfkit.js";
// We need to inform PSPDFKit where to look for its library assets, i.e. the location of the `pspdfkit-lib` directory.const baseUrl = `${window.location.protocol}//${window.location.host}/assets/`;
PSPDFKit.load({
baseUrl,
container: "#pspdfkit",
document: "document.pdf"
})
.then(instance => {
console.log("PSPDFKit loaded", instance);
})
.catch(error => {
console.error(error.message);
});
Import index.js into your HTML page:
<script type="module" src="index.js"></script>
See the full index.html file below:
<!DOCTYPE html>
<html>
  <head>
    <title>My App</title>
    <!-- Provide proper viewport information so that the layout works on mobile devices. -->
    <meta
      name="viewport"
      content="width=device-width, initial-scale=1.0, minimum-scale=1.0, maximum-scale=1.0, user-scalable=no"
    />
  </head>
  <body>
    <!-- Element where PSPDFKit will be mounted. -->
    <div id="pspdfkit" style="width: 100%; height: 100vh;"></div>

    <script type="module" src="index.js"></script>
  </body>
</html>
Serving Your Website
You’ll use the npm serve package as a simple HTTP server.
To set up Document Engine so that it’ll be the backend for PSPDFKit for Web, follow the instructions in the Getting Started with Document Engine guide.
Once Document Engine has been set up, you’ll need to update your code to open a document from Document Engine. This is accomplished by replacing properties included in the configuration object passed to PSPDFKit.load(). Refer to the code snippets located earlier in this guide to find where PSPDFKit.load() will need to be updated.
The document property in PSPDFKit.load() will be replaced with the documentId provided by Document Engine, while the authPayload and the serverUrl properties will be added. If you’d like to enable Instant synchronization, set the instant property to true. See the following example:
This guide will walk you through the steps necessary to integrate PSPDFKit for Web into your project. By the end, you’ll be able to present a PDF document in the PSPDFKit UI.
Select the preferred products
The Web SDK uses the Standalone operational mode, where our JavaScript library renders and edits documents directly in the browser. It’s powered by WebAssembly technology, and it doesn’t require a server, plugins, or internet access. Compare operational modes.
PSPDFKit for Web can be evaluated without a trial license key, but with certain limitations (such as a red watermark added to documents). To evaluate without limitations, get a trial key.
A package manager compatible with npm. This guide contains usage examples for Yarn and the npm client. The npm client is installed with Node.js by default.
You need Node.js to complete this guide, but in general, Node.js isn’t a requirement for using PSPDFKit for Web.
Make sure your public directory contains a pspdfkit-lib directory with the PSPDFKit library assets.
Make sure your server has the Content-Type: application/wasm MIME typeset. Read more about this in the troubleshooting section.
Displaying a PDF
Rename the PDF document you want to display in your application to document.pdf, and then add the PDF document to the public directory. You can use this demo document as an example.
In the src/components/ folder, create the PdfViewerComponent.js file with the following content. This adds a component wrapper for the PSPDFKit library:
import { useEffect, useRef } from "react";
exportdefaultfunction PdfViewerComponent(props) {
const containerRef = useRef(null);
useEffect(() => {
const container = containerRef.current; // This `useRef` instance will render the PDF.let PSPDFKit, instance;
(asyncfunction () {
PSPDFKit = awaitimport("pspdfkit")
PSPDFKit.unload(container) // Ensure that there's only one PSPDFKit instance.
instance = await PSPDFKit.load({
// Container where PSPDFKit should be mounted.
container,
// The document to open.
document: props.document,
// Use the public directory URL as a base URL. PSPDFKit will download its library assets from here.
baseUrl: `${window.location.protocol}//${window.location.host}/${process.env.PUBLIC_URL}`
});
})();
return () => PSPDFKit && PSPDFKit.unload(container)
}, []);
// This div element will render the document to the DOM.return <div ref={containerRef} style={{ width: "100%", height: "100vh" }} />
}
In the src folder, replace the contents of the App.js file with the following. This includes the newly created component in your app:
When the Web SDK is combined with Document Engine, it uses the Server-Backed operational mode, where rendering is handled by the server and documents are streamed down to the web viewer. It’s delivered as a Docker container, and it offers the fastest performance, along with more advanced capabilities. Compare operational modes.
PSPDFKit for Web can be evaluated without a trial license key, but with certain limitations (such as a red watermark added to documents). To evaluate without limitations, get a trial key.
Make sure your public directory contains a pspdfkit-lib directory with the PSPDFKit library assets.
Make sure your server has the Content-Type: application/wasm MIME typeset. Read more about this in the troubleshooting section.
Displaying a PDF
Rename the PDF document you want to display in your application to document.pdf, and then add the PDF document to the public directory. You can use this demo document as an example.
In the src/components/ folder, create the PdfViewerComponent.js file with the following content. This adds a component wrapper for the PSPDFKit library:
import { useEffect, useRef } from "react";
exportdefaultfunction PdfViewerComponent(props) {
const containerRef = useRef(null);
useEffect(() => {
const container = containerRef.current; // This `useRef` instance will render the PDF.let PSPDFKit, instance;
(asyncfunction () {
PSPDFKit = awaitimport("pspdfkit")
PSPDFKit.unload(container) // Ensure that there's only one PSPDFKit instance.
instance = await PSPDFKit.load({
// Container where PSPDFKit should be mounted.
container,
// The document to open.
document: props.document,
// Use the public directory URL as a base URL. PSPDFKit will download its library assets from here.
baseUrl: `${window.location.protocol}//${window.location.host}/${process.env.PUBLIC_URL}`
});
})();
return () => PSPDFKit && PSPDFKit.unload(container)
}, []);
// This div element will render the document to the DOM.return <div ref={containerRef} style={{ width: "100%", height: "100vh" }} />
}
In the src folder, replace the contents of the App.js file with the following. This includes the newly created component in your app:
To set up Document Engine so that it’ll be the backend for PSPDFKit for Web, follow the instructions in the Getting Started with Document Engine guide.
Once Document Engine has been set up, you’ll need to update your code to open a document from Document Engine. This is accomplished by replacing properties included in the configuration object passed to PSPDFKit.load(). Refer to the code snippets located earlier in this guide to find where PSPDFKit.load() will need to be updated.
The document property in PSPDFKit.load() will be replaced with the documentId provided by Document Engine, while the authPayload and the serverUrl properties will be added. If you’d like to enable Instant synchronization, set the instant property to true. See the following example:
This guide will walk you through the steps necessary to integrate PSPDFKit for Web into your project. By the end, you’ll be able to present a PDF document in the PSPDFKit UI.
Select the preferred products
The Web SDK uses the Standalone operational mode, where our JavaScript library renders and edits documents directly in the browser. It’s powered by WebAssembly technology, and it doesn’t require a server, plugins, or internet access. Compare operational modes.
PSPDFKit for Web can be evaluated without a trial license key, but with certain limitations (such as a red watermark added to documents). To evaluate without limitations, get a trial key.
Make sure your public directory contains a pspdfkit-lib directory with the PSPDFKit library assets.
Make sure your server has the Content-Type: application/wasm MIME typeset. Read more about this in the troubleshooting section.
Displaying a PDF
Rename the PDF document you want to display in your application to document.pdf, and then add the PDF document to the public directory. You can use this demo document as an example.
In the src/components/ folder, create the PdfViewerComponent.js file with the following content. This adds a component wrapper for the PSPDFKit library:
import { useEffect, useRef } from "react";
exportdefaultfunction PdfViewerComponent(props) {
const containerRef = useRef(null);
useEffect(() => {
const container = containerRef.current; // This `useRef` instance will render the PDF.let PSPDFKit, instance;
(asyncfunction () {
PSPDFKit = awaitimport("pspdfkit")
PSPDFKit.unload(container) // Ensure that there's only one PSPDFKit instance.
instance = await PSPDFKit.load({
// Container where PSPDFKit should be mounted.
container,
// The document to open.
document: props.document,
// Use the public directory URL as a base URL. PSPDFKit will download its library assets from here.
baseUrl: `${window.location.protocol}//${window.location.host}/${process.env.PUBLIC_URL}`
});
})();
return () => PSPDFKit && PSPDFKit.unload(container)
}, []);
// This div element will render the document to the DOM.return <div ref={containerRef} style={{ width: "100%", height: "100vh" }} />
}
In your app, add the following below the lines beginning with import. This includes the newly created component in your app:
import PdfViewerComponent from './components/PdfViewerComponent';

function DocumentViewerComponent() {
	return (
		<div className="PDF-viewer">
			<PdfViewerComponent
				document={"document.pdf"}
			/>
		</div>
	);
}
Add the following to the rendering function in your app:
When the Web SDK is combined with Document Engine, it uses the Server-Backed operational mode, where rendering is handled by the server and documents are streamed down to the web viewer. It’s delivered as a Docker container, and it offers the fastest performance, along with more advanced capabilities. Compare operational modes.
PSPDFKit for Web can be evaluated without a trial license key, but with certain limitations (such as a red watermark added to documents). To evaluate without limitations, get a trial key.
Make sure your public directory contains a pspdfkit-lib directory with the PSPDFKit library assets.
Make sure your server has the Content-Type: application/wasm MIME typeset. Read more about this in the troubleshooting section.
Displaying a PDF
Rename the PDF document you want to display in your application to document.pdf, and then add the PDF document to the public directory. You can use this demo document as an example.
In the src/components/ folder, create the PdfViewerComponent.js file with the following content. This adds a component wrapper for the PSPDFKit library:
import { useEffect, useRef } from "react";
exportdefaultfunction PdfViewerComponent(props) {
const containerRef = useRef(null);
useEffect(() => {
const container = containerRef.current; // This `useRef` instance will render the PDF.let PSPDFKit, instance;
(asyncfunction () {
PSPDFKit = awaitimport("pspdfkit")
PSPDFKit.unload(container) // Ensure that there's only one PSPDFKit instance.
instance = await PSPDFKit.load({
// Container where PSPDFKit should be mounted.
container,
// The document to open.
document: props.document,
// Use the public directory URL as a base URL. PSPDFKit will download its library assets from here.
baseUrl: `${window.location.protocol}//${window.location.host}/${process.env.PUBLIC_URL}`
});
})();
return () => PSPDFKit && PSPDFKit.unload(container)
}, []);
// This div element will render the document to the DOM.return <div ref={containerRef} style={{ width: "100%", height: "100vh" }} />
}
In your app, add the following below the lines beginning with import. This includes the newly created component in your app:
import PdfViewerComponent from './components/PdfViewerComponent';

function DocumentViewerComponent() {
	return (
		<div className="PDF-viewer">
			<PdfViewerComponent
				document={"document.pdf"}
			/>
		</div>
	);
}
Add the following to the rendering function in your app:
DocumentViewerComponent()
Start the app and run it in your default browser:
yarn start
npm start
Setting Up Document Engine
To set up Document Engine so that it’ll be the backend for PSPDFKit for Web, follow the instructions in the Getting Started with Document Engine guide.
Once Document Engine has been set up, you’ll need to update your code to open a document from Document Engine. This is accomplished by replacing properties included in the configuration object passed to PSPDFKit.load(). Refer to the code snippets located earlier in this guide to find where PSPDFKit.load() will need to be updated.
The document property in PSPDFKit.load() will be replaced with the documentId provided by Document Engine, while the authPayload and the serverUrl properties will be added. If you’d like to enable Instant synchronization, set the instant property to true. See the following example:
This guide will walk you through the steps necessary to integrate PSPDFKit for Web into your project. By the end, you’ll be able to present a PDF document in the PSPDFKit UI.
Select the preferred products
The Web SDK uses the Standalone operational mode, where our JavaScript library renders and edits documents directly in the browser. It’s powered by WebAssembly technology, and it doesn’t require a server, plugins, or internet access. Compare operational modes.
PSPDFKit for Web can be evaluated without a trial license key, but with certain limitations (such as a red watermark added to documents). To evaluate without limitations, get a trial key.
A package manager compatible with npm. This guide contains usage examples for Yarn and the npm client. The npm client is installed with Node.js by default.
You need Node.js to complete this guide, but in general, Node.js isn’t a requirement for using PSPDFKit for Web.
Creating a New Project
Install the Angular CLI:
yarn global add @angular/cli
npm install -g @angular/cli
Create a new Angular application:
ng new my-app
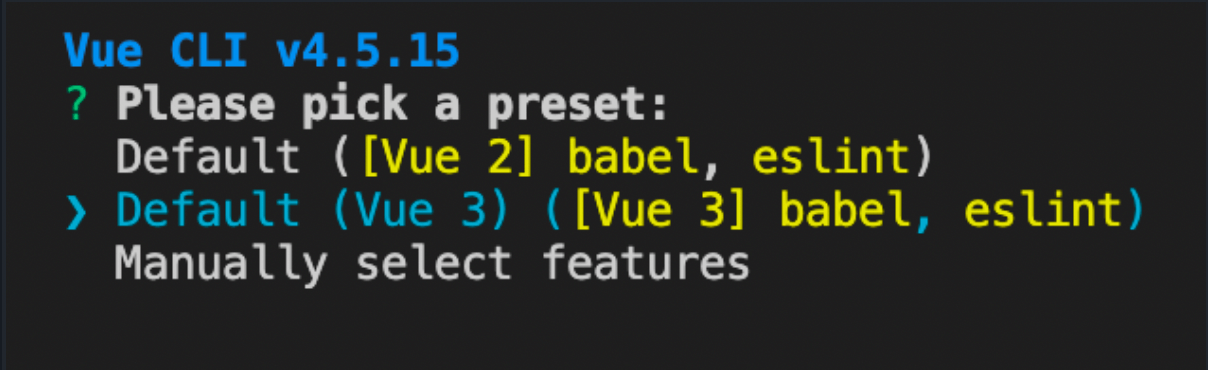
The Angular CLI will ask you information about the app configuration. Accept the defaults by repeatedly pressing the Enter key.
Change to the created project directory:
cd my-app
Adding PSPDFKit
Add the PSPDFKit dependency:
yarn add pspdfkit
npm install --save pspdfkit
Make sure your server has the Content-Type: application/wasm MIME typeset. Read more about this in the troubleshooting section.
In the angular.json file, add the following to the assets option:
Angular will now copy the PSPDFKit library assets to the assets directory before running your app.
Displaying a PDF
Rename the PDF document you want to display in your application to document.pdf, and then add the PDF document to the src/assets directory. You can use this demo document as an example.
In the src/app/ folder, replace the contents of the app.component.html file with the following:
<div class="app">
	<!-- We'll mount the PSPDFKit UI to this element. -->
	<div id="pspdfkit-container" style="width: 100%; height: 100vh"></div>
</div>
In the src/app/ folder, replace the contents of the app.component.ts file with the following:
import { Component } from "@angular/core";
import PSPDFKit from "pspdfkit";
@Component({
selector: "app-root",
templateUrl: "./app.component.html",
styleUrls: ["app.component.css"]
})
exportclass AppComponent {
title = "PSPDFKit for Web Angular Example";
ngAfterViewInit() {
PSPDFKit.load({
// Use the assets directory URL as a base URL. PSPDFKit will download its library assets from here.
baseUrl: location.protocol + "//" + location.host + "/assets/",
document: "/assets/Document.pdf",
container: "#pspdfkit-container",
}).then(instance => {
// For the sake of this demo, store the PSPDFKit for Web instance// on the global object so that you can open the dev tools and// play with the PSPDFKit API.
(window asany).instance = instance;
});
}
}
Start the app and open it in your default browser:
When the Web SDK is combined with Document Engine, it uses the Server-Backed operational mode, where rendering is handled by the server and documents are streamed down to the web viewer. It’s delivered as a Docker container, and it offers the fastest performance, along with more advanced capabilities. Compare operational modes.
PSPDFKit for Web can be evaluated without a trial license key, but with certain limitations (such as a red watermark added to documents). To evaluate without limitations, get a trial key.
A package manager compatible with npm. This guide contains usage examples for Yarn and the npm client. The npm client is installed with Node.js by default.
You need Node.js to complete this guide, but in general, Node.js isn’t a requirement for using PSPDFKit for Web.
Creating a New Project
Install the Angular CLI:
yarn global add @angular/cli
npm install -g @angular/cli
Create a new Angular application:
ng new my-app
The Angular CLI will ask you information about the app configuration. Accept the defaults by repeatedly pressing the Enter key.
Change to the created project directory:
cd my-app
Adding PSPDFKit
Add the PSPDFKit dependency:
yarn add pspdfkit
npm install --save pspdfkit
Make sure your server has the Content-Type: application/wasm MIME typeset. Read more about this in the troubleshooting section.
In the angular.json file, add the following to the assets option:
Angular will now copy the PSPDFKit library assets to the assets directory before running your app.
Displaying a PDF
Rename the PDF document you want to display in your application to document.pdf, and then add the PDF document to the src/assets directory. You can use this demo document as an example.
In the src/app/ folder, replace the contents of the app.component.html file with the following:
<div class="app">
	<!-- We'll mount the PSPDFKit UI to this element. -->
	<div id="pspdfkit-container" style="width: 100%; height: 100vh"></div>
</div>
In the src/app/ folder, replace the contents of the app.component.ts file with the following:
import { Component } from "@angular/core";
import PSPDFKit from "pspdfkit";
@Component({
selector: "app-root",
templateUrl: "./app.component.html",
styleUrls: ["app.component.css"]
})
exportclass AppComponent {
title = "PSPDFKit for Web Angular Example";
ngAfterViewInit() {
PSPDFKit.load({
// Use the assets directory URL as a base URL. PSPDFKit will download its library assets from here.
baseUrl: location.protocol + "//" + location.host + "/assets/",
document: "/assets/Document.pdf",
container: "#pspdfkit-container",
}).then(instance => {
// For the sake of this demo, store the PSPDFKit for Web instance// on the global object so that you can open the dev tools and// play with the PSPDFKit API.
(window asany).instance = instance;
});
}
}
Start the app and open it in your default browser:
yarn start --open
npm start --open
Setting Up Document Engine
To set up Document Engine so that it’ll be the backend for PSPDFKit for Web, follow the instructions in the Getting Started with Document Engine guide.
Once Document Engine has been set up, you’ll need to update your code to open a document from Document Engine. This is accomplished by replacing properties included in the configuration object passed to PSPDFKit.load(). Refer to the code snippets located earlier in this guide to find where PSPDFKit.load() will need to be updated.
The document property in PSPDFKit.load() will be replaced with the documentId provided by Document Engine, while the authPayload and the serverUrl properties will be added. If you’d like to enable Instant synchronization, set the instant property to true. See the following example:
This guide will walk you through the steps necessary to integrate PSPDFKit for Web into your project. By the end, you’ll be able to present a PDF document in the PSPDFKit UI.
Select the preferred products
The Web SDK uses the Standalone operational mode, where our JavaScript library renders and edits documents directly in the browser. It’s powered by WebAssembly technology, and it doesn’t require a server, plugins, or internet access. Compare operational modes.
PSPDFKit for Web can be evaluated without a trial license key, but with certain limitations (such as a red watermark added to documents). To evaluate without limitations, get a trial key.
Angular will now copy the PSPDFKit library assets to the assets directory before running your app.
Displaying a PDF
Rename the PDF document you want to display in your application to document.pdf, and then add the PDF document to the src/assets directory. You can use this demo document as an example.
Generate a new PDF viewer component:
ng generate component pdf-viewer
In the src/app/pdf-viewer folder, replace the contents of the pdf-viewer.component.html file with the following:
In the src/app/pdf-viewer folder, replace the contents of the pdf-viewer.component.ts file with the following. This initializes PSPDFKit in the PDF viewer component:
import { Component, OnInit } from '@angular/core';
import PSPDFKit from 'pspdfkit';
@Component({
selector: 'pdf-viewer',
templateUrl: './pdf-viewer.component.html',
styleUrls: ['./pdf-viewer.component.css']
})
exportclass PdfViewerComponent implements OnInit {
ngOnInit(): void {
PSPDFKit.load({
// Use the assets directory URL as a base URL. PSPDFKit will download its library assets from here.
baseUrl: location.protocol + "//" + location.host + "/assets/",
document: "/assets/document.pdf",
container: "#pspdfkit-container",
}).then(instance => {
// For the sake of this demo, store the PSPDFKit for Web instance// on the global object so that you can open the dev tools and// play with the PSPDFKit API.
(window asany).instance = instance;
});
}
}
In the src/app/ folder, add the following to the app.component.html file in the place where you want to add the PDF viewer:
<pdf-viewer></pdf-viewer>
Start the app and open it in your default browser:
When the Web SDK is combined with Document Engine, it uses the Server-Backed operational mode, where rendering is handled by the server and documents are streamed down to the web viewer. It’s delivered as a Docker container, and it offers the fastest performance, along with more advanced capabilities. Compare operational modes.
PSPDFKit for Web can be evaluated without a trial license key, but with certain limitations (such as a red watermark added to documents). To evaluate without limitations, get a trial key.
Angular will now copy the PSPDFKit library assets to the assets directory before running your app.
Displaying a PDF
Rename the PDF document you want to display in your application to document.pdf, and then add the PDF document to the src/assets directory. You can use this demo document as an example.
Generate a new PDF viewer component:
ng generate component pdf-viewer
In the src/app/pdf-viewer folder, replace the contents of the pdf-viewer.component.html file with the following:
In the src/app/pdf-viewer folder, replace the contents of the pdf-viewer.component.ts file with the following. This initializes PSPDFKit in the PDF viewer component:
import { Component, OnInit } from '@angular/core';
import PSPDFKit from 'pspdfkit';
@Component({
selector: 'pdf-viewer',
templateUrl: './pdf-viewer.component.html',
styleUrls: ['./pdf-viewer.component.css']
})
exportclass PdfViewerComponent implements OnInit {
ngOnInit(): void {
PSPDFKit.load({
// Use the assets directory URL as a base URL. PSPDFKit will download its library assets from here.
baseUrl: location.protocol + "//" + location.host + "/assets/",
document: "/assets/document.pdf",
container: "#pspdfkit-container",
}).then(instance => {
// For the sake of this demo, store the PSPDFKit for Web instance// on the global object so that you can open the dev tools and// play with the PSPDFKit API.
(window asany).instance = instance;
});
}
}
In the src/app/ folder, add the following to the app.component.html file in the place where you want to add the PDF viewer:
<pdf-viewer></pdf-viewer>
Start the app and open it in your default browser:
yarn start --open
npm start --open
Setting Up Document Engine
To set up Document Engine so that it’ll be the backend for PSPDFKit for Web, follow the instructions in the Getting Started with Document Engine guide.
Once Document Engine has been set up, you’ll need to update your code to open a document from Document Engine. This is accomplished by replacing properties included in the configuration object passed to PSPDFKit.load(). Refer to the code snippets located earlier in this guide to find where PSPDFKit.load() will need to be updated.
The document property in PSPDFKit.load() will be replaced with the documentId provided by Document Engine, while the authPayload and the serverUrl properties will be added. If you’d like to enable Instant synchronization, set the instant property to true. See the following example:
This guide will walk you through the steps necessary to integrate PSPDFKit for Web into your project. By the end, you’ll be able to present a PDF document in the PSPDFKit UI.
Select the preferred products
The Web SDK uses the Standalone operational mode, where our JavaScript library renders and edits documents directly in the browser. It’s powered by WebAssembly technology, and it doesn’t require a server, plugins, or internet access. Compare operational modes.
PSPDFKit for Web can be evaluated without a trial license key, but with certain limitations (such as a red watermark added to documents). To evaluate without limitations, get a trial key.
A package manager compatible with npm. This guide contains usage examples for Yarn and the npm client. The npm client is installed with Node.js by default.
You need Node.js to complete this guide, but in general, Node.js isn’t a requirement for using PSPDFKit for Web.
Make sure your server has the Content-Type: application/wasm MIME typeset. Read more about this in the troubleshooting section.
Displaying a PDF
Rename the PDF document you want to display in your application to document.pdf, and then add the PDF document to the public directory. You can use this demo document as an example.
In the src/components/ folder, create the PSPDFKitContainer.vue file with the following content. This adds a component wrapper for the PSPDFKit library:
<template>
<div class="pdf-container"></div>
</template>
<script>
import PSPDFKit from "pspdfkit";
/**
* PSPDFKit for Web example component.
*/exportdefault {
name: 'PSPDFKit',
/**
* The component receives `pdfFile` as a prop, which is type of `String` and is required.
*/
props: {
pdfFile: {
type: String,
required: true,
},
},
/**
* We wait until the template has been rendered to load the document into the library.
*/
mounted() {
this.loadPSPDFKit().then((instance) => {
this.$emit("loaded", instance);
});
},
/**
* We watch for `pdfFile` prop changes and trigger unloading and loading when there's a new document to load.
*/
watch: {
pdfFile(val) {
if (val) {
this.loadPSPDFKit();
}
},
},
/**
* Our component has the `loadPSPDFKit` method. This unloads and cleans up the component and triggers document loading.
*/
methods: {
async loadPSPDFKit() {
PSPDFKit.unload(".pdf-container");
return PSPDFKit.load({
// access the pdfFile from props
document: this.pdfFile,
container: ".pdf-container",
});
},
},
/**
* Clean up when the component is unmounted so it's ready to load another document (not needed in this example).
*/
beforeUnmount() {
PSPDFKit.unload(".pdf-container");
},
};
</script>
<style scoped>
.pdf-container {
height: 100vh;
}
</style>
In the src folder, replace the contents of the App.vue file with the following. This includes the newly created component in your app:
<template>
<div id="app">
<label for="file-upload" class="custom-file-upload">
Open PDF
</label>
<input id="file-upload" type="file" @change="openDocument" class="btn" />
<PSPDFKitContainer :pdfFile="pdfFile" @loaded="handleLoaded" />
</div>
</template>
<script>
import PSPDFKitContainer from "@/components/PSPDFKitContainer";
exportdefault {
data() {
return {
pdfFile: this.pdfFile || "/document.pdf",
};
},
/**
* Render the `PSPDFKitContainer` component.
*/
components: {
PSPDFKitContainer,
},
/**
* Our component has two methods — one to check when the document is loaded, and the other to open the document.
*/
methods: {
handleLoaded(instance) {
console.log("PSPDFKit has loaded: ", instance);
// Do something.
},
openDocument(event) {
// To access the Vue.js instance data properties, use `this` keyword.if (this.pdfFile && this.pdfFile.startsWith('blob:')) {
window.URL.revokeObjectURL(this.pdfFile);
}
this.pdfFile = window.URL.createObjectURL(event.target.files[0]);
},
},
};
</script>
<style>
#app {
font-family: Avenir, Helvetica, Arial, sans-serif;
text-align: center;
color: #2c3e50;
}
body {
margin: 0;
}
input[type="file"] {
display: none;
}
.custom-file-upload {
border: 1px solid #ccc;
border-radius: 4px;
display: inline-block;
padding: 6px12px;
cursor: pointer;
background:#4A8FED;
padding:10px;
color:#fff;
font:inherit;
font-size: 16px;
font-weight: bold;
}
</style>
When the Web SDK is combined with Document Engine, it uses the Server-Backed operational mode, where rendering is handled by the server and documents are streamed down to the web viewer. It’s delivered as a Docker container, and it offers the fastest performance, along with more advanced capabilities. Compare operational modes.
PSPDFKit for Web can be evaluated without a trial license key, but with certain limitations (such as a red watermark added to documents). To evaluate without limitations, get a trial key.
A package manager compatible with npm. This guide contains usage examples for Yarn and the npm client. The npm client is installed with Node.js by default.
You need Node.js to complete this guide, but in general, Node.js isn’t a requirement for using PSPDFKit for Web.
Make sure your server has the Content-Type: application/wasm MIME typeset. Read more about this in the troubleshooting section.
Displaying a PDF
Rename the PDF document you want to display in your application to document.pdf, and then add the PDF document to the public directory. You can use this demo document as an example.
In the src/components/ folder, create the PSPDFKitContainer.vue file with the following content. This adds a component wrapper for the PSPDFKit library:
<template>
<div class="pdf-container"></div>
</template>
<script>
import PSPDFKit from "pspdfkit";
/**
* PSPDFKit for Web example component.
*/exportdefault {
name: 'PSPDFKit',
/**
* The component receives `pdfFile` as a prop, which is type of `String` and is required.
*/
props: {
pdfFile: {
type: String,
required: true,
},
},
/**
* We wait until the template has been rendered to load the document into the library.
*/
mounted() {
this.loadPSPDFKit().then((instance) => {
this.$emit("loaded", instance);
});
},
/**
* We watch for `pdfFile` prop changes and trigger unloading and loading when there's a new document to load.
*/
watch: {
pdfFile(val) {
if (val) {
this.loadPSPDFKit();
}
},
},
/**
* Our component has the `loadPSPDFKit` method. This unloads and cleans up the component and triggers document loading.
*/
methods: {
async loadPSPDFKit() {
PSPDFKit.unload(".pdf-container");
return PSPDFKit.load({
// access the pdfFile from props
document: this.pdfFile,
container: ".pdf-container",
});
},
},
/**
* Clean up when the component is unmounted so it's ready to load another document (not needed in this example).
*/
beforeUnmount() {
PSPDFKit.unload(".pdf-container");
},
};
</script>
<style scoped>
.pdf-container {
height: 100vh;
}
</style>
In the src folder, replace the contents of the App.vue file with the following. This includes the newly created component in your app:
<template>
<div id="app">
<label for="file-upload" class="custom-file-upload">
Open PDF
</label>
<input id="file-upload" type="file" @change="openDocument" class="btn" />
<PSPDFKitContainer :pdfFile="pdfFile" @loaded="handleLoaded" />
</div>
</template>
<script>
import PSPDFKitContainer from "@/components/PSPDFKitContainer";
exportdefault {
data() {
return {
pdfFile: this.pdfFile || "/document.pdf",
};
},
/**
* Render the `PSPDFKitContainer` component.
*/
components: {
PSPDFKitContainer,
},
/**
* Our component has two methods — one to check when the document is loaded, and the other to open the document.
*/
methods: {
handleLoaded(instance) {
console.log("PSPDFKit has loaded: ", instance);
// Do something.
},
openDocument(event) {
// To access the Vue.js instance data properties, use `this` keyword.if (this.pdfFile && this.pdfFile.startsWith('blob:')) {
window.URL.revokeObjectURL(this.pdfFile);
}
this.pdfFile = window.URL.createObjectURL(event.target.files[0]);
},
},
};
</script>
<style>
#app {
font-family: Avenir, Helvetica, Arial, sans-serif;
text-align: center;
color: #2c3e50;
}
body {
margin: 0;
}
input[type="file"] {
display: none;
}
.custom-file-upload {
border: 1px solid #ccc;
border-radius: 4px;
display: inline-block;
padding: 6px12px;
cursor: pointer;
background:#4A8FED;
padding:10px;
color:#fff;
font:inherit;
font-size: 16px;
font-weight: bold;
}
</style>
To set up Document Engine so that it’ll be the backend for PSPDFKit for Web, follow the instructions in the Getting Started with Document Engine guide.
Once Document Engine has been set up, you’ll need to update your code to open a document from Document Engine. This is accomplished by replacing properties included in the configuration object passed to PSPDFKit.load(). Refer to the code snippets located earlier in this guide to find where PSPDFKit.load() will need to be updated.
The document property in PSPDFKit.load() will be replaced with the documentId provided by Document Engine, while the authPayload and the serverUrl properties will be added. If you’d like to enable Instant synchronization, set the instant property to true. See the following example:
This guide will walk you through the steps necessary to integrate PSPDFKit for Web into your project. By the end, you’ll be able to present a PDF document in the PSPDFKit UI.
Select the preferred products
The Web SDK uses the Standalone operational mode, where our JavaScript library renders and edits documents directly in the browser. It’s powered by WebAssembly technology, and it doesn’t require a server, plugins, or internet access. Compare operational modes.
PSPDFKit for Web can be evaluated without a trial license key, but with certain limitations (such as a red watermark added to documents). To evaluate without limitations, get a trial key.
Make sure your server has the Content-Type: application/wasm MIME typeset. Read more about this in the troubleshooting section.
Displaying a PDF
Rename the PDF document you want to display in your application to document.pdf, and then add the PDF document to the public directory. You can use this demo document as an example.
In the src/components/ folder, create the PSPDFKitContainer.vue file with the following content. This adds a component wrapper for the PSPDFKit library:
<template>
<div class="pdf-container"></div>
</template>
<script>
import PSPDFKit from "pspdfkit";
/**
* PSPDFKit for Web example component.
*/exportdefault {
name: 'PSPDFKit',
/**
* The component receives `pdfFile` as a prop, which is type of `String` and is required.
*/
props: {
pdfFile: {
type: String,
required: true,
},
},
/**
* We wait until the template has been rendered to load the document into the library.
*/
mounted() {
this.loadPSPDFKit().then((instance) => {
this.$emit("loaded", instance);
});
},
/**
* We watch for `pdfFile` prop changes and trigger unloading and loading when there's a new document to load.
*/
watch: {
pdfFile(val) {
if (val) {
this.loadPSPDFKit();
}
},
},
/**
* Our component has the `loadPSPDFKit` method. This unloads and cleans up the component and triggers document loading.
*/
methods: {
async loadPSPDFKit() {
PSPDFKit.unload(".pdf-container");
return PSPDFKit.load({
// access the pdfFile from props
document: this.pdfFile,
container: ".pdf-container",
});
},
},
/**
* Clean up when the component is unmounted so it's ready to load another document (not needed in this example).
*/
beforeUnmount() {
PSPDFKit.unload(".pdf-container");
},
};
</script>
<style scoped>
.pdf-container {
height: 100vh;
}
</style>
In the src folder, add the newly created component to the App.vue file in the following way:
<template>
<div id="app">
<label for="file-upload" class="custom-file-upload">
Open PDF
</label>
<input id="file-upload" type="file" @change="openDocument" class="btn" />
<PSPDFKitContainer :pdfFile="pdfFile" @loaded="handleLoaded" />
</div>
</template>
<script>
import PSPDFKitContainer from "@/components/PSPDFKitContainer";
exportdefault {
data() {
return {
pdfFile: this.pdfFile || "/document.pdf",
};
},
/**
* Render the `PSPDFKitContainer` component.
*/
components: {
PSPDFKitContainer,
},
/**
* Our component has two methods — one to check when the document is loaded, and the other to open the document.
*/
methods: {
handleLoaded(instance) {
console.log("PSPDFKit has loaded: ", instance);
// Do something.
},
openDocument(event) {
// To access the Vue.js instance data properties, use `this` keyword.if (this.pdfFile && this.pdfFile.startsWith('blob:')) {
window.URL.revokeObjectURL(this.pdfFile);
}
this.pdfFile = window.URL.createObjectURL(event.target.files[0]);
},
},
};
</script>
<style>
#app {
font-family: Avenir, Helvetica, Arial, sans-serif;
text-align: center;
color: #2c3e50;
}
body {
margin: 0;
}
input[type="file"] {
display: none;
}
.custom-file-upload {
border: 1px solid #ccc;
border-radius: 4px;
display: inline-block;
padding: 6px12px;
cursor: pointer;
background:#4A8FED;
padding:10px;
color:#fff;
font:inherit;
font-size: 16px;
font-weight: bold;
}
</style>
When the Web SDK is combined with Document Engine, it uses the Server-Backed operational mode, where rendering is handled by the server and documents are streamed down to the web viewer. It’s delivered as a Docker container, and it offers the fastest performance, along with more advanced capabilities. Compare operational modes.
PSPDFKit for Web can be evaluated without a trial license key, but with certain limitations (such as a red watermark added to documents). To evaluate without limitations, get a trial key.
Make sure your server has the Content-Type: application/wasm MIME typeset. Read more about this in the troubleshooting section.
Displaying a PDF
Rename the PDF document you want to display in your application to document.pdf, and then add the PDF document to the public directory. You can use this demo document as an example.
In the src/components/ folder, create the PSPDFKitContainer.vue file with the following content. This adds a component wrapper for the PSPDFKit library:
<template>
<div class="pdf-container"></div>
</template>
<script>
import PSPDFKit from "pspdfkit";
/**
* PSPDFKit for Web example component.
*/exportdefault {
name: 'PSPDFKit',
/**
* The component receives `pdfFile` as a prop, which is type of `String` and is required.
*/
props: {
pdfFile: {
type: String,
required: true,
},
},
/**
* We wait until the template has been rendered to load the document into the library.
*/
mounted() {
this.loadPSPDFKit().then((instance) => {
this.$emit("loaded", instance);
});
},
/**
* We watch for `pdfFile` prop changes and trigger unloading and loading when there's a new document to load.
*/
watch: {
pdfFile(val) {
if (val) {
this.loadPSPDFKit();
}
},
},
/**
* Our component has the `loadPSPDFKit` method. This unloads and cleans up the component and triggers document loading.
*/
methods: {
async loadPSPDFKit() {
PSPDFKit.unload(".pdf-container");
return PSPDFKit.load({
// access the pdfFile from props
document: this.pdfFile,
container: ".pdf-container",
});
},
},
/**
* Clean up when the component is unmounted so it's ready to load another document (not needed in this example).
*/
beforeUnmount() {
PSPDFKit.unload(".pdf-container");
},
};
</script>
<style scoped>
.pdf-container {
height: 100vh;
}
</style>
In the src folder, add the newly created component to the App.vue file in the following way:
<template>
<div id="app">
<label for="file-upload" class="custom-file-upload">
Open PDF
</label>
<input id="file-upload" type="file" @change="openDocument" class="btn" />
<PSPDFKitContainer :pdfFile="pdfFile" @loaded="handleLoaded" />
</div>
</template>
<script>
import PSPDFKitContainer from "@/components/PSPDFKitContainer";
exportdefault {
data() {
return {
pdfFile: this.pdfFile || "/document.pdf",
};
},
/**
* Render the `PSPDFKitContainer` component.
*/
components: {
PSPDFKitContainer,
},
/**
* Our component has two methods — one to check when the document is loaded, and the other to open the document.
*/
methods: {
handleLoaded(instance) {
console.log("PSPDFKit has loaded: ", instance);
// Do something.
},
openDocument(event) {
// To access the Vue.js instance data properties, use `this` keyword.if (this.pdfFile && this.pdfFile.startsWith('blob:')) {
window.URL.revokeObjectURL(this.pdfFile);
}
this.pdfFile = window.URL.createObjectURL(event.target.files[0]);
},
},
};
</script>
<style>
#app {
font-family: Avenir, Helvetica, Arial, sans-serif;
text-align: center;
color: #2c3e50;
}
body {
margin: 0;
}
input[type="file"] {
display: none;
}
.custom-file-upload {
border: 1px solid #ccc;
border-radius: 4px;
display: inline-block;
padding: 6px12px;
cursor: pointer;
background:#4A8FED;
padding:10px;
color:#fff;
font:inherit;
font-size: 16px;
font-weight: bold;
}
</style>
To set up Document Engine so that it’ll be the backend for PSPDFKit for Web, follow the instructions in the Getting Started with Document Engine guide.
Once Document Engine has been set up, you’ll need to update your code to open a document from Document Engine. This is accomplished by replacing properties included in the configuration object passed to PSPDFKit.load(). Refer to the code snippets located earlier in this guide to find where PSPDFKit.load() will need to be updated.
The document property in PSPDFKit.load() will be replaced with the documentId provided by Document Engine, while the authPayload and the serverUrl properties will be added. If you’d like to enable Instant synchronization, set the instant property to true. See the following example:
This guide will walk you through the steps necessary to integrate PSPDFKit for Web into your project. By the end, you’ll be able to present a PDF document in the PSPDFKit UI.
Select the preferred products
The Web SDK uses the Standalone operational mode, where our JavaScript library renders and edits documents directly in the browser. It’s powered by WebAssembly technology, and it doesn’t require a server, plugins, or internet access. Compare operational modes.
PSPDFKit for Web can be evaluated without a trial license key, but with certain limitations (such as a red watermark added to documents). To evaluate without limitations, get a trial key.
A package manager compatible with npm. This guide contains usage examples for Yarn and the npm client. The npm client is installed with Node.js by default.
You need Node.js to complete this guide, but in general, Node.js isn’t a requirement for using PSPDFKit for Web.
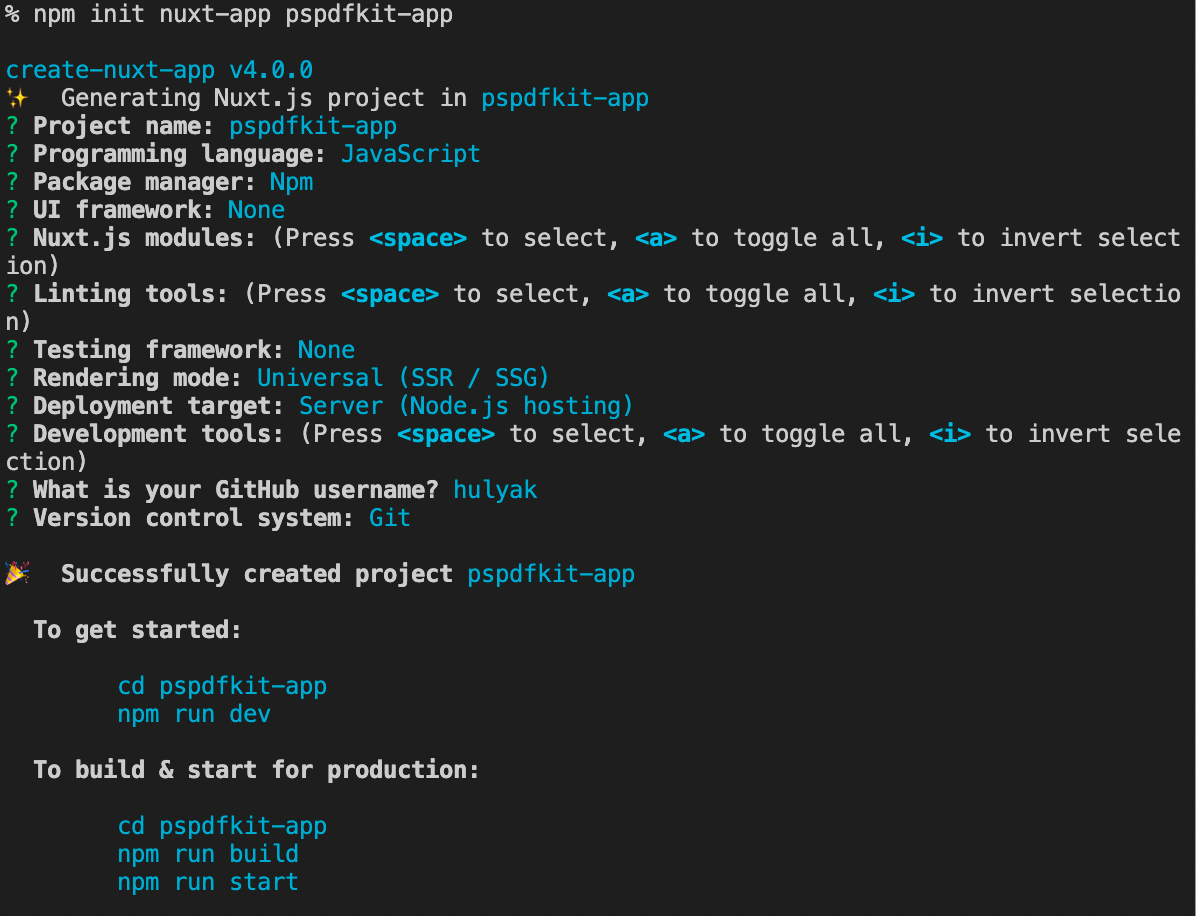
During the setup process, Next.js will prompt you with a series of questions, allowing you to customize your project. One of the questions will ask if you want to use TypeScript. Respond with your preference (No or Yes) to set up your project accordingly.
Change to the created project directory:
cd pspdfkit-nextjs-example
Adding PSPDFKit to Your Project
Add the PSPDFKit dependency:
yarn add pspdfkit
npm install pspdfkit
Copy the PSPDFKit for Web library assets to the public directory:
Make sure your public directory contains a pspdfkit-lib directory with the PSPDFKit library assets.
Make sure your server has the Content-Type: application/wasm MIME typeset. Read more about this in the troubleshooting section.
Displaying a PDF
Rename the PDF document you want to display in your application to document.pdf, and then add the PDF document to the public directory. You can use this demo document as an example.
If you chose JavaScript during the setup of your project, add the following code to your app/page.js file:
When the Web SDK is combined with Document Engine, it uses the Server-Backed operational mode, where rendering is handled by the server and documents are streamed down to the web viewer. It’s delivered as a Docker container, and it offers the fastest performance, along with more advanced capabilities. Compare operational modes.
PSPDFKit for Web can be evaluated without a trial license key, but with certain limitations (such as a red watermark added to documents). To evaluate without limitations, get a trial key.
A package manager compatible with npm. This guide contains usage examples for Yarn and the npm client. The npm client is installed with Node.js by default.
You need Node.js to complete this guide, but in general, Node.js isn’t a requirement for using PSPDFKit for Web.
During the setup process, Next.js will prompt you with a series of questions, allowing you to customize your project. One of the questions will ask if you want to use TypeScript. Respond with your preference (No or Yes) to set up your project accordingly.
Change to the created project directory:
cd pspdfkit-nextjs-example
Adding PSPDFKit to Your Project
Add the PSPDFKit dependency:
yarn add pspdfkit
npm install pspdfkit
Copy the PSPDFKit for Web library assets to the public directory:
Make sure your public directory contains a pspdfkit-lib directory with the PSPDFKit library assets.
Make sure your server has the Content-Type: application/wasm MIME typeset. Read more about this in the troubleshooting section.
Displaying a PDF
Rename the PDF document you want to display in your application to document.pdf, and then add the PDF document to the public directory. You can use this demo document as an example.
If you chose JavaScript during the setup of your project, add the following code to your app/page.js file:
To set up Document Engine so that it’ll be the backend for PSPDFKit for Web, follow the instructions in the Getting Started with Document Engine guide.
Once Document Engine has been set up, you’ll need to update your code to open a document from Document Engine. This is accomplished by replacing properties included in the configuration object passed to PSPDFKit.load(). Refer to the code snippets located earlier in this guide to find where PSPDFKit.load() will need to be updated.
The document property in PSPDFKit.load() will be replaced with the documentId provided by Document Engine, while the authPayload and the serverUrl properties will be added. If you’d like to enable Instant synchronization, set the instant property to true. See the following example:
This guide will walk you through the steps necessary to integrate PSPDFKit for Web into your project. By the end, you’ll be able to present a PDF document in the PSPDFKit UI.
Select the preferred products
The Web SDK uses the Standalone operational mode, where our JavaScript library renders and edits documents directly in the browser. It’s powered by WebAssembly technology, and it doesn’t require a server, plugins, or internet access. Compare operational modes.
PSPDFKit for Web can be evaluated without a trial license key, but with certain limitations (such as a red watermark added to documents). To evaluate without limitations, get a trial key.
Make sure your public directory contains a pspdfkit-lib directory with the PSPDFKit library assets.
Make sure your server has the Content-Type: application/wasm MIME typeset. Read more about this in the troubleshooting section.
Displaying a PDF
Rename the PDF document you want to display in your application to document.pdf, and then add the PDF document to the public directory. You can use this demo document as an example.
If you chose JavaScript during the setup of your project, add the following code to your app/page.js file:
When the Web SDK is combined with Document Engine, it uses the Server-Backed operational mode, where rendering is handled by the server and documents are streamed down to the web viewer. It’s delivered as a Docker container, and it offers the fastest performance, along with more advanced capabilities. Compare operational modes.
PSPDFKit for Web can be evaluated without a trial license key, but with certain limitations (such as a red watermark added to documents). To evaluate without limitations, get a trial key.
Make sure your public directory contains a pspdfkit-lib directory with the PSPDFKit library assets.
Make sure your server has the Content-Type: application/wasm MIME typeset. Read more about this in the troubleshooting section.
Displaying a PDF
Rename the PDF document you want to display in your application to document.pdf, and then add the PDF document to the public directory. You can use this demo document as an example.
If you chose JavaScript during the setup of your project, add the following code to your app/page.js file:
To set up Document Engine so that it’ll be the backend for PSPDFKit for Web, follow the instructions in the Getting Started with Document Engine guide.
Once Document Engine has been set up, you’ll need to update your code to open a document from Document Engine. This is accomplished by replacing properties included in the configuration object passed to PSPDFKit.load(). Refer to the code snippets located earlier in this guide to find where PSPDFKit.load() will need to be updated.
The document property in PSPDFKit.load() will be replaced with the documentId provided by Document Engine, while the authPayload and the serverUrl properties will be added. If you’d like to enable Instant synchronization, set the instant property to true. See the following example:
This guide will walk you through the steps necessary to integrate PSPDFKit for Web into your project. By the end, you’ll be able to present a PDF document in the PSPDFKit UI.
Select the preferred products
The Web SDK uses the Standalone operational mode, where our JavaScript library renders and edits documents directly in the browser. It’s powered by WebAssembly technology, and it doesn’t require a server, plugins, or internet access. Compare operational modes.
PSPDFKit for Web can be evaluated without a trial license key, but with certain limitations (such as a red watermark added to documents). To evaluate without limitations, get a trial key.
A package manager compatible with npm. This guide contains usage examples for Yarn and the npm client. The npm client is installed with Node.js by default.
You need Node.js to complete this guide, but in general, Node.js isn’t a requirement for using PSPDFKit for Web.
Run the following command to install TypeScript globally:
npm install -g typescript
Creating a New Project
Run the following command to initialize a new npm workspace in an empty directory:
yarn init -y
npm init -y
In the root folder of your application, create a tsconfig.json file with the following content:
PSPDFKit for TypeScript is installed as an npm package. This will add a pspdfkit dependency to your application’s package.json:
yarn add pspdfkit
npm install pspdfkit
Run the following command to install the necessary dependencies for webpack, create a config directory, and place your webpack configuration file inside it:
In the config folder, add the following code to the webpack.js file:
const path = require('path');
const HtmlWebpackPlugin = require('html-webpack-plugin');
const CopyWebpackPlugin = require('copy-webpack-plugin');
const filesToCopy = [
// PSPDFKit files.
{
from: './node_modules/pspdfkit/dist/pspdfkit-lib',
to: './pspdfkit-lib',
},
// Application CSS.
{
from: './src/index.css',
to: './index.css',
},
// Example PDF.
{
from: './assets/document.pdf',
to: './document.pdf',
},
];
/**
* webpack main configuration object.
*/const config = {
entry: path.resolve(__dirname, '../src/index.ts'),
mode: 'development',
devtool: 'inline-source-map',
output: {
path: path.resolve(__dirname, '../dist'),
filename: '[name].js',
},
resolve: {
extensions: ['.ts', '.tsx', '.js'],
},
module: {
rules: [
// All files with a `.ts` or `.tsx` extension will be handled by `ts-loader`.
{
test: /\.tsx?$/,
loader: 'ts-loader',
exclude: /node_modules/,
},
],
},
plugins: [
new HtmlWebpackPlugin({
template: './src/index.html',
}),
// Copy the WASM/ASM and CSS files to the `output.path`.new CopyWebpackPlugin({ patterns: filesToCopy }),
],
optimization: {
splitChunks: {
cacheGroups: {
// Creates a `vendor.js` bundle that contains external libraries (including `pspdfkit.js`).
vendor: {
test: /node_modules/,
chunks: 'initial',
name: 'vendor',
priority: 10,
enforce: true,
},
},
},
},
};
module.exports = config;
Displaying a PDF
Rename the PDF document you want to display in your application to document.pdf, and then add the PDF document to the assets directory. You can use this demo document as an example.
In the src folder, create an index.html file with the following content. This adds an empty <div> element where PSPDFKit is loaded:
<!DOCTYPE html>
<html>
	<head>
		<title>PSPDFKit for Web — TypeScript example</title>
		<link rel="stylesheet" href="index.css" />
	</head>
	<body>
		<div class="container"></div>
	</body>
</html>
In the src folder, create an index.css file with the following content. This declares the height of the PSPDFKit element:
.container {
	height: 100vh;
}
In the src folder, create an index.ts file with the following content:
import PSPDFKit from 'pspdfkit';

function load(document: string) {
	console.log(`Loading ${document}...`);
	PSPDFKit.load({
		document,
		container: '.container',
	})
		.then((instance) => {
			console.log('PSPDFKit loaded', instance);
		})
		.catch(console.error);
}

load('document.pdf'); // Pass your PDF file.
When the Web SDK is combined with Document Engine, it uses the Server-Backed operational mode, where rendering is handled by the server and documents are streamed down to the web viewer. It’s delivered as a Docker container, and it offers the fastest performance, along with more advanced capabilities. Compare operational modes.
PSPDFKit for Web can be evaluated without a trial license key, but with certain limitations (such as a red watermark added to documents). To evaluate without limitations, get a trial key.
A package manager compatible with npm. This guide contains usage examples for Yarn and the npm client. The npm client is installed with Node.js by default.
You need Node.js to complete this guide, but in general, Node.js isn’t a requirement for using PSPDFKit for Web.
Run the following command to install TypeScript globally:
npm install -g typescript
Creating a New Project
Run the following command to initialize a new npm workspace in an empty directory:
yarn init -y
npm init -y
In the root folder of your application, create a tsconfig.json file with the following content:
PSPDFKit for TypeScript is installed as an npm package. This will add a pspdfkit dependency to your application’s package.json:
yarn add pspdfkit
npm install pspdfkit
Run the following command to install the necessary dependencies for webpack, create a config directory, and place your webpack configuration file inside it:
In the config folder, add the following code to the webpack.js file:
const path = require('path');
const HtmlWebpackPlugin = require('html-webpack-plugin');
const CopyWebpackPlugin = require('copy-webpack-plugin');
const filesToCopy = [
// PSPDFKit files.
{
from: './node_modules/pspdfkit/dist/pspdfkit-lib',
to: './pspdfkit-lib',
},
// Application CSS.
{
from: './src/index.css',
to: './index.css',
},
// Example PDF.
{
from: './assets/document.pdf',
to: './document.pdf',
},
];
/**
* webpack main configuration object.
*/const config = {
entry: path.resolve(__dirname, '../src/index.ts'),
mode: 'development',
devtool: 'inline-source-map',
output: {
path: path.resolve(__dirname, '../dist'),
filename: '[name].js',
},
resolve: {
extensions: ['.ts', '.tsx', '.js'],
},
module: {
rules: [
// All files with a `.ts` or `.tsx` extension will be handled by `ts-loader`.
{
test: /\.tsx?$/,
loader: 'ts-loader',
exclude: /node_modules/,
},
],
},
plugins: [
new HtmlWebpackPlugin({
template: './src/index.html',
}),
// Copy the WASM/ASM and CSS files to the `output.path`.new CopyWebpackPlugin({ patterns: filesToCopy }),
],
optimization: {
splitChunks: {
cacheGroups: {
// Creates a `vendor.js` bundle that contains external libraries (including `pspdfkit.js`).
vendor: {
test: /node_modules/,
chunks: 'initial',
name: 'vendor',
priority: 10,
enforce: true,
},
},
},
},
};
module.exports = config;
Displaying a PDF
Rename the PDF document you want to display in your application to document.pdf, and then add the PDF document to the assets directory. You can use this demo document as an example.
In the src folder, create an index.html file with the following content. This adds an empty <div> element where PSPDFKit is loaded:
<!DOCTYPE html>
<html>
	<head>
		<title>PSPDFKit for Web — TypeScript example</title>
		<link rel="stylesheet" href="index.css" />
	</head>
	<body>
		<div class="container"></div>
	</body>
</html>
In the src folder, create an index.css file with the following content. This declares the height of the PSPDFKit element:
.container {
	height: 100vh;
}
In the src folder, create an index.ts file with the following content:
import PSPDFKit from 'pspdfkit';

function load(document: string) {
	console.log(`Loading ${document}...`);
	PSPDFKit.load({
		document,
		container: '.container',
	})
		.then((instance) => {
			console.log('PSPDFKit loaded', instance);
		})
		.catch(console.error);
}

load('document.pdf'); // Pass your PDF file.
To set up Document Engine so that it’ll be the backend for PSPDFKit for Web, follow the instructions in the Getting Started with Document Engine guide.
Once Document Engine has been set up, you’ll need to update your code to open a document from Document Engine. This is accomplished by replacing properties included in the configuration object passed to PSPDFKit.load(). Refer to the code snippets located earlier in this guide to find where PSPDFKit.load() will need to be updated.
The document property in PSPDFKit.load() will be replaced with the documentId provided by Document Engine, while the authPayload and the serverUrl properties will be added. If you’d like to enable Instant synchronization, set the instant property to true. See the following example:
This guide will walk you through the steps necessary to integrate PSPDFKit for Web into your project. By the end, you’ll be able to present a PDF document in the PSPDFKit UI.
Select the preferred products
The Web SDK uses the Standalone operational mode, where our JavaScript library renders and edits documents directly in the browser. It’s powered by WebAssembly technology, and it doesn’t require a server, plugins, or internet access. Compare operational modes.
PSPDFKit for Web can be evaluated without a trial license key, but with certain limitations (such as a red watermark added to documents). To evaluate without limitations, get a trial key.
PSPDFKit does not collect any data during your evaluation of the SDK.
Adding PSPDFKit and Configuring webpack
PSPDFKit for TypeScript is installed as an npm package. This will add a pspdfkit dependency to your application’s package.json:
yarn add pspdfkit
npm install pspdfkit
Run the following command to install the necessary dependencies for webpack, create a config directory, and place your webpack configuration file inside it:
In the config folder, add the following code to the webpack.js file:
const path = require('path');
const HtmlWebpackPlugin = require('html-webpack-plugin');
const CopyWebpackPlugin = require('copy-webpack-plugin');
const filesToCopy = [
// PSPDFKit files.
{
from: './node_modules/pspdfkit/dist/pspdfkit-lib',
to: './pspdfkit-lib',
},
// Application CSS.
{
from: './src/index.css',
to: './index.css',
},
// Example PDF.
{
from: './assets/document.pdf',
to: './document.pdf',
},
];
/**
* webpack main configuration object.
*/const config = {
entry: path.resolve(__dirname, '../src/index.ts'),
mode: 'development',
devtool: 'inline-source-map',
output: {
path: path.resolve(__dirname, '../dist'),
filename: '[name].js',
},
resolve: {
extensions: ['.ts', '.tsx', '.js'],
},
module: {
rules: [
// All files with a `.ts` or `.tsx` extension will be handled by `ts-loader`.
{
test: /\.tsx?$/,
loader: 'ts-loader',
exclude: /node_modules/,
},
],
},
plugins: [
new HtmlWebpackPlugin({
template: './src/index.html',
}),
// Copy the WASM/ASM and CSS files to the `output.path`.new CopyWebpackPlugin({ patterns: filesToCopy }),
],
optimization: {
splitChunks: {
cacheGroups: {
// Creates a `vendor.js` bundle that contains external libraries (including `pspdfkit.js`).
vendor: {
test: /node_modules/,
chunks: 'initial',
name: 'vendor',
priority: 10,
enforce: true,
},
},
},
},
};
module.exports = config;
Displaying a PDF
Rename the PDF document you want to display in your application to document.pdf, and then add the PDF document to the assets directory. You can use this demo document as an example.
In the src folder, create an index.html file with the following content. This adds an empty <div> element where PSPDFKit is loaded:
<!DOCTYPE html>
<html>
	<head>
		<title>PSPDFKit for Web — TypeScript example</title>
		<link rel="stylesheet" href="index.css" />
	</head>
	<body>
		<div class="container"></div>
	</body>
</html>
In the src folder, create an index.css file with the following content. This declares the height of the PSPDFKit element:
.container {
	height: 100vh;
}
In the src folder, create an index.ts file with the following content:
import PSPDFKit from 'pspdfkit';

function load(document: string) {
	console.log(`Loading ${document}...`);
	PSPDFKit.load({
		document,
		container: '.container',
	})
		.then((instance) => {
			console.log('PSPDFKit loaded', instance);
		})
		.catch(console.error);
}

load('document.pdf'); // Pass your PDF file.
Running the Project
Run the following command to install the serve package:
yarn global add serve
npm install --global serve
Add the following to the scripts section of the package.json file:
When the Web SDK is combined with Document Engine, it uses the Server-Backed operational mode, where rendering is handled by the server and documents are streamed down to the web viewer. It’s delivered as a Docker container, and it offers the fastest performance, along with more advanced capabilities. Compare operational modes.
PSPDFKit for Web can be evaluated without a trial license key, but with certain limitations (such as a red watermark added to documents). To evaluate without limitations, get a trial key.
PSPDFKit does not collect any data during your evaluation of the SDK.
Adding PSPDFKit and Configuring webpack
PSPDFKit for TypeScript is installed as an npm package. This will add a pspdfkit dependency to your application’s package.json:
yarn add pspdfkit
npm install pspdfkit
Run the following command to install the necessary dependencies for webpack, create a config directory, and place your webpack configuration file inside it:
In the config folder, add the following code to the webpack.js file:
const path = require('path');
const HtmlWebpackPlugin = require('html-webpack-plugin');
const CopyWebpackPlugin = require('copy-webpack-plugin');
const filesToCopy = [
// PSPDFKit files.
{
from: './node_modules/pspdfkit/dist/pspdfkit-lib',
to: './pspdfkit-lib',
},
// Application CSS.
{
from: './src/index.css',
to: './index.css',
},
// Example PDF.
{
from: './assets/document.pdf',
to: './document.pdf',
},
];
/**
* webpack main configuration object.
*/const config = {
entry: path.resolve(__dirname, '../src/index.ts'),
mode: 'development',
devtool: 'inline-source-map',
output: {
path: path.resolve(__dirname, '../dist'),
filename: '[name].js',
},
resolve: {
extensions: ['.ts', '.tsx', '.js'],
},
module: {
rules: [
// All files with a `.ts` or `.tsx` extension will be handled by `ts-loader`.
{
test: /\.tsx?$/,
loader: 'ts-loader',
exclude: /node_modules/,
},
],
},
plugins: [
new HtmlWebpackPlugin({
template: './src/index.html',
}),
// Copy the WASM/ASM and CSS files to the `output.path`.new CopyWebpackPlugin({ patterns: filesToCopy }),
],
optimization: {
splitChunks: {
cacheGroups: {
// Creates a `vendor.js` bundle that contains external libraries (including `pspdfkit.js`).
vendor: {
test: /node_modules/,
chunks: 'initial',
name: 'vendor',
priority: 10,
enforce: true,
},
},
},
},
};
module.exports = config;
Displaying a PDF
Rename the PDF document you want to display in your application to document.pdf, and then add the PDF document to the assets directory. You can use this demo document as an example.
In the src folder, create an index.html file with the following content. This adds an empty <div> element where PSPDFKit is loaded:
<!DOCTYPE html>
<html>
	<head>
		<title>PSPDFKit for Web — TypeScript example</title>
		<link rel="stylesheet" href="index.css" />
	</head>
	<body>
		<div class="container"></div>
	</body>
</html>
In the src folder, create an index.css file with the following content. This declares the height of the PSPDFKit element:
.container {
	height: 100vh;
}
In the src folder, create an index.ts file with the following content:
import PSPDFKit from 'pspdfkit';

function load(document: string) {
	console.log(`Loading ${document}...`);
	PSPDFKit.load({
		document,
		container: '.container',
	})
		.then((instance) => {
			console.log('PSPDFKit loaded', instance);
		})
		.catch(console.error);
}

load('document.pdf'); // Pass your PDF file.
Running the Project
Run the following command to install the serve package:
yarn global add serve
npm install --global serve
Add the following to the scripts section of the package.json file:
To set up Document Engine so that it’ll be the backend for PSPDFKit for Web, follow the instructions in the Getting Started with Document Engine guide.
Once Document Engine has been set up, you’ll need to update your code to open a document from Document Engine. This is accomplished by replacing properties included in the configuration object passed to PSPDFKit.load(). Refer to the code snippets located earlier in this guide to find where PSPDFKit.load() will need to be updated.
The document property in PSPDFKit.load() will be replaced with the documentId provided by Document Engine, while the authPayload and the serverUrl properties will be added. If you’d like to enable Instant synchronization, set the instant property to true. See the following example:
This guide will walk you through the steps necessary to integrate PSPDFKit for Web into your project. By the end, you’ll be able to present a PDF document in the PSPDFKit UI.
Select the preferred products
The Web SDK uses the Standalone operational mode, where our JavaScript library renders and edits documents directly in the browser. It’s powered by WebAssembly technology, and it doesn’t require a server, plugins, or internet access. Compare operational modes.
PSPDFKit for Web can be evaluated without a trial license key, but with certain limitations (such as a red watermark added to documents). To evaluate without limitations, get a trial key.
A package manager compatible with npm. This guide contains usage examples for Yarn and the npm client. The npm client is installed with Node.js by default.
You need Node.js to complete this guide, but in general, Node.js isn’t a requirement for using PSPDFKit for Web.
Creating a New Project
Create a new Svelte app using the degit tool with the Svelte template:
npx degit sveltejs/template my-svelte-project
Change to the created project directory:
cd my-svelte-project
Install the dependencies:
yarn install
npm install
Adding PSPDFKit to Your Project
Add the PSPDFKit dependency:
yarn add pspdfkit
npm install pspdfkit
Copy the PSPDFKit for Web library assets to the public directory:
Make sure your public directory contains a pspdfkit-lib directory with the PSPDFKit library assets.
Make sure your server has the Content-Type: application/wasm MIME typeset. Read more about this in the troubleshooting section.
Displaying a PDF
Rename the PDF document you want to display in your application to document.pdf, and then add the PDF document to the public directory. You can use this demo document as an example.
In the src folder, create a PdfViewerComponent.svelte file with the following content. This adds a component wrapper for the PSPDFKit library:
When the Web SDK is combined with Document Engine, it uses the Server-Backed operational mode, where rendering is handled by the server and documents are streamed down to the web viewer. It’s delivered as a Docker container, and it offers the fastest performance, along with more advanced capabilities. Compare operational modes.
PSPDFKit for Web can be evaluated without a trial license key, but with certain limitations (such as a red watermark added to documents). To evaluate without limitations, get a trial key.
A package manager compatible with npm. This guide contains usage examples for Yarn and the npm client. The npm client is installed with Node.js by default.
You need Node.js to complete this guide, but in general, Node.js isn’t a requirement for using PSPDFKit for Web.
Creating a New Project
Create a new Svelte app using the degit tool with the Svelte template:
npx degit sveltejs/template my-svelte-project
Change to the created project directory:
cd my-svelte-project
Install the dependencies:
yarn install
npm install
Adding PSPDFKit to Your Project
Add the PSPDFKit dependency:
yarn add pspdfkit
npm install pspdfkit
Copy the PSPDFKit for Web library assets to the public directory:
Make sure your public directory contains a pspdfkit-lib directory with the PSPDFKit library assets.
Make sure your server has the Content-Type: application/wasm MIME typeset. Read more about this in the troubleshooting section.
Displaying a PDF
Rename the PDF document you want to display in your application to document.pdf, and then add the PDF document to the public directory. You can use this demo document as an example.
In the src folder, create a PdfViewerComponent.svelte file with the following content. This adds a component wrapper for the PSPDFKit library:
To set up Document Engine so that it’ll be the backend for PSPDFKit for Web, follow the instructions in the Getting Started with Document Engine guide.
Once Document Engine has been set up, you’ll need to update your code to open a document from Document Engine. This is accomplished by replacing properties included in the configuration object passed to PSPDFKit.load(). Refer to the code snippets located earlier in this guide to find where PSPDFKit.load() will need to be updated.
The document property in PSPDFKit.load() will be replaced with the documentId provided by Document Engine, while the authPayload and the serverUrl properties will be added. If you’d like to enable Instant synchronization, set the instant property to true. See the following example:
This guide will walk you through the steps necessary to integrate PSPDFKit for Web into your project. By the end, you’ll be able to present a PDF document in the PSPDFKit UI.
Select the preferred products
The Web SDK uses the Standalone operational mode, where our JavaScript library renders and edits documents directly in the browser. It’s powered by WebAssembly technology, and it doesn’t require a server, plugins, or internet access. Compare operational modes.
PSPDFKit for Web can be evaluated without a trial license key, but with certain limitations (such as a red watermark added to documents). To evaluate without limitations, get a trial key.
Make sure your public directory contains a pspdfkit-lib directory with the PSPDFKit library assets.
Make sure your server has the Content-Type: application/wasm MIME typeset. Read more about this in the troubleshooting section.
Displaying a PDF
Rename the PDF document you want to display in your application to document.pdf, and then add the PDF document to the public directory. You can use this demo document as an example.
In the src folder, create a PdfViewerComponent.svelte file with the following content. This adds a component wrapper for the PSPDFKit library:
When the Web SDK is combined with Document Engine, it uses the Server-Backed operational mode, where rendering is handled by the server and documents are streamed down to the web viewer. It’s delivered as a Docker container, and it offers the fastest performance, along with more advanced capabilities. Compare operational modes.
PSPDFKit for Web can be evaluated without a trial license key, but with certain limitations (such as a red watermark added to documents). To evaluate without limitations, get a trial key.
Make sure your public directory contains a pspdfkit-lib directory with the PSPDFKit library assets.
Make sure your server has the Content-Type: application/wasm MIME typeset. Read more about this in the troubleshooting section.
Displaying a PDF
Rename the PDF document you want to display in your application to document.pdf, and then add the PDF document to the public directory. You can use this demo document as an example.
In the src folder, create a PdfViewerComponent.svelte file with the following content. This adds a component wrapper for the PSPDFKit library:
To set up Document Engine so that it’ll be the backend for PSPDFKit for Web, follow the instructions in the Getting Started with Document Engine guide.
Once Document Engine has been set up, you’ll need to update your code to open a document from Document Engine. This is accomplished by replacing properties included in the configuration object passed to PSPDFKit.load(). Refer to the code snippets located earlier in this guide to find where PSPDFKit.load() will need to be updated.
The document property in PSPDFKit.load() will be replaced with the documentId provided by Document Engine, while the authPayload and the serverUrl properties will be added. If you’d like to enable Instant synchronization, set the instant property to true. See the following example:
This guide will walk you through the steps necessary to integrate PSPDFKit for Web into your project. By the end, you’ll be able to present a PDF document in the PSPDFKit UI.
Select the preferred products
The Web SDK uses the Standalone operational mode, where our JavaScript library renders and edits documents directly in the browser. It’s powered by WebAssembly technology, and it doesn’t require a server, plugins, or internet access. Compare operational modes.
PSPDFKit for Web can be evaluated without a trial license key, but with certain limitations (such as a red watermark added to documents). To evaluate without limitations, get a trial key.
A package manager compatible with npm. This guide contains usage examples for Yarn and the npm client. The npm client is installed with Node.js by default.
You need Node.js to complete this guide, but in general, Node.js isn’t a requirement for using PSPDFKit for Web.
yarn create vite pspdfkit-vite-react-example --template react
# npm 7+, extra double-dash is needed:
npm create vite@latest pspdfkit-vite-react-example -- --template react
Change to the created project directory:
cd pspdfkit-vite-react-example
Adding PSPDFKit and Configuring Vite
Add the PSPDFKit dependency:
yarn add pspdfkit
npm install pspdfkit
Add another dependency needed for vite.config.js to copy the PSPDFKit for Web library assets to the /public folder:
yarn add -D rollup-plugin-copy
npm install --save-dev rollup-plugin-copy
In the root folder of your application, replace vite.config.js with the following code:
import { defineConfig } from "vite";
import react from "@vitejs/plugin-react";
import copy from "rollup-plugin-copy";

// https://vitejs.dev/config/
export default defineConfig({
  // Your Vite configuration.
  plugins: [
    // Your Vite plugins.
    copy({
      targets: [
        {
          src: "node_modules/pspdfkit/dist/pspdfkit-lib",
          dest: "public/",
        },
      ],
      hook: "buildStart",
    }),
    react(),
  ],
  build: {
    outDir: "build",
  },
});
Displaying a PDF
Rename the PDF document you want to display in your application to document.pdf, and then add the PDF document to the public directory. You can use this demo document as an example.
In the src/components/ folder, create the PdfViewerComponent.jsx file with the following code. This adds a component wrapper for the PSPDFKit library:
import { useEffect, useRef } from "react";
exportdefaultfunction PdfViewerComponent(props) {
const containerRef = useRef(null);
useEffect(() => {
const container = containerRef.current; // This `useRef` instance will render the PDF.let PSPDFKit;
(asyncfunction () {
PSPDFKit = awaitimport("pspdfkit");
PSPDFKit.unload(container); // Ensure that there's only one PSPDFKit instance.await PSPDFKit.load({
// Container where PSPDFKit should be mounted.
container,
// The document to open.
document: props.document,
// Use the public directory URL as a base URL. PSPDFKit will download its library assets from here.
baseUrl: `${window.location.protocol}//${window.location.host}/${import.meta.env.PUBLIC_URL}`,
});
})();
return () => PSPDFKit && PSPDFKit.unload(container);
}, [props.document]);
// This div element will render the document to the DOM.return <div ref={containerRef} style={{ width: "100%", height: "100vh" }} />;
}
In the src folder, replace the contents of the App.css file with the following code:
When the Web SDK is combined with Document Engine, it uses the Server-Backed operational mode, where rendering is handled by the server and documents are streamed down to the web viewer. It’s delivered as a Docker container, and it offers the fastest performance, along with more advanced capabilities. Compare operational modes.
PSPDFKit for Web can be evaluated without a trial license key, but with certain limitations (such as a red watermark added to documents). To evaluate without limitations, get a trial key.
A package manager compatible with npm. This guide contains usage examples for Yarn and the npm client. The npm client is installed with Node.js by default.
You need Node.js to complete this guide, but in general, Node.js isn’t a requirement for using PSPDFKit for Web.
yarn create vite pspdfkit-vite-react-example --template react
# npm 7+, extra double-dash is needed:
npm create vite@latest pspdfkit-vite-react-example -- --template react
Change to the created project directory:
cd pspdfkit-vite-react-example
Adding PSPDFKit and Configuring Vite
Add the PSPDFKit dependency:
yarn add pspdfkit
npm install pspdfkit
Add another dependency needed for vite.config.js to copy the PSPDFKit for Web library assets to the /public folder:
yarn add -D rollup-plugin-copy
npm install --save-dev rollup-plugin-copy
In the root folder of your application, replace vite.config.js with the following code:
import { defineConfig } from "vite";
import react from "@vitejs/plugin-react";
import copy from "rollup-plugin-copy";

// https://vitejs.dev/config/
export default defineConfig({
  // Your Vite configuration.
  plugins: [
    // Your Vite plugins.
    copy({
      targets: [
        {
          src: "node_modules/pspdfkit/dist/pspdfkit-lib",
          dest: "public/",
        },
      ],
      hook: "buildStart",
    }),
    react(),
  ],
  build: {
    outDir: "build",
  },
});
Displaying a PDF
Rename the PDF document you want to display in your application to document.pdf, and then add the PDF document to the public directory. You can use this demo document as an example.
In the src/components/ folder, create the PdfViewerComponent.jsx file with the following code. This adds a component wrapper for the PSPDFKit library:
import { useEffect, useRef } from "react";
exportdefaultfunction PdfViewerComponent(props) {
const containerRef = useRef(null);
useEffect(() => {
const container = containerRef.current; // This `useRef` instance will render the PDF.let PSPDFKit;
(asyncfunction () {
PSPDFKit = awaitimport("pspdfkit");
PSPDFKit.unload(container); // Ensure that there's only one PSPDFKit instance.await PSPDFKit.load({
// Container where PSPDFKit should be mounted.
container,
// The document to open.
document: props.document,
// Use the public directory URL as a base URL. PSPDFKit will download its library assets from here.
baseUrl: `${window.location.protocol}//${window.location.host}/${import.meta.env.PUBLIC_URL}`,
});
})();
return () => PSPDFKit && PSPDFKit.unload(container);
}, [props.document]);
// This div element will render the document to the DOM.return <div ref={containerRef} style={{ width: "100%", height: "100vh" }} />;
}
In the src folder, replace the contents of the App.css file with the following code:
To set up Document Engine so that it’ll be the backend for PSPDFKit for Web, follow the instructions in the Getting Started with Document Engine guide.
Once Document Engine has been set up, you’ll need to update your code to open a document from Document Engine. This is accomplished by replacing properties included in the configuration object passed to PSPDFKit.load(). Refer to the code snippets located earlier in this guide to find where PSPDFKit.load() will need to be updated.
The document property in PSPDFKit.load() will be replaced with the documentId provided by Document Engine, while the authPayload and the serverUrl properties will be added. If you’d like to enable Instant synchronization, set the instant property to true. See the following example:
This guide will walk you through the steps necessary to integrate PSPDFKit for Web into your project. By the end, you’ll be able to present a PDF document in the PSPDFKit UI.
Select the preferred products
The Web SDK uses the Standalone operational mode, where our JavaScript library renders and edits documents directly in the browser. It’s powered by WebAssembly technology, and it doesn’t require a server, plugins, or internet access. Compare operational modes.
PSPDFKit for Web can be evaluated without a trial license key, but with certain limitations (such as a red watermark added to documents). To evaluate without limitations, get a trial key.
PSPDFKit does not collect any data during your evaluation of the SDK.
Adding PSPDFKit and Configuring Vite
Add the PSPDFKit dependency:
yarn add pspdfkit
npm install pspdfkit
Add another dependency needed for vite.config.js to copy the PSPDFKit for Web library assets to the /public folder:
yarn add -D rollup-plugin-copy
npm install --save-dev rollup-plugin-copy
In the root folder of your application, replace vite.config.js with the following code:
import { defineConfig } from "vite";
import react from "@vitejs/plugin-react";
import copy from "rollup-plugin-copy";

// https://vitejs.dev/config/
export default defineConfig({
  // Your Vite configuration.
  plugins: [
    // Your Vite plugins.
    copy({
      targets: [
        {
          src: "node_modules/pspdfkit/dist/pspdfkit-lib",
          dest: "public/",
        },
      ],
      hook: "buildStart",
    }),
    react(),
  ],
  build: {
    outDir: "build",
  },
});
Displaying a PDF
Rename the PDF document you want to display in your application to document.pdf, and then add the PDF document to the public directory. You can use this demo document as an example.
In the src/components/ folder, create the PdfViewerComponent.jsx file with the following code. This adds a component wrapper for the PSPDFKit library:
import { useEffect, useRef } from "react";
exportdefaultfunction PdfViewerComponent(props) {
const containerRef = useRef(null);
useEffect(() => {
const container = containerRef.current; // This `useRef` instance will render the PDF.let PSPDFKit;
(asyncfunction () {
PSPDFKit = awaitimport("pspdfkit");
PSPDFKit.unload(container); // Ensure that there's only one PSPDFKit instance.await PSPDFKit.load({
// Container where PSPDFKit should be mounted.
container,
// The document to open.
document: props.document,
// Use the public directory URL as a base URL. PSPDFKit will download its library assets from here.
baseUrl: `${window.location.protocol}//${window.location.host}/${import.meta.env.PUBLIC_URL}`,
});
})();
return () => PSPDFKit && PSPDFKit.unload(container);
}, [props.document]);
// This div element will render the document to the DOM.return <div ref={containerRef} style={{ width: "100%", height: "100vh" }} />;
}
In your app, add the following code below the lines beginning with import. This includes the newly created component in your app:
import PdfViewerComponent from './components/PdfViewerComponent.jsx';

function DocumentViewerComponent() {
	return (
		<div className="App-viewer">
			<PdfViewerComponent
				document={"document.pdf"}
			/>
		</div>
	);
}
Add the following to the rendering function in your app:
When the Web SDK is combined with Document Engine, it uses the Server-Backed operational mode, where rendering is handled by the server and documents are streamed down to the web viewer. It’s delivered as a Docker container, and it offers the fastest performance, along with more advanced capabilities. Compare operational modes.
PSPDFKit for Web can be evaluated without a trial license key, but with certain limitations (such as a red watermark added to documents). To evaluate without limitations, get a trial key.
PSPDFKit does not collect any data during your evaluation of the SDK.
Adding PSPDFKit and Configuring Vite
Add the PSPDFKit dependency:
yarn add pspdfkit
npm install pspdfkit
Add another dependency needed for vite.config.js to copy the PSPDFKit for Web library assets to the /public folder:
yarn add -D rollup-plugin-copy
npm install --save-dev rollup-plugin-copy
In the root folder of your application, replace vite.config.js with the following code:
import { defineConfig } from "vite";
import react from "@vitejs/plugin-react";
import copy from "rollup-plugin-copy";

// https://vitejs.dev/config/
export default defineConfig({
  // Your Vite configuration.
  plugins: [
    // Your Vite plugins.
    copy({
      targets: [
        {
          src: "node_modules/pspdfkit/dist/pspdfkit-lib",
          dest: "public/",
        },
      ],
      hook: "buildStart",
    }),
    react(),
  ],
  build: {
    outDir: "build",
  },
});
Displaying a PDF
Rename the PDF document you want to display in your application to document.pdf, and then add the PDF document to the public directory. You can use this demo document as an example.
In the src/components/ folder, create the PdfViewerComponent.jsx file with the following code. This adds a component wrapper for the PSPDFKit library:
import { useEffect, useRef } from "react";
exportdefaultfunction PdfViewerComponent(props) {
const containerRef = useRef(null);
useEffect(() => {
const container = containerRef.current; // This `useRef` instance will render the PDF.let PSPDFKit;
(asyncfunction () {
PSPDFKit = awaitimport("pspdfkit");
PSPDFKit.unload(container); // Ensure that there's only one PSPDFKit instance.await PSPDFKit.load({
// Container where PSPDFKit should be mounted.
container,
// The document to open.
document: props.document,
// Use the public directory URL as a base URL. PSPDFKit will download its library assets from here.
baseUrl: `${window.location.protocol}//${window.location.host}/${import.meta.env.PUBLIC_URL}`,
});
})();
return () => PSPDFKit && PSPDFKit.unload(container);
}, [props.document]);
// This div element will render the document to the DOM.return <div ref={containerRef} style={{ width: "100%", height: "100vh" }} />;
}
In your app, add the following code below the lines beginning with import. This includes the newly created component in your app:
import PdfViewerComponent from './components/PdfViewerComponent.jsx';

function DocumentViewerComponent() {
	return (
		<div className="App-viewer">
			<PdfViewerComponent
				document={"document.pdf"}
			/>
		</div>
	);
}
Add the following to the rendering function in your app:
To set up Document Engine so that it’ll be the backend for PSPDFKit for Web, follow the instructions in the Getting Started with Document Engine guide.
Once Document Engine has been set up, you’ll need to update your code to open a document from Document Engine. This is accomplished by replacing properties included in the configuration object passed to PSPDFKit.load(). Refer to the code snippets located earlier in this guide to find where PSPDFKit.load() will need to be updated.
The document property in PSPDFKit.load() will be replaced with the documentId provided by Document Engine, while the authPayload and the serverUrl properties will be added. If you’d like to enable Instant synchronization, set the instant property to true. See the following example:
This guide will walk you through the steps necessary to integrate PSPDFKit for Electron into your project.
PSPDFKit for Electron is a wrapper on top of PSPDFKit for Web Standalone, which is a client-side JavaScript library for viewing and editing PDF documents directly in a web browser.
PSPDFKit for Electron shares the same APIs as PSPDFKit for Web Standalone, so please use the Web documentation when customizing your Electron application.
PSPDFKit for Electron can be evaluated without a trial license key, but with certain limitations (such as a red watermark added to documents). To evaluate without limitations, get a trial key.
A package manager compatible with npm. This guide contains usage examples for Yarn and the npm client. The npm client is installed with Node.js by default.
You need Node.js to complete this guide, but in general, Node.js isn’t a requirement for using PSPDFKit for Web.
Creating a New Project
Initialize a new npm workspace in an empty directory:
In the package.json file in the root folder of your application, add "start": "electron ." to the scripts section. The end result will be similar to the following:
PSPDFKit for Electron is installed as an npm package. This will add a pspdfkit dependency to your application’s package.json:
yarn add pspdfkit
npm install pspdfkit
Copy the PSPDFKit for Web library assets to the public directory:
cp -R ./node_modules/pspdfkit/dist/ ./public/
Displaying a PDF
Rename the PDF document you want to display in your application to document.pdf, and then add the PDF document to the public directory. You can use this demo document as an example.
In the root folder of your application, create an index.html file with the following content:
In the root folder of your application, create a preload.js file with the following content. This script runs before the main renderer process:
const { contextBridge } = require("electron");
const {
documentExport,
documentImport,
askUserToDiscardChanges,
} = require("./lib/modals");
// Use the recommended, safe way of selectively exposing the capabilities// of the Node.js API to the browser context.// Electron helpers exposed in the browser context as `window.electron`.
contextBridge.exposeInMainWorld("electron", {
processPlatform: () => process.platform,
documentExport,
documentImport,
askUserToDiscardChanges,
});
In the root folder of your application, create an index.js file with the following content. This is the main JavaScript file that gets access to the preload script inside the BrowserWindow constructor’s webPreferences option:
This guide will walk you through the steps necessary to integrate PSPDFKit for Electron into your project.
PSPDFKit for Electron is a wrapper on top of PSPDFKit for Web Standalone, which is a client-side JavaScript library for viewing and editing PDF documents directly in a web browser.
PSPDFKit for Electron shares the same APIs as PSPDFKit for Web Standalone, so please use the Web documentation when customizing your Electron application.
PSPDFKit for Electron can be evaluated without a trial license key, but with certain limitations (such as a red watermark added to documents). To evaluate without limitations, get a trial key.
PSPDFKit does not collect any data during your evaluation of the SDK.
Adding PSPDFKit
PSPDFKit for Electron is installed as an npm package. This will add a pspdfkit dependency to your application’s package.json:
yarn add pspdfkit
npm install pspdfkit
Copy the PSPDFKit for Web library assets to the public directory:
cp -R ./node_modules/pspdfkit/dist/ ./public/
Displaying a PDF
Rename the PDF document you want to display in your application to document.pdf, and then add the PDF document to the public directory. You can use this demo document as an example.
In the root folder of your application, add the following to the index.html file in the place where you want to add the PDF viewer:
Make sure you’ve enabled the file protocol in your main process:
// Make sure to enable access to the local file system. This is required// to load PDF files and PSPDFKit dependencies from the local file system.
electron.protocol.registerSchemesAsPrivileged([
{
scheme: "file",
privileges: { secure: true, standard: true },
},
]);
This guide will walk you through the steps necessary to integrate PSPDFKit for Web into your project. By the end, you’ll be able to present a PDF document in the PSPDFKit UI.
Select the preferred products
The Web SDK uses the Standalone operational mode, where our JavaScript library renders and edits documents directly in the browser. It’s powered by WebAssembly technology, and it doesn’t require a server, plugins, or internet access. Compare operational modes.
PSPDFKit for Web can be evaluated without a trial license key, but with certain limitations (such as a red watermark added to documents). To evaluate without limitations, get a trial key.
A package manager compatible with npm. This guide contains usage examples for Yarn and the npm client. The npm client is installed with Node.js by default.
You need Node.js to complete this guide, but in general, Node.js isn’t a requirement for using PSPDFKit for Web.
Using create-nuxt-app
To get started, use create-nuxt-app to create a new Nuxt.js project:
yarn create nuxt-app pspdfkit-app
npm init nuxt-app pspdfkit-app
This will ask you some questions. Choose the default options by pressing Enter. Once you answer all the questions, it’ll install the dependencies and create a new Nuxt.js project.
Change to the created project directory:
cd pspdfkit-app
Adding PSPDFKit
Add the PSPDFKit dependency:
yarn add pspdfkit
npm install pspdfkit
Copy the PSPDFKit for Web library assets to the static directory:
Make sure your server has the Content-Type: application/wasm MIME typeset. Read more about this in the troubleshooting section.
Displaying a PDF
Rename the PDF document you want to display in your application to document.pdf, and then add the PDF document to the static directory. You can use this demo document as an example.
In the components folder, create a PSPDFKitContainer.vue file with the following content. This creates a component wrapper for the PSPDFKit library:
<template>
<div class="pdf-container"></div>
</template>
<script>
/**
* PSPDFKit for Web example component.
*/exportdefault {
name: "PSPDFKit",
/**
* The component receives `pdfFile` as a prop, which is type of `String` and is required.
*/
props: {
pdfFile: {
type: String,
required: true,
},
},
PSPDFKit: null,
/**
* Wait until the template has been rendered to load the document into the library.
*/
mounted() {
this.loadPSPDFKit().then((instance) => {
this.$emit("loaded", instance);
});
},
/**
* Watch for `pdfFile` prop changes and trigger unloading and loading when there's a new document to load.
*/
watch: {
pdfFile(val) {
if (val) {
this.loadPSPDFKit();
}
},
},
/**
* Our component has the `loadPSPDFKit` method. This unloads and cleans up the component and triggers document loading.
*/
methods: {
async loadPSPDFKit() {
import("pspdfkit")
.then((PSPDFKit) => {
this.PSPDFKit = PSPDFKit;
PSPDFKit.unload(".pdf-container");
return PSPDFKit.load({
document: this.pdfFile,
container: ".pdf-container",
baseUrl: "http://localhost:3000/",
});
})
.catch((error) => {
console.error(error);
});
},
},
};
</script>
<style scoped>
.pdf-container {
height: 100vh;
}
</style>
In the pages folder, replace the contents of the index.vue file with the following. This includes the newly created component in your app:
<template>
<div id="app">
<label for="file-upload" class="custom-file-upload"> Open PDF </label>
<input id="file-upload" type="file" @change="openDocument" class="btn" />
<PSPDFKitContainer :pdfFile="pdfFile" @loaded="handleLoaded" />
</div>
</template>
<script>
import PSPDFKitContainer from "../components/PSPDFKitContainer.vue";
exportdefault {
name: "app",
/**
* Render the `PSPDFKitContainer` component.
*/
components: {
PSPDFKitContainer,
},
data() {
return {
pdfFile: this.pdfFile || "/document.pdf",
};
},
/**
* Our component has two methods — one to check when the document is loaded, and the other to open the document.
*/
methods: {
handleLoaded(instance) {
console.log("PSPDFKit has loaded: ", instance);
// Do something.
},
openDocument(event) {
if (this.pdfFile && this.pdfFile.startsWith("blob:")) {
window.URL.revokeObjectURL(this.pdfFile);
}
this.pdfFile = window.URL.createObjectURL(event.target.files[0]);
},
},
};
</script>
<style>
#app {
font-family: Avenir, Helvetica, Arial, sans-serif;
text-align: center;
color: #2c3e50;
}
body {
margin: 0;
}
input[type="file"] {
display: none;
}
.custom-file-upload {
border: 1px solid #ccc;
border-radius: 4px;
display: inline-block;
padding: 6px12px;
cursor: pointer;
background: #4a8fed;
padding: 10px;
color: #fff;
font: inherit;
font-size: 16px;
font-weight: bold;
}
</style>
When the Web SDK is combined with Document Engine, it uses the Server-Backed operational mode, where rendering is handled by the server and documents are streamed down to the web viewer. It’s delivered as a Docker container, and it offers the fastest performance, along with more advanced capabilities. Compare operational modes.
PSPDFKit for Web can be evaluated without a trial license key, but with certain limitations (such as a red watermark added to documents). To evaluate without limitations, get a trial key.
A package manager compatible with npm. This guide contains usage examples for Yarn and the npm client. The npm client is installed with Node.js by default.
You need Node.js to complete this guide, but in general, Node.js isn’t a requirement for using PSPDFKit for Web.
Using create-nuxt-app
To get started, use create-nuxt-app to create a new Nuxt.js project:
yarn create nuxt-app pspdfkit-app
npm init nuxt-app pspdfkit-app
This will ask you some questions. Choose the default options by pressing Enter. Once you answer all the questions, it’ll install the dependencies and create a new Nuxt.js project.
Change to the created project directory:
cd pspdfkit-app
Adding PSPDFKit
Add the PSPDFKit dependency:
yarn add pspdfkit
npm install pspdfkit
Copy the PSPDFKit for Web library assets to the static directory:
Make sure your server has the Content-Type: application/wasm MIME typeset. Read more about this in the troubleshooting section.
Displaying a PDF
Rename the PDF document you want to display in your application to document.pdf, and then add the PDF document to the static directory. You can use this demo document as an example.
In the components folder, create a PSPDFKitContainer.vue file with the following content. This creates a component wrapper for the PSPDFKit library:
<template>
<div class="pdf-container"></div>
</template>
<script>
/**
* PSPDFKit for Web example component.
*/exportdefault {
name: "PSPDFKit",
/**
* The component receives `pdfFile` as a prop, which is type of `String` and is required.
*/
props: {
pdfFile: {
type: String,
required: true,
},
},
PSPDFKit: null,
/**
* Wait until the template has been rendered to load the document into the library.
*/
mounted() {
this.loadPSPDFKit().then((instance) => {
this.$emit("loaded", instance);
});
},
/**
* Watch for `pdfFile` prop changes and trigger unloading and loading when there's a new document to load.
*/
watch: {
pdfFile(val) {
if (val) {
this.loadPSPDFKit();
}
},
},
/**
* Our component has the `loadPSPDFKit` method. This unloads and cleans up the component and triggers document loading.
*/
methods: {
async loadPSPDFKit() {
import("pspdfkit")
.then((PSPDFKit) => {
this.PSPDFKit = PSPDFKit;
PSPDFKit.unload(".pdf-container");
return PSPDFKit.load({
document: this.pdfFile,
container: ".pdf-container",
baseUrl: "http://localhost:3000/",
});
})
.catch((error) => {
console.error(error);
});
},
},
};
</script>
<style scoped>
.pdf-container {
height: 100vh;
}
</style>
In the pages folder, replace the contents of the index.vue file with the following. This includes the newly created component in your app:
<template>
<div id="app">
<label for="file-upload" class="custom-file-upload"> Open PDF </label>
<input id="file-upload" type="file" @change="openDocument" class="btn" />
<PSPDFKitContainer :pdfFile="pdfFile" @loaded="handleLoaded" />
</div>
</template>
<script>
import PSPDFKitContainer from "../components/PSPDFKitContainer.vue";
exportdefault {
name: "app",
/**
* Render the `PSPDFKitContainer` component.
*/
components: {
PSPDFKitContainer,
},
data() {
return {
pdfFile: this.pdfFile || "/document.pdf",
};
},
/**
* Our component has two methods — one to check when the document is loaded, and the other to open the document.
*/
methods: {
handleLoaded(instance) {
console.log("PSPDFKit has loaded: ", instance);
// Do something.
},
openDocument(event) {
if (this.pdfFile && this.pdfFile.startsWith("blob:")) {
window.URL.revokeObjectURL(this.pdfFile);
}
this.pdfFile = window.URL.createObjectURL(event.target.files[0]);
},
},
};
</script>
<style>
#app {
font-family: Avenir, Helvetica, Arial, sans-serif;
text-align: center;
color: #2c3e50;
}
body {
margin: 0;
}
input[type="file"] {
display: none;
}
.custom-file-upload {
border: 1px solid #ccc;
border-radius: 4px;
display: inline-block;
padding: 6px12px;
cursor: pointer;
background: #4a8fed;
padding: 10px;
color: #fff;
font: inherit;
font-size: 16px;
font-weight: bold;
}
</style>
To set up Document Engine so that it’ll be the backend for PSPDFKit for Web, follow the instructions in the Getting Started with Document Engine guide.
Once Document Engine has been set up, you’ll need to update your code to open a document from Document Engine. This is accomplished by replacing properties included in the configuration object passed to PSPDFKit.load(). Refer to the code snippets located earlier in this guide to find where PSPDFKit.load() will need to be updated.
The document property in PSPDFKit.load() will be replaced with the documentId provided by Document Engine, while the authPayload and the serverUrl properties will be added. If you’d like to enable Instant synchronization, set the instant property to true. See the following example:
This guide will walk you through the steps necessary to integrate PSPDFKit for Web into your project. By the end, you’ll be able to present a PDF document in the PSPDFKit UI.
Select the preferred products
The Web SDK uses the Standalone operational mode, where our JavaScript library renders and edits documents directly in the browser. It’s powered by WebAssembly technology, and it doesn’t require a server, plugins, or internet access. Compare operational modes.
PSPDFKit for Web can be evaluated without a trial license key, but with certain limitations (such as a red watermark added to documents). To evaluate without limitations, get a trial key.
Make sure your server has the Content-Type: application/wasm MIME typeset. Read more about this in the troubleshooting section.
Displaying a PDF
Rename the PDF document you want to display in your application to document.pdf, and then add the PDF document to the static directory. You can use this demo document as an example.
In the components folder, create a PSPDFKitContainer.vue file with the following content. This creates a component wrapper for the PSPDFKit library:
<template>
<div class="pdf-container"></div>
</template>
<script>
/**
* PSPDFKit for Web example component.
*/exportdefault {
name: "PSPDFKit",
/**
* The component receives `pdfFile` as a prop, which is type of `String` and is required.
*/
props: {
pdfFile: {
type: String,
required: true,
},
},
PSPDFKit: null,
/**
* Wait until the template has been rendered to load the document into the library.
*/
mounted() {
this.loadPSPDFKit().then((instance) => {
this.$emit("loaded", instance);
});
},
/**
* Watch for `pdfFile` prop changes and trigger unloading and loading when there's a new document to load.
*/
watch: {
pdfFile(val) {
if (val) {
this.loadPSPDFKit();
}
},
},
/**
* Our component has the `loadPSPDFKit` method. This unloads and cleans up the component and triggers document loading.
*/
methods: {
async loadPSPDFKit() {
import("pspdfkit")
.then((PSPDFKit) => {
this.PSPDFKit = PSPDFKit;
PSPDFKit.unload(".pdf-container");
return PSPDFKit.load({
document: this.pdfFile,
container: ".pdf-container",
baseUrl: "http://localhost:3000/",
});
})
.catch((error) => {
console.error(error);
});
},
},
};
</script>
<style scoped>
.pdf-container {
height: 100vh;
}
</style>
In the pages folder, add the newly created component to the index.vue file in the following way:
<template>
<div id="app">
<label for="file-upload" class="custom-file-upload"> Open PDF </label>
<input id="file-upload" type="file" @change="openDocument" class="btn" />
<PSPDFKitContainer :pdfFile="pdfFile" @loaded="handleLoaded" />
</div>
</template>
<script>
import PSPDFKitContainer from "../components/PSPDFKitContainer.vue";
exportdefault {
name: "app",
/**
* Render the `PSPDFKitContainer` component.
*/
components: {
PSPDFKitContainer,
},
data() {
return {
pdfFile: this.pdfFile || "/document.pdf",
};
},
/**
* Our component has two methods — one to check when the document is loaded, and the other to open the document.
*/
methods: {
handleLoaded(instance) {
console.log("PSPDFKit has loaded: ", instance);
// Do something.
},
openDocument(event) {
if (this.pdfFile && this.pdfFile.startsWith("blob:")) {
window.URL.revokeObjectURL(this.pdfFile);
}
this.pdfFile = window.URL.createObjectURL(event.target.files[0]);
},
},
};
</script>
<style>
#app {
font-family: Avenir, Helvetica, Arial, sans-serif;
text-align: center;
color: #2c3e50;
}
body {
margin: 0;
}
input[type="file"] {
display: none;
}
.custom-file-upload {
border: 1px solid #ccc;
border-radius: 4px;
display: inline-block;
padding: 6px12px;
cursor: pointer;
background: #4a8fed;
padding: 10px;
color: #fff;
font: inherit;
font-size: 16px;
font-weight: bold;
}
</style>
When the Web SDK is combined with Document Engine, it uses the Server-Backed operational mode, where rendering is handled by the server and documents are streamed down to the web viewer. It’s delivered as a Docker container, and it offers the fastest performance, along with more advanced capabilities. Compare operational modes.
PSPDFKit for Web can be evaluated without a trial license key, but with certain limitations (such as a red watermark added to documents). To evaluate without limitations, get a trial key.
Make sure your server has the Content-Type: application/wasm MIME typeset. Read more about this in the troubleshooting section.
Displaying a PDF
Rename the PDF document you want to display in your application to document.pdf, and then add the PDF document to the static directory. You can use this demo document as an example.
In the components folder, create a PSPDFKitContainer.vue file with the following content. This creates a component wrapper for the PSPDFKit library:
<template>
<div class="pdf-container"></div>
</template>
<script>
/**
* PSPDFKit for Web example component.
*/exportdefault {
name: "PSPDFKit",
/**
* The component receives `pdfFile` as a prop, which is type of `String` and is required.
*/
props: {
pdfFile: {
type: String,
required: true,
},
},
PSPDFKit: null,
/**
* Wait until the template has been rendered to load the document into the library.
*/
mounted() {
this.loadPSPDFKit().then((instance) => {
this.$emit("loaded", instance);
});
},
/**
* Watch for `pdfFile` prop changes and trigger unloading and loading when there's a new document to load.
*/
watch: {
pdfFile(val) {
if (val) {
this.loadPSPDFKit();
}
},
},
/**
* Our component has the `loadPSPDFKit` method. This unloads and cleans up the component and triggers document loading.
*/
methods: {
async loadPSPDFKit() {
import("pspdfkit")
.then((PSPDFKit) => {
this.PSPDFKit = PSPDFKit;
PSPDFKit.unload(".pdf-container");
return PSPDFKit.load({
document: this.pdfFile,
container: ".pdf-container",
baseUrl: "http://localhost:3000/",
});
})
.catch((error) => {
console.error(error);
});
},
},
};
</script>
<style scoped>
.pdf-container {
height: 100vh;
}
</style>
In the pages folder, add the newly created component to the index.vue file in the following way:
<template>
<div id="app">
<label for="file-upload" class="custom-file-upload"> Open PDF </label>
<input id="file-upload" type="file" @change="openDocument" class="btn" />
<PSPDFKitContainer :pdfFile="pdfFile" @loaded="handleLoaded" />
</div>
</template>
<script>
import PSPDFKitContainer from "../components/PSPDFKitContainer.vue";
exportdefault {
name: "app",
/**
* Render the `PSPDFKitContainer` component.
*/
components: {
PSPDFKitContainer,
},
data() {
return {
pdfFile: this.pdfFile || "/document.pdf",
};
},
/**
* Our component has two methods — one to check when the document is loaded, and the other to open the document.
*/
methods: {
handleLoaded(instance) {
console.log("PSPDFKit has loaded: ", instance);
// Do something.
},
openDocument(event) {
if (this.pdfFile && this.pdfFile.startsWith("blob:")) {
window.URL.revokeObjectURL(this.pdfFile);
}
this.pdfFile = window.URL.createObjectURL(event.target.files[0]);
},
},
};
</script>
<style>
#app {
font-family: Avenir, Helvetica, Arial, sans-serif;
text-align: center;
color: #2c3e50;
}
body {
margin: 0;
}
input[type="file"] {
display: none;
}
.custom-file-upload {
border: 1px solid #ccc;
border-radius: 4px;
display: inline-block;
padding: 6px12px;
cursor: pointer;
background: #4a8fed;
padding: 10px;
color: #fff;
font: inherit;
font-size: 16px;
font-weight: bold;
}
</style>
To set up Document Engine so that it’ll be the backend for PSPDFKit for Web, follow the instructions in the Getting Started with Document Engine guide.
Once Document Engine has been set up, you’ll need to update your code to open a document from Document Engine. This is accomplished by replacing properties included in the configuration object passed to PSPDFKit.load(). Refer to the code snippets located earlier in this guide to find where PSPDFKit.load() will need to be updated.
The document property in PSPDFKit.load() will be replaced with the documentId provided by Document Engine, while the authPayload and the serverUrl properties will be added. If you’d like to enable Instant synchronization, set the instant property to true. See the following example:
This guide will walk you through the steps necessary to integrate PSPDFKit for Web into your project. By the end, you’ll be able to present a PDF document in the PSPDFKit UI.
Select the preferred products
The Web SDK uses the Standalone operational mode, where our JavaScript library renders and edits documents directly in the browser. It’s powered by WebAssembly technology, and it doesn’t require a server, plugins, or internet access. Compare operational modes.
PSPDFKit for Web can be evaluated without a trial license key, but with certain limitations (such as a red watermark added to documents). To evaluate without limitations, get a trial key.
PSPDFKit does not collect any data during your evaluation of the SDK.
Requirements
Visual Studio 2019 or above
Creating a New Project
Open Visual Studio and select File > New Project… to create a new project for your application:
Choose the Web Application (Model-View-Controller) template:
Choose .NET 7.0 for the target framework:
When prompted, choose your app name (PSPDFKit_ASPNETExample) and use the default options:
Finish the project creation by confirming the next dialog steps.
Adding PSPDFKit
PSPDFKit for Web library files are distributed as an archive that can be extracted manually:
Download the framework here. The download will start immediately and will save a .tar.gz archive like PSPDFKit-Web-binary-2024.3.0.tar.gz to your computer.
Once the download is complete, extract the archive and copy the entire contents of its dist folder to the wwwroot/lib directory in your project.
Make sure your wwwroot/lib folder contains the file pspdfkit.js and a pspdfkit-lib directory with library assets.
Make sure your server has the Content-Type: application/wasm MIME typeset. Read more about this in the troubleshooting section of our guides.
Integrating PSPDFKit
Integrate PSPDFKit directly in your app’s index view, Views/Home/Index.cshtml.
To clean out the UI, go to the Views/Shared/_Layout.cshtml file and keep only the @RenderBody() property:
<!-- Include PSPDFKit library -->
<script src="/lib/pspdfkit.js"></script>

<!-- Element where PSPDFKit will be mounted. -->
<div id="pspdfkit" style="width: 100%; height: 100vh;"></div>

<!-- Initialize PSPDFKit. -->
<script>
	PSPDFKit.load({
		container: "#pspdfkit",
		document: "document.pdf",
	})
		.then(function (pspdfkitInstance) {
			console.log("PSPDFKit loaded", pspdfkitInstance);
		})
		.catch(function (error) {
			console.error(error.message);
		});
</script>
Displaying the PDF
Rename the PDF document you want to display in your application to document.pdf, and then add the PDF document to the wwwroot directory. You can use this demo document as an example.
Select Run > Start Debugging. This will start your app and open it in your default browser.
When the Web SDK is combined with Document Engine, it uses the Server-Backed operational mode, where rendering is handled by the server and documents are streamed down to the web viewer. It’s delivered as a Docker container, and it offers the fastest performance, along with more advanced capabilities. Compare operational modes.
PSPDFKit for Web can be evaluated without a trial license key, but with certain limitations (such as a red watermark added to documents). To evaluate without limitations, get a trial key.
PSPDFKit does not collect any data during your evaluation of the SDK.
Requirements
Visual Studio 2019 or above
Creating a New Project
Open Visual Studio and select File > New Project… to create a new project for your application:
Choose the Web Application (Model-View-Controller) template:
Choose .NET 7.0 for the target framework:
When prompted, choose your app name (PSPDFKit_ASPNETExample) and use the default options:
Finish the project creation by confirming the next dialog steps.
Adding PSPDFKit
PSPDFKit for Web library files are distributed as an archive that can be extracted manually:
Download the framework here. The download will start immediately and will save a .tar.gz archive like PSPDFKit-Web-binary-2024.3.0.tar.gz to your computer.
Once the download is complete, extract the archive and copy the entire contents of its dist folder to the wwwroot/lib directory in your project.
Make sure your wwwroot/lib folder contains the file pspdfkit.js and a pspdfkit-lib directory with library assets.
Make sure your server has the Content-Type: application/wasm MIME typeset. Read more about this in the troubleshooting section of our guides.
Integrating PSPDFKit
Integrate PSPDFKit directly in your app’s index view, Views/Home/Index.cshtml.
To clean out the UI, go to the Views/Shared/_Layout.cshtml file and keep only the @RenderBody() property:
<!-- Include PSPDFKit library -->
<script src="/lib/pspdfkit.js"></script>

<!-- Element where PSPDFKit will be mounted. -->
<div id="pspdfkit" style="width: 100%; height: 100vh;"></div>

<!-- Initialize PSPDFKit. -->
<script>
	PSPDFKit.load({
		container: "#pspdfkit",
		document: "document.pdf",
	})
		.then(function (pspdfkitInstance) {
			console.log("PSPDFKit loaded", pspdfkitInstance);
		})
		.catch(function (error) {
			console.error(error.message);
		});
</script>
Displaying the PDF
Rename the PDF document you want to display in your application to document.pdf, and then add the PDF document to the wwwroot directory. You can use this demo document as an example.
Select Run > Start Debugging. This will start your app and open it in your default browser.
Setting Up Document Engine
To set up Document Engine so that it’ll be the backend for PSPDFKit for Web, follow the instructions in the Getting Started with Document Engine guide.
Once Document Engine has been set up, you’ll need to update your code to open a document from Document Engine. This is accomplished by replacing properties included in the configuration object passed to PSPDFKit.load(). Refer to the code snippets located earlier in this guide to find where PSPDFKit.load() will need to be updated.
The document property in PSPDFKit.load() will be replaced with the documentId provided by Document Engine, while the authPayload and the serverUrl properties will be added. If you’d like to enable Instant synchronization, set the instant property to true. See the following example:
This guide will walk you through the steps necessary to integrate PSPDFKit for Web into your project. By the end, you’ll be able to present a PDF document in the PSPDFKit UI.
Select the preferred products
The Web SDK uses the Standalone operational mode, where our JavaScript library renders and edits documents directly in the browser. It’s powered by WebAssembly technology, and it doesn’t require a server, plugins, or internet access. Compare operational modes.
PSPDFKit for Web can be evaluated without a trial license key, but with certain limitations (such as a red watermark added to documents). To evaluate without limitations, get a trial key.
Create a new ASP.NET Core Web App (Model-View-Controller):
dotnet new mvc -o pspdfkit-aspnet-example
Change to the created project directory:
cd pspdfkit-aspnet-example
Adding PSPDFKit
PSPDFKit for Web library files are distributed as an archive that can be extracted manually:
Download the framework here. The download will start immediately and will save a .tar.gz archive like PSPDFKit-Web-binary-2024.3.0.tar.gz to your computer.
Once the download is complete, extract the archive and copy the entire contents of its dist folder to the wwwroot/lib directory in your project.
Make sure your wwwroot/lib folder contains the file pspdfkit.js and a pspdfkit-lib directory with library assets.
Make sure your server has the Content-Type: application/wasm MIME typeset. Read more about this in the troubleshooting section of our guides.
Integrating PSPDFKit
Integrate PSPDFKit directly in your app’s index view, Views/Home/Index.cshtml.
To clean out the UI, go to the Views/Shared/_Layout.cshtml file and keep only the @RenderBody() property:
<!-- Include PSPDFKit library -->
<script src="/lib/pspdfkit.js"></script>

<!-- Element where PSPDFKit will be mounted. -->
<div id="pspdfkit" style="width: 100%; height: 100vh;"></div>

<!-- Initialize PSPDFKit. -->
<script>
	PSPDFKit.load({
		container: "#pspdfkit",
		document: "document.pdf",
	})
		.then(function (pspdfkitInstance) {
			console.log("PSPDFKit loaded", pspdfkitInstance);
		})
		.catch(function (error) {
			console.error(error.message);
		});
</script>
Displaying the PDF
Rename the PDF document you want to display in your application to document.pdf, and then add the PDF document to the wwwroot directory. You can use this demo document as an example.
When the Web SDK is combined with Document Engine, it uses the Server-Backed operational mode, where rendering is handled by the server and documents are streamed down to the web viewer. It’s delivered as a Docker container, and it offers the fastest performance, along with more advanced capabilities. Compare operational modes.
PSPDFKit for Web can be evaluated without a trial license key, but with certain limitations (such as a red watermark added to documents). To evaluate without limitations, get a trial key.
Create a new ASP.NET Core Web App (Model-View-Controller):
dotnet new mvc -o pspdfkit-aspnet-example
Change to the created project directory:
cd pspdfkit-aspnet-example
Adding PSPDFKit
PSPDFKit for Web library files are distributed as an archive that can be extracted manually:
Download the framework here. The download will start immediately and will save a .tar.gz archive like PSPDFKit-Web-binary-2024.3.0.tar.gz to your computer.
Once the download is complete, extract the archive and copy the entire contents of its dist folder to the wwwroot/lib directory in your project.
Make sure your wwwroot/lib folder contains the file pspdfkit.js and a pspdfkit-lib directory with library assets.
Make sure your server has the Content-Type: application/wasm MIME typeset. Read more about this in the troubleshooting section of our guides.
Integrating PSPDFKit
Integrate PSPDFKit directly in your app’s index view, Views/Home/Index.cshtml.
To clean out the UI, go to the Views/Shared/_Layout.cshtml file and keep only the @RenderBody() property:
<!-- Include PSPDFKit library -->
<script src="/lib/pspdfkit.js"></script>

<!-- Element where PSPDFKit will be mounted. -->
<div id="pspdfkit" style="width: 100%; height: 100vh;"></div>

<!-- Initialize PSPDFKit. -->
<script>
	PSPDFKit.load({
		container: "#pspdfkit",
		document: "document.pdf",
	})
		.then(function (pspdfkitInstance) {
			console.log("PSPDFKit loaded", pspdfkitInstance);
		})
		.catch(function (error) {
			console.error(error.message);
		});
</script>
Displaying the PDF
Rename the PDF document you want to display in your application to document.pdf, and then add the PDF document to the wwwroot directory. You can use this demo document as an example.
Start the app and run it in your default browser:
dotnet watch run
Setting Up Document Engine
To set up Document Engine so that it’ll be the backend for PSPDFKit for Web, follow the instructions in the Getting Started with Document Engine guide.
Once Document Engine has been set up, you’ll need to update your code to open a document from Document Engine. This is accomplished by replacing properties included in the configuration object passed to PSPDFKit.load(). Refer to the code snippets located earlier in this guide to find where PSPDFKit.load() will need to be updated.
The document property in PSPDFKit.load() will be replaced with the documentId provided by Document Engine, while the authPayload and the serverUrl properties will be added. If you’d like to enable Instant synchronization, set the instant property to true. See the following example:
This guide will walk you through the steps necessary to integrate PSPDFKit for Web into your project. By the end, you’ll be able to present a PDF document in the PSPDFKit UI.
Select the preferred products
The Web SDK uses the Standalone operational mode, where our JavaScript library renders and edits documents directly in the browser. It’s powered by WebAssembly technology, and it doesn’t require a server, plugins, or internet access. Compare operational modes.
PSPDFKit for Web can be evaluated without a trial license key, but with certain limitations (such as a red watermark added to documents). To evaluate without limitations, get a trial key.
PSPDFKit does not collect any data during your evaluation of the SDK.
Requirements
Visual Studio 2019 or above
Adding PSPDFKit
PSPDFKit for Web library files are distributed as an archive that can be extracted manually:
Download the framework here. The download will start immediately and will save a .tar.gz archive like PSPDFKit-Web-binary-2024.3.0.tar.gz to your computer.
Once the download is complete, extract the archive and copy the entire contents of its dist folder to the wwwroot/lib directory in your project.
Make sure your wwwroot/lib folder contains the file pspdfkit.js and a pspdfkit-lib directory with library assets.
Make sure your server has the Content-Type: application/wasm MIME typeset. Read more about this in the troubleshooting section of our guides.
Integrating PSPDFKit
Integrate PSPDFKit in your view, Views/Home/Index.cshtml.
Include pspdfkit.js. The path is relative to the wwwroot directory:
<script src="/lib/pspdfkit.js"></script>
Add an empty <div> element with a defined width and height to where PSPDFKit will be mounted:
Rename the PDF document you want to display in your application to document.pdf, and then add the PDF document to the wwwroot directory. You can use this demo document as an example.
Select Run > Start Debugging. This will start your app and open it in your default browser.
When the Web SDK is combined with Document Engine, it uses the Server-Backed operational mode, where rendering is handled by the server and documents are streamed down to the web viewer. It’s delivered as a Docker container, and it offers the fastest performance, along with more advanced capabilities. Compare operational modes.
PSPDFKit for Web can be evaluated without a trial license key, but with certain limitations (such as a red watermark added to documents). To evaluate without limitations, get a trial key.
PSPDFKit does not collect any data during your evaluation of the SDK.
Requirements
Visual Studio 2019 or above
Adding PSPDFKit
PSPDFKit for Web library files are distributed as an archive that can be extracted manually:
Download the framework here. The download will start immediately and will save a .tar.gz archive like PSPDFKit-Web-binary-2024.3.0.tar.gz to your computer.
Once the download is complete, extract the archive and copy the entire contents of its dist folder to the wwwroot/lib directory in your project.
Make sure your wwwroot/lib folder contains the file pspdfkit.js and a pspdfkit-lib directory with library assets.
Make sure your server has the Content-Type: application/wasm MIME typeset. Read more about this in the troubleshooting section of our guides.
Integrating PSPDFKit
Integrate PSPDFKit in your view, Views/Home/Index.cshtml.
Include pspdfkit.js. The path is relative to the wwwroot directory:
<script src="/lib/pspdfkit.js"></script>
Add an empty <div> element with a defined width and height to where PSPDFKit will be mounted:
Rename the PDF document you want to display in your application to document.pdf, and then add the PDF document to the wwwroot directory. You can use this demo document as an example.
Select Run > Start Debugging. This will start your app and open it in your default browser.
Setting Up Document Engine
To set up Document Engine so that it’ll be the backend for PSPDFKit for Web, follow the instructions in the Getting Started with Document Engine guide.
Once Document Engine has been set up, you’ll need to update your code to open a document from Document Engine. This is accomplished by replacing properties included in the configuration object passed to PSPDFKit.load(). Refer to the code snippets located earlier in this guide to find where PSPDFKit.load() will need to be updated.
The document property in PSPDFKit.load() will be replaced with the documentId provided by Document Engine, while the authPayload and the serverUrl properties will be added. If you’d like to enable Instant synchronization, set the instant property to true. See the following example:
This guide will walk you through the steps necessary to integrate PSPDFKit for Web into your project. By the end, you’ll be able to present a PDF document in the PSPDFKit UI.
Select the preferred products
The Web SDK uses the Standalone operational mode, where our JavaScript library renders and edits documents directly in the browser. It’s powered by WebAssembly technology, and it doesn’t require a server, plugins, or internet access. Compare operational modes.
PSPDFKit for Web can be evaluated without a trial license key, but with certain limitations (such as a red watermark added to documents). To evaluate without limitations, get a trial key.
PSPDFKit for Web library files are distributed as an archive that can be extracted manually:
Download the framework here. The download will start immediately and will save a .tar.gz archive like PSPDFKit-Web-binary-2024.3.0.tar.gz to your computer.
Once the download is complete, extract the archive and copy the entire contents of its dist folder to the wwwroot/lib directory in your project.
Make sure your wwwroot/lib folder contains the file pspdfkit.js and a pspdfkit-lib directory with library assets.
Make sure your server has the Content-Type: application/wasm MIME typeset. Read more about this in the troubleshooting section of our guides.
Integrating PSPDFKit
Integrate PSPDFKit in your view, Views/Home/Index.cshtml.
Include pspdfkit.js. The path is relative to the wwwroot directory:
<script src="/lib/pspdfkit.js"></script>
Add an empty <div> element with a defined width and height to where PSPDFKit will be mounted:
Rename the PDF document you want to display in your application to document.pdf, and then add the PDF document to the wwwroot directory. You can use this demo document as an example.
When the Web SDK is combined with Document Engine, it uses the Server-Backed operational mode, where rendering is handled by the server and documents are streamed down to the web viewer. It’s delivered as a Docker container, and it offers the fastest performance, along with more advanced capabilities. Compare operational modes.
PSPDFKit for Web can be evaluated without a trial license key, but with certain limitations (such as a red watermark added to documents). To evaluate without limitations, get a trial key.
PSPDFKit for Web library files are distributed as an archive that can be extracted manually:
Download the framework here. The download will start immediately and will save a .tar.gz archive like PSPDFKit-Web-binary-2024.3.0.tar.gz to your computer.
Once the download is complete, extract the archive and copy the entire contents of its dist folder to the wwwroot/lib directory in your project.
Make sure your wwwroot/lib folder contains the file pspdfkit.js and a pspdfkit-lib directory with library assets.
Make sure your server has the Content-Type: application/wasm MIME typeset. Read more about this in the troubleshooting section of our guides.
Integrating PSPDFKit
Integrate PSPDFKit in your view, Views/Home/Index.cshtml.
Include pspdfkit.js. The path is relative to the wwwroot directory:
<script src="/lib/pspdfkit.js"></script>
Add an empty <div> element with a defined width and height to where PSPDFKit will be mounted:
Rename the PDF document you want to display in your application to document.pdf, and then add the PDF document to the wwwroot directory. You can use this demo document as an example.
Start the app and run it in your default browser:
dotnet watch run
Setting Up Document Engine
To set up Document Engine so that it’ll be the backend for PSPDFKit for Web, follow the instructions in the Getting Started with Document Engine guide.
Once Document Engine has been set up, you’ll need to update your code to open a document from Document Engine. This is accomplished by replacing properties included in the configuration object passed to PSPDFKit.load(). Refer to the code snippets located earlier in this guide to find where PSPDFKit.load() will need to be updated.
The document property in PSPDFKit.load() will be replaced with the documentId provided by Document Engine, while the authPayload and the serverUrl properties will be added. If you’d like to enable Instant synchronization, set the instant property to true. See the following example:
This guide will walk you through the steps necessary to integrate PSPDFKit for Web into your project. By the end, you’ll be able to present a PDF document in the PSPDFKit UI.
Select the preferred products
The Web SDK uses the Standalone operational mode, where our JavaScript library renders and edits documents directly in the browser. It’s powered by WebAssembly technology, and it doesn’t require a server, plugins, or internet access. Compare operational modes.
PSPDFKit for Web can be evaluated without a trial license key, but with certain limitations (such as a red watermark added to documents). To evaluate without limitations, get a trial key.
PSPDFKit does not collect any data during your evaluation of the SDK.
Requirements
Visual Studio 2019 or above
Creating a New Project
Open Visual Studio and select File > New Project… to create a new project for your application.
Choose the Blazor Server App project template.
Choose .NET 7.0 for the target framework.
When prompted, choose your app name (PSPDFKit_BlazorServer) and use the default options.
Finish the project creation by confirming the next dialog steps.
Adding PSPDFKit
PSPDFKit for Web library files are distributed as an archive that can be extracted manually.
Download the framework here. The download will start immediately and will save a .tar.gz archive like PSPDFKit-Web-binary-2024.3.0.tar.gz to your computer.
Once the download is complete, extract the archive and copy the entire folder and contents of its dist folder to your project’s wwwroot folder.
Make sure your wwwroot folder contains the pspdfkit.js file and a pspdfkit-lib directory with the library assets.
Displaying a PDF
Rename the PDF document you want to display in your application to document.pdf, and then add the PDF document to the wwwroot directory. You can use this demo document as an example.
To clean out the UI, go to the Shared/MainLayout.razor component and keep only the @Body property:
@inherits LayoutComponentBase
@Body
Go to the Home route located under the Pages/Index.razor file, and replace the contents of the file with the following:
Load the PSPDFKit SDK to Pages/_Host.cshtml before the </body> tag:
@* Include pspdfkit.js in your Pages/_Host.cshtml file *@
 <script src="dist/pspdfkit.js"></script>

 @* Initialize PSPDFKit for Web in Blazor Server by calling PSPDFKit.load(): *@
 <script>
   function loadPDF(container, document) {
      PSPDFKit.load({
         container: container,
         document: document
      })
   }
 </script>
Serving Your Website
Make sure to add the MIME type mappings to allow conversion of Office files.
When the Web SDK is combined with Document Engine, it uses the Server-Backed operational mode, where rendering is handled by the server and documents are streamed down to the web viewer. It’s delivered as a Docker container, and it offers the fastest performance, along with more advanced capabilities. Compare operational modes.
PSPDFKit for Web can be evaluated without a trial license key, but with certain limitations (such as a red watermark added to documents). To evaluate without limitations, get a trial key.
PSPDFKit does not collect any data during your evaluation of the SDK.
Requirements
Visual Studio 2019 or above
Creating a New Project
Open Visual Studio and select File > New Project… to create a new project for your application.
Choose the Blazor Server App project template.
Choose .NET 7.0 for the target framework.
When prompted, choose your app name (PSPDFKit_BlazorServer) and use the default options.
Finish the project creation by confirming the next dialog steps.
Adding PSPDFKit
PSPDFKit for Web library files are distributed as an archive that can be extracted manually.
Download the framework here. The download will start immediately and will save a .tar.gz archive like PSPDFKit-Web-binary-2024.3.0.tar.gz to your computer.
Once the download is complete, extract the archive and copy the entire folder and contents of its dist folder to your project’s wwwroot folder.
Make sure your wwwroot folder contains the pspdfkit.js file and a pspdfkit-lib directory with the library assets.
Displaying a PDF
Rename the PDF document you want to display in your application to document.pdf, and then add the PDF document to the wwwroot directory. You can use this demo document as an example.
To clean out the UI, go to the Shared/MainLayout.razor component and keep only the @Body property:
@inherits LayoutComponentBase
@Body
Go to the Home route located under the Pages/Index.razor file, and replace the contents of the file with the following:
Load the PSPDFKit SDK to Pages/_Host.cshtml before the </body> tag:
@* Include pspdfkit.js in your Pages/_Host.cshtml file *@
 <script src="dist/pspdfkit.js"></script>

 @* Initialize PSPDFKit for Web in Blazor Server by calling PSPDFKit.load(): *@
 <script>
   function loadPDF(container, document) {
      PSPDFKit.load({
         container: container,
         document: document
      })
   }
 </script>
Serving Your Website
Make sure to add the MIME type mappings to allow conversion of Office files.
Start the app in the root directory of your project:
dotnet watch run
Setting Up Document Engine
To set up Document Engine so that it’ll be the backend for PSPDFKit for Web, follow the instructions in the Getting Started with Document Engine guide.
Once Document Engine has been set up, you’ll need to update your code to open a document from Document Engine. This is accomplished by replacing properties included in the configuration object passed to PSPDFKit.load(). Refer to the code snippets located earlier in this guide to find where PSPDFKit.load() will need to be updated.
The document property in PSPDFKit.load() will be replaced with the documentId provided by Document Engine, while the authPayload and the serverUrl properties will be added. If you’d like to enable Instant synchronization, set the instant property to true. See the following example:
This guide will walk you through the steps necessary to integrate PSPDFKit for Web into your project. By the end, you’ll be able to present a PDF document in the PSPDFKit UI.
Select the preferred products
The Web SDK uses the Standalone operational mode, where our JavaScript library renders and edits documents directly in the browser. It’s powered by WebAssembly technology, and it doesn’t require a server, plugins, or internet access. Compare operational modes.
PSPDFKit for Web can be evaluated without a trial license key, but with certain limitations (such as a red watermark added to documents). To evaluate without limitations, get a trial key.
PSPDFKit for Web library files are distributed as an archive that can be extracted manually.
Download the framework here. The download will start immediately and will save a .tar.gz archive like PSPDFKit-Web-binary-2024.3.0.tar.gz to your computer.
Once the download is complete, extract the archive and copy the entire folder and contents of its dist folder to your project’s wwwroot folder.
Make sure your wwwroot folder contains the pspdfkit.js file and a pspdfkit-lib directory with the library assets.
Displaying a PDF
Rename the PDF document you want to display in your application to document.pdf, and then add the PDF document to the wwwroot directory. You can use this demo document as an example.
To clean out the UI, go to the Shared/MainLayout.razor component and keep only the @Body property:
@inherits LayoutComponentBase
@Body
Go to the Home route located under the Pages/Index.razor file, and replace the contents of the file with the following:
Load the PSPDFKit SDK to Pages/_Host.cshtml before the </body> tag:
@* Include pspdfkit.js in your `Pages/_Host.cshtml` file *@
    <script src="pspdfkit.js"></script>

   @* Initialize PSPDFKit for Web in Blazor Server by calling `PSPDFKit.load():` *@
    <script>
        function loadPDF(container, document) {
            PSPDFKit.load({
                container: container,
                document: document
            })
        }
    </script>
Serving Your Website
Make sure to add the MIME type mappings to allow conversion of Office files.
When the Web SDK is combined with Document Engine, it uses the Server-Backed operational mode, where rendering is handled by the server and documents are streamed down to the web viewer. It’s delivered as a Docker container, and it offers the fastest performance, along with more advanced capabilities. Compare operational modes.
PSPDFKit for Web can be evaluated without a trial license key, but with certain limitations (such as a red watermark added to documents). To evaluate without limitations, get a trial key.
PSPDFKit for Web library files are distributed as an archive that can be extracted manually.
Download the framework here. The download will start immediately and will save a .tar.gz archive like PSPDFKit-Web-binary-2024.3.0.tar.gz to your computer.
Once the download is complete, extract the archive and copy the entire folder and contents of its dist folder to your project’s wwwroot folder.
Make sure your wwwroot folder contains the pspdfkit.js file and a pspdfkit-lib directory with the library assets.
Displaying a PDF
Rename the PDF document you want to display in your application to document.pdf, and then add the PDF document to the wwwroot directory. You can use this demo document as an example.
To clean out the UI, go to the Shared/MainLayout.razor component and keep only the @Body property:
@inherits LayoutComponentBase
@Body
Go to the Home route located under the Pages/Index.razor file, and replace the contents of the file with the following:
Load the PSPDFKit SDK to Pages/_Host.cshtml before the </body> tag:
@* Include pspdfkit.js in your `Pages/_Host.cshtml` file *@
    <script src="pspdfkit.js"></script>

   @* Initialize PSPDFKit for Web in Blazor Server by calling `PSPDFKit.load():` *@
    <script>
        function loadPDF(container, document) {
            PSPDFKit.load({
                container: container,
                document: document
            })
        }
    </script>
Serving Your Website
Make sure to add the MIME type mappings to allow conversion of Office files.
Start the app in the root directory of your project:
dotnet watch run
Setting Up Document Engine
To set up Document Engine so that it’ll be the backend for PSPDFKit for Web, follow the instructions in the Getting Started with Document Engine guide.
Once Document Engine has been set up, you’ll need to update your code to open a document from Document Engine. This is accomplished by replacing properties included in the configuration object passed to PSPDFKit.load(). Refer to the code snippets located earlier in this guide to find where PSPDFKit.load() will need to be updated.
The document property in PSPDFKit.load() will be replaced with the documentId provided by Document Engine, while the authPayload and the serverUrl properties will be added. If you’d like to enable Instant synchronization, set the instant property to true. See the following example:
This guide will walk you through the steps necessary to integrate PSPDFKit for Web into your project. By the end, you’ll be able to present a PDF document in the PSPDFKit UI.
Select the preferred products
The Web SDK uses the Standalone operational mode, where our JavaScript library renders and edits documents directly in the browser. It’s powered by WebAssembly technology, and it doesn’t require a server, plugins, or internet access. Compare operational modes.
PSPDFKit for Web can be evaluated without a trial license key, but with certain limitations (such as a red watermark added to documents). To evaluate without limitations, get a trial key.
PSPDFKit does not collect any data during your evaluation of the SDK.
Requirements
Visual Studio 2019 or above
Creating a New Project
Open Visual Studio and select File > New Project… to create a new project for your application.
Choose the Blazor WebAssembly App project template.
Choose .NET 7.0 for the target framework.
When prompted, choose your app name (PSPDFKit_BlazorWASM) and use the default options.
Finish the project creation by confirming the next dialog steps.
Adding PSPDFKit
PSPDFKit for Web library files are distributed as an archive that can be extracted manually.
Download the framework here. The download will start immediately and will save a .tar.gz archive like PSPDFKit-Web-binary-2024.3.0.tar.gz to your computer.
Once the download is complete, extract the archive and copy the entire folder and contents of its dist folder to your project’s wwwroot folder.
Make sure your wwwroot folder contains the pspdfkit.js file and a pspdfkit-lib directory with the library assets.
Displaying a PDF
Rename the PDF document you want to display in your application to document.pdf, and then add the PDF document to the wwwroot directory. You can use this demo document as an example.
To clean out the UI, go to the Shared/MainLayout.razor component and keep only the @Body property:
@inherits LayoutComponentBase
@Body
Go to the Home route located under the Pages/Index.razor file, and replace the contents of the file with the following:
Load the PSPDFKit SDK loading code to wwwroot/index.html before the </body> tag:
<!-- Include pspdfkit.js in your wwwroot/index.html file -->
	<script src="dist/pspdfkit.js"></script>
    <!-- Initialize PSPDFKit for Web in Blazor WASM by calling `PSPDFKit.load():` -->
    <script>
      function loadPDF(container, document) {
        PSPDFKit.load({
          container,
          document,
        });
      }
    </script>
Serving Your Website
Select Run > Start Debugging. This will start your app and open it in your default browser.
When the Web SDK is combined with Document Engine, it uses the Server-Backed operational mode, where rendering is handled by the server and documents are streamed down to the web viewer. It’s delivered as a Docker container, and it offers the fastest performance, along with more advanced capabilities. Compare operational modes.
PSPDFKit for Web can be evaluated without a trial license key, but with certain limitations (such as a red watermark added to documents). To evaluate without limitations, get a trial key.
PSPDFKit does not collect any data during your evaluation of the SDK.
Requirements
Visual Studio 2019 or above
Creating a New Project
Open Visual Studio and select File > New Project… to create a new project for your application.
Choose the Blazor WebAssembly App project template.
Choose .NET 7.0 for the target framework.
When prompted, choose your app name (PSPDFKit_BlazorWASM) and use the default options.
Finish the project creation by confirming the next dialog steps.
Adding PSPDFKit
PSPDFKit for Web library files are distributed as an archive that can be extracted manually.
Download the framework here. The download will start immediately and will save a .tar.gz archive like PSPDFKit-Web-binary-2024.3.0.tar.gz to your computer.
Once the download is complete, extract the archive and copy the entire folder and contents of its dist folder to your project’s wwwroot folder.
Make sure your wwwroot folder contains the pspdfkit.js file and a pspdfkit-lib directory with the library assets.
Displaying a PDF
Rename the PDF document you want to display in your application to document.pdf, and then add the PDF document to the wwwroot directory. You can use this demo document as an example.
To clean out the UI, go to the Shared/MainLayout.razor component and keep only the @Body property:
@inherits LayoutComponentBase
@Body
Go to the Home route located under the Pages/Index.razor file, and replace the contents of the file with the following:
Load the PSPDFKit SDK loading code to wwwroot/index.html before the </body> tag:
<!-- Include pspdfkit.js in your wwwroot/index.html file -->
	<script src="dist/pspdfkit.js"></script>
    <!-- Initialize PSPDFKit for Web in Blazor WASM by calling `PSPDFKit.load():` -->
    <script>
      function loadPDF(container, document) {
        PSPDFKit.load({
          container,
          document,
        });
      }
    </script>
Serving Your Website
Select Run > Start Debugging. This will start your app and open it in your default browser.
Setting Up Document Engine
To set up Document Engine so that it’ll be the backend for PSPDFKit for Web, follow the instructions in the Getting Started with Document Engine guide.
Once Document Engine has been set up, you’ll need to update your code to open a document from Document Engine. This is accomplished by replacing properties included in the configuration object passed to PSPDFKit.load(). Refer to the code snippets located earlier in this guide to find where PSPDFKit.load() will need to be updated.
The document property in PSPDFKit.load() will be replaced with the documentId provided by Document Engine, while the authPayload and the serverUrl properties will be added. If you’d like to enable Instant synchronization, set the instant property to true. See the following example:
This guide will walk you through the steps necessary to integrate PSPDFKit for Web into your project. By the end, you’ll be able to present a PDF document in the PSPDFKit UI.
Select the preferred products
The Web SDK uses the Standalone operational mode, where our JavaScript library renders and edits documents directly in the browser. It’s powered by WebAssembly technology, and it doesn’t require a server, plugins, or internet access. Compare operational modes.
PSPDFKit for Web can be evaluated without a trial license key, but with certain limitations (such as a red watermark added to documents). To evaluate without limitations, get a trial key.
PSPDFKit for Web library files are distributed as an archive that can be extracted manually.
Download the framework here. The download will start immediately and will save a .tar.gz archive like PSPDFKit-Web-binary-2024.3.0.tar.gz to your computer.
Once the download is complete, extract the archive and copy the entire folder and contents of its dist folder to your project’s wwwroot folder.
Make sure your wwwroot folder contains the pspdfkit.js file and a pspdfkit-lib directory with the library assets.
Displaying a PDF
Rename the PDF document you want to display in your application to document.pdf, and then add the PDF document to the wwwroot directory. You can use this demo document as an example.
To clean out the UI, go to the Shared/MainLayout.razor component and keep only the @Body property:
@inherits LayoutComponentBase
@Body
Go to the Home route located under the Pages/Index.razor file, and replace the contents of the file with the following:
Load the PSPDFKit SDK loading code to wwwroot/index.html before the </body> tag:
<script src="pspdfkit.js"></script>
    <!-- Initialize PSPDFKit for Web in Blazor WASM by calling `PSPDFKit.load():` -->
    <script>
      function loadPDF(container, document) {
        PSPDFKit.load({
          container,
          document,
        });
      }
    </script>
Serving Your Website
Start the app in the root directory of your project:
When the Web SDK is combined with Document Engine, it uses the Server-Backed operational mode, where rendering is handled by the server and documents are streamed down to the web viewer. It’s delivered as a Docker container, and it offers the fastest performance, along with more advanced capabilities. Compare operational modes.
PSPDFKit for Web can be evaluated without a trial license key, but with certain limitations (such as a red watermark added to documents). To evaluate without limitations, get a trial key.
PSPDFKit for Web library files are distributed as an archive that can be extracted manually.
Download the framework here. The download will start immediately and will save a .tar.gz archive like PSPDFKit-Web-binary-2024.3.0.tar.gz to your computer.
Once the download is complete, extract the archive and copy the entire folder and contents of its dist folder to your project’s wwwroot folder.
Make sure your wwwroot folder contains the pspdfkit.js file and a pspdfkit-lib directory with the library assets.
Displaying a PDF
Rename the PDF document you want to display in your application to document.pdf, and then add the PDF document to the wwwroot directory. You can use this demo document as an example.
To clean out the UI, go to the Shared/MainLayout.razor component and keep only the @Body property:
@inherits LayoutComponentBase
@Body
Go to the Home route located under the Pages/Index.razor file, and replace the contents of the file with the following:
Load the PSPDFKit SDK loading code to wwwroot/index.html before the </body> tag:
<script src="pspdfkit.js"></script>
    <!-- Initialize PSPDFKit for Web in Blazor WASM by calling `PSPDFKit.load():` -->
    <script>
      function loadPDF(container, document) {
        PSPDFKit.load({
          container,
          document,
        });
      }
    </script>
Serving Your Website
Start the app in the root directory of your project:
dotnet watch run
Setting Up Document Engine
To set up Document Engine so that it’ll be the backend for PSPDFKit for Web, follow the instructions in the Getting Started with Document Engine guide.
Once Document Engine has been set up, you’ll need to update your code to open a document from Document Engine. This is accomplished by replacing properties included in the configuration object passed to PSPDFKit.load(). Refer to the code snippets located earlier in this guide to find where PSPDFKit.load() will need to be updated.
The document property in PSPDFKit.load() will be replaced with the documentId provided by Document Engine, while the authPayload and the serverUrl properties will be added. If you’d like to enable Instant synchronization, set the instant property to true. See the following example:
This guide will walk you through the steps necessary to integrate PSPDFKit for Web into your project. By the end, you’ll be able to present a PDF document in the PSPDFKit UI.
Select the preferred products
The Web SDK uses the Standalone operational mode, where our JavaScript library renders and edits documents directly in the browser. It’s powered by WebAssembly technology, and it doesn’t require a server, plugins, or internet access. Compare operational modes.
PSPDFKit for Web can be evaluated without a trial license key, but with certain limitations (such as a red watermark added to documents). To evaluate without limitations, get a trial key.
A package manager compatible with npm. This guide contains usage examples for Yarn and the npm client. The npm client is installed with Node.js by default.
You need Node.js to complete this guide, but in general, Node.js isn’t a requirement for using PSPDFKit for Web.
Adding to Your Project
PSPDFKit for Web library files are distributed as an archive that can be installed as an npm module.
Add the PSPDFKit dependency:
yarn add pspdfkit
npm install pspdfkit
Copy the PSPDFKit for Web distribution to the assets directory in your project’s folder:
cp -R ./node_modules/pspdfkit/dist/ ./assets/
Make sure your assets directory contains the pspdfkit.js file and a pspdfkit-lib directory with the library assets.
Make sure your server has the Content-Type: application/wasm MIME typeset. Read more about this in the troubleshooting section.
Integrating into Your Project
Rename the PDF document you want to display in your application to document.pdf, and then add the PDF document to your project’s root directory. You can use this demo document as an example.
In the index.html file in the root folder of your application, add an empty <div> element with a defined width and height to where PSPDFKit will be mounted:
When the Web SDK is combined with Document Engine, it uses the Server-Backed operational mode, where rendering is handled by the server and documents are streamed down to the web viewer. It’s delivered as a Docker container, and it offers the fastest performance, along with more advanced capabilities. Compare operational modes.
PSPDFKit for Web can be evaluated without a trial license key, but with certain limitations (such as a red watermark added to documents). To evaluate without limitations, get a trial key.
A package manager compatible with npm. This guide contains usage examples for Yarn and the npm client. The npm client is installed with Node.js by default.
You need Node.js to complete this guide, but in general, Node.js isn’t a requirement for using PSPDFKit for Web.
Adding to Your Project
PSPDFKit for Web library files are distributed as an archive that can be installed as an npm module.
Add the PSPDFKit dependency:
yarn add pspdfkit
npm install pspdfkit
Copy the PSPDFKit for Web distribution to the assets directory in your project’s folder:
cp -R ./node_modules/pspdfkit/dist/ ./assets/
Make sure your assets directory contains the pspdfkit.js file and a pspdfkit-lib directory with the library assets.
Make sure your server has the Content-Type: application/wasm MIME typeset. Read more about this in the troubleshooting section.
Integrating into Your Project
Rename the PDF document you want to display in your application to document.pdf, and then add the PDF document to your project’s root directory. You can use this demo document as an example.
In the index.html file in the root folder of your application, add an empty <div> element with a defined width and height to where PSPDFKit will be mounted:
To set up Document Engine so that it’ll be the backend for PSPDFKit for Web, follow the instructions in the Getting Started with Document Engine guide.
Once Document Engine has been set up, you’ll need to update your code to open a document from Document Engine. This is accomplished by replacing properties included in the configuration object passed to PSPDFKit.load(). Refer to the code snippets located earlier in this guide to find where PSPDFKit.load() will need to be updated.
The document property in PSPDFKit.load() will be replaced with the documentId provided by Document Engine, while the authPayload and the serverUrl properties will be added. If you’d like to enable Instant synchronization, set the instant property to true. See the following example:
This guide will walk you through the steps necessary to integrate PSPDFKit for Web into your project. By the end, you’ll be able to present a PDF document in the PSPDFKit UI.
Select the preferred products
The Web SDK uses the Standalone operational mode, where our JavaScript library renders and edits documents directly in the browser. It’s powered by WebAssembly technology, and it doesn’t require a server, plugins, or internet access. Compare operational modes.
PSPDFKit for Web can be evaluated without a trial license key, but with certain limitations (such as a red watermark added to documents). To evaluate without limitations, get a trial key.
A package manager compatible with npm. This guide contains usage examples for Yarn and the npm client. The npm client is installed with Node.js by default.
You need Node.js to complete this guide, but in general, Node.js isn’t a requirement for using PSPDFKit for Web.
Adding to Your Project
PSPDFKit for Web library files are distributed as an archive that can be installed as an npm module.
Add the PSPDFKit dependency:
yarn add pspdfkit
npm install pspdfkit
Copy the PSPDFKit for Web distribution to the assets directory in your project’s folder:
cp -R ./node_modules/pspdfkit/dist/ ./assets/
Make sure your assets directory contains the pspdfkit.js file and a pspdfkit-lib directory with the library assets.
Make sure your server has the Content-Type: application/wasm MIME typeset. Read more about this in the troubleshooting section.
Integrating into Your Project
Rename the PDF document you want to display in your application to document.pdf, and then add the PDF document to your project’s root directory. You can use this demo document as an example.
In the index.html file in the root folder of your application, add an empty <div> element with a defined width and height to where PSPDFKit will be mounted:
Import pspdfkit into your application, and initialize PSPDFKit for Web in jQuery by calling PSPDFKit.load():
import './assets/pspdfkit.js';
// We need to inform PSPDFKit where to look for its library assets, i.e. the location of the `pspdfkit-lib` directory.const baseUrl = `${window.location.protocol}//${window.location.host}/assets/`;
PSPDFKit.load({
baseUrl,
container: '#pspdfkit',
document: 'Document.pdf',
})
.then((instance) => {
console.log('PSPDFKit loaded', instance);
})
.catch((error) => {
console.error(error.message);
});
Import index.js into your HTML page:
<script type="module" src="index.js"></script>
Here’s the full index.html file:
<!DOCTYPE html>
<html>
<head>
<meta charset="UTF-8" />
<meta http-equiv="X-UA-Compatible" content="IE=edge" />
<!-- Provide proper viewport information so that the layout works on mobile devices. -->
<meta
name="viewport"
content="width=device-width, initial-scale=1.0, minimum-scale=1.0, maximum-scale=1.0, user-scalable=no"
/>
<title>My App</title>
</head>
<body>
<!-- Element where PSPDFKit will be mounted. -->
<div id="pspdfkit" style="width: 100%; height: 100vh"></div>
<script src="https://ajax.googleapis.com/ajax/libs/jquery/3.5.1/jquery.min.js"></script>
<script type="module" src="index.js"></script>
</body>
</html>
Serving Your Website
You’ll use the npm serve package as a simple HTTP server.
When the Web SDK is combined with Document Engine, it uses the Server-Backed operational mode, where rendering is handled by the server and documents are streamed down to the web viewer. It’s delivered as a Docker container, and it offers the fastest performance, along with more advanced capabilities. Compare operational modes.
PSPDFKit for Web can be evaluated without a trial license key, but with certain limitations (such as a red watermark added to documents). To evaluate without limitations, get a trial key.
A package manager compatible with npm. This guide contains usage examples for Yarn and the npm client. The npm client is installed with Node.js by default.
You need Node.js to complete this guide, but in general, Node.js isn’t a requirement for using PSPDFKit for Web.
Adding to Your Project
PSPDFKit for Web library files are distributed as an archive that can be installed as an npm module.
Add the PSPDFKit dependency:
yarn add pspdfkit
npm install pspdfkit
Copy the PSPDFKit for Web distribution to the assets directory in your project’s folder:
cp -R ./node_modules/pspdfkit/dist/ ./assets/
Make sure your assets directory contains the pspdfkit.js file and a pspdfkit-lib directory with the library assets.
Make sure your server has the Content-Type: application/wasm MIME typeset. Read more about this in the troubleshooting section.
Integrating into Your Project
Rename the PDF document you want to display in your application to document.pdf, and then add the PDF document to your project’s root directory. You can use this demo document as an example.
In the index.html file in the root folder of your application, add an empty <div> element with a defined width and height to where PSPDFKit will be mounted:
Import pspdfkit into your application, and initialize PSPDFKit for Web in jQuery by calling PSPDFKit.load():
import './assets/pspdfkit.js';
// We need to inform PSPDFKit where to look for its library assets, i.e. the location of the `pspdfkit-lib` directory.const baseUrl = `${window.location.protocol}//${window.location.host}/assets/`;
PSPDFKit.load({
baseUrl,
container: '#pspdfkit',
document: 'Document.pdf',
})
.then((instance) => {
console.log('PSPDFKit loaded', instance);
})
.catch((error) => {
console.error(error.message);
});
Import index.js into your HTML page:
<script type="module" src="index.js"></script>
Here’s the full index.html file:
<!DOCTYPE html>
<html>
<head>
<meta charset="UTF-8" />
<meta http-equiv="X-UA-Compatible" content="IE=edge" />
<!-- Provide proper viewport information so that the layout works on mobile devices. -->
<meta
name="viewport"
content="width=device-width, initial-scale=1.0, minimum-scale=1.0, maximum-scale=1.0, user-scalable=no"
/>
<title>My App</title>
</head>
<body>
<!-- Element where PSPDFKit will be mounted. -->
<div id="pspdfkit" style="width: 100%; height: 100vh"></div>
<script src="https://ajax.googleapis.com/ajax/libs/jquery/3.5.1/jquery.min.js"></script>
<script type="module" src="index.js"></script>
</body>
</html>
Serving Your Website
You’ll use the npm serve package as a simple HTTP server.
To set up Document Engine so that it’ll be the backend for PSPDFKit for Web, follow the instructions in the Getting Started with Document Engine guide.
Once Document Engine has been set up, you’ll need to update your code to open a document from Document Engine. This is accomplished by replacing properties included in the configuration object passed to PSPDFKit.load(). Refer to the code snippets located earlier in this guide to find where PSPDFKit.load() will need to be updated.
The document property in PSPDFKit.load() will be replaced with the documentId provided by Document Engine, while the authPayload and the serverUrl properties will be added. If you’d like to enable Instant synchronization, set the instant property to true. See the following example:
This guide will walk you through the steps necessary to integrate PSPDFKit for Web into your project. By the end, you’ll be able to present a PDF document in the PSPDFKit UI.
Select the preferred products
The Web SDK uses the Standalone operational mode, where our JavaScript library renders and edits documents directly in the browser. It’s powered by WebAssembly technology, and it doesn’t require a server, plugins, or internet access. Compare operational modes.
PSPDFKit for Web can be evaluated without a trial license key, but with certain limitations (such as a red watermark added to documents). To evaluate without limitations, get a trial key.
You need Node.js to complete this guide, but in general, Node.js isn’t a requirement for using PSPDFKit for Web.
Adding to Your Project
PSPDFKit for Web library files are distributed as an archive that can be extracted manually.
Download the framework here. The download will start immediately and will save a .tar.gz archive like PSPDFKit-Web-binary-2024.3.0.tar.gz to your computer.
Once the download is complete, extract the archive and copy the entire contents of its dist folder to your project’s assets folder.
Make sure your assets folder contains the pspdfkit.js file and a pspdfkit-lib directory with the library assets.
Make sure your server has the Content-Type: application/wasm MIME typeset. Read more about this in the troubleshooting section.
Integrating into Your Project
Rename the PDF document you want to display in your application to document.pdf, and then add the PDF document to your project’s root directory. You can use this demo document as an example.
In the index.html file in the root folder of your application, add an empty <div> element with a defined width and height to where PSPDFKit will be mounted:
When the Web SDK is combined with Document Engine, it uses the Server-Backed operational mode, where rendering is handled by the server and documents are streamed down to the web viewer. It’s delivered as a Docker container, and it offers the fastest performance, along with more advanced capabilities. Compare operational modes.
PSPDFKit for Web can be evaluated without a trial license key, but with certain limitations (such as a red watermark added to documents). To evaluate without limitations, get a trial key.
You need Node.js to complete this guide, but in general, Node.js isn’t a requirement for using PSPDFKit for Web.
Adding to Your Project
PSPDFKit for Web library files are distributed as an archive that can be extracted manually.
Download the framework here. The download will start immediately and will save a .tar.gz archive like PSPDFKit-Web-binary-2024.3.0.tar.gz to your computer.
Once the download is complete, extract the archive and copy the entire contents of its dist folder to your project’s assets folder.
Make sure your assets folder contains the pspdfkit.js file and a pspdfkit-lib directory with the library assets.
Make sure your server has the Content-Type: application/wasm MIME typeset. Read more about this in the troubleshooting section.
Integrating into Your Project
Rename the PDF document you want to display in your application to document.pdf, and then add the PDF document to your project’s root directory. You can use this demo document as an example.
In the index.html file in the root folder of your application, add an empty <div> element with a defined width and height to where PSPDFKit will be mounted:
To set up Document Engine so that it’ll be the backend for PSPDFKit for Web, follow the instructions in the Getting Started with Document Engine guide.
Once Document Engine has been set up, you’ll need to update your code to open a document from Document Engine. This is accomplished by replacing properties included in the configuration object passed to PSPDFKit.load(). Refer to the code snippets located earlier in this guide to find where PSPDFKit.load() will need to be updated.
The document property in PSPDFKit.load() will be replaced with the documentId provided by Document Engine, while the authPayload and the serverUrl properties will be added. If you’d like to enable Instant synchronization, set the instant property to true. See the following example:
This guide will walk you through the steps necessary to integrate PSPDFKit for Web into your project. By the end, you’ll be able to present a PDF document in the PSPDFKit UI.
Select the preferred products
The Web SDK uses the Standalone operational mode, where our JavaScript library renders and edits documents directly in the browser. It’s powered by WebAssembly technology, and it doesn’t require a server, plugins, or internet access. Compare operational modes.
PSPDFKit for Web can be evaluated without a trial license key, but with certain limitations (such as a red watermark added to documents). To evaluate without limitations, get a trial key.
You need Node.js to complete this guide, but in general, Node.js isn’t a requirement for using PSPDFKit for Web.
Adding to Your Project
PSPDFKit for Web library files are distributed as an archive that can be extracted manually.
Download the framework here. The download will start immediately and will save a .tar.gz archive like PSPDFKit-Web-binary-2024.3.0.tar.gz to your computer.
Once the download is complete, extract the archive and copy the entire contents of its dist folder to your project’s assets folder.
Make sure your assets folder contains the pspdfkit.js file and a pspdfkit-lib directory with the library assets.
Make sure your server has the Content-Type: application/wasm MIME typeset. Read more about this in the troubleshooting section.
Integrating into Your Project
Rename the PDF document you want to display in your application to document.pdf, and then add the PDF document to your project’s root directory. You can use this demo document as an example.
In the index.html file in the root folder of your application, add an empty <div> element with a defined width and height to where PSPDFKit will be mounted:
Import pspdfkit into your application, and initialize PSPDFKit for Web in jQuery by calling PSPDFKit.load():
import './assets/pspdfkit.js';
// We need to inform PSPDFKit where to look for its library assets, i.e. the location of the `pspdfkit-lib` directory.const baseUrl = `${window.location.protocol}//${window.location.host}/assets/`;
PSPDFKit.load({
baseUrl,
container: '#pspdfkit',
document: 'Document.pdf',
})
.then((instance) => {
console.log('PSPDFKit loaded', instance);
})
.catch((error) => {
console.error(error.message);
});
Import index.js into your HTML page:
<script type="module" src="index.js"></script>
Here’s the full index.html file:
<!DOCTYPE html>
<html>
<head>
<meta charset="UTF-8" />
<meta http-equiv="X-UA-Compatible" content="IE=edge" />
<!-- Provide proper viewport information so that the layout works on mobile devices. -->
<meta
name="viewport"
content="width=device-width, initial-scale=1.0, minimum-scale=1.0, maximum-scale=1.0, user-scalable=no"
/>
<title>My App</title>
</head>
<body>
<!-- Element where PSPDFKit will be mounted. -->
<div id="pspdfkit" style="width: 100%; height: 100vh"></div>
<script src="https://ajax.googleapis.com/ajax/libs/jquery/3.5.1/jquery.min.js"></script>
<script type="module" src="index.js"></script>
</body>
</html>
Serving Your Website
You’ll use the npm serve package as a simple HTTP server.
When the Web SDK is combined with Document Engine, it uses the Server-Backed operational mode, where rendering is handled by the server and documents are streamed down to the web viewer. It’s delivered as a Docker container, and it offers the fastest performance, along with more advanced capabilities. Compare operational modes.
PSPDFKit for Web can be evaluated without a trial license key, but with certain limitations (such as a red watermark added to documents). To evaluate without limitations, get a trial key.
You need Node.js to complete this guide, but in general, Node.js isn’t a requirement for using PSPDFKit for Web.
Adding to Your Project
PSPDFKit for Web library files are distributed as an archive that can be extracted manually.
Download the framework here. The download will start immediately and will save a .tar.gz archive like PSPDFKit-Web-binary-2024.3.0.tar.gz to your computer.
Once the download is complete, extract the archive and copy the entire contents of its dist folder to your project’s assets folder.
Make sure your assets folder contains the pspdfkit.js file and a pspdfkit-lib directory with the library assets.
Make sure your server has the Content-Type: application/wasm MIME typeset. Read more about this in the troubleshooting section.
Integrating into Your Project
Rename the PDF document you want to display in your application to document.pdf, and then add the PDF document to your project’s root directory. You can use this demo document as an example.
In the index.html file in the root folder of your application, add an empty <div> element with a defined width and height to where PSPDFKit will be mounted:
Import pspdfkit into your application, and initialize PSPDFKit for Web in jQuery by calling PSPDFKit.load():
import './assets/pspdfkit.js';
// We need to inform PSPDFKit where to look for its library assets, i.e. the location of the `pspdfkit-lib` directory.const baseUrl = `${window.location.protocol}//${window.location.host}/assets/`;
PSPDFKit.load({
baseUrl,
container: '#pspdfkit',
document: 'Document.pdf',
})
.then((instance) => {
console.log('PSPDFKit loaded', instance);
})
.catch((error) => {
console.error(error.message);
});
Import index.js into your HTML page:
<script type="module" src="index.js"></script>
Here’s the full index.html file:
<!DOCTYPE html>
<html>
<head>
<meta charset="UTF-8" />
<meta http-equiv="X-UA-Compatible" content="IE=edge" />
<!-- Provide proper viewport information so that the layout works on mobile devices. -->
<meta
name="viewport"
content="width=device-width, initial-scale=1.0, minimum-scale=1.0, maximum-scale=1.0, user-scalable=no"
/>
<title>My App</title>
</head>
<body>
<!-- Element where PSPDFKit will be mounted. -->
<div id="pspdfkit" style="width: 100%; height: 100vh"></div>
<script src="https://ajax.googleapis.com/ajax/libs/jquery/3.5.1/jquery.min.js"></script>
<script type="module" src="index.js"></script>
</body>
</html>
Serving Your Website
You’ll use the npm serve package as a simple HTTP server.
To set up Document Engine so that it’ll be the backend for PSPDFKit for Web, follow the instructions in the Getting Started with Document Engine guide.
Once Document Engine has been set up, you’ll need to update your code to open a document from Document Engine. This is accomplished by replacing properties included in the configuration object passed to PSPDFKit.load(). Refer to the code snippets located earlier in this guide to find where PSPDFKit.load() will need to be updated.
The document property in PSPDFKit.load() will be replaced with the documentId provided by Document Engine, while the authPayload and the serverUrl properties will be added. If you’d like to enable Instant synchronization, set the instant property to true. See the following example:
This guide will walk you through the steps necessary to integrate PSPDFKit for Web into your project. By the end, you’ll be able to present a PDF document in the PSPDFKit UI.
Select the preferred products
The Web SDK uses the Standalone operational mode, where our JavaScript library renders and edits documents directly in the browser. It’s powered by WebAssembly technology, and it doesn’t require a server, plugins, or internet access. Compare operational modes.
PSPDFKit for Web can be evaluated without a trial license key, but with certain limitations (such as a red watermark added to documents). To evaluate without limitations, get a trial key.
PSPDFKit for Web library files are distributed as an archive that can be extracted manually.
Download the framework here. The download will start immediately and will save a .tar.gz archive like PSPDFKit-Web-binary-2024.3.0.tar.gz to your computer.
Once the download is complete, extract the archive and copy the entire contents of its dist folder to your project’s assets folder.
Make sure your assets folder contains the pspdfkit.js file and a pspdfkit-lib directory with the library assets.
Make sure your server has the Content-Type: application/wasm MIME typeset. Read more about this in the troubleshooting section.
Integrating into Your Project
Rename the PDF document you want to display in your application to document.pdf, and then add the PDF document to your project’s root directory. You can use this demo document as an example.
Add an empty <div> element with a defined width and height to where PSPDFKit will be mounted:
When the Web SDK is combined with Document Engine, it uses the Server-Backed operational mode, where rendering is handled by the server and documents are streamed down to the web viewer. It’s delivered as a Docker container, and it offers the fastest performance, along with more advanced capabilities. Compare operational modes.
PSPDFKit for Web can be evaluated without a trial license key, but with certain limitations (such as a red watermark added to documents). To evaluate without limitations, get a trial key.
PSPDFKit for Web library files are distributed as an archive that can be extracted manually.
Download the framework here. The download will start immediately and will save a .tar.gz archive like PSPDFKit-Web-binary-2024.3.0.tar.gz to your computer.
Once the download is complete, extract the archive and copy the entire contents of its dist folder to your project’s assets folder.
Make sure your assets folder contains the pspdfkit.js file and a pspdfkit-lib directory with the library assets.
Make sure your server has the Content-Type: application/wasm MIME typeset. Read more about this in the troubleshooting section.
Integrating into Your Project
Rename the PDF document you want to display in your application to document.pdf, and then add the PDF document to your project’s root directory. You can use this demo document as an example.
Add an empty <div> element with a defined width and height to where PSPDFKit will be mounted:
Go to your terminal and run a server with this command:
php -S 127.0.0.1:8000
Navigate to http://127.0.0.1:8000 to view the website.
Setting Up Document Engine
To set up Document Engine so that it’ll be the backend for PSPDFKit for Web, follow the instructions in the Getting Started with Document Engine guide.
Once Document Engine has been set up, you’ll need to update your code to open a document from Document Engine. This is accomplished by replacing properties included in the configuration object passed to PSPDFKit.load(). Refer to the code snippets located earlier in this guide to find where PSPDFKit.load() will need to be updated.
The document property in PSPDFKit.load() will be replaced with the documentId provided by Document Engine, while the authPayload and the serverUrl properties will be added. If you’d like to enable Instant synchronization, set the instant property to true. See the following example:
This guide will walk you through the steps necessary to integrate PSPDFKit for Web into your project. By the end, you’ll be able to present a PDF document in the PSPDFKit UI.
Select the preferred products
The Web SDK uses the Standalone operational mode, where our JavaScript library renders and edits documents directly in the browser. It’s powered by WebAssembly technology, and it doesn’t require a server, plugins, or internet access. Compare operational modes.
PSPDFKit for Web can be evaluated without a trial license key, but with certain limitations (such as a red watermark added to documents). To evaluate without limitations, get a trial key.
PSPDFKit does not collect any data during your evaluation of the SDK.
Adding to Your Project
PSPDFKit for Web library files are distributed as an archive that can be extracted manually.
Download the framework here. The download will start immediately and will save a .tar.gz archive like PSPDFKit-Web-binary-2024.3.0.tar.gz to your computer.
Once the download is complete, extract the archive and copy the entire contents of its dist folder to your project’s assets folder.
Make sure your assets folder contains the pspdfkit.js file and a pspdfkit-lib directory with the library assets.
Make sure your server has the Content-Type: application/wasm MIME typeset. Read more about this in the troubleshooting section.
Integrating into Your Project
Rename the PDF document you want to display in your application to document.pdf, and then add the PDF document to your project’s root directory. You can use this demo document as an example.
Add an empty <div> element with a defined width and height to where PSPDFKit will be mounted:
When the Web SDK is combined with Document Engine, it uses the Server-Backed operational mode, where rendering is handled by the server and documents are streamed down to the web viewer. It’s delivered as a Docker container, and it offers the fastest performance, along with more advanced capabilities. Compare operational modes.
PSPDFKit for Web can be evaluated without a trial license key, but with certain limitations (such as a red watermark added to documents). To evaluate without limitations, get a trial key.
PSPDFKit does not collect any data during your evaluation of the SDK.
Adding to Your Project
PSPDFKit for Web library files are distributed as an archive that can be extracted manually.
Download the framework here. The download will start immediately and will save a .tar.gz archive like PSPDFKit-Web-binary-2024.3.0.tar.gz to your computer.
Once the download is complete, extract the archive and copy the entire contents of its dist folder to your project’s assets folder.
Make sure your assets folder contains the pspdfkit.js file and a pspdfkit-lib directory with the library assets.
Make sure your server has the Content-Type: application/wasm MIME typeset. Read more about this in the troubleshooting section.
Integrating into Your Project
Rename the PDF document you want to display in your application to document.pdf, and then add the PDF document to your project’s root directory. You can use this demo document as an example.
Add an empty <div> element with a defined width and height to where PSPDFKit will be mounted:
Go to your terminal and run a server with this command:
php -S 127.0.0.1:8000
Navigate to http://127.0.0.1:8000 to view the website.
Setting Up Document Engine
To set up Document Engine so that it’ll be the backend for PSPDFKit for Web, follow the instructions in the Getting Started with Document Engine guide.
Once Document Engine has been set up, you’ll need to update your code to open a document from Document Engine. This is accomplished by replacing properties included in the configuration object passed to PSPDFKit.load(). Refer to the code snippets located earlier in this guide to find where PSPDFKit.load() will need to be updated.
The document property in PSPDFKit.load() will be replaced with the documentId provided by Document Engine, while the authPayload and the serverUrl properties will be added. If you’d like to enable Instant synchronization, set the instant property to true. See the following example:
This guide will walk you through the steps necessary to integrate PSPDFKit for Web into your project. By the end, you’ll be able to present a PDF document in the PSPDFKit UI.
Select the preferred products
The Web SDK uses the Standalone operational mode, where our JavaScript library renders and edits documents directly in the browser. It’s powered by WebAssembly technology, and it doesn’t require a server, plugins, or internet access. Compare operational modes.
PSPDFKit for Web can be evaluated without a trial license key, but with certain limitations (such as a red watermark added to documents). To evaluate without limitations, get a trial key.
Make sure your /public/assets/ directory contains the pspdfkit.js file and a pspdfkit-lib directory with the library assets.
Make sure your server has the Content-Type: application/wasm MIME typeset. Read more about this in the troubleshooting section.
Displaying a PDF
Rename the PDF document you want to display in your application to document.pdf, and then add the PDF document to the public directory. You can use this demo document as an example.
Navigate to the resources/views/welcome.blade.php file.
Add an empty <div> element with a defined height to where PSPDFKit will be mounted:
<div id="pspdfkit" style="height: 100vh"></div>
Include pspdfkit.js on the welcome.blade.php page:
<script src="assets/pspdfkit.js"></script>
Initialize PSPDFKit for Web in Laravel by calling PSPDFKit.load():
<script>
PSPDFKit.load({
container: "#pspdfkit",
document: "document.pdf" // Add the path to your document here.
})
.then(function(instance) {
console.log("PSPDFKit loaded", instance);
})
.catch(function(error) {
console.error(error.message);
});
</script>
Here’s the full welcome.blade.php file (which is just a plain HTML file) :
When the Web SDK is combined with Document Engine, it uses the Server-Backed operational mode, where rendering is handled by the server and documents are streamed down to the web viewer. It’s delivered as a Docker container, and it offers the fastest performance, along with more advanced capabilities. Compare operational modes.
PSPDFKit for Web can be evaluated without a trial license key, but with certain limitations (such as a red watermark added to documents). To evaluate without limitations, get a trial key.
Make sure your /public/assets/ directory contains the pspdfkit.js file and a pspdfkit-lib directory with the library assets.
Make sure your server has the Content-Type: application/wasm MIME typeset. Read more about this in the troubleshooting section.
Displaying a PDF
Rename the PDF document you want to display in your application to document.pdf, and then add the PDF document to the public directory. You can use this demo document as an example.
Navigate to the resources/views/welcome.blade.php file.
Add an empty <div> element with a defined height to where PSPDFKit will be mounted:
<div id="pspdfkit" style="height: 100vh"></div>
Include pspdfkit.js on the welcome.blade.php page:
<script src="assets/pspdfkit.js"></script>
Initialize PSPDFKit for Web in Laravel by calling PSPDFKit.load():
<script>
PSPDFKit.load({
container: "#pspdfkit",
document: "document.pdf" // Add the path to your document here.
})
.then(function(instance) {
console.log("PSPDFKit loaded", instance);
})
.catch(function(error) {
console.error(error.message);
});
</script>
Here’s the full welcome.blade.php file (which is just a plain HTML file) :
To set up Document Engine so that it’ll be the backend for PSPDFKit for Web, follow the instructions in the Getting Started with Document Engine guide.
Once Document Engine has been set up, you’ll need to update your code to open a document from Document Engine. This is accomplished by replacing properties included in the configuration object passed to PSPDFKit.load(). Refer to the code snippets located earlier in this guide to find where PSPDFKit.load() will need to be updated.
The document property in PSPDFKit.load() will be replaced with the documentId provided by Document Engine, while the authPayload and the serverUrl properties will be added. If you’d like to enable Instant synchronization, set the instant property to true. See the following example:
This guide will walk you through the steps necessary to integrate PSPDFKit for Web into your project. By the end, you’ll be able to present a PDF document in the PSPDFKit UI.
Select the preferred products
The Web SDK uses the Standalone operational mode, where our JavaScript library renders and edits documents directly in the browser. It’s powered by WebAssembly technology, and it doesn’t require a server, plugins, or internet access. Compare operational modes.
PSPDFKit for Web can be evaluated without a trial license key, but with certain limitations (such as a red watermark added to documents). To evaluate without limitations, get a trial key.
PSPDFKit does not collect any data during your evaluation of the SDK.
Adding to Your Project
PSPDFKit for Web library files are distributed as an archive that can be extracted manually.
Download the framework here. The download will start immediately and will save a .tar.gz archive like PSPDFKit-Web-binary-2024.3.0.tar.gz to your computer.
Once the download is complete, extract the archive to your computer.
Create a new directory under public called assets and copy the entire contents of its dist folder to your project’s public/assets folder.
Make sure your assets folder contains the pspdfkit.js file and a pspdfkit-lib directory with the library assets.
Make sure your server has the Content-Type: application/wasm MIME typeset. Read more about this in the troubleshooting section.
Displaying a PDF
Rename the PDF document you want to display in your application to document.pdf, and then add the PDF document to the public directory. You can use this demo document as an example.
Navigate to the resources/views/welcome.blade.php file.
Add an empty <div> element with a defined height to where PSPDFKit will be mounted:
<div id="pspdfkit" style="height: 100vh"></div>
Include pspdfkit.js on the welcome.blade.php page:
<script src="assets/pspdfkit.js"></script>
Initialize PSPDFKit for Web in Laravel by calling PSPDFKit.load():
<script>
PSPDFKit.load({
container: "#pspdfkit",
document: "document.pdf" // Add the path to your document here.
})
.then(function(instance) {
console.log("PSPDFKit loaded", instance);
})
.catch(function(error) {
console.error(error.message);
});
</script>
Here’s the full welcome.blade.php file (which is just a plain HTML file) :
When the Web SDK is combined with Document Engine, it uses the Server-Backed operational mode, where rendering is handled by the server and documents are streamed down to the web viewer. It’s delivered as a Docker container, and it offers the fastest performance, along with more advanced capabilities. Compare operational modes.
PSPDFKit for Web can be evaluated without a trial license key, but with certain limitations (such as a red watermark added to documents). To evaluate without limitations, get a trial key.
Don’t forget to add composer to your path directory:
export PATH="$HOME/.composer/vendor/bin:$PATH"
Creating the Project
Create a new Laravel project:
laravel new pspdfkit-app
Change to the created project directory:
cd pspdfkit-app
Adding to Your Project
PSPDFKit for Web library files are distributed as an archive that can be extracted manually.
Download the framework here. The download will start immediately and will save a .tar.gz archive like PSPDFKit-Web-binary-2024.3.0.tar.gz to your computer.
Once the download is complete, extract the archive to your computer.
Create a new directory under public called assets and copy the entire contents of its dist folder to your project’s public/assets folder.
Make sure your assets folder contains the pspdfkit.js file and a pspdfkit-lib directory with the library assets.
Make sure your server has the Content-Type: application/wasm MIME typeset. Read more about this in the troubleshooting section.
Displaying a PDF
Rename the PDF document you want to display in your application to document.pdf, and then add the PDF document to the public directory. You can use this demo document as an example.
Navigate to the resources/views/welcome.blade.php file.
Add an empty <div> element with a defined height to where PSPDFKit will be mounted:
<div id="pspdfkit" style="height: 100vh"></div>
Include pspdfkit.js on the welcome.blade.php page:
<script src="assets/pspdfkit.js"></script>
Initialize PSPDFKit for Web in Laravel by calling PSPDFKit.load():
<script>
PSPDFKit.load({
container: "#pspdfkit",
document: "document.pdf" // Add the path to your document here.
})
.then(function(instance) {
console.log("PSPDFKit loaded", instance);
})
.catch(function(error) {
console.error(error.message);
});
</script>
Here’s the full welcome.blade.php file (which is just a plain HTML file) :
To set up Document Engine so that it’ll be the backend for PSPDFKit for Web, follow the instructions in the Getting Started with Document Engine guide.
Once Document Engine has been set up, you’ll need to update your code to open a document from Document Engine. This is accomplished by replacing properties included in the configuration object passed to PSPDFKit.load(). Refer to the code snippets located earlier in this guide to find where PSPDFKit.load() will need to be updated.
The document property in PSPDFKit.load() will be replaced with the documentId provided by Document Engine, while the authPayload and the serverUrl properties will be added. If you’d like to enable Instant synchronization, set the instant property to true. See the following example:
The Web SDK uses the Standalone operational mode, where our JavaScript library renders and edits documents directly in the browser. It’s powered by WebAssembly technology, and it doesn’t require a server, plugins, or internet access. Compare operational modes.
PSPDFKit for Web can be evaluated without a trial license key, but with certain limitations (such as a red watermark added to documents). To evaluate without limitations, get a trial key.
PSPDFKit does not collect any data during your evaluation of the SDK.
Prerequisites
This guide assumes you’ve already configured PSPDFKit for your specific framework. If you haven’t, select your framework from the list above and configure PSPDFKit. Then return to this guide.
Our PWA must be served by a web server over HTTPS, so please make sure your server is configured to serve pages in HTTPS. In development, however, we don’t need HTTPS since browsers treat localhost as a secure origin.
A Note about Progressive Enhancement
By definition, PWAs are progressive, meaning they’re inclusive and they rely heavily on progressive enhancement. When building a PWA, it’s good to always keep this in mind and provide a basic experience for every user of the application.
Richer features should be built on top of an always-working barebones implementation. We highly recommend using feature detection to provide progressive enhancement so that applications won’t break in older browsers that don’t support a specific feature.
Opening a PDF File
To read the PDF, you’ll need a helper to read the selected file from disk using the FileReader API:
function registerFilePicker(element, callback) { ... }
/* ./src/app.js */function registerFilePicker(element, callback) {
function handler(event) {
if (event.target.files.length == 0) {
event.target.value = null;
return;
}
var pdfFile = event.target.files[0];
if (pdfFile.type !== "application/pdf") {
alert("Invalid file type, please load a PDF.");
return;
}
var reader = new FileReader();
reader.addEventListener("load", function(event) {
var pdf = event.target.result;
callback(pdf, pdfFile);
});
reader.addEventListener("error", function(error) {
alert(error.message);
});
reader.readAsArrayBuffer(pdfFile);
event.target.value = null;
}
element.addEventListener("change", handler);
returnfunction() {
element.removeEventListener("change", handler);
};
}
callback is a function that gets the pdf in the ArrayBuffer format so that you can load it directly with PSPDFKit. It also gets the selected File object.
Once you have this helper, you can add the code to initialize PSPDFKit for Web:
./src/app.js
var pspdfkitInstance = null;
var filePicker = document.querySelector('input[type="file"]');
registerFilePicker(filePicker, function(pdf, fileInfo) {
if (pspdfkitInstance) {
PSPDFKit.unload(pspdfkitInstance);
}
PSPDFKit.load({
document: pdf,
container: ".PSPDFKit-container",
// See https://pspdfkit.com/api/web/PSPDFKit.Configuration.html#enableServiceWorkerSupport
enableServiceWorkerSupport: true
}).then(function(instance) {
pspdfkitInstance = instance;
});
});
Our advanced PWA example allows us to load PDF files from a remote server, and it uses IndexedDB to cache them locally for offline use. It also uses the History API to easily load files via URL.
Adding Caching and Offline Capabilities with Service Workers
One of the most important features of PWAs is the ability to load fast and to work on slow network conditions, or even offline. To achieve this, you can use a service worker to cache the application shell and, when available, use the network only to fetch necessary data.
The service worker is a script you register in the application shell. It runs in the background, separate from a webpage. It can intercept and handle network requests, allowing you to cache responses programmatically.
This uses feature detection to determine whether service workers are supported and to register your serviceWorker.js when the feature is available.
You can now start your application and try it out in a web browser. In the Application tab of Chrome Dev Tools, you’ll see that your service worker has been registered and is active!
For local development, it’s a good idea to check the Update on reload option so that the service worker is updated every time the page reloads. You can clear the service worker storage any time from this panel using the Clear storage view.
A Note about the Service Worker API
The Service Worker API is low level, flexible, and powerful. Because of this, it usually requires some boilerplate code to do common tasks like activate the service worker, intercept requests and cache responses, clear the cache, and precache files.
To simplify those tasks, Google developed Workbox, an open source library that abstracts away all the complexity and makes building PWAs easy. Before deploying to production, we recommend using Workbox to manage your service workers.
Workbox can help with doing more than precaching, and it allows you to configure how each resource should be cached and how routes should be handled.
Complex applications will likely need to use the network to fetch data before they can render content in the app shell. In those cases, it’s important to choose the correct caching strategy for your data.
Please refer to the Workbox website to learn more about how to handle advanced use cases.
Final Touches
Now that your app has offline capabilities, you only need to add a web app manifest to make the application recognizable by the web browser and to describe how the app should behave when installed on users’ devices.
The web app manifest is a file whose name is manifest.json. It contains metadata like the name of the app, the paths to icons and their sizes, the start URL, and the theme color. Now you’ll create a basic one for your PWA:
Finally, you need to register the manifest in the app pages — in your case, index.html:
<!-- ./src/index.html -->
<title>PSPDFKit PWA</title>
<script>
if ("serviceWorker" in navigator) {
window.addEventListener('load', function () {
navigator.serviceWorker.register('./serviceWorker.js')
})
}
</script>
+<link rel="manifest" href="./manifest.json">
You can verify the manifest in the Application tab of Chrome Dev Tools:
The web app manifest also makes it possible to display an App Install Banner or an Add to Home Screen dialog. You can follow the guidelines from Google to learn how to create and display one.
Limitations
Disk Quota
Web browsers define quotas either per origin (Chrome and Opera) or per API (e.g. IndexedDB, service workers). When storing files via web APIs, it’s a good idea to keep this in mind and ideally monitor the disk quota status to avoid failures. Apps can check how much quota they’re using with the Quota Management API. We highly recommend you check out this research report on browser storage from HTML5 Rocks.
Precached PSPDFKit Assets
In this guide, you saw how to precache all the PSPDFKit for Web assets, including the JavaScript fallback pspdfkit.asm.js. However, when the target browser supports WebAssembly, it’d be better to exclude this file from the precache manifest and vice versa: When the target browser doesn’t support WebAssembly, you shouldn’t precache the WASM module pspdfkit.wasm. For production applications, we recommend generating separate manifests and service workers and serving them conditionally.
Conclusion
Hopefully the above information demonstrated how easy it is to integrate PSPDFKit for Web and make a simple PWA to display PDF documents. This is possible thanks to Workbox, which provides a simple yet powerful abstraction on top of the Service Worker API.
The PWA built in this guide meets all the requirements of a baseline PWA, however, it’s just a proof of concept that shouldn’t be used in production.
We also built a more comprehensive and advanced example where PDF documents can be fetched from a remote server and are stored locally in IndexedDB for offline use. The advanced example also uses the History API to provide a unique working URL for every PDF document, along with a connectivity status indicator.
When the Web SDK is combined with Document Engine, it uses the Server-Backed operational mode, where rendering is handled by the server and documents are streamed down to the web viewer. It’s delivered as a Docker container, and it offers the fastest performance, along with more advanced capabilities. Compare operational modes.
PSPDFKit for Web can be evaluated without a trial license key, but with certain limitations (such as a red watermark added to documents). To evaluate without limitations, get a trial key.
PSPDFKit does not collect any data during your evaluation of the SDK.
Prerequisites
This guide assumes you’ve already configured PSPDFKit for your specific framework. If you haven’t, select your framework from the list above and configure PSPDFKit. Then return to this guide.
Our PWA must be served by a web server over HTTPS, so please make sure your server is configured to serve pages in HTTPS. In development, however, we don’t need HTTPS since browsers treat localhost as a secure origin.
A Note about Progressive Enhancement
By definition, PWAs are progressive, meaning they’re inclusive and they rely heavily on progressive enhancement. When building a PWA, it’s good to always keep this in mind and provide a basic experience for every user of the application.
Richer features should be built on top of an always-working barebones implementation. We highly recommend using feature detection to provide progressive enhancement so that applications won’t break in older browsers that don’t support a specific feature.
Opening a PDF File
To read the PDF, you’ll need a helper to read the selected file from disk using the FileReader API:
function registerFilePicker(element, callback) { ... }
/* ./src/app.js */function registerFilePicker(element, callback) {
function handler(event) {
if (event.target.files.length == 0) {
event.target.value = null;
return;
}
var pdfFile = event.target.files[0];
if (pdfFile.type !== "application/pdf") {
alert("Invalid file type, please load a PDF.");
return;
}
var reader = new FileReader();
reader.addEventListener("load", function(event) {
var pdf = event.target.result;
callback(pdf, pdfFile);
});
reader.addEventListener("error", function(error) {
alert(error.message);
});
reader.readAsArrayBuffer(pdfFile);
event.target.value = null;
}
element.addEventListener("change", handler);
returnfunction() {
element.removeEventListener("change", handler);
};
}
callback is a function that gets the pdf in the ArrayBuffer format so that you can load it directly with PSPDFKit. It also gets the selected File object.
Once you have this helper, you can add the code to initialize PSPDFKit for Web:
./src/app.js
var pspdfkitInstance = null;
var filePicker = document.querySelector('input[type="file"]');
registerFilePicker(filePicker, function(pdf, fileInfo) {
if (pspdfkitInstance) {
PSPDFKit.unload(pspdfkitInstance);
}
PSPDFKit.load({
document: pdf,
container: ".PSPDFKit-container",
// See https://pspdfkit.com/api/web/PSPDFKit.Configuration.html#enableServiceWorkerSupport
enableServiceWorkerSupport: true
}).then(function(instance) {
pspdfkitInstance = instance;
});
});
Our advanced PWA example allows us to load PDF files from a remote server, and it uses IndexedDB to cache them locally for offline use. It also uses the History API to easily load files via URL.
Adding Caching and Offline Capabilities with Service Workers
One of the most important features of PWAs is the ability to load fast and to work on slow network conditions, or even offline. To achieve this, you can use a service worker to cache the application shell and, when available, use the network only to fetch necessary data.
The service worker is a script you register in the application shell. It runs in the background, separate from a webpage. It can intercept and handle network requests, allowing you to cache responses programmatically.
This uses feature detection to determine whether service workers are supported and to register your serviceWorker.js when the feature is available.
You can now start your application and try it out in a web browser. In the Application tab of Chrome Dev Tools, you’ll see that your service worker has been registered and is active!
For local development, it’s a good idea to check the Update on reload option so that the service worker is updated every time the page reloads. You can clear the service worker storage any time from this panel using the Clear storage view.
A Note about the Service Worker API
The Service Worker API is low level, flexible, and powerful. Because of this, it usually requires some boilerplate code to do common tasks like activate the service worker, intercept requests and cache responses, clear the cache, and precache files.
To simplify those tasks, Google developed Workbox, an open source library that abstracts away all the complexity and makes building PWAs easy. Before deploying to production, we recommend using Workbox to manage your service workers.
Workbox can help with doing more than precaching, and it allows you to configure how each resource should be cached and how routes should be handled.
Complex applications will likely need to use the network to fetch data before they can render content in the app shell. In those cases, it’s important to choose the correct caching strategy for your data.
Please refer to the Workbox website to learn more about how to handle advanced use cases.
Final Touches
Now that your app has offline capabilities, you only need to add a web app manifest to make the application recognizable by the web browser and to describe how the app should behave when installed on users’ devices.
The web app manifest is a file whose name is manifest.json. It contains metadata like the name of the app, the paths to icons and their sizes, the start URL, and the theme color. Now you’ll create a basic one for your PWA:
Finally, you need to register the manifest in the app pages — in your case, index.html:
<!-- ./src/index.html -->
<title>PSPDFKit PWA</title>
<script>
if ("serviceWorker" in navigator) {
window.addEventListener('load', function () {
navigator.serviceWorker.register('./serviceWorker.js')
})
}
</script>
+<link rel="manifest" href="./manifest.json">
You can verify the manifest in the Application tab of Chrome Dev Tools:
The web app manifest also makes it possible to display an App Install Banner or an Add to Home Screen dialog. You can follow the guidelines from Google to learn how to create and display one.
Limitations
Disk Quota
Web browsers define quotas either per origin (Chrome and Opera) or per API (e.g. IndexedDB, service workers). When storing files via web APIs, it’s a good idea to keep this in mind and ideally monitor the disk quota status to avoid failures. Apps can check how much quota they’re using with the Quota Management API. We highly recommend you check out this research report on browser storage from HTML5 Rocks.
Precached PSPDFKit Assets
In this guide, you saw how to precache all the PSPDFKit for Web assets, including the JavaScript fallback pspdfkit.asm.js. However, when the target browser supports WebAssembly, it’d be better to exclude this file from the precache manifest and vice versa: When the target browser doesn’t support WebAssembly, you shouldn’t precache the WASM module pspdfkit.wasm. For production applications, we recommend generating separate manifests and service workers and serving them conditionally.
Conclusion
Hopefully the above information demonstrated how easy it is to integrate PSPDFKit for Web and make a simple PWA to display PDF documents. This is possible thanks to Workbox, which provides a simple yet powerful abstraction on top of the Service Worker API.
The PWA built in this guide meets all the requirements of a baseline PWA, however, it’s just a proof of concept that shouldn’t be used in production.
We also built a more comprehensive and advanced example where PDF documents can be fetched from a remote server and are stored locally in IndexedDB for offline use. The advanced example also uses the History API to provide a unique working URL for every PDF document, along with a connectivity status indicator.
Setting Up Document Engine
To set up Document Engine so that it’ll be the backend for PSPDFKit for Web, follow the instructions in the Getting Started with Document Engine guide.
Once Document Engine has been set up, you’ll need to update your code to open a document from Document Engine. This is accomplished by replacing properties included in the configuration object passed to PSPDFKit.load(). Refer to the code snippets located earlier in this guide to find where PSPDFKit.load() will need to be updated.
The document property in PSPDFKit.load() will be replaced with the documentId provided by Document Engine, while the authPayload and the serverUrl properties will be added. If you’d like to enable Instant synchronization, set the instant property to true. See the following example:
This guide will walk you through the steps necessary to integrate PSPDFKit for Flutter into your web application.
PSPDFKit for Flutter can be evaluated without a trial license key, but with certain limitations (such as a red watermark added to documents). To evaluate without limitations, get a trial key.
In the terminal app, change the location of the current working directory to your project:
cd <project-root>
PSPDFKit for Web library files are distributed as an archive that can be extracted manually.
Download the framework here. The download will start immediately and will save a .tar.gz archive like PSPDFKit-Web-binary-2024.3.0.tar.gz to your computer.
Once the download is complete, extract the archive and copy the entire contents of its dist folder to your project’s web/assets folder or any other folder of your choice inside the web subfolder.
Make sure your assets folder contains the pspdfkit.js file and a pspdfkit-lib directory with the library assets.
Make sure your server has the Content-Type: application/wasm MIME typeset. Read more about this in the troubleshooting section.
Include the PSPDFKit library in your index.html file:
From the terminal app, run the following command to get all the packages:
flutter pub get
Then run the command below to upgrade the dependencies:
flutter pub upgrade
Displaying a PDF
Open the lib/main.dart file:
open lib/main.dart
Replace the contents of lib/main.dart with the following code snippet that loads a document from the assets path:
import'dart:io';
import'package:flutter/foundation.dart';
import'package:flutter/material.dart';
import'package:pspdfkit_flutter/pspdfkit.dart';
constString documentPath = 'PDFs/Document.pdf';
void main() {
// Initialize PSPDFKit with the license key. Pass `null` to use the trial version.
Pspdfkit.setLicenseKey(null);
runApp(const MaterialApp(
home: MyApp(),
));
}
class MyApp extends StatelessWidget {
const MyApp({super.key});
Future<String> extractAsset(BuildContext context, String assetPath) async {
if (kIsWeb) {
return assetPath;
}
final bytes = await DefaultAssetBundle.of(context).load(assetPath);
final list = bytes.buffer.asUint8List();
final tempDir = await Pspdfkit.getTemporaryDirectory();
final tempDocumentPath = '${tempDir.path}/$assetPath';
final file = File(tempDocumentPath);
await file.create(recursive: true);
file.writeAsBytesSync(list);
return file.path;
}
@override
Widget build(BuildContext context) {
return Scaffold(
body: FutureBuilder<String>(
future: extractAsset(context, documentPath),
builder: (context, snapshot) {
if (snapshot.hasData) {
/// PspdfkitWidget is a widget that displays a PDF document.return PspdfkitWidget(
documentPath: snapshot.data!,
);
} elseif (snapshot.hasError) {
return Center(
child: Text('${snapshot.error}'),
);
} else {
returnconst Center(
child: CircularProgressIndicator(),
);
}
}),
);
}
}
Since PSPDFKit for Flutter 3.9.0, it’s now required to initialize the PSPDFKit SDK before it can be used by setting a license key. If you don’t have one yet, you can set it to null. This will show a watermark on the document. You can get a trial license to remove the watermark:
void main(){
Pspdfkit.setLicenseKey('YOUR_LICENSE_KEY or null');
runApp(const MyApp());
}
On Android, you’ll run into a class cast exception for AppCompatActivity. To fix this, you’ll need to follow this troubleshooting guide.
Add the PDF document you want to display in your project’s assets directory. You can use this Quickstart Guide PDF as an example.
Create a PDFs directory:
mkdir PDFs
Copy the sample document into the newly created PDFs directory:
cp ~/Downloads/Document.pdf PDFs/Document.pdf
Specify the assets directory in pubspec.yaml:
# The following section is specific to Flutter.
flutter:
+ assets:
+ - PDFs/
...
Make sure Chrome is installed on your computer.
Run the app with:
flutter run
Next Steps
To learn more about Flutter, make sure to check out the following blog posts:
You can find our Flutter library on pub.dev and GitHub.
Integrate into a Flutter Web Project
This guide will walk you through the steps necessary to integrate PSPDFKit for Flutter into your web application.
PSPDFKit for Flutter can be evaluated without a trial license key, but with certain limitations (such as a red watermark added to documents). To evaluate without limitations, get a trial key.
In the terminal app, change the location of the current working directory to your project:
cd <project-root>
PSPDFKit for Web library files are distributed as an archive that can be extracted manually.
Download the framework here. The download will start immediately and will save a .tar.gz archive like PSPDFKit-Web-binary-2024.3.0.tar.gz to your computer.
Once the download is complete, extract the archive and copy the entire contents of its dist folder to your project’s web/assets folder or any other folder of your choice inside the web subfolder.
Make sure your assets folder contains the pspdfkit.js file and a pspdfkit-lib directory with the library assets.
Make sure your server has the Content-Type: application/wasm MIME typeset. Read more about this in the troubleshooting section.
Include the PSPDFKit library in your index.html file:
You can find our Flutter library on pub.dev and GitHub.
PSPDFKit Server has been deprecated and replaced by PSPDFKit Document Engine. All PSPDFKit Server and PSPDFKit for Web Server-Backed licenses will work as before and be supported until 15 May 2024 (we will contact you about license migration). To start using Document Engine, refer to the migration guide. With Document Engine, you’ll have access to robust new capabilities (read the blog for more information).
Requirements
PSPDFKit Server runs on a variety of platforms. The following operating systems are supported:
macOS Ventura, Monterey, Mojave, Catalina, or Big Sur
Windows 10 Pro, Home, Education, or Enterprise 64-bit
Ubuntu, Fedora, Debian, or CentOS. Ubuntu and Debian derivatives such as Kubuntu or Xubuntu are supported as well. Currently only 64-bit Intel (x86_64) processors are supported.
Regardless of your operating system, you’ll need at least 4 GB of RAM.
Installing Docker
PSPDFKit Server is distributed as a Docker container. To run it on your computer, you need to install a Docker runtime distribution for your operating system.
Install and start Docker Desktop for Mac. Please refer to the Docker website for instructions.
Install and start Docker Desktop for Windows. Please refer to the Docker website for instructions.
Install and start Docker Engine. Please refer to the Docker website for instructions on how to install it for your Linux distribution.
After you install Docker, use these instructions to install Docker Compose.
Setting Up PSPDFKit Server
Copy the code snippet below and save it anywhere on your computer in a file called docker-compose.yml:
Use the terminal emulator integrated with your code editor or IDE. Alternatively, you can use Terminal.app or iTerm2.
Use the terminal emulator integrated with your code editor or IDE. Alternatively, you can use PowerShell.
Use the terminal emulator integrated with your code editor or IDE, or one bundled with your desktop environment.
Go to the directory where you saved the docker-compose.yml file:
cd <path-to-directory-with-docker-compose-yml>
Run the following:
docker-compose up
This command might take a while to run, depending on your internet connection speed. Wait until you see the following message in the terminal:
pspdfkit_1 | Access the web dashboard at http://localhost:5000/dashboard
The PSPDFKit Server is now up and running!
Uploading a Document to PSPDFKit Server
With PSPDFKit Server running, visit http://localhost:5000/dashboard and authenticate using “dashboard” for the username and “secret” for the password. Choose Add Document and upload the document you want to work with.
Once the document is uploaded, visit http://localhost:5000/dashboard/documents to see the list of available documents. Each document is identified by an ID. Take note of the ID of the document you just uploaded, as you’ll need it shortly.
The ID should look similar to 7KPS8X13JRB2G841X4V7EQ3T2J.
Installing Node.js
If you haven’t installed Node.js, head to the official guides and follow the instructions. By the end of the installation process, you should be able to run the following command:
node --version
The output should be something like v14. You can ignore any subsequent number.
Generating the Application
You’ll use Express, one of the most common Node.js web frameworks. To create a new Express application, you can use the official generator.
Run:
npx express-generator pspdfkit_example --view=ejs
This command will generate a project structure and instruct you on the steps to follow to install dependencies and start the project.
Once you’ve followed all the steps, you should be able to visit http://localhost:3000 to confirm the application is working as expected.
Adding a Page to View the Document
You need to create a page that will show a document stored inside PSPDFKit Server.
You’ll want this page to be available at http://localhost:3000/documents/:id, where the document ID is the ID automatically assigned by PSPDFKit Server when uploading a document.
To achieve this, create a new route to display a document and mount it in the application.
Create the documents route:
./routes/documents.js
var express = require("express");
var router = express.Router();
router.get("/:documentId", function (req, res, next) {
res.render("documents/show", { documentId: req.params.documentId });
});
module.exports = router;
Inside the route, retrieve the ID captured by the routing logic and assign it to a documentId variable you can refer to in the view.
Create a corresponding view with some minimal HTML that prints the document ID:
./views/documents/show.ejs
<h1>Show document <%= documentId %></h1>
Mount the new route in the application:
./app.js
var indexRouter = require('./routes/index');
var usersRouter = require('./routes/users');
+var documentsRouter = require("./routes/documents");
// ...
// rest of the file
// ...
app.use('/', indexRouter);
app.use('/users', usersRouter);
+app.use("/documents", documentsRouter);
Stop and restart the Express server.
You can now visit http://localhost:3000/documents/:id, replacing :id with the ID of the document you uploaded to the PSPDFKit Server dashboard.
The page should contain the text Show document, followed by your document ID.
Creating a JSON Web Token (JWT)
PSPDFKit requires the use of JWTs to authenticate and authorize a viewer session against PSPDFKit Server.
To create JWTs, install the jsonwebtoken dependency:
npm install --save jsonwebtoken
Stop and restart the Express server.
Working with JWTs requires a private and public key pair. The private key is used by the Express application, while the public key is used by PSPDFKit Server.
The public key has already been configured in the PSPDFKit Server docker-compose.yml file via the JWT_PUBLIC_KEY environment variable.
To configure the private key, create a config/pspdfkit/jwt.pem file with the following contents:
Refresh the page, and you should see the PSPDFKit for Web viewer showing the document you just uploaded. If you annotate the document and refresh the page, all changes will be automatically persisted.
PSPDFKit Server has been deprecated and replaced by PSPDFKit Document Engine. All PSPDFKit Server and PSPDFKit for Web Server-Backed licenses will work as before and be supported until 15 May 2024 (we will contact you about license migration). To start using Document Engine, refer to the migration guide. With Document Engine, you’ll have access to robust new capabilities (read the blog for more information).
Requirements
PSPDFKit Server runs on a variety of platforms. The following operating systems are supported:
macOS Ventura, Monterey, Mojave, Catalina, or Big Sur
Windows 10 Pro, Home, Education, or Enterprise 64-bit
Ubuntu, Fedora, Debian, or CentOS. Ubuntu and Debian derivatives such as Kubuntu or Xubuntu are supported as well. Currently only 64-bit Intel (x86_64) processors are supported.
Regardless of your operating system, you’ll need at least 4 GB of RAM.
Installing Docker
PSPDFKit Server is distributed as a Docker container. To run it on your computer, you need to install a Docker runtime distribution for your operating system.
Install and start Docker Desktop for Mac. Please refer to the Docker website for instructions.
Install and start Docker Desktop for Windows. Please refer to the Docker website for instructions.
Install and start Docker Engine. Please refer to the Docker website for instructions on how to install it for your Linux distribution.
After you install Docker, use these instructions to install Docker Compose.
Setting Up PSPDFKit Server
Copy the code snippet below and save it anywhere on your computer in a file called docker-compose.yml:
Use the terminal emulator integrated with your code editor or IDE. Alternatively, you can use Terminal.app or iTerm2.
Use the terminal emulator integrated with your code editor or IDE. Alternatively, you can use PowerShell.
Use the terminal emulator integrated with your code editor or IDE, or one bundled with your desktop environment.
Go to the directory where you saved the docker-compose.yml file:
cd <path-to-directory-with-docker-compose-yml>
Run the following:
docker-compose up
This command might take a while to run, depending on your internet connection speed. Wait until you see the following message in the terminal:
pspdfkit_1 | Access the web dashboard at http://localhost:5000/dashboard
The PSPDFKit Server is now up and running!
Uploading a Document to PSPDFKit Server
With PSPDFKit Server running, visit http://localhost:5000/dashboard and authenticate using “dashboard” for the username and “secret” for the password. Choose Add Document and upload the document you want to work with.
Once the document is uploaded, visit http://localhost:5000/dashboard/documents to see the list of available documents. Each document is identified by an ID. Take note of the ID of the document you just uploaded, as you’ll need it shortly.
The ID should look similar to 7KPS8X13JRB2G841X4V7EQ3T2J.
Installing Ruby and Ruby on Rails
If you haven’t installed Ruby and Ruby on Rails, head to the official guides and follow the instructions. By the end of the installation process, you should be able to run the following command:
rails --version
The output should be something like Rails 6.1. You can ignore any subsequent number.
Generating the Application
You can start by generating a vanilla Rails application.
Run:
rails new pspdfkit_example
This command will take a minute or two. Once done, you should be able to cd pspdfkit_example and run:
bin/rails server
You can then visit http://localhost:3000 to confirm the application is working as expected.
Adding a Page to View the Document
You need to create a page that will show a document stored inside PSPDFKit Server.
You’ll want this page to be available at http://localhost:3000/documents/:id, where the document ID is the ID automatically assigned by PSPDFKit Server when uploading a document.
To achieve this, you need to update your routes and create a controller and view.
Add a new route to the application:
./config/routes.rb
Rails.application.routes.draw do
# For details on the DSL available within this file, see https://guides.rubyonrails.org/routing.html
+ resources :documents, only: :show
end
Create a corresponding controller:
./app/controllers/documents_controller.rb
class DocumentsController < ApplicationController
def show
@document_id = params['id']
endend
Inside the controller, retrieve the ID captured by the routing logic and assign it to a @document_id instance variable you can refer to in the view.
Create a corresponding view with some minimal HTML that prints the document ID:
./app/views/documents/show.html.erb
<h1>Show document <%= @document_id %></h1>
You can now visit http://localhost:3000/documents/:id, replacing :id with the ID of the document you uploaded to the PSPDFKit Server dashboard.
The page should contain the text Show document, followed by your document ID.
Creating a JSON Web Token (JWT)
PSPDFKit requires the use of JWTs to authenticate and authorize a viewer session against PSPDFKit Server.
To create JWTs, add the jwt dependency to the project Gemfile:
./Gemfile
# Use Active Model has_secure_password
# gem 'bcrypt', '~> 3.1.7'
+gem 'jwt', '~> 2.2', '>= 2.2.2'
Stop the Rails server with Control-C, run bundle install to install the dependency, and then run bin/rails server to restart it.
Working with JWTs requires a private and public key pair. The private key is used by the Rails application, while the public key is used by PSPDFKit Server.
Create a config/pspdfkit/jwt.pem file with the following contents:
Refresh, and you should see the PSPDFKit for Web viewer showing the document you just uploaded. If you annotate the document and refresh the page, all changes will be automatically persisted.
PSPDFKit Server has been deprecated and replaced by PSPDFKit Document Engine. All PSPDFKit Server and PSPDFKit for Web Server-Backed licenses will work as before and be supported until 15 May 2024 (we will contact you about license migration). To start using Document Engine, refer to the migration guide. With Document Engine, you’ll have access to robust new capabilities (read the blog for more information).
Requirements
PSPDFKit Server runs on a variety of platforms. The following operating systems are supported:
macOS Ventura, Monterey, Mojave, Catalina, or Big Sur
Windows 10 Pro, Home, Education, or Enterprise 64-bit
Ubuntu, Fedora, Debian, or CentOS. Ubuntu and Debian derivatives such as Kubuntu or Xubuntu are supported as well. Currently only 64-bit Intel (x86_64) processors are supported.
Regardless of your operating system, you’ll need at least 4 GB of RAM.
Installing Docker
PSPDFKit Server is distributed as a Docker container. To run it on your computer, you need to install a Docker runtime distribution for your operating system.
Install and start Docker Desktop for Mac. Please refer to the Docker website for instructions.
Install and start Docker Desktop for Windows. Please refer to the Docker website for instructions.
Install and start Docker Engine. Please refer to the Docker website for instructions on how to install it for your Linux distribution.
After you install Docker, use these instructions to install Docker Compose.
Setting Up PSPDFKit Server
Copy the code snippet below and save it anywhere on your computer in a file called docker-compose.yml:
Use the terminal emulator integrated with your code editor or IDE. Alternatively, you can use Terminal.app or iTerm2.
Use the terminal emulator integrated with your code editor or IDE. Alternatively, you can use PowerShell.
Use the terminal emulator integrated with your code editor or IDE, or one bundled with your desktop environment.
Go to the directory where you saved the docker-compose.yml file:
cd <path-to-directory-with-docker-compose-yml>
Run the following:
docker-compose up
This command might take a while to run, depending on your internet connection speed. Wait until you see the following message in the terminal:
pspdfkit_1 | Access the web dashboard at http://localhost:5000/dashboard
The PSPDFKit Server is now up and running!
Uploading a Document to PSPDFKit Server
With PSPDFKit Server running, visit http://localhost:5000/dashboard and authenticate using “dashboard” for the username and “secret” for the password. Choose Add Document and upload the document you want to work with.
Once the document is uploaded, visit http://localhost:5000/dashboard/documents to see the list of available documents. Each document is identified by an ID. Take note of the ID of the document you just uploaded, as you’ll need it shortly.
The ID should look similar to 7KPS8X13JRB2G841X4V7EQ3T2J.
Generating the Application
Now, the application using PSPDFKit Server needs to be provisioned.
To use PSPDFKit Server, you’ll need a web application library or framework. Depending on the chosen technology, different steps might be necessary. Please refer to the technology/framework-specific guidelines for setting up the project.
Creating a JSON Web Token (JWT)
PSPDFKit requires the use of a JSON Web Token (JWT) to authenticate and authorize a viewer session against PSPDFKit Server.
You can generate JWTs using one of the libraries available in the programming language of your choice. The list of available libraries can be found at jwt.io.
When generating the JWT, make sure to use the RS256 signing algorithm and the private key below:
When it comes to claims, you must provide the document ID, the set of permissions, and an expiry time in the future. Please note that some libraries might automatically inject the exp (expiration time) field, while other ones expect the field to be present in the payload. Please check the documentation of the chosen JWT library to see how it’s handled:
To view the document in the browser, first you need to load the PSPDFKit for Web JavaScript library. Please add the following script tag to the page that will present the document:
There are two variables that need to be passed in: documentId and jwt. Please refer to the documentation of the web application framework you use to see how to pass variables to the page, or use hardcoded values. When you open the page, you should see the PSPDFKit for Web viewer showing the document you just uploaded. If you annotate the document and refresh the page, all changes will be automatically persisted.
PSPDFKit Server has been deprecated and replaced by PSPDFKit Document Engine. All PSPDFKit Server and PSPDFKit for Web Server-Backed licenses will work as before and be supported until 15 May 2024 (we will contact you about license migration). To start using Document Engine, refer to the migration guide. With Document Engine, you’ll have access to robust new capabilities (read the blog for more information).
Requirements
PSPDFKit Server runs on a variety of platforms. The following operating systems are supported:
macOS Ventura, Monterey, Mojave, Catalina, or Big Sur
Windows 10 Pro, Home, Education, or Enterprise 64-bit
Ubuntu, Fedora, Debian, or CentOS. Ubuntu and Debian derivatives such as Kubuntu or Xubuntu are supported as well. Currently only 64-bit Intel (x86_64) processors are supported.
Regardless of your operating system, you’ll need at least 4 GB of RAM.
Installing Docker
PSPDFKit Server is distributed as a Docker container. To run it on your computer, you need to install a Docker runtime distribution for your operating system.
Install and start Docker Desktop for Mac. Please refer to the Docker website for instructions.
Install and start Docker Desktop for Windows. Please refer to the Docker website for instructions.
Install and start Docker Engine. Please refer to the Docker website for instructions on how to install it for your Linux distribution.
After you install Docker, use these instructions to install Docker Compose.
Setting Up PSPDFKit Server
Copy the code snippet below and save it anywhere on your computer in a file called docker-compose.yml:
Use the terminal emulator integrated with your code editor or IDE. Alternatively, you can use Terminal.app or iTerm2.
Use the terminal emulator integrated with your code editor or IDE. Alternatively, you can use PowerShell.
Use the terminal emulator integrated with your code editor or IDE, or one bundled with your desktop environment.
Go to the directory where you saved the docker-compose.yml file:
cd <path-to-directory-with-docker-compose-yml>
Run the following:
docker-compose up
This command might take a while to run, depending on your internet connection speed. Wait until you see the following message in the terminal:
pspdfkit_1 | Access the web dashboard at http://localhost:5000/dashboard
The PSPDFKit Server is now up and running!
Uploading a Document to PSPDFKit Server
With PSPDFKit Server running, visit http://localhost:5000/dashboard and authenticate using “dashboard” for the username and “secret” for the password. Choose Add Document and upload the document you want to work with.
Once the document is uploaded, visit http://localhost:5000/dashboard/documents to see the list of available documents. Each document is identified by an ID. Take note of the ID of the document you just uploaded, as you’ll need it shortly.
The ID should look similar to 7KPS8X13JRB2G841X4V7EQ3T2J.
Creating a JSON Web Token (JWT)
PSPDFKit requires the use of a JSON Web Token (JWT) to authenticate and authorize a viewer session against PSPDFKit Server.
You can generate JWTs using one of the libraries available in the programming language of your choice. The list of available libraries can be found at jwt.io.
When generating the JWT, make sure to use the RS256 signing algorithm and the private key below:
When it comes to claims, you must provide the document ID, the set of permissions, and an expiry time in the future. Please note that some libraries might automatically inject the exp (expiration time) field, while other ones expect the field to be present in the payload. Please check the documentation of the chosen JWT library to see how it’s handled:
To view the document in the browser, first you need to load the PSPDFKit for Web JavaScript library. Please add the following script tag to the page that will present the document:
There are two variables that need to be passed in: documentId and jwt. Please refer to the documentation of the web application framework you use to see how to pass variables to the page, or use hardcoded values. When you open the page, you should see the PSPDFKit for Web viewer showing the document you just uploaded. If you annotate the document and refresh the page, all changes will be automatically persisted.